Light is the lifeblood of photography. It's the brushstroke that paints our visual narratives, the sculptor of shadows and highlights, and the magical ingredient that transforms a mundane scene into a captivating work of art. In the world of photography, understanding the importance of lighting and mastering the techniques and tips to harness its power is akin to wielding a superpower. It's the key to unlocking a realm of creative possibilities, whether you're capturing breathtaking landscapes, evocative portraits, or the intricate details of products.
Lighting in photography is a subject that transcends the technical aspects of camera settings and gear. It's an art form, a science, and a dance between shadows and brilliance. In this blog post, we embark on a journey through the luminescent world of photography, where we'll explore the profound significance of lighting. We'll uncover the essential techniques and tips that photographers, from beginners to seasoned professionals, employ to craft stunning visual stories. Whether you're a natural light enthusiast or a studio lighting aficionado, join us as we illuminate the path to photographic mastery, one photon at a time.
Importance of Lighting in Photography
Highlights the Subject
When we talk about how lighting is important in photography, one of the reasons is that it highlights the subject. Proper lighting can make the subject stand out from the background and draw the viewer's attention to it. This is important because the subject is often the focal point of the photograph and the reason why the photo was taken in the first place.
When lighting is used correctly, it can help to emphasize the texture, shape, and color of the subject, making it more visually appealing. It can also create contrast between the subject and the background, which can add depth and dimension to the photo.
In summary, proper lighting can highlight the subject and make it the center of attention in the photograph. This is important for creating a visually compelling image that captures the viewer's interest and holds their attention.
Sets the Mood
Another important reason why lighting is important in photography is that it sets the mood or tone of the photo. Different types of lighting can create different moods or emotions in a photograph, and this can be used to convey a particular message or feeling to the viewer.
For example, soft and diffused lighting can create a romantic or dreamy mood, whereas harsh and direct lighting can create a dramatic or intense mood. Similarly, warm lighting can create a cozy and inviting atmosphere, while cool lighting can create a more distant and clinical feel.
The use of lighting can also be used to create a specific atmosphere, such as a festive or celebratory mood in event photography, or a somber and serious tone in documentary photography.
In summary, lighting plays a crucial role in setting the mood or tone of a photograph. By using different lighting techniques, photographers can create a specific mood or atmosphere that adds to the overall impact of the image.
Creates Depth
Another important reason why lighting is crucial in photography is that it can create the illusion of depth in a photograph. By highlighting the shadows and highlights in the subject, lighting can add dimension and depth to the image, making it more visually appealing and interesting to the viewer.
Proper lighting can create shadows that give the impression of depth and texture, making the subject appear more three-dimensional. For example, a light source positioned to one side of the subject can create shadows on the opposite side, adding depth and dimension to the image.
Additionally, the use of lighting can also create a sense of distance between the subject and the background. By illuminating the subject while keeping the background in shadow, the subject can appear to be further away from the viewer, creating a sense of depth in the photograph.
In summary, lighting is essential in photography as it can create the illusion of depth in an image. By highlighting shadows and highlights in the subject, lighting can add dimension and texture, making the photograph more visually interesting and dynamic.
Adds Visual Interest
Another important reason why lighting is essential in photography is that it adds visual interest to the photograph. By manipulating the light source, photographers can create different effects that add interest and creativity to the image.
For example, using backlighting can create a halo effect around the subject, which can be used to create a sense of mystery or intrigue. Similarly, using side lighting can highlight the textures and details of the subject, creating a visually compelling image.
The use of color temperature in lighting can also add interest to the photograph. For example, using warm light can create a cozy and inviting atmosphere, while using cool light can create a more distant and clinical feel.
The use of creative lighting techniques, such as using colored gels, can also add visual interest to the photograph. By adding color to the light source, photographers can create a unique and creative effect that adds personality and style to the image.
In summary, lighting is important in photography as it can add visual interest and creativity to the photograph. By manipulating the light source, color temperature, and using creative lighting techniques, photographers can create unique and visually compelling images that capture the viewer's attention.
[caption id="attachment_192628" align="alignnone" width="1280"]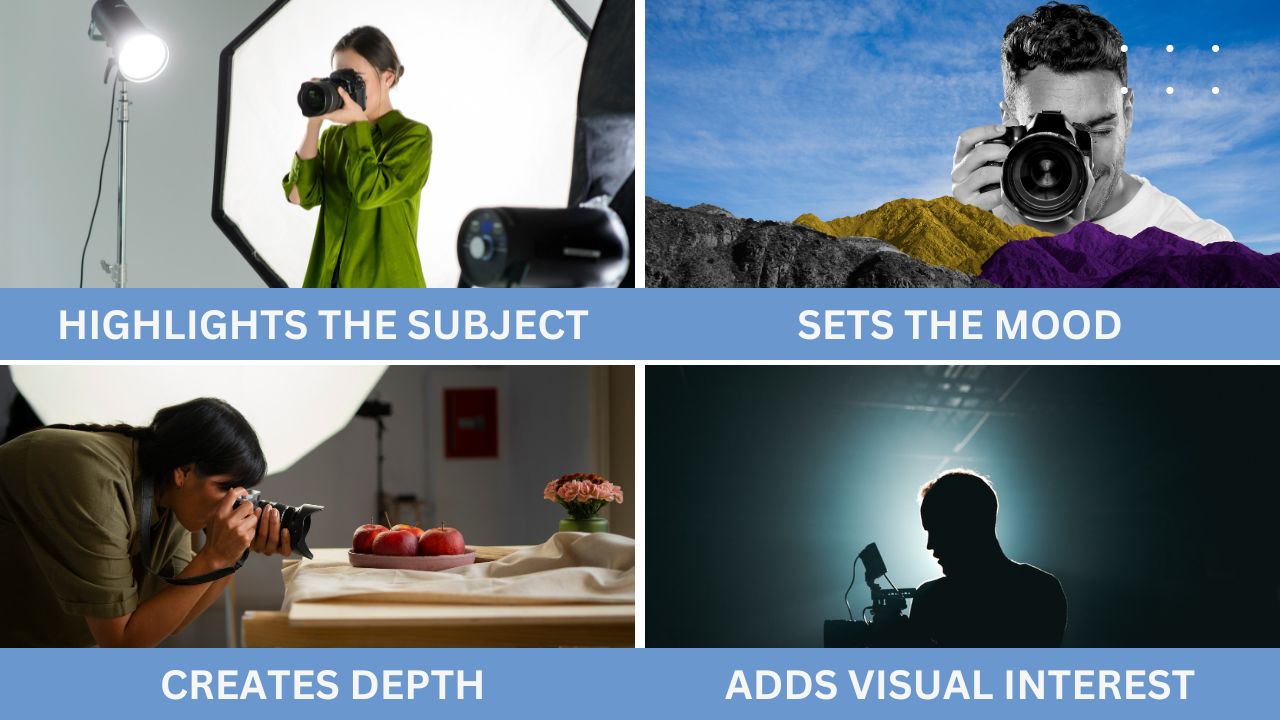 Importance of Lighting in Photography[/caption]
Also Read This: Understanding the Importance of Asking Are You Okay
Techniques and Tips for Lighting in Photography
Natural Light
Natural light is the light that is present in the environment, such as sunlight or light from the sky, and it is one of the most common sources of light used in photography. Natural light can produce beautiful and dynamic images when used correctly, and it can also create a sense of realism and authenticity in the photograph.
When using natural light, photographers should pay attention to the direction, quality, and intensity of the light source. For example, the light can be diffused and soft on a cloudy day, or it can be harsh and direct during midday sunlight. Photographers can use this to their advantage by positioning their subject in a way that maximizes the quality of the natural light and creates the desired effect.
One advantage of using natural light is that it can be used to create a sense of atmosphere and mood in the photograph. For example, the soft, warm light during sunrise or sunset can create a romantic or dreamy mood, while the harsh, direct light during midday can create a more intense or dramatic atmosphere.
However, natural light can also present challenges, such as unpredictable changes in lighting conditions or limited availability of natural light. To overcome these challenges, photographers may need to adjust their camera settings or use additional lighting sources to achieve the desired effect.
In summary, natural light is a common source of light used in photography that can produce beautiful and dynamic images when used correctly. By paying attention to the direction, quality, and intensity of the light source, photographers can use natural light to create a sense of atmosphere and mood in the photograph.
Artificial Light
Artificial light is any light source that is not present in the natural environment, such as light from lamps, flash units, or studio lighting. Artificial light is commonly used in photography when natural light is not available or not sufficient for the desired effect.
One advantage of artificial light is that it can be controlled more easily than natural light. Photographers can adjust the intensity, direction, and color temperature of artificial light sources to achieve the desired effect. This level of control allows photographers to create consistent lighting conditions, which is important in commercial and studio photography.
Artificial light can also be used to create a specific mood or atmosphere in the photograph. For example, using warm and diffused light can create a cozy and inviting atmosphere, while using cool and harsh light can create a more clinical or futuristic feel.
However, artificial light can also present challenges, such as the need for additional equipment and the potential for unnatural or unflattering lighting effects. To overcome these challenges, photographers may need to experiment with different lighting setups and techniques to achieve the desired effect.
In summary, artificial light is a common source of light used in photography when natural light is not available or not sufficient for the desired effect. By adjusting the intensity, direction, and color temperature of artificial light sources, photographers can create consistent lighting conditions and a specific mood or atmosphere in the photograph.
Use Reflectors and Fill Lights
Reflectors and fill lights are tools used to control the lighting in a photograph. They are commonly used in portrait and still life photography to fill in shadows and add more light to a subject. Here are some tips on how to use reflectors and fill lights in your photography:
Use a reflector to bounce light onto the subject: A reflector is a tool that reflects light back onto the subject. It can be made of a variety of materials, including white, silver, or gold. A white reflector will produce a natural and even light, while a silver reflector will produce a brighter, more contrasty light. A gold reflector will produce a warm, golden light.
Place the reflector close to the subject: To get the most out of a reflector, it should be placed close to the subject. This will ensure that the light is bounced back onto the subject, filling in any shadows.
Use a fill light to balance the light: A fill light is used to balance the light in a scene. It is typically a light source that is used to add more light to the subject. A fill light can be used to brighten shadows and balance out the light in a scene.
Place the fill light opposite the main light source: The fill light should be placed opposite the main light source to balance out the light in the scene. It should be dimmer than the main light source to avoid overexposure.
Use diffusers to soften the light: Diffusers can be used to soften the light from the reflector or fill light. This will produce a more natural and even light.
In summary, reflectors and fill lights are important tools for controlling the lighting in a photograph. They can be used to fill in shadows, balance out the light in a scene, and create a more natural and even light. By experimenting with different types of reflectors, fill lights, and diffusers, you can create a variety of lighting effects in your photography.
Understand the Direction of Light
Understanding the direction of light is important in photography because it affects the mood, depth, and texture of a photograph. Here are some tips on how to use the direction of light to create different effects:
Front Lighting: Front lighting is when the light source is directly in front of the subject. This creates a flat and even look, with little to no shadows. Front lighting is commonly used in portrait photography to create a flattering and well-lit image.
Side Lighting: Side lighting is when the light source is to the side of the subject. This creates shadows and highlights, which can add depth and texture to a photograph. Side lighting is commonly used in still life photography to create a dramatic and moody effect.
Back Lighting: Back lighting is when the light source is behind the subject. This creates a halo effect around the subject, and can create a sense of depth and separation from the background. Back lighting is commonly used in portrait and nature photography to create a dramatic and ethereal effect.
Upward Lighting: Upward lighting is when the light source is below the subject, pointing upwards. This creates shadows that accentuate the contours and texture of the subject. Upward lighting is commonly used in product and food photography to create a sense of depth and texture.
Downward Lighting: Downward lighting is when the light source is above the subject, pointing downwards. This creates shadows that can add depth and texture to a photograph. Downward lighting is commonly used in landscape and architectural photography to create a sense of scale and depth.
In summary, the direction of light is an important factor in photography that can greatly affect the mood, depth, and texture of a photograph. By understanding the different types of lighting and how to use them, you can create a variety of effects in your photography. Here is a video titled "Enhance Your Photos with Easy Lighting Photography Tips | Adobe Photography Basics."
Also Read This: Discover If Canva Templates Are Free to Use
Pros and Cons
Also Read This: Should You Put Your Resume on LinkedIn? The Pros and Cons Explained
Pros
Creates a flattering and well-lit image.
Provides even lighting that is easy to work with.
Reduces the appearance of wrinkles, blemishes, and other imperfections.
Cons
Can create a flat and uninteresting image.
May lack depth and texture.
May not be suitable for all subjects or types of photography.
Also Read This: How to Earn Money on Flickr – Easy Ways
Conclusion
In conclusion, understanding the direction of light is an important aspect of photography as it can greatly affect the mood, depth, and texture of a photograph. Each direction of light has its own advantages and disadvantages, and it is up to the photographer to choose the direction that best suits their subject and the desired effect. By experimenting with different directions of light, photographers can create a variety of effects and enhance the visual appeal of their photographs.
FAQ
What is the best direction of light for portrait photography?
A: The best direction of light for portrait photography depends on the desired effect and the subject. Front lighting is commonly used to create a well-lit and flattering image, while side lighting can create dramatic shadows and highlights for a more moody and atmospheric effect. Back lighting can create a halo effect around the subject for a dramatic and ethereal effect. It is important to consider the subject's features, skin tone, and the mood or message you want to convey when choosing the direction of light for portrait photography.
How can I control the direction of light in outdoor photography?
A: In outdoor photography, the direction of light is often controlled by the position of the sun. To control the direction of light, you can change the angle or position of your subject, use reflectors or diffusers to redirect or soften the light, or wait for a specific time of day when the light is more favorable for your desired effect. You can also create your own light source using external flash or strobe units.
What type of lighting should I use for product photography?
A: The type of lighting you use for product photography depends on the type of product and the desired effect. Generally, a combination of diffuse and directional lighting is used to create a sense of depth and texture in the product. Softboxes, umbrellas, or diffusers can be used to create diffuse lighting, while reflectors or fill lights can be used to create directional lighting. It is important to choose lighting that accurately represents the product and highlights its features and details.
Can I use the direction of light to make a small room look larger?
A: Yes, the direction of light can be used to create an illusion of space in a small room. By using upward lighting, you can create shadows that make the ceiling appear higher, while downward lighting can create shadows that make the floor appear farther away. Additionally, using a combination of natural and artificial light sources can create a sense of depth and make the room appear larger.