Introduction
When it comes to creating engaging and eye-catching content for your YouTube channel, Freepik is a name that often comes to mind. This popular platform offers a wealth of high-quality resources, including images, vectors, icons, and templates, perfect for spicing up your videos and thumbnails.
However, using Freepik resources on YouTube comes with a responsibility – proper attribution. In this comprehensive guide, we will walk you through the steps to attribute Freepik on your YouTube videos. Whether you're a seasoned content creator or just starting your YouTube journey, understanding how to attribute Freepik is essential to avoid copyright issues and show respect for the talented artists behind the content.
By the end of this guide, you'll be well-versed in the art of giving credit where it's due and using Freepik resources confidently in your YouTube projects. Let's get started on this attribution journey!
Also Read This: Design Effective White Papers with Canva White Paper Template
What is Freepik?
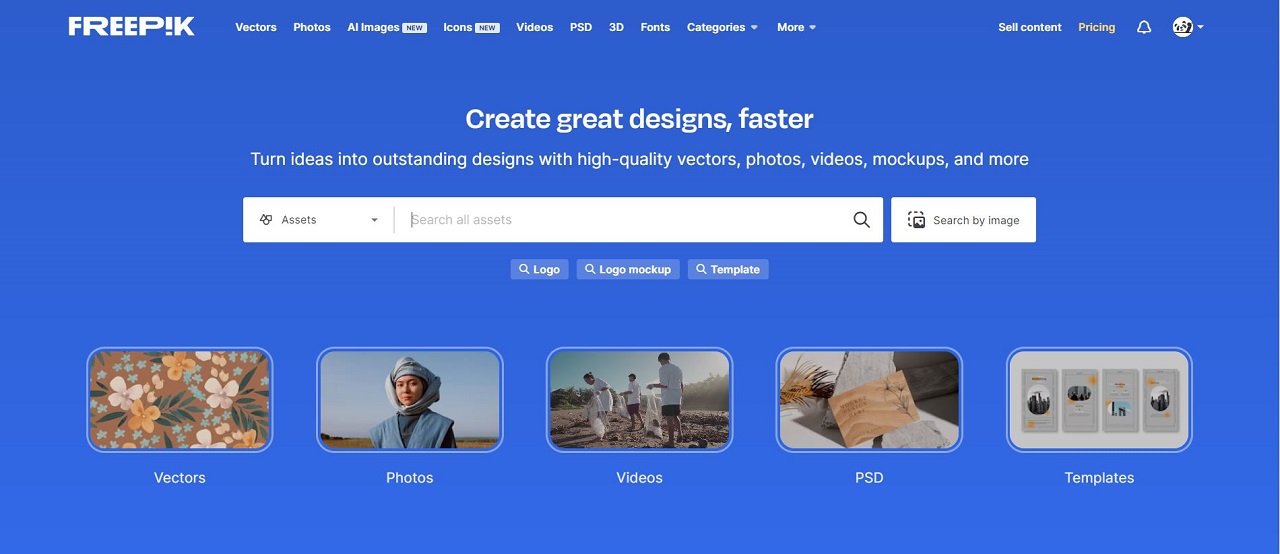
Freepik is a renowned online platform that serves as a treasure trove of creative resources for designers, content creators, and anyone in need of visually appealing content. Founded in 2010, this platform has become a go-to source for high-quality graphic assets, and it's particularly valuable for YouTube content creators looking to enhance their videos.
At its core, Freepik offers a vast and diverse collection of resources, which include:
- Vector Graphics: Freepik is famous for its extensive library of vector graphics. Vectors are versatile and scale perfectly, making them ideal for various design projects, including YouTube thumbnails, logos, and animations.
- Images: The platform features a wide array of images suitable for different themes and purposes, from product shots to scenic landscapes and beyond.
- Icons: You can find an abundance of icons and symbols to add a professional touch to your video graphics or website design.
- Templates: Freepik also provides templates for presentations, flyers, brochures, and social media posts. These templates save you time and ensure a polished look.
One of the key reasons for Freepik's popularity is its user-friendly interface and convenient search options. Users can easily search for specific assets using keywords or explore curated collections to discover inspiring content.
Many of the resources on Freepik are available for free, which is an attractive feature for budget-conscious content creators. However, it's essential to note that Freepik operates under a freemium model. While free users can access a substantial portion of the content, there's also a premium subscription option called Freepik Premium. Premium subscribers enjoy several benefits, including access to the full library, exclusive content, and, importantly, the right to use resources without attribution.
When using Freepik's free resources, attribution is required to comply with the platform's licensing terms. Properly attributing Freepik content is not only a legal obligation but also a way to show appreciation for the talented artists who contribute to the platform.
Now that you have a better understanding of what Freepik is and the array of resources it offers, let's delve deeper into why attribution on YouTube is so crucial when utilizing Freepik content in your video creations.
Also Read This: How Much Money Can Photographers Make Using Shutterstock
Understanding Attribution
Attribution is a fundamental concept in the world of creative commons licensing, and it plays a crucial role when using resources from platforms like Freepik. Understanding what attribution means is vital for content creators, as it ensures they are respecting copyright and legal agreements while using these valuable resources.
What is Attribution?
Attribution, in the context of creative commons licenses, is the act of giving proper credit to the creator of a work when you use their content. It acknowledges their effort and allows others to know the original source of the material. When you attribute correctly, you show respect for the artist's rights and encourage the sharing of creative content.
Why is Attribution Important?
Proper attribution is essential because it helps maintain a fair and ethical system for content sharing. Here's why it matters:
- Legal Compliance: Many resources available on platforms like Freepik are published under specific creative commons licenses, which require attribution. Failure to comply with these licenses could lead to copyright infringement issues.
- Supporting Artists: By giving credit to the creators, you support their work and encourage them to continue sharing their talents and resources for free or at an affordable cost.
- Transparency: Attribution promotes transparency in content creation. It allows viewers, collaborators, and fellow creators to understand the origins of the materials used in your projects.
Components of Proper Attribution
Proper attribution typically includes the following components:
| 1. Title or Name: | The title or name of the work you're using. |
| 2. Author/Creator: | The name of the creator of the content. |
| 3. Source: | The original source where you found the content, such as Freepik. |
| 4. License: | Information about the license under which the work is published. |
| 5. Hyperlink: | A direct link to the original work, if available. |
Proper attribution should be clear, visible, and located in a way that viewers can easily identify it. It can be placed in the video description, credits, or on the screen during the video itself, depending on your preference and the license requirements.
Now that you have a solid grasp of what attribution entails, let's explore why attribution on YouTube is of particular importance when using Freepik resources in your video content.
Also Read This: How to Change IP Address in Windows XP
Why Attribution on YouTube Matters
Attribution on YouTube is not just a mere formality; it holds significant importance for content creators using Freepik resources. Let's dive into the specific reasons why proper attribution is crucial when incorporating Freepik content into your YouTube videos:
1. Legal Compliance and Copyright Protection
YouTube is a platform with strict copyright policies. When you use resources from Freepik, which are often subject to creative commons licenses, providing proper attribution is a legal requirement. Failure to attribute correctly can result in copyright claims or even the removal of your content, potentially impacting your YouTube channel's standing.
2. Ethical Responsibility
Attribution is not just a legal obligation but also an ethical one. When you give credit to the creators of the content you use, you are acknowledging their efforts and respecting their rights. This ethical responsibility fosters a sense of community and goodwill in the creative space, encouraging artists to continue sharing their work with the world.
3. Transparency and Credibility
Proper attribution enhances the transparency of your content. It allows viewers, collaborators, and fellow creators to understand the origins of the materials used in your projects. This transparency builds credibility and trust with your audience, as they can see that you're using resources responsibly and legally.
4. Promoting Freepik
Freepik relies on proper attribution to continue offering free and premium resources to creators. By crediting Freepik when you use their content, you help promote the platform. This, in turn, supports the sustainability of the platform and ensures that more resources continue to be available for the creative community.
5. Avoiding Copyright Strikes and Penalties
YouTube's Content ID system can automatically detect copyrighted content. Without proper attribution, your videos may trigger copyright strikes, leading to penalties on your channel. These strikes can result in limitations such as video removal, loss of monetization, and, in severe cases, channel termination.
Remember, attribution is not a burden; it's an essential part of responsible content creation. By understanding and adhering to the requirements, you can continue to benefit from Freepik's resources without the risk of copyright-related issues on your YouTube channel.
Now that you appreciate the significance of attribution, let's proceed with a step-by-step guide on how to correctly attribute Freepik on your YouTube videos, ensuring both legal compliance and ethical responsibility.
Also Read This: Category-Based Filtering with Fortiguard Downloader
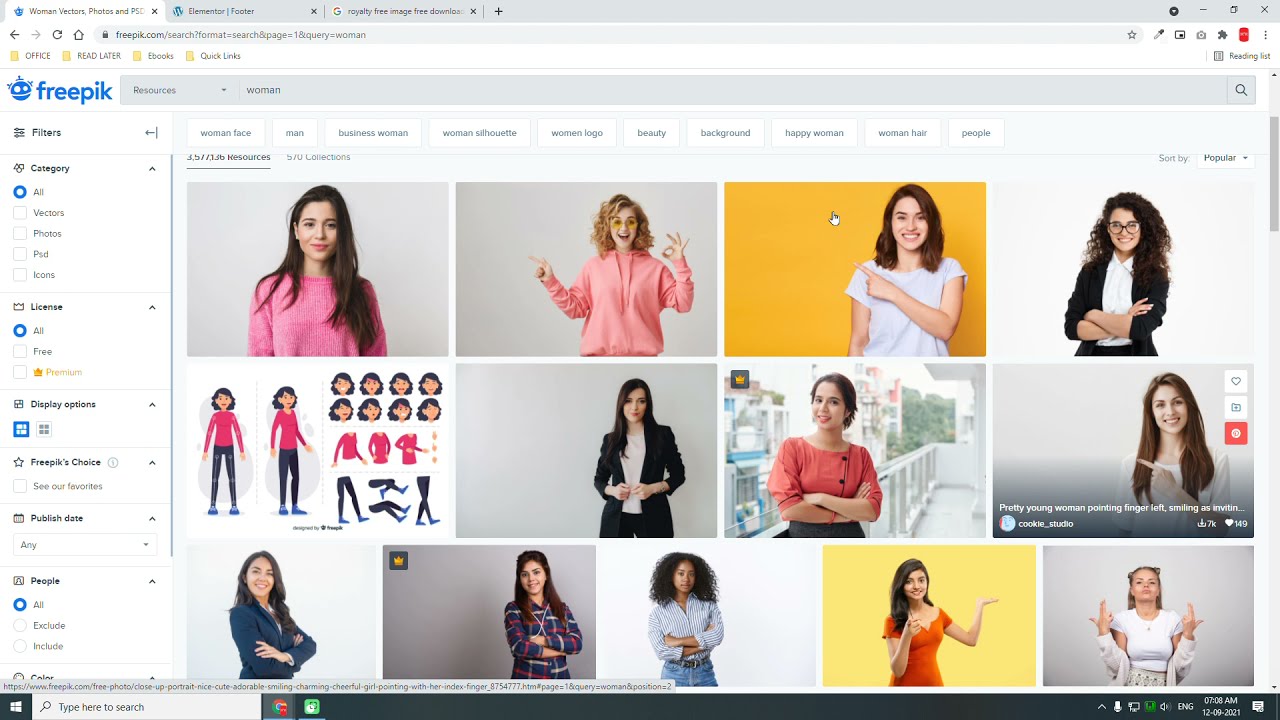
Step 1: Find the Right Freepik Resource
Choosing the perfect Freepik resource for your YouTube project is the first step in the attribution process. With Freepik's extensive library, you have a wide array of options to explore. Here's how to find the right resource:
1. Define Your Project Needs
Before you start searching on Freepik, have a clear idea of what you need for your YouTube video. Determine the type of content, whether it's vector graphics, images, icons, or templates, and identify the theme, style, and color scheme that matches your video's aesthetics.
2. Use Freepik's Search Tools
Freepik offers user-friendly search tools to help you find the perfect resource. Utilize keywords that describe the content you're looking for. For example, if you're creating a video about travel, use keywords like "travel icons" or "vacation images" to narrow down your search.
3. Explore Curated Collections
Freepik's curated collections are a goldmine of thematic resources. These collections are often put together by the platform's editorial team and can save you time by presenting a selection of resources that match specific topics or styles. Explore these collections to find resources that align with your project.
4. Filter and Sort Results
Once you've initiated a search, you can filter results based on various criteria, such as file type, orientation, and color. This makes it easier to pinpoint resources that precisely match your project's requirements. You can also sort results by relevance, downloads, or date to find the most suitable assets.
5. Check Licensing Details
As you browse through resources, always check the licensing details. Freepik offers both free and premium resources, and the attribution requirements can vary. Ensure you understand the licensing terms associated with the resource you want to use, as this will dictate how you need to attribute it in your YouTube video.
6. Download the Chosen Resource
Once you've found the right resource, download it to your computer. Freepik provides easy downloading options, and you can choose the format that best suits your project, whether it's a JPEG image, an EPS vector file, or any other compatible format for your editing software.
By following these steps, you'll be well on your way to finding the perfect Freepik resource for your YouTube video. Remember that the choice of resource should align with your video's theme and style to ensure it enhances the overall quality and engagement of your content.
Now that you've selected the ideal resource, the next step is to review the license details to understand how to attribute it correctly in your YouTube video.
Also Read This: Can You Post YouTube Videos on Instagram and What to Keep in Mind
Step 2: Download and Review the License
After you've found the perfect Freepik resource for your YouTube project, the next critical step is to download the resource and thoroughly review its licensing details. Understanding the license is essential to ensure you attribute it correctly and comply with Freepik's terms. Here's how to proceed:
1. Download the Resource
Once you've identified the resource you wish to use, click the download button or link provided on Freepik. You'll typically have options for different file formats (e.g., JPEG, EPS, PNG) to choose from based on your project's requirements. Select the format that best suits your video editing software.
2. Save License Information
It's a good practice to save the license information that comes with the downloaded resource. This could be in the form of a text file or a PDF document. Keeping this information accessible is helpful for reference and ensures that you can easily access the necessary details when attributing the resource in your YouTube video.
3. Read the License Terms
Take the time to carefully read and understand the license terms associated with the resource. The license will specify whether it falls under Freepik's free or premium content, and it will outline the attribution requirements. Pay attention to any specific details, such as whether attribution needs to be included in the video description, on the screen, or in another format.
4. Note the Attribution Details
The license will provide clear instructions on how to attribute the resource. This typically includes what information should be included in the attribution, such as the title, author/creator's name, and a hyperlink to the original resource on Freepik. Make a note of these details as you'll need them to ensure proper attribution in your YouTube video.
5. Understand Usage Limitations
The license may also specify any limitations on the usage of the resource. For instance, it might outline whether the resource can be used for commercial purposes or if there are any restrictions on modifying the content. Understanding these limitations is crucial to avoid potential copyright issues.
6. Comply with the License
It's essential to comply with the license terms provided by Freepik. Failure to do so can result in copyright claims and other legal repercussions on your YouTube channel. Ensure that you adhere to the attribution requirements, usage limitations, and any other terms outlined in the license.
7. Keep License Information Accessible
Throughout your project, keep the license information easily accessible, whether it's a saved document on your computer or a printed copy. This ensures you can reference the license details as needed during your YouTube video creation and when attributing the resource.
By downloading the resource and thoroughly reviewing its license, you'll be well-prepared to provide the required attribution in your YouTube video. Remember that understanding and complying with the license terms is essential for legal compliance and ethical responsibility in content creation.
Next, we'll explore the step-by-step process of adding proper attribution to your YouTube video, ensuring it aligns with Freepik's licensing requirements.
Also Read This: Why is YouTube Not Working on My Phone? Troubleshooting Mobile App Issues
Step 3: Add Attribution to Your YouTube Video
Now that you've found the right Freepik resource and reviewed its license, it's time to add the required attribution to your YouTube video. Proper attribution not only ensures legal compliance but also acknowledges the creators behind the resources you use. Here's a step-by-step guide on how to add attribution:
1. Choose the Attribution Location
Decide where you'll place the attribution in your video. Common locations include the video description, credits at the end of the video, or on-screen during the video. Check the license terms to determine the specific requirements provided by Freepik.
2. Gather Attribution Details
Retrieve the attribution details from the license information you reviewed in Step 2. This typically includes the title or name of the resource, the author/creator's name, the source (Freepik), and a hyperlink to the original resource on Freepik.
3. Create a Clear and Visible Attribution
Ensure that the attribution is clear and easily visible to your viewers. If you're adding it to the video description, consider placing it at the top so that it's immediately noticeable. If it's on-screen during the video, make it prominent but unobtrusive to the content.
4. Use Legible Fonts and Colors
Choose legible fonts and colors for your attribution. It should be easy to read and should not blend into the background or become unreadable. The goal is to make the attribution both informative and visually appealing.
5. Include a Hyperlink
If the license requires it, be sure to include a hyperlink to the original resource on Freepik. This allows viewers to easily access the source and verify the authenticity of the content you've used.
6. Update the Video Description
If you're placing the attribution in the video description, edit the description of your YouTube video. Add the attribution details, ensuring that they are complete and follow the format specified in the license terms. This step is crucial for legal compliance.
7. On-Screen Attribution
If you're adding attribution on-screen during the video, choose the right timing and placement. It should be present long enough for viewers to read, but it should not interfere with the overall viewing experience. Consider using a lower corner or a designated section for attribution.
8. Review Your Video
Before publishing your video, review it to ensure that the attribution is in place and meets the requirements specified in the license. Check for clarity, visibility, and accuracy to guarantee that it aligns with Freepik's terms.
9. Publish Your Video
Once you're confident that the attribution is correctly included in your video, go ahead and publish it on your YouTube channel. You can now share your content with your audience, knowing that you've respected the creators' rights and fulfilled your legal and ethical responsibilities.
By following these steps, you'll ensure that your YouTube video complies with Freepik's attribution requirements while providing recognition to the creators of the resources you've used. This not only keeps you in good standing with copyright regulations but also contributes to a respectful and collaborative creative community on YouTube.
Now that you've successfully added attribution to your YouTube video, you can share your content confidently, knowing that you've adhered to Freepik's licensing terms. In the FAQ section, we'll address common questions and concerns related to attributing Freepik resources on YouTube.
Also Read This: How to Change YouTube Display Settings for a Customized User Interface
FAQ
Here are answers to some commonly asked questions about attributing Freepik resources on YouTube:
Q: What is the importance of attribution on YouTube?
A: Attribution on YouTube is crucial for legal compliance and ethical responsibility. It ensures that you respect the copyright and licensing terms of the resources you use, preventing copyright claims and penalties.
Q: Can I use Freepik resources without attribution on YouTube?
A: Yes, if you have a Freepik Premium subscription. Premium subscribers have the privilege of using resources without attribution. Free users must provide proper attribution as per the license terms.
Q: Where should I place the attribution in my YouTube video?
A: The location of the attribution depends on the license terms. It can be placed in the video description, credits at the end of the video, or on-screen during the video. Check the license for specific instructions.
Q: Can I modify Freepik resources and still use them with attribution?
A: The license terms may specify whether modifications are allowed. If the license permits modifications, you can use the resource with attribution after making the necessary changes.
Q: What should I do if I receive a copyright claim on my YouTube video despite providing attribution?
A: Contact Freepik's support and provide them with the attribution details. They may be able to help resolve the issue. Ensure your attribution is accurate and follows the license requirements.
Q: Do I need to provide attribution for every Freepik resource I use in a single video?
A: Yes, if you use multiple Freepik resources in a single video, each resource should be individually attributed. Follow the license terms for each resource to ensure compliance.
Q: Is it necessary to include a hyperlink in the attribution?
A: The inclusion of a hyperlink to the original resource is often specified in the license terms. If the license requires it, be sure to include the hyperlink in your attribution.
Q: What happens if I don't provide proper attribution for Freepik resources on YouTube?
A: Failure to provide proper attribution can result in copyright claims and, in severe cases, the removal of your video or penalties on your YouTube channel. It's essential to adhere to the license terms.
Q: Can I use Freepik resources for commercial purposes with attribution?
A: The license may specify whether a resource can be used for commercial purposes. If it allows commercial use with attribution, you can use the resource in your commercial YouTube content, ensuring you follow the license requirements.
Q: How do I access the licensing information for a Freepik resource I've downloaded?
A: The licensing information is typically included with the downloaded resource as a text file or PDF document. You can also find the information on the Freepik website when you download the resource.
Q: Can I attribute Freepik in the video description and on-screen at the same time?
A: Yes, you can include the attribution both in the video description and on-screen during the video if the license terms allow it. Providing attribution in multiple locations ensures that you fulfill the requirements.
Q: Are there any specific formatting requirements for the attribution?
A: The license may specify a preferred format for attribution. Follow the format provided in the license terms to ensure that your attribution is accurate and compliant.
Properly attributing Freepik resources on YouTube is essential for a smooth and respectful creative process. By understanding the requirements and following them diligently, you can enjoy the benefits of using high-quality resources in your video content without the risk of copyright issues.
Conclusion
In conclusion, understanding how to attribute Freepik on YouTube is not just a legal obligation but a fundamental practice for ethical content creation. By following the steps outlined in this guide, you can navigate the process of using Freepik resources in your YouTube videos with confidence and respect for copyright and creative commons licensing:
Step 1: Finding the right Freepik resource is the first crucial step. Define your project needs, use Freepik's search tools, explore curated collections, filter results, and check licensing details to select the perfect resource.
Step 2: Downloading and reviewing the license ensures that you understand the specific attribution requirements, usage limitations, and other terms. This step is essential for legal compliance and ethical responsibility.
Step 3: Adding the required attribution to your YouTube video is the final step. Choose the right location, create a clear and visible attribution, use legible fonts and colors, and include a hyperlink as specified in the license terms.
Proper attribution on YouTube not only keeps you in good standing with copyright regulations but also supports the creative community and the artists who contribute their work to platforms like Freepik. It's a simple yet impactful way to show appreciation and respect for the resources you use in your content.
By consistently following the best practices and respecting the licensing terms of Freepik, you can continue to create engaging and visually appealing YouTube videos without the worry of copyright claims or penalties. Your commitment to attribution ensures a collaborative and ethical approach to content creation, fostering a positive and respectful creative community on YouTube.
Thank you for taking the time to learn how to attribute Freepik on YouTube. We hope this guide has been informative and that you can now confidently integrate Freepik resources into your YouTube projects, following the proper attribution guidelines. Happy content creation!