Introduction
Welcome to our comprehensive guide on how to edit Freepik vectors. If you're a graphic designer, artist, or just someone interested in working with high-quality vector graphics, Freepik is a valuable resource you should explore. In this blog post, we'll walk you through the process of finding, downloading, and editing Freepik vectors, making it easier than ever to create stunning designs for your projects.
Also Read This: Fortiguard Downloader Labs Signature Database Overview
What is Freepik?
Freepik is a popular online platform that offers a vast collection of high-quality graphic resources, making it a go-to destination for graphic designers, illustrators, and creatives. Founded in 2010, Freepik has become a reliable source for vector graphics, stock photos, icons, and more. Here, we delve into what Freepik is all about:
- Vector Graphics: At the heart of Freepik's offerings are vector graphics. Vectors are graphic elements that are created using mathematical equations, allowing them to be scaled to any size without loss of quality. This makes them perfect for a wide range of design projects.
- Diverse Categories: Freepik's extensive library covers a diverse range of categories, from business and technology to fashion and nature. You'll find vectors, photos, and illustrations to suit almost any project or theme.
- Free and Premium Resources: Freepik operates on a freemium model. While many resources are available for free, they also offer premium content through Freepik Pro, providing even more options for designers.
- User-Friendly Interface: The website's user interface is intuitive, making it easy to search, browse, and download resources. Whether you're a beginner or a seasoned professional, you'll find it easy to navigate.
Freepik's user-friendly approach and the quality of its resources have earned it a dedicated user base. It's a valuable tool for graphic designers and creators looking to enhance their projects with stunning visuals. One of the key advantages is the ability to customize and edit the vectors to fit your specific needs, which we will explore in detail later in this guide.
Before we dive into the editing process, let's explore how to access Freepik's resources, an essential step in unleashing your creativity with these graphic elements.
Also Read This: Easy Crafting Guide to Make a Paper Ninja Star
Understanding Freepik Vectors
Before you start editing Freepik vectors, it's important to have a clear understanding of what vectors are and why they are a popular choice among graphic designers. Let's dive into the basics:
What Are Vectors?
Vectors are graphic elements that are created using mathematical equations. Unlike raster graphics (such as JPEGs or PNGs), vectors are not made up of pixels. Instead, they are defined by lines and curves, which means they can be scaled to any size without losing quality. This scalability makes vectors ideal for a wide range of design applications.
Advantages of Vectors:
Understanding why vectors are so important in graphic design can help you appreciate their value when working with Freepik resources:
- Scalability: As mentioned earlier, vectors can be resized without loss of quality, making them perfect for creating everything from small icons to large banners.
- Flexibility: Vectors can be easily customized. You can change colors, shapes, and other attributes to fit your project's requirements.
- Print-Ready: Vectors are ideal for print materials like brochures, posters, and business cards, as they maintain their crispness at any size.
- Smooth Edges: Vectors have smooth, clean lines and edges, giving your designs a professional and polished look.
Why Freepik Vectors?
Freepik offers a wide variety of vector graphics in its extensive library. These vectors cover numerous categories, making them suitable for a diverse range of projects, from web design and marketing materials to art and crafts. The ability to edit these vectors allows you to customize them to match your project's unique style and requirements.
With this understanding of vectors and their advantages, you are well-prepared to make the most of Freepik's vector resources. Now, let's explore how to access and download these vectors to get started with your creative projects.
Also Read This: Canva Image Shape Cropping
Accessing Freepik Resources
Now that you have a good understanding of what Freepik is and the value of vectors, it's time to explore how to access and utilize the resources available on the platform. Follow these steps to get started:
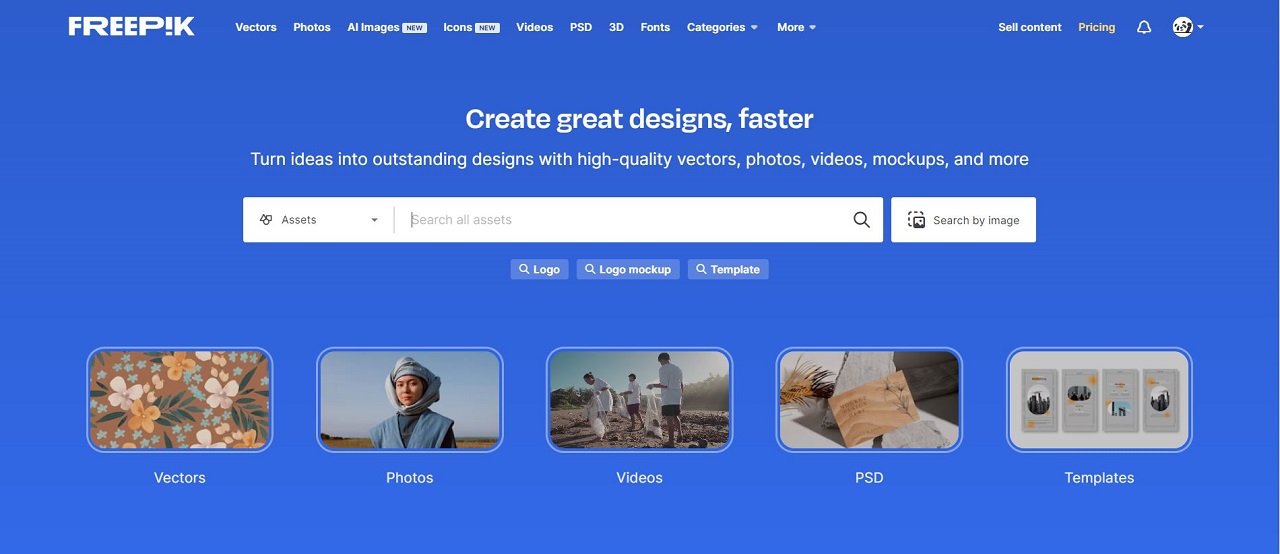
1. Visit the Freepik Website
First, open your web browser and navigate to the Freepik website at www.freepik.com. This is where you'll find the extensive library of vectors and other graphic resources.
2. Search for Resources
Use the search bar at the top of the website to look for specific vectors or browse through the categories to discover a wide range of graphics. Freepik categorizes its resources to help you find what you need quickly. Whether you're looking for icons, illustrations, or vectors for a specific project, you'll find them organized for easy access.
3. Filter and Sort
Freepik provides filtering and sorting options to narrow down your search. You can filter results based on whether you want free or premium resources. Sorting options help you arrange resources by popularity, relevance, or date of publication.
4. Preview and Choose
Before downloading, you can preview the resources to ensure they match your requirements. Freepik offers a detailed preview of each resource, allowing you to see the graphics up close and personal.
5. Download the Resource
Once you've found the perfect vector or graphic, click the "Download" button. Depending on the resource and your account status (free or premium), you may need to create a Freepik account to access the download. Follow the on-screen instructions to complete the download process.
6. Terms of Use
It's important to understand and abide by Freepik's terms of use. While many resources are available for free, they may come with certain restrictions on usage. Premium resources typically offer more flexibility in terms of usage. Always check the licensing terms to ensure compliance with your intended project.
By following these steps, you can easily access and download the desired resources from Freepik. Once you've downloaded the vectors, you can proceed to edit and customize them to suit your project's needs, which we will explore in detail in the next section.
Also Read This: How to Add a Download Button in Behance to Allow Visitors to Download Your Work
Editing Freepik Vectors
Now that you've accessed the Freepik resources, it's time to dive into the exciting process of editing Freepik vectors to match your project's unique style and requirements. Whether you're a graphic designer or a creative enthusiast, here's how to get started with the editing process:
1. Choose the Right Editing Software
The first step is selecting the appropriate editing software. You can use a variety of tools, depending on your familiarity and needs. Here are some popular choices:
- Adobe Illustrator: Known for its vector editing capabilities, Illustrator is a top choice for professionals. It offers a wide range of tools for detailed vector manipulation.
- Inkscape: An open-source alternative to Illustrator, Inkscape is a free option for vector editing. It's a great choice for beginners and those on a budget.
- CorelDRAW: Corel's software is another professional-grade option for vector editing. It's versatile and suitable for a wide range of design projects.
2. Import the Freepik Vector
Once you have your editing software ready, import the downloaded Freepik vector into the program. Most editing software allows you to open or import files in common formats such as AI, EPS, or SVG.
3. Explore Editing Tools
Each editing software provides a set of tools for editing vectors. These tools typically include:
| Tool | Description |
|---|---|
| Selection Tool | Select and move objects within the vector. |
| Pen Tool | Create and edit vector paths and shapes. |
| Color Palette | Adjust colors and gradients to match your design. |
| Layers Panel | Organize and manage different elements of the vector. |
4. Customize Your Vector
Now comes the fun part! Use the tools provided by your chosen software to customize the Freepik vector. You can modify colors, shapes, sizes, and other attributes to align the vector with your project's vision.
5. Save Your Edited Vector
Once you're satisfied with your edits, save the vector in your desired format. Common formats for vector graphics are AI, EPS, and SVG. This ensures that your edited vector maintains its scalability and quality.
6. Respect Licensing
Always be mindful of the licensing terms associated with the Freepik vector you're editing. Ensure your edits are in compliance with Freepik's terms and any additional licensing agreements.
By following these steps, you can successfully edit Freepik vectors to create unique, customized graphics for your projects. Now, you're ready to implement these edited vectors into your designs, adding a personal touch to your creative endeavors.
Also Read This: Ultimate Guide to Downloading Dailymotion Video Playlists
Step-by-Step Editing Process
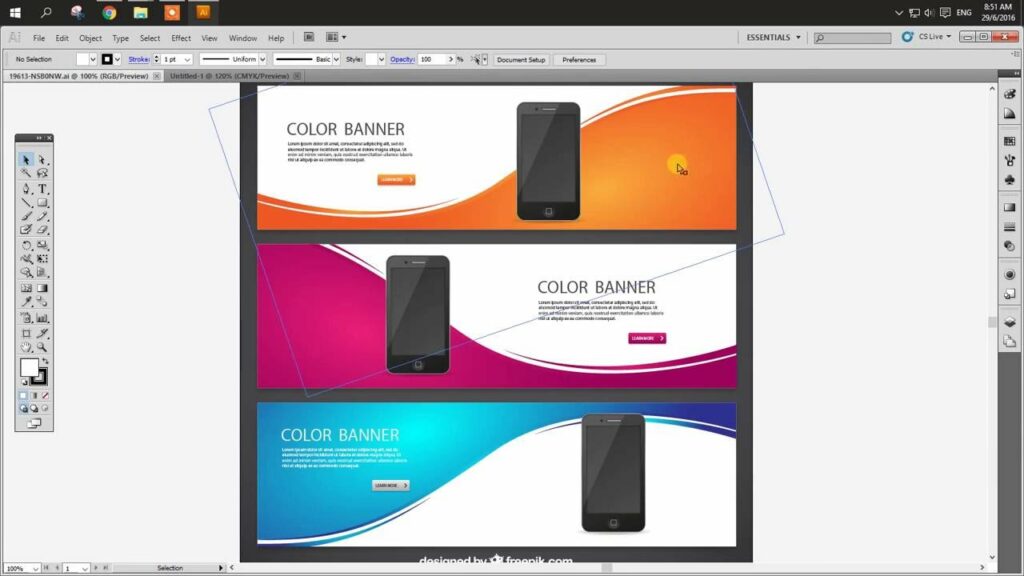
Let's dive into a detailed step-by-step process for editing Freepik vectors. By following these guidelines, you'll be able to efficiently transform these vectors to suit your design needs. We'll use Adobe Illustrator as our editing software in this example:
Step 1: Open Adobe Illustrator
Launch Adobe Illustrator on your computer and ensure you have the latest Freepik vector file you want to edit ready for use.
Step 2: Import the Freepik Vector
Go to "File" and select "Open" to import the Freepik vector file into Illustrator. The vector will appear on the artboard.
Step 3: Familiarize Yourself with the Vector
Take a moment to explore the vector. Use the selection tool to click and select various elements. This allows you to understand the structure and components of the vector.
Step 4: Make Necessary Edits
Now, it's time to edit. Use the editing tools in Adobe Illustrator, such as the Pen Tool for creating and editing paths, the Fill and Stroke options to change colors, and the Transform tool to resize or rotate elements. Make adjustments as per your project's requirements.
Step 5: Work with Layers
Utilize the layers panel to organize and manage different elements within the vector. This helps maintain a structured and well-organized design.
Step 6: Test and Preview
After making edits, it's crucial to test the vector in various contexts to ensure it fits your design. Zoom in and out to check for any pixelation or loss of quality.
Step 7: Save Your Work
Once you are satisfied with the edits, go to "File" and select "Save As." Choose the format you want to save your edited vector in, such as AI, EPS, or SVG. This format preserves the vector's scalability and quality.
Step 8: Respect Licensing
Always ensure that your edits comply with Freepik's terms and any licensing agreements. Be aware of how you plan to use the edited vector in your projects.
Step 9: Back Up Your Work
It's a good practice to create backups of your edited vectors. Store them in a safe location in case you need to revisit or reuse them in the future.
Step 10: Implement the Edited Vector
Now, you can integrate your edited Freepik vector into your design projects. Whether it's a website, poster, or any other creative endeavor, your customized vector will enhance the visual appeal of your work.
By following these steps, you can confidently edit Freepik vectors to align them with your creative vision. Remember that practice and experimentation are key to mastering the art of vector editing. Your skills will improve with each project, allowing you to create unique and compelling designs.
Underwater Life
Surreal scene in an autumnal forest pic.twitter.com/QW5sy0cBKb
— Markus Stock Photography (@MarkusStockPho1) October 26, 2023
Also Read This: Understanding Adobe Stock Images Price: Pricing Your Content
FAQ
Here are some frequently asked questions about editing Freepik vectors to help you navigate the process with ease:
Q: Can I edit Freepik vectors for commercial use?
A: The licensing terms for Freepik resources can vary. Some vectors are available for free for personal and commercial use, while others may require a premium subscription or attribution. It's essential to carefully read and adhere to the specific licensing terms associated with each resource.
Q: What file formats are suitable for editing Freepik vectors?
A: Freepik offers vectors in various file formats, including AI (Adobe Illustrator), EPS, and SVG. These formats are highly compatible with vector editing software and preserve the scalability and quality of the vectors during editing.
Q: Do I need to credit Freepik for edited vectors?
A: The requirement for attribution depends on the specific licensing terms associated with the resource. Freepik provides clear guidance on whether attribution is necessary. Always check the licensing terms to ensure compliance with Freepik's requirements.
Q: Can I sell products that feature edited Freepik vectors?
A: The ability to sell products featuring edited Freepik vectors may vary depending on the licensing terms of the resource and the specific usage you have in mind. Some vectors are available for commercial use, while others may have restrictions. It's essential to understand and adhere to the licensing terms to avoid any legal issues.
Q: Are there any limitations on editing Freepik vectors?
A: While you have the freedom to customize Freepik vectors to suit your project's needs, you should be mindful of respecting the original creator's work. Avoid using edited vectors in a way that could be considered offensive, defamatory, or harmful. Always adhere to Freepik's terms and conditions when editing and using their resources.
Q: What if I encounter technical issues while editing Freepik vectors?
A: If you run into technical difficulties or have specific software-related questions while editing Freepik vectors, it's a good idea to consult the documentation and support resources provided by your chosen vector editing software. Additionally, the Freepik website may offer guidance or a support section to address common user issues.
These frequently asked questions should help you better understand the nuances of editing Freepik vectors and ensure a smooth and legally compliant editing process. If you have additional questions, be sure to consult Freepik's official resources for more information and guidance.
Conclusion
Congratulations! You've reached the end of our comprehensive guide on how to edit Freepik vectors. We hope this guide has empowered you with the knowledge and skills to make the most of the fantastic resources available on Freepik for your creative projects.
By understanding the value of vectors, accessing Freepik resources, and mastering the art of vector editing, you've taken a significant step toward enhancing your design capabilities. The ability to customize vectors to your unique vision allows you to add a personal touch to your creative endeavors, whether you're designing a website, creating promotional materials, or working on artistic projects.
Remember to always respect the licensing terms associated with Freepik resources. Compliance with licensing ensures that you can use your edited vectors confidently, whether for personal or commercial purposes. Be mindful of any attribution requirements and usage restrictions to avoid legal complications.
Continued practice and exploration of vector editing tools will help you refine your skills and unlock new possibilities in your design work. With each project, you'll gain valuable experience, making your creative journey even more rewarding.
We encourage you to put your newfound knowledge to use and embark on your design adventures with confidence. Freepik's extensive collection of vectors, along with your editing skills, will open doors to limitless creative possibilities. So, go ahead and bring your design ideas to life with the edited Freepik vectors at your disposal.
Thank you for joining us on this educational journey, and we wish you all the best in your future design endeavors. Happy editing!