Submitting photos to Shutterstock is a straightforward process, but getting them approved can sometimes feel challenging. Shutterstock has strict guidelines to maintain the quality of its marketplace. Each photo goes through a thorough review process where Shutterstock checks for technical quality, legal considerations, and artistic value. If your photo meets all the criteria, it gets approved; if not, you’ll receive feedback on why it was rejected.
Understanding the approval process is key to improving your chances. Knowing what Shutterstock looks for can help you fine-tune your photos and increase the likelihood of a successful submission.
Common Reasons for Photo Rejection
Rejection can be frustrating, but it’s part of the learning process. Shutterstock provides detailed feedback on why your photo wasn’t approved. Here are some common reasons photos get rejected:
- Focus and Sharpness: Blurry or out-of-focus images are a common reason for rejection.
- Lighting Issues: Underexposed or overexposed photos often don’t pass the review process.
- Noise and Artifacts: Excessive noise, grain, or compression artifacts can lead to rejection.
- Intellectual Property Violations: Logos, brand names, or copyrighted content in your images may cause rejection.
- Technical Errors: Things like color fringing, poor cropping, or incorrect color balance are often flagged.
Understanding these reasons can help you avoid common mistakes, making your next submission more likely to succeed.
Also Read This: How to Add Experience on LinkedIn
Steps to Prepare Your Photo for Resubmission
Once your photo has been rejected, the next step is to make the necessary improvements and resubmit it. Here’s a step-by-step guide to help you through the process:
- Review Feedback: Carefully read the rejection reasons provided by Shutterstock.
- Fix Technical Issues: Correct problems like focus, lighting, or noise using photo-editing software.
- Check for Legal Issues: Ensure your image doesn’t contain copyrighted content or identifiable logos.
- Optimize Image Quality: Recheck sharpness, exposure, and overall image quality before resubmitting.
- Resubmit the Photo: After making the corrections, upload the updated version for review.
Taking these steps ensures that you address any issues and gives your photo a better chance of approval on the second attempt.
Also Read This: Accessing Your Resume on LinkedIn
How to Correct Technical Issues in Your Image
When your photo gets rejected due to technical issues, it’s important to know how to fix them. These issues can range from focus problems to exposure imbalances. By addressing these, you can improve the quality of your image and enhance its chances of getting approved on Shutterstock.
Here’s how you can correct common technical problems:
- Focus and Sharpness: Use editing tools to enhance sharpness. If the image is too blurry, you may need to reshoot it using a tripod or adjusting your camera settings to ensure better focus.
- Exposure and Lighting: Photos that are too dark or too bright can be fixed by adjusting the exposure, brightness, or contrast in an editing software like Adobe Photoshop or Lightroom. Balancing the highlights and shadows also helps.
- Noise and Artifacts: Excessive digital noise or grain can be reduced using noise reduction tools in your editing software. Be careful not to overdo it, as too much noise reduction can make your image look unnatural.
- White Balance: Incorrect color temperatures can be corrected by adjusting the white balance in your image. This ensures that the colors appear more natural.
By addressing these technical issues, you can ensure that your photo meets Shutterstock’s quality standards.
Also Read This: Imago Stock Videos: Boost Your Content
Best Practices for Ensuring Quality and Compliance
Ensuring your photo is both high-quality and compliant with Shutterstock's guidelines is key to getting it approved. Paying attention to the finer details can help avoid rejection, making the process smoother for you.
Here are some best practices to follow:
| Aspect | Best Practices |
|---|---|
| Resolution | Make sure your image is high resolution, at least 4 MP (megapixels) or higher. |
| Legal Considerations | Ensure you have permission to use any recognizable people, locations, or objects. Use model or property releases when needed. |
| Content Relevance | Submit images that are relevant to Shutterstock’s audience. Photos should be visually appealing and have commercial value. |
| Post-Processing | While editing is encouraged, avoid over-processing your image. Overuse of filters or extreme color corrections can lead to rejection. |
These practices not only help with image approval but also increase the chances of your photo performing well in the Shutterstock marketplace.
Also Read This: Managing Your Downloads in Adobe Stock
How to Submit Your Photo for Review Again
After making the necessary corrections to your rejected image, the final step is to resubmit it for review. The process is simple but should be done carefully to avoid another rejection.
Here’s how to resubmit your photo:
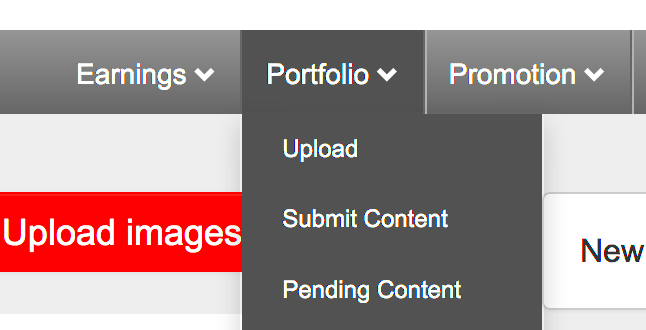
- Login to Your Shutterstock Account: Start by logging into your Shutterstock contributor account.
- Select the Rejected Image: Go to your submissions page and find the image that was previously rejected.
- Make Corrections: Ensure you’ve corrected all the issues highlighted in the rejection feedback before uploading the new version.
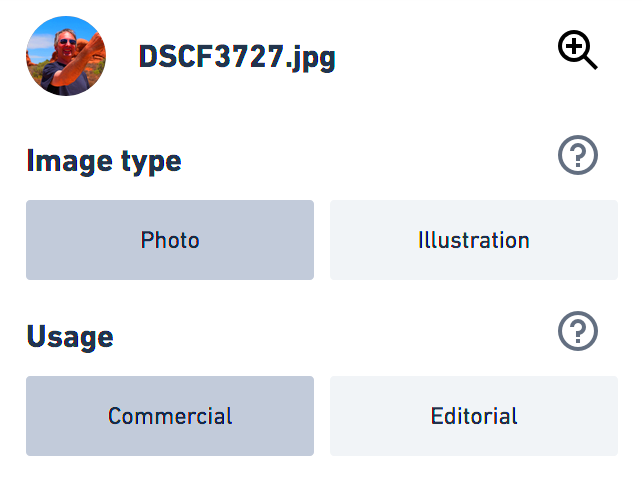
- Resubmit the Photo: Upload the corrected image and provide all required metadata like title, description, and keywords.
- Wait for Review: Once submitted, your photo will go through the review process again, which usually takes a few days.
Being thorough with your corrections and metadata increases your chances of approval. If your image gets rejected again, review the feedback and continue refining your submission until it meets the platform’s standards.
Also Read This: How to Change Visibility in Dailymotion for Effective Content Sharing
Monitoring the Status of Your Resubmitted Photo
After you’ve resubmitted your corrected photo to Shutterstock, it’s important to keep track of its status. Shutterstock provides tools that allow contributors to monitor the progress of their submissions. Understanding where your photo is in the review process will help you plan your next steps.
Here’s how you can monitor the status of your resubmitted photo:
- Login to Your Account: Access your Shutterstock contributor account.
- Navigate to the ‘Pending’ Tab: Go to your dashboard and click on the ‘Pending’ tab to see your resubmitted photos that are still under review.
- Check for Updates: Shutterstock typically reviews resubmitted photos within a few days, though it can take longer depending on the volume of submissions. Keep checking this section for updates.
- Review Feedback: Once the review is complete, you’ll receive feedback on whether your image has been approved or rejected again. Be sure to read this carefully.
Staying updated on the status of your submission allows you to respond quickly if more changes are needed or celebrate if your photo is finally approved.
Also Read This: Gaining Recognition on EyeEm: A Comprehensive Guide
FAQ: Resubmitting Photos on Shutterstock
Resubmitting photos on Shutterstock can bring up many questions, especially if you’re new to the process. Here are some common questions contributors have:
- How long does the review process take?
Shutterstock usually reviews submissions within a few days, but it can sometimes take up to a week during busy periods. - Can I resubmit the same image multiple times?
Yes, you can resubmit the same image after making necessary corrections, as long as you follow the feedback provided. - What should I do if my photo is rejected again?
If your photo is rejected a second time, review the feedback and make further adjustments. It’s also a good idea to seek advice from other contributors or online forums. - Are there limits to how many photos I can resubmit?
There’s no specific limit, but it's better to focus on improving the quality of your photos rather than repeatedly resubmitting without changes.
By understanding the most common concerns about resubmitting, you can move forward with more confidence and clarity.
Conclusion: Maximizing Your Chances for Approval
Resubmitting photos on Shutterstock may seem daunting, but with the right approach, it can lead to success. Focus on addressing the feedback provided during the review process, whether that involves fixing technical issues or ensuring your photo complies with legal guidelines.
Here are some final tips to maximize your chances of approval:
- Always Review Feedback: Shutterstock provides helpful feedback. Understanding the reasons for rejection will help you improve your submissions.
- Refine Your Editing: Make sure your images are sharp, well-exposed, and free from noise or other technical flaws.
- Follow Best Practices: Stick to Shutterstock’s content guidelines to avoid legal or compliance issues. This will save time and frustration.
- Be Patient: The review process can take time. Use this period to prepare your next submissions or work on other images.
By consistently improving your submissions and learning from the feedback, you can significantly increase your chances of getting your photos approved on Shutterstock.