YouTube has transformed the way we consume content, offering a vast array of videos from all over the world. One of the fundamental aspects affecting our viewing experience is video quality. When you click on a video, YouTube automatically selects a default quality setting based on several factors, such as your internet speed and the device you're using. Understanding these default settings can significantly enhance your experience, allowing you to make informed choices about how you watch your favorite videos.
The Importance of Video Quality on YouTube

Video quality plays a crucial role in the overall user experience on YouTube. Here’s why it matters:
- Visual Clarity: High-quality videos provide a clear and engaging viewing experience. For example, watching a nature documentary in 4K resolution helps you appreciate the stunning details of a hawk in flight or the vibrant colors of a sunset.
- Engagement: Quality matters when it comes to keeping viewers engaged. A video that looks grainy or pixelated can lead to frustration, causing viewers to click away. A study found that viewers are 60% more likely to finish a video if it’s in high definition.
- Device Compatibility: Different devices support various video resolutions. Mobile users might prefer lower quality to save data, while users on a smart TV can enjoy videos in 4K. Understanding your default settings allows you to optimize your experience for the device you're using.
- Impact on Loading Times: Higher video quality requires more bandwidth. If your internet connection is slow, a high-quality video might buffer frequently, making it necessary to adjust to a lower quality. Knowing how to change these settings can help you avoid interruptions.
Ultimately, understanding YouTube's video quality settings enhances your viewing experience, ensuring that you enjoy content in the best possible way, tailored to your specific needs.
Also Read This: How to Add Friends in My Hero Ultra Rumble
Reasons Behind YouTube's Default to 360p
When you first hit play on a YouTube video, you might notice that it often defaults to 360p resolution. But why does YouTube choose this particular setting? Here are a few key reasons:
- Accessibility: Not everyone has access to high-speed internet. By defaulting to 360p, YouTube ensures that users with slower connections can still enjoy the content without buffering interruptions.
- Reduced Data Usage: For mobile users or those with limited data plans, 360p is a great way to minimize data consumption. A lower resolution means less data is used, allowing users to watch more videos without exceeding their data limits.
- Quick Loading Times: Starting a video at a lower resolution helps it load faster, providing a smoother user experience. This is especially crucial for users who want to jump in quickly without waiting for the video to buffer.
While many users might prefer higher resolutions like 720p or 1080p, starting at 360p is a practical choice for YouTube to accommodate a broader audience. Users can always manually adjust the quality settings if their connection allows for it!
Also Read This: What Is the Royal Rumble Streaming On in 2024
Impact of Internet Speed on Video Quality

Internet speed plays a crucial role in determining the quality of videos you can stream on YouTube. Here’s how it affects your viewing experience:
| Internet Speed (Mbps) | Recommended Video Quality |
|---|---|
| 0.5 - 1.5 | 240p - 360p |
| 1.5 - 3 | 360p - 480p |
| 3 - 5 | 720p (HD) |
| 5 - 10 | 1080p (Full HD) |
| 10+ | 4K and higher |
As you can see, higher internet speeds allow for higher video quality. If your connection is slower, YouTube may automatically reduce the quality to prevent buffering. For example, if you're on a 3 Mbps connection, trying to stream a 4K video would likely result in constant interruptions.
In summary, the speed of your internet connection directly impacts your video experience on YouTube. It's essential to be mindful of your connection, especially when deciding whether to stream in higher resolutions!
Also Read This: How to Cut Side Bangs at Home with a Step-by-Step Dailymotion Tutorial
How YouTube Adjusts Video Quality Automatically
Have you ever noticed that sometimes your YouTube videos start playing in lower quality, and then gradually improve? That’s all thanks to YouTube’s smart video quality adjustment system! This feature is designed to enhance your viewing experience, especially when network conditions vary.
YouTube uses a method called Adaptive Bitrate Streaming. Here’s how it works:
- Initial Load: When you click play, YouTube assesses your internet speed and device capabilities. It starts streaming at a quality that ensures smooth playback.
- Continuous Monitoring: As you watch, YouTube constantly checks your connection. If your internet speed drops, it may automatically switch to a lower quality to prevent buffering.
- Quality Boost: Conversely, if your signal improves, YouTube will increase the video quality, providing you with a better visual experience.
This automatic adjustment can happen seamlessly in the background, so you can enjoy your content without interruptions. However, these adjustments may depend on several factors such as:
| Factor | Impact |
|---|---|
| Internet Speed | Higher speeds allow for better quality. |
| Device Capability | Older devices may struggle with high resolutions. |
| Network Congestion | Busy networks might lead to lower quality to maintain playback. |
This intelligent system means you can focus on enjoying your favorite videos without worrying about constant buffering or interruptions!
Also Read This: How OK.ru Helps You Stay Connected with Loved Ones Around the World
Changing Video Quality Settings Manually
While YouTube does a fantastic job of adjusting video quality automatically, there are times when you might want to take control and adjust the settings yourself. Whether it’s to save data or ensure the best possible viewing experience, changing video quality is simple and quick!
Here’s how you can manually change video quality on YouTube:
- Open the YouTube video you want to watch.
- Click on the gear icon (⚙️) located at the bottom right corner of the video player.
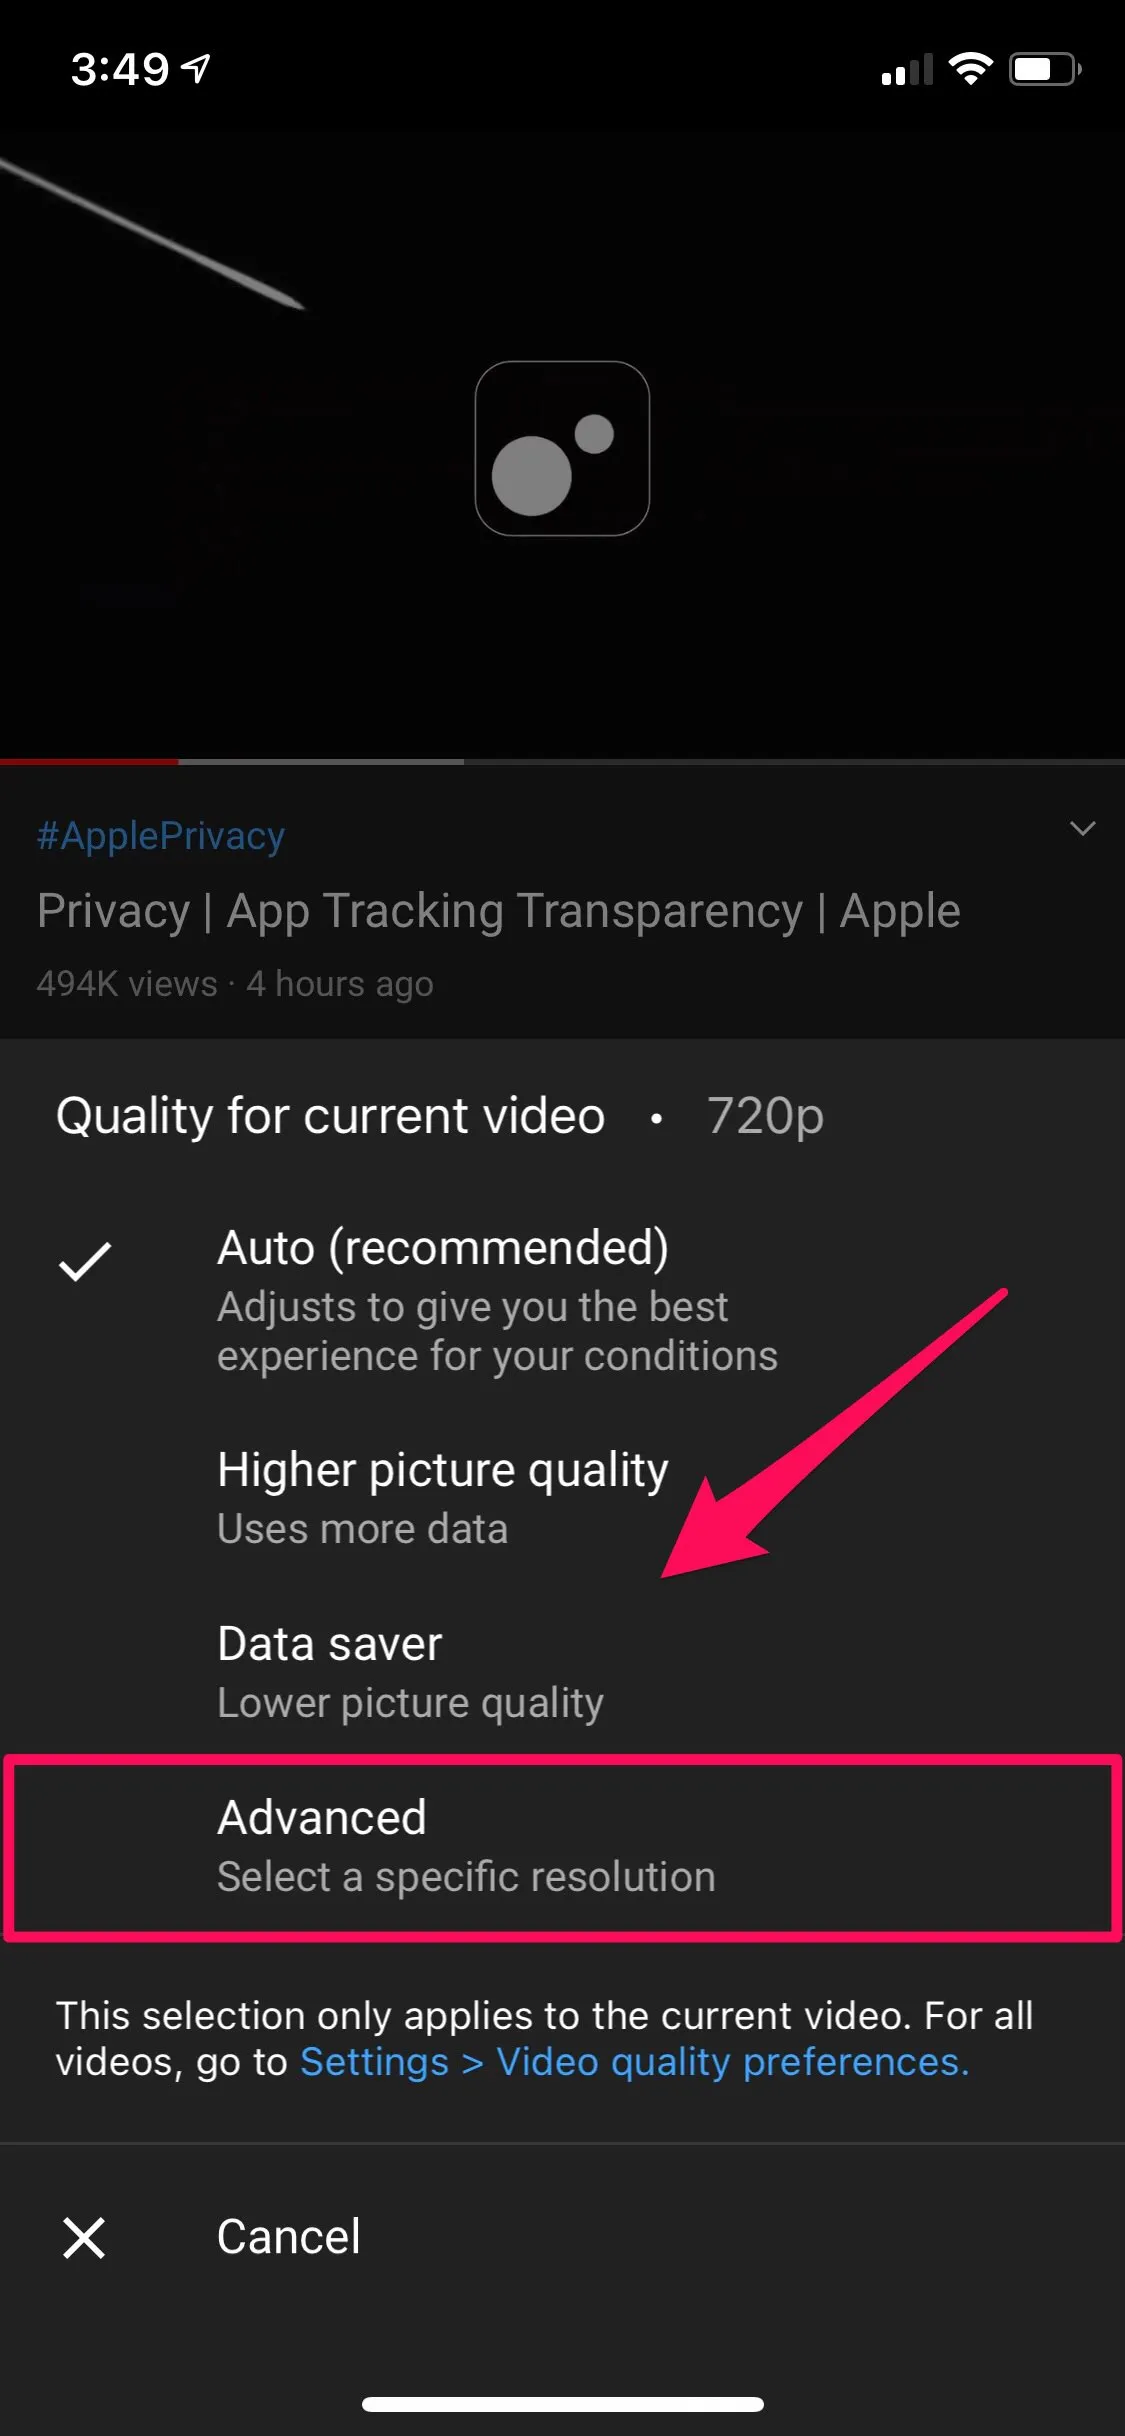
- Select “Quality” from the menu that appears.
- You’ll see a list of available resolutions, such as:
- 144p
- 360p
- 720p
- 1080p
- 4K (if available)
Pro Tip: If you're using mobile data, consider selecting a lower quality to save on data usage. Alternatively, if you want the best experience on a large screen, go for the highest resolution available.
Remember, you can always revert to automatic settings if you prefer YouTube to handle the quality adjustments for you. Enjoy watching!
Also Read This: How to Download Dailymotion Videos Using IDM in 2013
7. Tips for Improving Video Quality on YouTube
If you find yourself frustrated with the video quality on YouTube, don’t worry! There are several tips you can employ to enhance your viewing experience. Here are some effective strategies:
- Adjust the Quality Settings: Click on the gear icon (⚙️) in the bottom right corner of the video player. From there, you can select a higher resolution, such as 1080p or 4K, if available.
- Check Your Internet Speed: A slow connection can hinder video quality. Use online speed tests to ensure you have sufficient bandwidth (at least 5 Mbps for HD streaming).
- Clear Your Cache: Over time, cache buildup can slow down your browser. Regularly clearing your cache can help improve streaming performance.
- Use Ethernet Instead of Wi-Fi: A wired connection is often more stable than Wi-Fi. If possible, connect your device directly to your router.
- Close Background Applications: Other applications consuming bandwidth can impact video quality. Close any unnecessary apps or tabs while streaming.
- Update Your Browser: Ensure that your browser is up-to-date. Older versions may not support the latest video technologies.
By implementing these tips, you can significantly enhance your YouTube viewing experience, ensuring that you watch your favorite videos in the best quality possible!
8. Conclusion: Navigating YouTube's Video Quality Options
Navigating YouTube’s video quality settings can initially seem daunting, but understanding the available options can greatly improve your viewing experience. Whether you're watching cat videos or the latest tutorials, video quality can make all the difference.
In conclusion, consider the following:
- The Importance of Quality: Higher resolution videos offer clearer images and better detail. Opt for 1080p or 4K whenever you can!
- Automatic vs. Manual Settings: While automatic settings adjust based on your internet speed, manually selecting a quality can sometimes yield better results, especially in fluctuating connection situations.
- Device and Browser Compatibility: Ensure your device and browser are compatible with higher resolutions to make the most out of YouTube's offerings.
Ultimately, being proactive about your settings and aware of your internet capabilities can lead to a richer, more enjoyable YouTube experience!