If you’ve ever clicked on a YouTube video only to be greeted by blurry images and choppy audio, you’re not alone. It can be incredibly frustrating, especially when you’re eager to watch your favorite content. In this post, we’re diving deep into the common reasons behind poor YouTube video quality and, more importantly, how to fix them. Let’s get started on improving your viewing experience!
Common Reasons for Poor YouTube Quality
Understanding why your YouTube quality is suffering can help you pinpoint the issues and enhance your viewing experience. Here are some of the most common culprits:
- Internet Connection: A slow or unstable internet connection is often the root cause of poor video quality. If your download speed is below 5 Mbps, you might experience buffering or reduced quality.
- Video Resolution Settings: YouTube automatically adjusts the video quality based on your internet speed. If you’re watching in a lower resolution (like 144p), you can manually change it to a higher setting (like 1080p) by clicking the gear icon.
- Device Performance: Older devices may struggle to render high-quality videos. Make sure your device’s software is up-to-date and consider closing any unnecessary apps running in the background.
- Browser Issues: Sometimes, the browser you’re using can affect video playback. Chrome is usually reliable, but if you experience issues, consider clearing your cache or trying a different browser.
- Content Quality: Not all videos are uploaded in high quality. Some creators may upload in lower resolutions, affecting your viewing experience.
Identifying these factors can guide you on how to improve your YouTube quality—so let’s get to the solutions next!
Also Read This: Getting more views and likes on Behance
How Internet Speed Affects Video Quality
Have you ever clicked play on a YouTube video, only to be met with buffering or grainy visuals? One of the biggest culprits behind this frustrating experience is your internet speed. The speed at which data travels plays a crucial role in how videos are streamed and displayed.
Generally, YouTube videos are available in various resolutions, ranging from 144p to 4K. Each resolution requires a certain amount of bandwidth:
- 144p: Approximately 0.1 Mbps
- 360p: Approximately 0.5 Mbps
- 720p: Approximately 2.5 Mbps
- 1080p: Approximately 5 Mbps
- 4K: Approximately 20 Mbps
If your internet speed is below the required threshold for the resolution you've selected, you may experience buffering, lower quality, or even complete playback failure. To check your speed, you can use websites like Speedtest.net. If your speed falls short, consider the following:
- Upgrade your internet plan.
- Use a wired connection instead of Wi-Fi.
- Limit the number of devices using the internet simultaneously.
Improving your internet speed can significantly enhance your YouTube viewing experience, allowing you to enjoy crisp, clear videos without interruption!
Also Read This: How to Add Private Work to Behance
Video Settings and Their Impact on Quality
Did you know that the video settings you choose on YouTube can drastically affect your viewing quality? When you watch a video, YouTube automatically adjusts the quality based on your internet speed. However, you can manually select the quality setting that suits your needs best.
YouTube offers several video quality options:
| Resolution | Recommended Speed |
|---|---|
| 144p | 0.1 Mbps |
| 360p | 0.5 Mbps |
| 720p | 2.5 Mbps |
| 1080p | 5 Mbps |
| 4K | 20 Mbps |
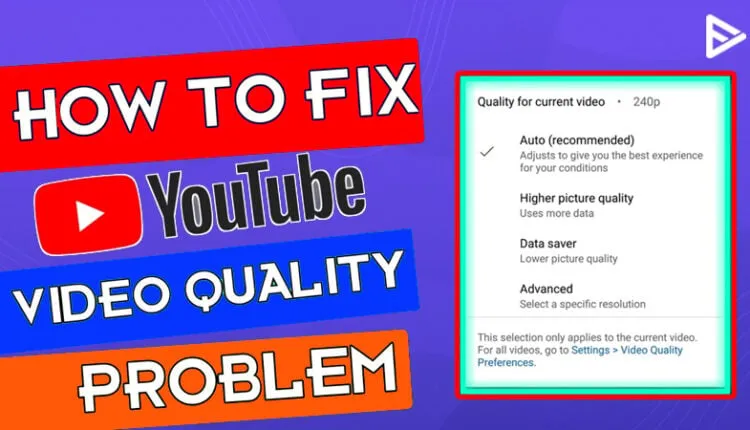
To change the quality:
- Click on the gear icon in the video player.
- Select "Quality."
- Choose your desired resolution.
Keep in mind that selecting a higher quality requires more bandwidth. If you notice lag or buffering, try lowering the quality to ensure a smoother experience. Additionally, you can enable the "Auto" setting, allowing YouTube to adjust the quality automatically based on your current internet speed.
By understanding and adjusting your video settings, you can take control of your YouTube experience and enjoy your favorite content in the best quality possible!
Also Read This: Announce Your Events with Canva Save the Date Template
5. Device and Browser Compatibility Issues
Ever been in the middle of a thrilling video only for it to look like a pixelated mess? It can be incredibly frustrating! One of the culprits behind this could be device and browser compatibility issues. YouTube is designed to work across a variety of devices—smartphones, tablets, laptops, and smart TVs. However, not all devices are created equal.
When using outdated browsers or older devices, you may face performance hiccups. For instance, older versions of Internet Explorer might struggle to render YouTube videos properly, leading to subpar quality. Similarly, if you're trying to watch videos on a low-spec smartphone, you might experience lag or buffering, which affects video clarity.
Here are some compatibility factors to consider:
- Browser Version: Ensure you’re using the latest version of your browser. Chrome, Firefox, and Safari regularly update to improve performance.
- Device Specifications: Check if your device meets the minimum specifications for streaming high-quality videos. Older devices may lack the processing power.
- Operating System: An outdated OS can hinder browsing speed and video playback. Update your device to the latest OS version available.
In summary, ensuring that your device and browser are up-to-date can significantly enhance your YouTube experience, bringing clarity back to those pixelated videos!
Also Read This: How to Sign Up for Getty Images to Submit Photos
6. Fixing YouTube Quality Issues
So, your YouTube videos are not looking as sharp as they should? Don’t worry! There are several straightforward methods to troubleshoot and fix these quality issues, making your viewing experience much more enjoyable.
Here’s a handy checklist to get you started:
- Adjust Video Quality: Click on the settings (gear icon) in the video player and select a higher quality. Sometimes, it defaults to a lower resolution based on your internet speed.
- Check Internet Connection: A slow connection can result in buffering. Run a speed test and ensure you have a stable connection—aim for at least 5 Mbps for HD content.
- Clear Cache and Cookies: Overloaded memory on your browser can slow down performance. Regularly clear your cache and cookies to keep things running smoothly.
- Disable Hardware Acceleration: Sometimes, this feature can interfere with video playback. Try disabling it in your browser settings to see if quality improves.
- Restart Your Devices: A simple restart can refresh your device’s memory and improve performance, allowing YouTube to function better.
By following these tips, you can get back to enjoying crisp, clear videos on YouTube in no time! Remember, it’s often the small adjustments that make the biggest difference.
Also Read This: Does Country of Residence Matter on YouTube? Understanding Regional Restrictions
7. Best Practices for Uploading High-Quality Videos
When it comes to uploading videos on YouTube, following the right practices can make a significant difference in the quality of your content. Here are some essential tips to ensure your videos shine:
- Choose the Right Resolution: Always aim for at least 1080p (Full HD) resolution. If possible, go for 4K. This not only improves the viewing experience but also helps in ranking higher in search results.
- Optimal Video Format: MP4 is the recommended format. It balances video quality with a manageable file size, ensuring faster uploads without compromising on clarity.
- Bitrate Settings: Use a higher bitrate for better quality. For 1080p, aim for around 8 Mbps, while 4K videos can range from 35 to 45 Mbps. This impacts how sharp and clear your video appears.
- Audio Quality Matters: Don’t overlook audio! Clear sound enhances viewer retention. Use high-quality microphones and consider formats like AAC for audio compression.
- Lighting and Framing: Proper lighting and composition can dramatically elevate video quality. Natural light works wonders, and ensure your subject is well-framed and in focus.
- Editing Software: Use good editing tools that allow you to enhance your video quality. Programs like Adobe Premiere Pro or Final Cut Pro can help refine your content before uploading.
- Check Upload Settings: Before you hit that upload button, double-check the settings. Opt for the highest quality available and ensure you’re uploading in the appropriate category.
8. Conclusion
In summary, experiencing poor video quality on YouTube can be frustrating, but understanding the root causes and implementing the right solutions can turn things around. By focusing on best practices for uploading and keeping your equipment and settings in check, you can create content that not only looks and sounds great but also engages your audience effectively.
So, whether you're an aspiring YouTuber or a seasoned creator, always remember:
- Prioritize video resolution and bitrate.
- Invest in quality audio equipment.
- Utilize proper lighting and framing techniques.
- Regularly optimize your upload settings.
With these strategies, you’ll not only enhance your video quality but also your channel’s growth. Happy uploading!