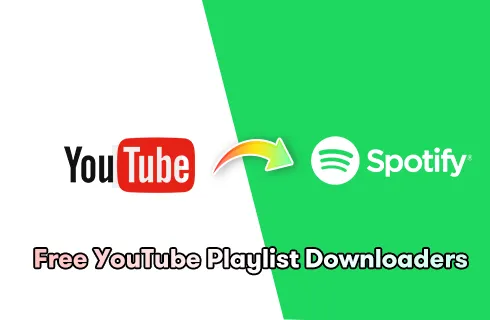
In today’s digital age, music lovers often find themselves juggling multiple platforms to curate their perfect playlists. YouTube is a treasure trove of music videos, while Spotify offers a seamless streaming experience. But what if you could combine the best of both worlds? This guide will walk you through the process of transferring songs from YouTube to Spotify, making it easier than ever to enjoy your favorite tracks in one place.
Understanding the Need for Transferring Songs
Have you ever found a song on YouTube that you just couldn’t get enough of, but wished it were on your Spotify playlist? You're not alone! Many music enthusiasts use both platforms for different reasons, which leads to a common dilemma: how to enjoy all their favorite tracks without hopping from one app to another.
Here are a few reasons why transferring songs might be necessary for you:
- Playlist Management: Spotify's user-friendly interface allows for easy playlist creation and management. If you have a collection of songs on YouTube, transferring them can streamline your listening experience.
- Offline Listening: One of Spotify's standout features is the ability to download songs for offline listening. By transferring songs, you can enjoy your favorite tracks without using up your mobile data.
- Access to Exclusive Content: Sometimes, artists release music videos or live performances exclusively on YouTube. Transferring these songs to Spotify ensures you don’t miss out on any essential tracks.
- Organized Library: Having a comprehensive library on a single platform makes it easier to discover new music and maintain an organized collection.
Ultimately, transferring songs from YouTube to Spotify not only saves you time but also enhances your overall music experience!
Also Read This: How Long Does It Take to Upload a YouTube Video? A Complete Timeline
3. Tools and Applications for Transferring Songs
When it comes to transferring songs from YouTube to Spotify, there are several nifty tools and applications that can make the process smooth and enjoyable. Let’s dive into some of the most popular options available:
- MusConv: This is a powerful tool that allows you to transfer playlists and songs between various music services. It supports multiple platforms, including YouTube and Spotify, making it a favorite among music lovers. Simply select the songs you want to transfer, and MusConv does the rest!
- Soundiiz: Soundiiz is a web-based application that enables you to manage and transfer playlists across different music platforms effortlessly. You can convert YouTube playlists to Spotify in just a few clicks, and it even allows you to keep your playlists synchronized.
- TuneMyMusic: This user-friendly tool allows you to transfer music between different services easily. You simply paste the YouTube playlist link, select Spotify as the destination, and let TuneMyMusic handle the conversion.
- FreeYourMusic: As the name suggests, this application focuses on freeing your music from one platform to another. It supports a wide range of music services and offers a straightforward interface for transferring your favorite tracks.
Each of these tools has its unique features and capabilities, so it’s worth exploring a few options to find the one that best suits your needs. Most of them offer free trials or basic functionalities at no cost, so you can try before you buy!
Also Read This: How to Become an Exclusive Contributor on iStock
4. Step-by-Step Guide to Transfer Songs from YouTube to Spotify
Ready to transfer your favorite tracks from YouTube to Spotify? Follow this step-by-step guide to make the process hassle-free:
- Choose Your Tool: Select one of the applications mentioned above, such as MusConv or Soundiiz, based on your preferences.
- Sign In: Create an account or sign in to your chosen application. You’ll often need to grant permission to access your YouTube and Spotify accounts.
- Locate Your YouTube Playlist: Copy the URL of the YouTube playlist you want to transfer. If you’re transferring individual songs, make sure to have them ready in a list.
- Select Source: In the application, choose YouTube as your source platform. Paste the playlist URL or input the song titles.
- Choose Destination: Set Spotify as your destination. The application will connect to your Spotify account for seamless integration.
- Start Transfer: Hit the transfer button! The application will begin moving your selected songs to your Spotify library.
- Check Your Spotify Library: Once the transfer is complete, open Spotify and verify that your songs or playlists are there. Enjoy your music!
By following these steps, you’ll have your favorite tunes from YouTube at your fingertips on Spotify in no time. Happy listening!
Also Read This: How to Delete LinkedIn account in 2025
Common Issues and Troubleshooting
Transferring songs from YouTube to Spotify can be a smooth process, but sometimes, things don’t go as planned. Here are a few common issues you might encounter and some tips on how to resolve them:
- Authentication Errors: If you have trouble logging into either service, double-check your credentials. Make sure you’re using the correct email and password, and consider resetting your password if you’re unsure.
- Incomplete Transfers: Sometimes, not all songs will transfer. This could be due to region restrictions on certain tracks. To troubleshoot, try manually adding the missing songs on Spotify or using a different transfer tool.
- Missing Playlists: If your playlists don’t show up in Spotify after the transfer, ensure you’ve followed the correct steps for playlist transfers. You might need to refresh or re-login to see the updates.
- Quality Issues: If you notice a drop in audio quality after the transfer, remember that YouTube compresses audio. Consider checking the sound quality settings in Spotify to ensure they are set to your preference.
- Sync Problems: If your playlists aren’t syncing across devices, try logging out of your Spotify account and logging back in. Sometimes, a simple refresh can do the trick.
By keeping these issues in mind and knowing how to tackle them, you’ll have a smoother experience as you transfer your favorite tracks.
Conclusion
Transferring songs from YouTube to Spotify may seem daunting at first, but it can be a rewarding way to curate your music library. Whether you're moving playlists for convenience or personalizing your listening experience, following the right steps can make the process seamless. Remember:
- Choose the Right Tool: Various tools can help with the transfer, so pick one that fits your needs.
- Stay Organized: Keep track of your playlists and songs before and after the transfer to ensure everything is accounted for.
- Be Patient: Sometimes, the process may take a little time, especially if you have a large number of songs.
In the end, the joy of having all your favorite tracks in one place makes it all worthwhile. So, go ahead, give it a try, and enjoy your music like never before!