Uploading videos to YouTube using your iPhone is easier than you might think! Whether you're a budding content creator or just want to share your latest adventure, this guide will walk you through the process step-by-step. With just a few taps, you can get your videos out into the world. Let’s dive in!
Preparing Your Video for Upload
Before you hit that upload button, it’s essential to prepare your video properly. Here’s how to ensure your video is ready to shine on YouTube:
- Check Video Quality: Aim for at least 1080p resolution for a crisp and clear viewing experience. You can check your video resolution in the settings of your camera app.
- Edit Your Video: Use apps like iMovie or Adobe Premiere Rush to edit your video. Trim unnecessary parts, add transitions, and consider incorporating music or voiceovers to enhance the viewing experience.
- Optimize File Size: Large video files can be cumbersome to upload. Use compression tools to reduce file size without sacrificing quality. Apps like Video Compress can help with this.
- Add a Thumbnail: Create an eye-catching thumbnail that represents your content. You can use Canva or any photo editing app to design one that stands out.
- Create a Compelling Title and Description: Think about what keywords your audience might search for. A catchy title along with a detailed description can help your video get discovered.
By taking these steps, your video will be primed for the best possible performance on YouTube. Ready to upload? Let’s move on to the actual uploading process!
Also Read This: Why OK.ruâs Video Library Is One of Its Most Exciting Features
3. Installing the YouTube App on Your iPhone
Getting started with uploading videos to YouTube from your iPhone begins with installing the YouTube app. But don’t worry, it's as easy as pie! Here’s how you can do it:
- Open the App Store: Locate the App Store icon on your iPhone's home screen. It usually looks like a blue square with a white "A" in the center.
- Search for YouTube: Tap on the search bar at the bottom, type in "YouTube," and hit search.
- Select the YouTube App: You’ll see a list of apps. The official YouTube app, created by Google, should be at the top. It has a red play button icon.
- Install the App: Tap the "Get" button (or the cloud icon if you’ve downloaded it before). You may need to enter your Apple ID password or use Face ID/Touch ID to confirm.
- Open the App: Once installed, tap “Open” directly from the App Store, or find the YouTube app on your home screen.
And that's it! You’re now ready to start uploading videos. The YouTube app not only allows you to upload but also to browse, comment, and manage your channel right from your iPhone.
Also Read This: Understanding Team Rumble in Fortnite and Tips for Winning
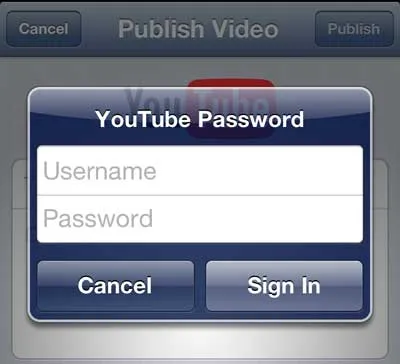
4. Logging into Your YouTube Account
Now that you have the YouTube app installed, it’s time to log into your YouTube account. This step is crucial for uploading videos, as it connects your uploads to your channel. Here’s a simple guide:
- Launch the YouTube App: Find the YouTube app on your iPhone and tap to open it.
- Tap on the Profile Icon: Look for your profile icon at the top right corner of the screen. If you’re not signed in, you might see a silhouette.
- Select “Sign in”: If you’re not logged in, tap the “Sign in” button that appears.
- Choose Your Google Account: You may need to select your Google account if you have multiple accounts on your device. If you don’t see your account, tap “Use another account” to enter your login details.
- Enter Your Credentials: Type in your email and password associated with your YouTube account. If you have two-factor authentication enabled, follow the prompts to verify your identity.
- Complete the Login: Once you’ve logged in, your profile icon will change to your account picture, confirming that you’re signed in.
Congratulations! You’re now logged into your YouTube account and ready to upload videos directly from your iPhone. Feel free to explore your channel, check your notifications, and get comfortable with the app!
Also Read This: Mastering Video Editing on Storyblocks for Enhanced Outcomes
5. Uploading Your Video Step-by-Step
Uploading your YouTube video from an iPhone is a straightforward process, but let’s break it down into easy-to-follow steps to make sure you get it right!
- Open the YouTube App: Start by launching the YouTube app on your iPhone. Ensure you’re signed in with your Google account.
- Tap the Create Icon: Look for the "+" icon at the bottom center of the screen. This is your gateway to uploading content.
- Select Upload a Video: After tapping the "+" icon, choose "Upload a video" from the options presented.
- Choose Your Video: Your photo library will open. Select the video you want to upload. You can also record a new video directly if you prefer!
- Set Video Preferences: Once your video is selected, you’ll be prompted to enter details such as title, description, and privacy settings. Make sure to add a catchy title!
- Adjust Settings: You can choose whether your video is public, unlisted, or private. Don’t forget to select a thumbnail that grabs attention!
- Upload: Finally, hit the "Upload" button, and your video will start uploading. A progress bar will show you how much of the video has been uploaded. Once done, you’ll receive a notification!
And just like that, you’re on your way to sharing your content with the world!
Also Read This: Importing YouTube Videos into CapCut for Seamless Editing
6. Editing Video Details After Upload
Once your video is uploaded, you might want to make some tweaks to enhance its visibility or clarify its content. Here’s how you can edit your video details directly from your iPhone:
- Go to Your Channel: Tap on your profile icon in the top right corner and navigate to "Your Channel."
- Select the Video: Scroll through your uploaded videos and tap on the one you’d like to edit.
- Tap Edit: Look for the pencil icon or the "Edit" button beneath the video. This will take you to the editing screen.
- Update Title and Description: Here, you can change your video’s title, add or update the description, and incorporate relevant keywords to boost searchability.
- Change Privacy Settings: If you initially uploaded the video as private or unlisted, you can change it to public or vice versa, depending on your needs.
- Adjust Tags: Adding tags helps categorize your video better. Include keywords that align with your content for improved discoverability.
- Save Changes: Don’t forget to tap "Save" in the top right corner to ensure all your edits are applied!
Editing your video details doesn’t take long and can significantly enhance your reach on the platform!
Also Read This: Exploring Investment Opportunities in Rumble Stock and Its Dividend Potential
7. Tips for Successful Uploads
Uploading videos to YouTube from your iPhone can be a breeze, but a few tips can make your upload experience even smoother and more effective. Here are some essential tips to keep in mind:
- Check Your Internet Connection: A stable Wi-Fi connection is crucial. Uploading over a strong network prevents interruptions and ensures faster uploads.
- Edit Your Video: Before uploading, consider using editing apps like iMovie or Adobe Premiere Rush. Trim unnecessary parts, add transitions, or enhance audio to make your video more engaging.
- Optimize Your Title and Tags: Use relevant keywords in your video title and tags. This improves your video's visibility and helps reach your target audience. Think about what viewers might search for!
- Create an Eye-Catching Thumbnail: Thumbnails are your first impression. Use bright colors, clear text, and interesting images to draw viewers in. Apps like Canva can help you design stunning thumbnails.
- Write a Compelling Description: Summarize what your video is about in the description. Include links to your social media or related videos to boost engagement.
- Set the Right Privacy Setting: Decide whether you want your video to be public, unlisted, or private. This decision can impact your video’s reach and audience.
By following these tips, you’re setting yourself up for a successful upload that can capture and engage your audience effectively!
8. Conclusion
Uploading YouTube videos from your iPhone is not just about hitting the upload button; it’s about sharing your creativity and connecting with viewers worldwide. Whether you’re a seasoned content creator or just starting, understanding the process is key.
Remember, planning your content, optimizing titles and descriptions, and ensuring a strong internet connection can significantly impact the success of your uploads. Don’t forget the power of engaging thumbnails and effective editing to elevate your videos. As you embark on this journey, be patient and open to learning—every upload is a step towards improvement.
So go ahead, unleash your creativity, and share your unique perspective with the world. Happy uploading!