Rumble is an innovative video platform that has gained popularity for its user-friendly interface and commitment to free speech. Unlike traditional social media giants, Rumble provides creators with a space to share their content without the fear of censorship. It’s especially appealing for those who want to reach an audience that values diverse perspectives. Whether you're a vlogger, gamer, or educator,
As the demand for video content continues to grow, Rumble stands out by allowing creators to monetize their videos right from the start. With options like ad revenue sharing and subscription models, it's a platform that supports creators financially. Additionally, Rumble’s simplicity makes it easy to get started, even for those who are new to livestreaming. So if you’re considering diving into the world of online video,
Benefits of Using Rumble for Livestreaming
Choosing Rumble for your livestreaming endeavors comes with a host of benefits that can elevate your content and expand your audience. Here are some key advantages:
- Freedom of Expression: Rumble promotes free speech, ensuring that your content isn’t subject to the same stringent moderation found on other platforms. This allows you to express your viewpoints and ideas freely.
- Monetization Opportunities: With Rumble, you can monetize your livestreams through ad revenue and subscriptions. This means that your passion can also become a source of income.
- User-Friendly Interface: The platform is designed for ease of use, making it simple for both seasoned streamers and newcomers to get started without any technical hurdles.
- Community Engagement: Rumble fosters a community atmosphere where viewers can interact with you during your streams. This builds a loyal audience and enhances viewer engagement.
- Analytics Tools: Rumble provides creators with valuable insights into their audience's behavior. You can track views, engagement, and other metrics to refine your content strategy.
In summary, Rumble not only offers a space for creativity but also equips you with the tools needed to build a successful livestreaming channel. With its focus on creator autonomy, monetization, and community, it's definitely worth considering for your next online venture!
Also Read This: Canva Image Outlining
3. Setting Up Your Rumble Account
Getting started on Rumble is a breeze! First things first, you need to create an account. Here’s how to do it:
- Visit the Rumble Website: Open your web browser and navigate to rumble.com.
- Sign Up: Click on the "Sign Up" button, usually found in the upper right corner. You can choose to register using your email, or you can use your existing social media accounts like Facebook or Google for quicker access.
- Fill in Your Details: If you’re signing up with email, you’ll need to provide some basic information. This includes your name, email address, and a password. Make sure your password is strong to protect your account!
- Verify Your Email: After signing up, check your inbox for a verification email from Rumble. Click the link in that email to confirm your account.
- Complete Your Profile: Once logged in, it’s time to spruce up your profile. Add a profile picture, write a bio, and link any other social media accounts if you wish. This helps viewers connect with you!
And there you have it! Your Rumble account is now ready. You’re all set to start sharing content and engaging with the community.
Also Read This: Develop Proposals with Canva Proposal Template
4. Steps to Create Your Rumble Channel
Now that you have your Rumble account, it’s time to create your channel! This is where all the magic happens, so let’s dive in:
- Log In to Your Account: Start by logging into your Rumble account using your credentials.
- Navigate to Your Profile: Click on your profile icon, usually found in the top right corner. This will take you to your account dashboard.
- Find the Channel Creation Option: Look for an option that says “Create Channel” or “Add Channel.” This might be located in a menu or directly on your dashboard.
- Fill in Channel Details: You’ll need to provide some details about your channel:
- Channel Name: Choose a catchy name that reflects your content.
- Description: Write a brief description of what viewers can expect.
- Category: Select a category that best fits your content, like gaming, cooking, or vlogging.
- Add Branding: Upload a channel logo and banner image to make your channel visually appealing.
- Save Your Channel: After filling in all the information, don’t forget to save your channel settings!
Congratulations! You’ve just created your very own Rumble channel. Now it’s time to start producing content that resonates with your audience!
Also Read This: Insights into Popular and Profitable Content: Alamy’s Best Selling Images
5. How to Livestream on Rumble
So, you’re ready to take the plunge and start livestreaming on Rumble? That’s awesome! Livestreaming is a fantastic way to engage with your audience in real-time. Here’s a step-by-step guide to get you started:
- Create Your Rumble Account: If you haven’t already, sign up for a Rumble account. It’s quick and easy. Just head to the Rumble website, click on “Sign Up,” and follow the prompts.
- Set Up Your Channel: Once your account is created, it’s time to set up your channel. Add a catchy name, a profile picture, and a compelling description that tells viewers what your channel is all about.
- Go to Your Dashboard: After setting up your channel, navigate to your dashboard. This is where all the magic happens! Look for the “Livestream” option in the menu.
- Choose Your Streaming Software: You’ll need streaming software to go live. Programs like OBS Studio or Streamlabs are popular choices. Download and set it up on your computer.
- Connect Your Software to Rumble: In your dashboard, you’ll find a “Stream Key.” Copy this key and paste it into your streaming software settings. This connects your software to your Rumble channel.
- Test Your Stream: Before you go live, do a test run to ensure everything is working smoothly. Check your audio, video, and internet connection to avoid any hiccups.
- Hit the Go Live Button: Once you’re ready, hit the “Go Live” button in your streaming software. You should see your stream appear on your Rumble channel!
Livestreaming on Rumble is pretty straightforward, but preparation is key. Make sure you’re comfortable with your setup before going live!
Also Read This: Comprehensive Guide to Safely Removing Hard Stool from Your Dog's Anus
6. Tips for Successful Livestreaming on Rumble
Ready to make your Rumble livestreams shine? Here are some invaluable tips that can help you connect with your audience and keep them coming back for more:
- Engage with Your Audience: During the livestream, interact with your viewers. Respond to comments, ask questions, and encourage them to participate. This makes them feel valued and part of the experience.
- Promote Your Stream: Don’t just go live without telling anyone! Promote your upcoming streams on social media, your Rumble channel, and any other platforms you use. Give your audience a heads-up so they can join in.
- Plan Your Content: Have a clear idea of what you want to discuss or showcase during your livestream. A rough outline can help keep the conversation flowing and ensure you don’t miss any essential points.
- Quality Over Quantity: Focus on delivering high-quality content rather than streaming for long hours. It’s better to have a short, engaging stream than a lengthy one that loses viewers’ interest.
- Check Your Equipment: Before going live, double-check your microphone, camera, and internet connection. Good audio and video quality can make a world of difference in viewer satisfaction.
- Have Fun! Lastly, remember to enjoy yourself! Your enthusiasm will be contagious and can make your livestream much more enjoyable for both you and your audience.
By following these tips, you can create engaging livestreams that resonate with your audience and help your Rumble channel grow. Happy streaming!
How to Start Your Own Rumble Channel and Livestream
Are you looking to dive into the world of content creation and connect with an audience? Starting your own Rumble channel and livestream can be an exciting venture. Rumble is a video platform that allows creators to share, monetize, and broadcast their content. Here’s a step-by-step guide to help you get started.
Step 1: Create a Rumble Account
Before you can start your channel, you need to register on Rumble. Here’s how:
- Visit the Rumble website.
- Click on the "Sign Up" button.
- Fill in your details, including email and password.
- Verify your email to activate your account.
Step 2: Setting Up Your Channel
Once your account is active, you can create your channel:
- Log in to your Rumble account.
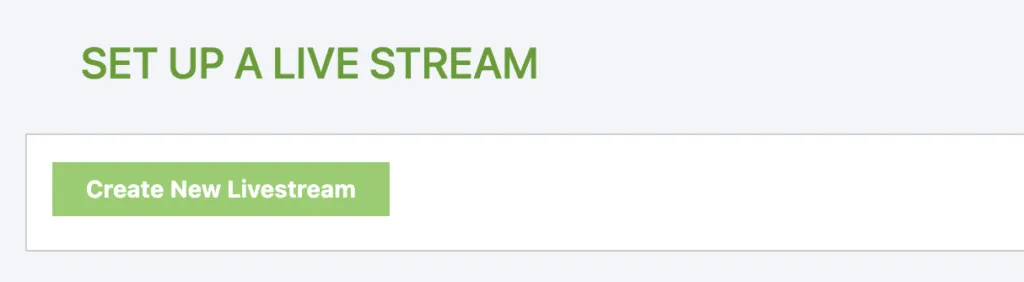
- Select "Create Channel" from your dashboard.
- Choose a unique channel name that reflects your content.
- Upload a profile picture and channel banner.
- Write a compelling channel description.
Step 3: Prepare for Livestreaming
To successfully livestream, consider the following:
| Equipment | Recommendations |
|---|---|
| Camera | HD webcam or DSLR camera |
| Microphone | USB microphone for clear audio |
| Lighting | Ring light or softbox lighting |
| Streaming Software | OBS Studio or Streamlabs |
Step 4: Go Live!
Once everything is set up, you can go live:
- Select the "Go Live" option on your dashboard.
- Choose your streaming settings.
- Engage with your audience during the stream.
By following these steps, you can successfully launch your Rumble channel and start livestreaming. The key to success is consistency and engagement with your audience, so keep creating and experimenting with your content!
Conclusion: Starting your own Rumble channel and livestream is a straightforward process that involves setting up an account, customizing your channel, preparing the right equipment, and engaging with your audience. With dedication and creativity, you can build a thriving community around your content.