Recording YouTube videos on a Mac can be an exciting venture, whether you're a budding content creator or looking to share your expertise with the world. With the right tools and techniques, you'll find that the process is not only straightforward but also enjoyable. Macs come with built-in features that make video recording seamless, and there are plenty of external applications that can take your recordings to the next level. In this blog post, we'll explore the basics of setting up your Mac for video recording and the essential tools you'll need to get started.
Essential Tools for Recording Videos on a Mac
When it comes to recording videos on your Mac, having the right tools at your disposal can make all the difference. Here’s a rundown of some essential tools you’ll need to get started:
- Screen Recording Software: The cornerstone of your video creation process. Popular options include:
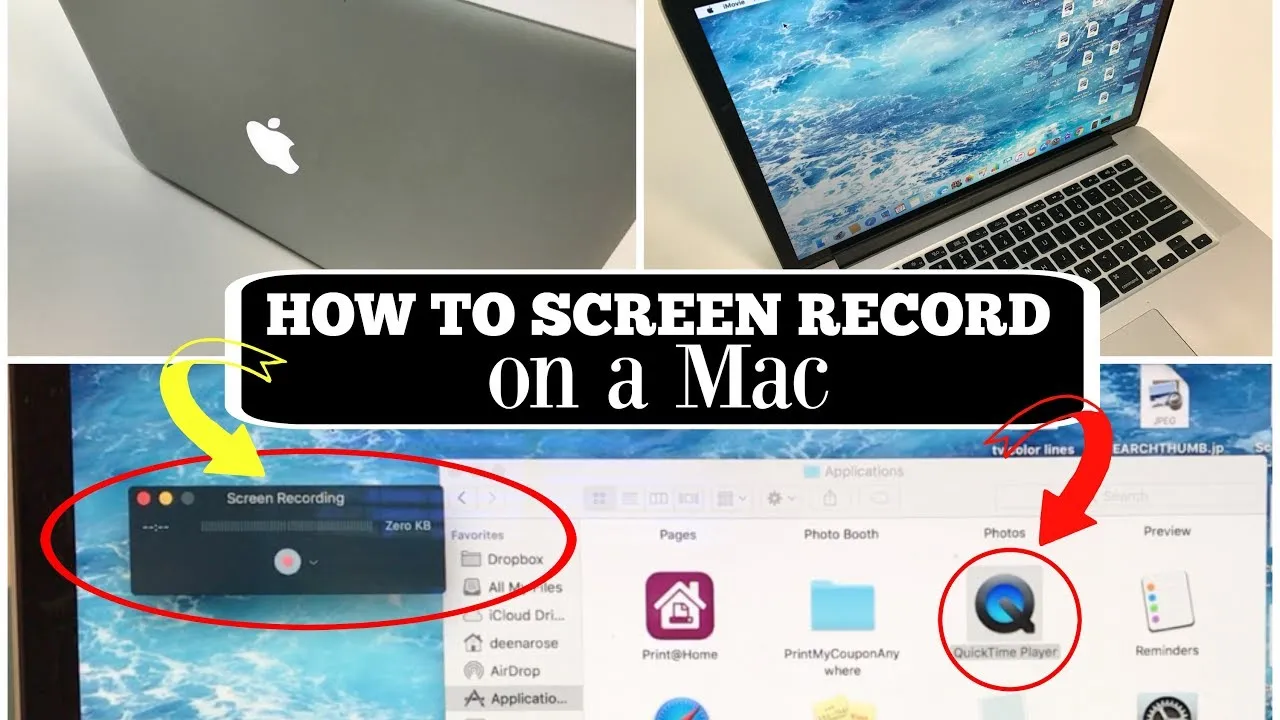
- QuickTime Player: A built-in application on Mac that allows you to record your screen easily. Just open QuickTime, select "New Screen Recording," and you’re good to go!
- OBS Studio: A free, open-source software that's perfect for more advanced recordings, including live streaming. It offers robust features but may require some initial setup.
- Camtasia: A paid option that provides excellent editing functionalities along with screen recording features.
- Microphone: Good sound quality is crucial for engaging videos. Consider investing in a USB microphone such as:
- Blue Yeti: A popular choice among YouTubers for its fantastic sound quality and easy USB connection.
- Audio-Technica AT2020: Another great mic that offers excellent audio clarity.
- Camera (optional): If you want to appear on screen, a good camera is necessary. You can use:
- Built-in Webcam: Convenient and simple for casual videos.
- External Webcam: Consider a Logitech HD webcam for higher video quality.
- DSLR or Mirrorless Camera: For professional quality videos, a camera like Canon EOS-series can be a great choice.
- Lighting: Proper lighting can enhance video quality. Simple options include:
- Ring Light: Provides even and flattering lighting.
- Softbox Lights: Ideal for a more professional setup.
With these essential tools, you're well on your way to creating engaging, high-quality YouTube videos on your Mac. The key is to choose tools that suit your particular style and needs, and don't hesitate to experiment as you find what works best for you!
Also Read This: How to View LinkedIn Connections and Analyze Their Network
Setting Up Your Mac for Video Recording
Before diving head-first into recording your YouTube videos, it's important to properly set up your Mac to ensure a smooth recording experience. Here are some crucial steps to follow:
- Check Your System Requirements: Ensure that your Mac meets the necessary system requirements for the software you plan to use. Most modern Macs are more than capable, but it’s always good to double-check.
- Free Up Space: Recording videos consumes a lot of storage. Delete any unnecessary files or move them to an external drive to make space. Aim for at least 10 GB of free space before you start.
- Optimize Performance: Close any unnecessary applications that could drain your Mac's resources. This includes web browsers, music players, and any apps you don't need while recording.
- Adjust Display Settings: Go to System Preferences and adjust your display settings. Setting your resolution to 1080p (or whatever resolution you plan to record in) can help you get the most out of your recording.
- Microphone Setup: If you're using an external microphone, make sure it's connected and selected as your audio input in the System Preferences. Test it out to ensure the sound quality is clear.
- Lighting and Background: Find a suitable recording environment. Good lighting is key, so aim for a well-lit area or use softbox lights. Similarly, choose a non-distracting background to maintain viewers' focus on you.
Taking these steps to set up your Mac will not only enhance the quality of your recordings but also make the entire process much more efficient and enjoyable!
Also Read This: Can You Survive the Rumbling Exploring the Concept and Survival Tactics
Choosing the Right Software for Screen Recording
When it comes to creating high-quality YouTube videos on your Mac, selecting the right screen recording software is essential. With a plethora of options available, here’s a rundown of factors to consider and some popular software choices:
Factors to Consider
- User-Friendliness: Look for software that’s easy to navigate, especially if you're new to video recording.
- Features: Consider the features you need, such as editing tools, the ability to add annotations, or even video overlays.
- Output Quality: Ensure the software supports the resolution and quality you desire for your videos.
- Price: While many great tools are available for free, some may require a purchase. Align your choice with your budget.
- Support and Updates: A good software company will provide ongoing support and regular updates.
Popular Software Choices
| Software | Description | Price |
|---|---|---|
| QuickTime Player | A built-in app on Mac, great for simple screen recordings. | Free |
| OBS Studio | Powerful and free, featuring live streaming options and various customization settings. | Free |
| Camtasia | A more advanced option for screen capturing, comes with powerful editing capabilities. | Starts at $249 |
| Screencast-O-Matic | Intuitive software that offers simple video creation with editing features. | Free (with premium options) |
By weighing these factors and exploring various software options, you’ll find the perfect tool to create stunning and engaging YouTube videos right from your Mac!
Also Read This: How to Remove Watermarks from Getty Images Using Reddit Insights
Configuring Audio Settings for Clear Sound
When it comes to recording YouTube videos, the audio quality can make or break your content. Great visuals mean nothing if viewers can't hear what you're saying clearly. So, let’s dive into configuring audio settings on your Mac to ensure you capture crisp and clear sound.
First off, you need to choose the right microphone. While the built-in mic on your Mac is okay, using an external USB microphone or a dedicated audio interface will significantly enhance your audio quality. Here's a quick list of popular options:
- Blue Yeti: A favorite among YouTubers for its versatility and clarity.
- Audio-Technica AT2020: Great sound quality and very affordable.
- Rode NT-USB: Known for its fantastic build and sound quality.
Once you have your microphone ready, it’s crucial to adjust the audio settings on your Mac:
- Go to System Preferences and select Sound.
- Under the Input tab, choose your external microphone.
- Adjust the Input Volume slider to ensure your voice is captured clearly without distortion. A good starting point is to set it to around 75%.
Lastly, consider using audio editing software to refine your sound. Programs like Audacity or GarageBand allow you to fine-tune your recordings, add effects, and remove background noise.
Taking these steps will ensure that your recordings are not only visually appealing but also sonically engaging!
Also Read This: Canva Adding Image to Canvas
Recording Your Video Content Step by Step
Now that you've got your audio settings configured, it's time to roll up your sleeves and get down to recording your video content! Recording on a Mac is straightforward, especially with the right tools. Let’s break it down step by step:
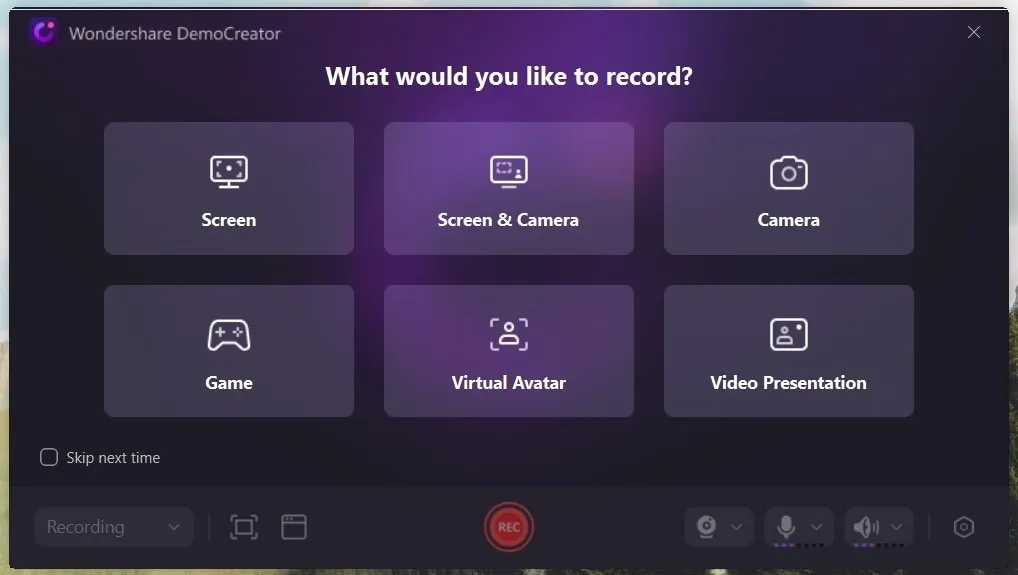
- Choose Your Recording Software: For Mac users, there are several excellent options. The built-in QuickTime Player is simple to use and effective. Alternatively, you might want to try screen recording software such as OBS Studio or Camtasia for more advanced features.
- Set Up Your Screen: Before hitting record, make sure your screen is clean and organized. If you’re demonstrating software or slides, have everything ready to go. Closing unnecessary tabs or applications can help minimize distractions.
- Adjust Your Webcam Settings: If you're featuring yourself on camera, ensure your webcam is positioned at eye level and well-lit. Test the framing and lighting before recording. Natural light works wonders, but consider additional soft lighting if necessary.
- Hit Record: With everything set up, it’s time to record. Don’t forget to start off with a friendly introduction. Smile, and remember that your enthusiasm will come through in the footage!
- Keep It Engaging: As you record, maintain a conversational and engaging tone. Avoid long pauses or super scripted dialogues; just be yourself!
- Stop Recording: Once you're done, remember to stop the recording and save your file. It’s a good practice to save multiple copies in different locations, just in case.
By following these easy steps, you’ll have your YouTube video recorded in no time. Just remember, the more you practice, the better you’ll get at creating content that connects with your audience!
Also Read This: What to Do When YouTube Stops Working on Your Phone
Editing Your Video for a Professional Finish
Editing is where your raw footage transforms into a polished product ready for your audience. A well-edited video can vastly improve viewer engagement and enhance your content's overall professionalism. So, let's dive into the essentials of video editing!
Choosing the Right Editing Software
First things first: the software you choose can make a significant difference in your editing experience. Here are a few popular options that work seamlessly on a Mac:
- iMovie: It’s free and user-friendly, perfect for beginners.
- Final Cut Pro: A more advanced option with powerful features for professional editing.
- Adobe Premiere Pro: Industry-standard software that offers flexibility and a plethora of tools.
Basic Editing Techniques
Once you have your software set up, it’s time to start editing. Here are a few techniques to get you started:
- Trimming: Cut out any unnecessary parts to keep your video engaging.
- Transitions: Smooth out the flow between clips using fade-ins and fade-outs.
- Text Overlays: Add titles, captions, or call-to-action prompts to increase clarity.
- Color Correction: Adjust brightness, contrast, and color balance to enhance visual appeal.
- Audio Adjustment: Ensure clear audio by normalizing sound levels and removing background noise.
Finally, don’t forget to preview your edited video several times. This way, you can catch any mistakes and ensure your content flows smoothly before moving on to the next step!
Exporting and Uploading Your Video to YouTube
Congratulations! After editing, you’re almost ready to share your masterpiece with the world. The next steps involve exporting your video and uploading it to YouTube, and here’s how you can do it like a pro.
Exporting Your Video
When exporting, it’s essential to choose the right settings for the best quality. Here are some tips:
- Resolution: Aim for at least 1080p for high-definition clarity.
- File Format: Common formats include MP4 or MOV as they’re widely accepted and maintain quality.
- Bitrate: A higher bitrate equals better quality, but be mindful of file size.
Most editing software will have an 'Export' option where you can choose these settings easily.
Uploading to YouTube
Now comes the exciting part! To upload your video, follow these simple steps:
- Log in to your YouTube account.
- Click the Upload icon (usually looks like a camera with a '+' sign).
- Select the video file you just exported.
- Fill in the video details: title, description, tags, and thumbnail. Make sure your title is catchy and represents your content well!
- Choose the privacy settings: Public, Unlisted, or Private, depending on your preference.
- Finally, hit Publish and watch your content go live!
With these steps, you’re all set to share your creative work with the world on YouTube. Happy uploading!