Recording audio from YouTube can be a great way to capture music, podcasts, or lectures for personal use. With Audacity, a free and powerful audio editing software, this task becomes simple and effective. In this guide, we’ll walk you through the steps to record YouTube audio using Audacity, ensuring you have everything you need to get started on your audio journey!
What You Need to Get Started
Before diving into the recording process, it's essential to gather all the necessary tools and equipment. Here’s a checklist of what you’ll need:
- Computer: Make sure you have a computer with either Windows, macOS, or Linux operating systems. Audacity is compatible with all of them.
- Audacity Software: Download and install Audacity from the official website. It's free and easy to set up.
- Audio Interface or Virtual Audio Cable: Depending on your setup, you may need an audio interface (for professional quality) or a virtual audio cable (like VB-Audio Cable) that allows you to route audio between applications.
- Internet Connection: You'll need a stable internet connection to access YouTube and potentially download any required plugins.
- Headphones: Using headphones can help you monitor audio quality without causing feedback during recording.
- Optional Accessories: A microphone can be handy if you want to add voiceovers or commentary while recording.
Once you have all these items in place, you’ll be ready to start recording YouTube audio effortlessly. Check your equipment to ensure everything is functioning properly, and let’s move on to the next steps!
Also Read This: Navigating Your Dashboard: Adobe Stock Contributor Dashboard Guide
Installing Audacity
Getting Audacity up and running is a breeze! Let’s walk through the steps together to ensure you have the software installed smoothly on your computer.
First things first, head over to the Audacity official website, where you can find the download link. Here’s how to do it:
- Select Your Operating System: Audacity is compatible with Windows, macOS, and Linux. Click on the appropriate link for your operating system.
- Download the Installer: A file will start downloading. Depending on your internet speed, this could take a few moments.
- Run the Installer: Once downloaded, locate the file (usually in your Downloads folder) and double-click it. Follow the on-screen instructions to complete the installation.
For Windows users, you might need to allow the program in your security settings. macOS users may need to adjust privacy settings to open the application. After installation, you should find Audacity in your applications or programs list.
And voilà! You’ve successfully installed Audacity. Now you're ready to take the next step and set up your audio preferences!
Also Read This: Mastering the Art of Selling Photos to Getty Images for Profit
Setting Up Your Audio Preferences
Now that you have Audacity installed, it’s time to fine-tune your audio preferences for recording YouTube audio. Let’s get started!
Open Audacity and look for the Preferences option under the Edit menu (or Audacity menu on macOS). Here’s what to do next:
- Select Audio Host: Choose the right audio host based on your system. For most users, MME or Windows WASAPI works well.
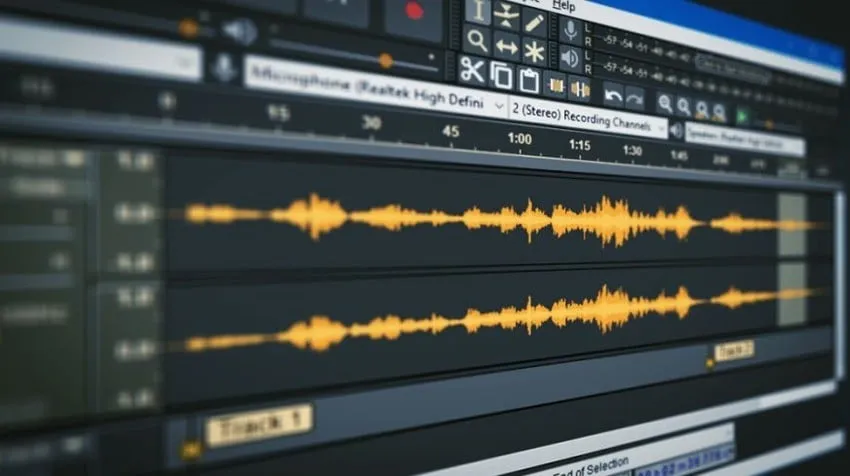
- Input Device: This is crucial! Select your microphone or the system audio you want to record. If you’re capturing audio from YouTube, choose Windows WASAPI and set the loopback option.
- Output Device: Ensure your speakers or headphones are selected here so you can monitor your audio while recording.
Don’t forget to adjust the Sample Rate and Bit Depth in the Quality section to ensure high-quality recordings. I recommend setting the sample rate to 44100 Hz and the bit depth to 16-bit.
With these settings, you’re all set to record clear and crisp audio from YouTube. Happy recording!
Also Read This: Honeymoon Makeup Tips for a Romantic and Glowing Look
5. Recording Audio from YouTube
Recording audio from YouTube using Audacity can be a straightforward process, but it does require a few steps to ensure you capture the sound effectively. Here’s how you can do it:
- Download Audacity: Make sure you have the latest version of Audacity installed on your computer. You can download it from the official website.
- Select Your Input Source: Open Audacity and go to the drop-down menu in the top left corner. Choose the correct recording device. If you're using Windows, select “Stereo Mix” or “What U Hear” to capture audio from your computer.
- Adjust Settings: Before hitting record, adjust the recording levels. You can do this by going to Edit > Preferences > Devices, and ensuring the input volume is set correctly.
- Open YouTube: Navigate to the YouTube video you want to record audio from.
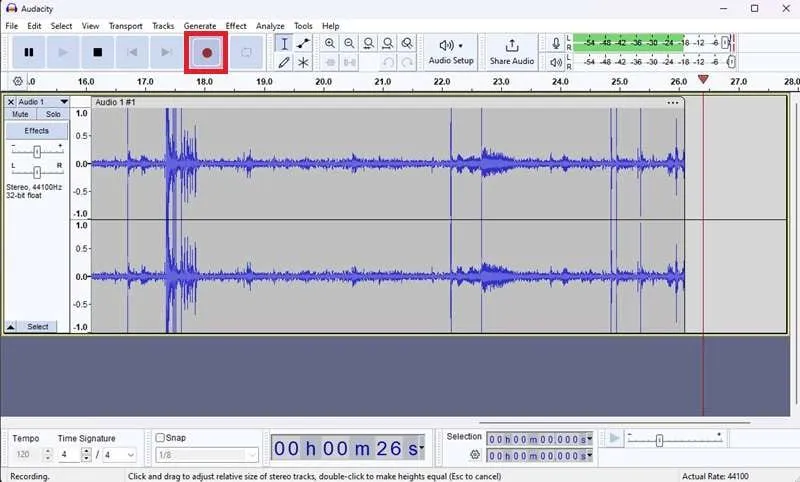
- Start Recording: Click the red record button in Audacity and then immediately start playing the YouTube video. Audacity will capture the audio in real-time.
- Stop Recording: Once you’ve captured the audio you need, click the stop button. Review the recording on Audacity's timeline.
And there you go! You’ve successfully recorded audio from YouTube. Make sure the audio quality is good and that it meets your needs before moving on to editing.
Also Read This: Understanding Fortiguard Downloader Intrusion Prevention
6. Editing Your Recording
Editing your recording in Audacity is where you can really enhance the audio quality and tailor it to your preferences. Here’s a step-by-step guide on how to edit your recording:
- Import the Recording: If you recorded directly in Audacity, your audio should already be there. If you need to import an existing file, go to File > Import > Audio.
- Listen Through: Play back your recording to identify sections that need editing. Take notes on parts to cut or enhance.
- Cut Unwanted Parts: Use the selection tool (the I-beam cursor) to highlight sections you don’t want. Press the Delete key to remove them.
- Apply Effects: Audacity offers a range of effects under the Effect menu. You can adjust volume, add reverb, or apply noise reduction to enhance the overall sound.
- Normalize the Audio: Go to Effect > Normalize to make sure the volume levels are consistent throughout the recording.
- Export Your Final Product: Once you’re satisfied with your edits, go to File > Export and choose your desired audio format (like MP3 or WAV).
Editing is crucial to making your audio recording sound polished and professional. Take your time and don’t hesitate to experiment with different effects and adjustments!
Also Read This: Getting Getty Images for Your Website Blog or Marketing
7. Exporting Your Audio File
Once you’ve finished recording your audio in Audacity and are satisfied with how it sounds, it’s time to export your masterpiece! This step is crucial as it allows you to save your audio in a format suitable for YouTube. Here’s how to do it:
- Go to the File Menu: At the top left corner of Audacity, click on File.
- Select Export: Hover over Export and choose the format you want to save your audio in. The most common formats for YouTube are WAV and MP3.
- Choose Your Location: A dialog box will open where you can select the folder where you’d like to save your audio file. Pick a location that’s easy for you to remember!
- Name Your File: Give your audio file a descriptive name that reflects its content. This will help you locate it later.
- Adjust Export Settings: Before you hit export, you might want to adjust the bitrate settings if you chose MP3. A bitrate of 192 kbps is usually a good balance of quality and file size.
- Click Export: Once everything is set, click on the Save button. If prompted, you can also add metadata, like artist name and genre, to your file.
And just like that, your audio file is ready to be uploaded to YouTube! Take a moment to check the file location and ensure everything is in order before you move on to the next step.
8. Conclusion
Recording YouTube audio using Audacity is not just an easy task; it’s an empowering experience that allows you to create high-quality sound content right from your computer! Whether you're creating podcasts, tutorials, or music, knowing how to effectively use Audacity opens up a world of possibilities.
To wrap it up:
- *Preparation is Key: Make sure you have a good microphone and a quiet space to record.
- Editing Makes Perfect: Utilize Audacity’s editing features to enhance your audio quality; trimming, normalizing, and adding effects can make a huge difference.
- Export Correctly:* Always remember that exporting in the right format is crucial for compatibility with platforms like YouTube.
With these steps, you’re ready to take your audio projects to the next level! Dive in, experiment, and most importantly, have fun with it. Your audience is waiting for your unique voice—so let it shine!