YouTube is a fantastic platform for sharing videos with the world, but sometimes, you might want to keep your content more private. Whether it’s a personal vlog, a family event, or a project you’re not ready to showcase publicly, YouTube provides options to control who sees your videos. In this post, we’ll explore how to hide your video on
Understanding YouTube Privacy Settings
YouTube offers three main privacy settings for your videos: Public, Unlisted, and Private. Each setting serves a unique purpose, allowing you to manage your content visibility based on your needs. Let’s break these down:
- Public: Anyone can view your video. It will appear in search results, on your channel, and can be shared freely.
- Unlisted: Your video won’t show up in search results or on your channel. However, anyone with the link can watch it, making it ideal for sharing with a select group without fully restricting access.
- Private: Only you and the users you specifically invite can view the video. It won’t appear in any search results or on your channel, making it the most secure option.
To give you a clearer picture, here’s a simple table summarizing these privacy options:
| Privacy Setting | Visibility | Can be Shared? |
|---|---|---|
| Public | Everyone | Yes |
| Unlisted | Anyone with the link | Yes |
| Private | Only invited users | No |
Understanding these settings will help you choose the best option for your video, ensuring that your content reaches the right audience while maintaining your desired level of privacy.
Also Read This: Download Shutterstock Images Without Watermark: A How-To Guide
Steps to Make a Video Private
Making your YouTube video private is a straightforward process, and it’s a great way to control who has access to your content. When a video is set to private, only you and the users you invite can view it. Here’s how to do it in a few simple steps:
- Log into Your YouTube Account: Start by signing into your YouTube account with your username and password.
- Navigate to YouTube Studio: Once logged in, click on your profile icon at the top right corner. From the dropdown menu, select “YouTube Studio.”
- Go to Videos: In the left-hand menu, click on “Content.” This will take you to a list of all your uploaded videos.
- Select the Video: Find the video you want to make private. Hover over it and click on the pencil icon (edit) beside it.
- Change Visibility Settings: In the video settings, look for the “Visibility” section. Click on it and select “Private.”
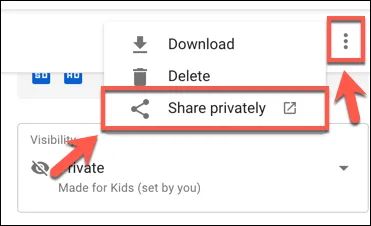
- Invite Viewers (Optional): If you want specific people to see your private video, you can invite them by entering their email addresses in the provided field.
- Save Changes: Don’t forget to click “Save” to apply your changes. Your video is now private!
And that’s it! You’ve successfully made your video private, ensuring only selected viewers can access it. This feature is perfect for sharing content with friends, family, or collaborators without it being publicly available.
Also Read This: How to Find Plugs and Contacts on Telegram for Networking
Steps to Make a Video Unlisted
Setting your video to unlisted is another excellent option if you want to share it with a limited audience without making it completely private. Unlisted videos can be viewed by anyone who has the link, but they won't appear in search results or your channel. Here’s how you can do it:
- Log into Your YouTube Account: Start by signing into YouTube with your credentials.
- Access YouTube Studio: Click on your profile icon in the top right corner and select “YouTube Studio” from the dropdown.
- Go to Content: On the left side menu, click on “Content” to see all your uploaded videos.
- Select the Video: Find the unlisted video you want to modify. Click on the pencil icon next to it to edit.
- Adjust Visibility Settings: In the video settings page, locate the “Visibility” option. Click on it and choose “Unlisted.”
- Save Your Changes: Press “Save” to confirm your changes. Your video is now unlisted!
Now, anyone with the link can watch your video without it being publicly searchable. This is a fantastic way to share content with a select audience, such as friends, family, or colleagues, while keeping it off the main YouTube platform.
Also Read This: Can You Watch Newsmax on YouTube Live TV
5. Comparing Private and Unlisted Videos
When it comes to sharing videos on YouTube, understanding the differences between private and unlisted videos is crucial. Both options give you more control over your content, but they serve different purposes. Let’s break it down!
| Feature | Private Videos | Unlisted Videos |
|---|---|---|
| Visibility | Only you and the users you invite can see the video. | Anyone with the link can view the video, but it won’t appear in search results. |
| Sharing | You must invite users via their email addresses. | Share the link freely without restrictions. |
| Searchability | Not searchable or discoverable by anyone. | Not searchable, but can be found through direct link sharing. |
| Audience Control | Complete control; only selected users can watch. | Less control; anyone with the link can share it. |
So, if you want to keep your video completely under wraps, a private setting is your best bet. However, if you’re looking to share with a wider audience while maintaining some level of privacy, unlisted might be the right choice. Each has its unique advantages, so consider your goals before making a decision!
6. Conclusion
In conclusion, knowing how to hide a video on YouTube by making it private or unlisted is a powerful tool at your disposal. Whether you're sharing a personal moment, an exclusive project, or sensitive information, these options provide the flexibility you need.
Here are some key takeaways:
- Private videos are perfect for keeping your content within a select group.
- Unlisted videos allow you to share without making your content public.
- Both settings help you manage your audience and maintain control over who gets to see your videos.
Ultimately, the choice between private and unlisted videos depends on your specific needs. So, take a moment to think about your goals before uploading your next video. Happy sharing!