Filming YouTube videos with your iPhone can be a game-changer! With the incredible camera quality and user-friendly interface, your iPhone is not just a communication tool; it’s a powerful video-making device. Whether you're a seasoned YouTuber or just getting started, using your iPhone allows for impressive results without the need for expensive gear. Let's dive into how to optimize your experience right from your pocket!
Choosing the Right Settings on Your iPhone
To get the best possible video quality from your iPhone, it’s essential to know how to adjust your settings. Here’s a quick guide to help you navigate this:
- Camera Resolution: Go to Settings > Camera > Record Video. Choose the highest resolution available, typically 4K at 60 fps, for stunning clarity.
- Frame Rate: Higher frame rates like 60 fps are fantastic for action-packed scenes, while 24 fps gives a cinematic feel. Choose according to the mood of your video.
- Grid Lines: Enable grid lines by going to Settings > Camera and turning on Grid. This helps with composition and aligns your shots perfectly.
- HDR: Turn on Smart HDR under Settings > Camera to enhance dynamic range, making bright areas vibrant and shadows detailed.
- Video Stabilization: Ensure that Video Stabilization is enabled for smoother footage, especially when filming handheld.
By selecting the right settings, you’re setting the stage for high-quality videos that truly shine. Happy filming!
Also Read This: How to Secure Creative Projects and Clients on Behance
Essential Equipment for Filming
When it comes to filming YouTube videos with your iPhone, having the right equipment can make a world of difference. While the iPhone’s camera is impressive, a few accessories can elevate your video quality significantly. Here’s a rundown of essential gear:
- Tripod: A sturdy tripod helps stabilize your shots, ensuring your video isn’t shaky. Look for one that’s adjustable and portable, making it easy to film from different angles.
- External Microphone: Audio quality is just as important as video quality. An external microphone, like the Rode VideoMic Me, enhances sound clarity and reduces background noise.
- Lighting Equipment: Proper lighting can transform your footage from ordinary to extraordinary. Consider investing in softbox lights or a ring light to achieve that professional look.
- Lenses: Attachments like wide-angle or macro lenses can expand your creative options. Brands like Moment offer high-quality lenses specifically designed for iPhones.
- Stabilizer/Gimbal: If you plan to shoot while moving, a gimbal stabilizer can help keep your footage smooth and cinematic.
With these essential pieces in your toolkit, you’ll be well on your way to creating engaging YouTube videos that capture your audience’s attention!
Also Read This: How to Contact Shutterstock Artists for Collaboration or Queries
Lighting Techniques for Great Video Quality
Lighting can make or break your video quality. Even the best iPhone camera won’t perform well in poor lighting conditions. Here are some techniques to ensure you get the best light for your videos:
- Natural Light: Utilize natural light whenever possible. Position yourself facing a window or outside during the golden hour (just after sunrise or before sunset) for flattering, soft light.
- Three-Point Lighting: This classic technique involves using three light sources: a key light (the main light), a fill light (to soften shadows), and a backlight (to create depth). This setup can significantly enhance your video’s visual appeal.
- Diffusers: If you're using harsh artificial lights, diffusers can soften the light and reduce shadows. You can create a DIY diffuser using a white bed sheet or specialized materials.
- Color Temperature: Be mindful of color temperature. Mixing warm and cool lights can lead to unflattering colors. Stick to one color temperature to maintain consistency.
- Experiment: Don’t hesitate to experiment with your lighting setup. Move your lights around and check how different angles affect your shot. Sometimes, a slight adjustment can make all the difference!
By mastering these lighting techniques, you’ll ensure your iPhone videos shine brightly and look professional, drawing viewers in from the very first frame!
Also Read This: Effective Ways to Conceal Your Birthday on LinkedIn
Framing Your Shots and Composition Tips
When it comes to filming YouTube videos with your iPhone, the way you frame your shots can make a world of difference. Think of framing as the foundation of your visual storytelling. It’s not just about what’s in the frame, but how it’s arranged. Here are some handy tips to elevate your video composition:
- Rule of Thirds: Imagine a tic-tac-toe grid on your screen. Place your subject along these lines or at their intersections to create a balanced and engaging composition.
- Headroom: Ensure that there’s enough space above your subject's head. Too much headroom can make the shot feel unbalanced, while too little can feel cramped.
- Leading Lines: Use natural lines in your environment—like roads, fences, or paths—that draw the viewer's eye to your subject. This adds depth and interest.
- Background Considerations: Keep an eye on your background. A cluttered or distracting background can draw attention away from your subject. Try to find a clean, aesthetically pleasing backdrop.
- Experiment with Angles: Don’t be afraid to change up your angles. Filming from a low angle can make your subject appear more powerful, while a high angle can create a sense of vulnerability.
By applying these composition tips, you’ll not only enhance the visual quality of your videos but also keep your audience more engaged!
Also Read This: Does Alexa Work with YouTube Music and How to Set It Up for Streaming
Audio Quality: Importance and Solutions
Let’s face it: audio quality can make or break your YouTube videos. Viewers are likely to tolerate lesser video quality, but poor audio can drive them away faster than anything else. Here’s why audio matters and how to improve it:
- Clarity is Key: Clear audio helps convey your message effectively. If your viewers can’t hear you well, they might click away.
- Background Noise: Minimize distractions by choosing a quiet location. Consider filming during times when ambient noise is low.
- External Microphone: Invest in an external microphone to dramatically improve your sound quality. Options like the Rode VideoMic or a lapel mic can be game-changers!
- Wind Noise Reduction: If you're filming outdoors, consider using windshields for your mics. Wind can create annoying noise that distracts from your content.
- Post-Production Editing: Utilize audio editing software to clean up your sound. Programs like Audacity or GarageBand can help you remove background noise and enhance clarity.
By prioritizing audio quality, you’ll create a more professional and enjoyable viewing experience for your audience!
Also Read This: How to Appreciate Something on Behance
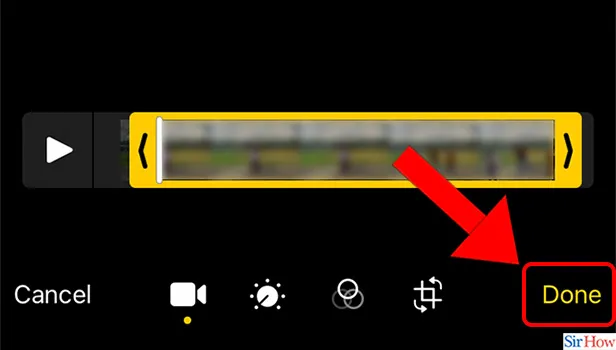
7. Editing Your Videos on iPhone
Editing your videos on your iPhone is not only easy but also a lot of fun! With a variety of apps at your disposal, you can turn raw footage into polished content that stands out on YouTube. Here are some fantastic options to consider:
- iMovie: A user-friendly app that comes pre-installed on most iPhones. It allows you to trim clips, add transitions, and even insert music from your library.
- InShot: Perfect for those looking to create engaging social media content. This app offers features like speed adjustment, filters, and text overlays.
- Adobe Premiere Rush: If you're after professional-level edits, this app is worth exploring. It boasts multi-track editing and a robust audio mixer.
- Filmic Pro: While primarily for filming, it includes some editing capabilities. It’s great for those who want more control over their footage.
When editing, remember to keep your audience in mind. Here are some tips:
- *Keep it concise: Aim for a clear message without unnecessary filler.
- Use engaging visuals: Incorporate clips, images, or graphics that enhance your narrative.
- Add background music: Choose royalty-free music that complements the mood of your video.
- Check audio quality:* Make sure dialogue is clear and background noise is minimized.
Also Read This: How to Permanently Delete My Facebook Account
8. Uploading and Optimizing for YouTube
Once you've edited your video, it’s time to upload it to YouTube! But before you hit that publish button, let’s talk about optimizing your video for better visibility and engagement.
First, navigate to the YouTube app and select the “+” icon to upload your video. Here’s a step-by-step process:
- Select your video: Choose the edited video from your camera roll.
- Write a catchy title: Make it descriptive and engaging to attract viewers.
- Add a detailed description: Include keywords related to your content to improve searchability.
- Choose a thumbnail: Custom thumbnails grab attention. Use an eye-catching image that represents your video.
- Tags matter: Use relevant tags to help categorize your video on YouTube.
Finally, consider the following optimization tips:
- Engage with viewers: Ask questions in your video to encourage comments and interactions.
- Use end screens: Promote your other videos or encourage subscriptions.
- Share on social media: Don’t forget to promote your video across your platforms for wider reach!
By following these steps, you’ll ensure your iPhone-filmed video not only reaches your audience but also captivates them!
How to Film YouTube Videos with Your iPhone
Filming YouTube videos with your iPhone is an accessible and effective way to create high-quality content without needing expensive equipment. With the right techniques and tools, you can capture stunning videos that engage your audience. Below are some tips and steps to help you get started.
1. Prepare Your iPhone
Before you start filming, ensure that your iPhone is ready:
- Update Software: Make sure your iPhone is running the latest version of iOS.
- Storage Space: Clear some space on your device to accommodate video files.
- Battery Life: Charge your iPhone fully or keep it connected to a power source.
2. Choose the Right Settings
Adjusting your camera settings can significantly enhance video quality:
- Resolution: Set your camera to 4K for the highest quality.
- Frame Rate: Choose 30fps or 60fps for smooth motion.
- Stabilization: Enable “Stabilization” to reduce shaky footage.
3. Lighting and Sound
Good lighting and sound are crucial for professional-looking videos:
- Natural Light: Film during the day using natural light when possible.
- Lighting Equipment: Consider using ring lights or softboxes for artificial lighting.
- External Microphone: Invest in a quality microphone for better audio clarity.
4. Filming Techniques
Keep these techniques in mind while filming:
| Technique | Description |
|---|---|
| Tripod | Use a tripod to keep your iPhone steady during filming. |
| Framing | Follow the rule of thirds to create balanced shots. |
| Editing Apps | Edit your videos using apps like iMovie or InShot for a polished final product. |
By following these steps, you can effectively film YouTube videos with your iPhone, making use of its powerful camera capabilities and various apps to enhance your content. With practice, you'll be able to create engaging videos that resonate with your audience.
Conclusion
Filming YouTube videos with your iPhone is not only convenient but can also yield impressive results when you apply the right techniques and tools. Embrace your creativity, and don't hesitate to experiment to find your unique style.