Introduction
Welcome to our step-by-step guide on how to edit Freepik templates in Photoshop. If you're a designer or someone who frequently works on creative projects, you've probably heard of Freepik. It's a fantastic resource for high-quality templates and graphics that can save you a significant amount of time and effort in your design work.
In this blog post, we will walk you through the process of downloading and customizing Freepik templates using Adobe Photoshop. Whether you're a beginner looking to enhance your designs or an experienced designer searching for ways to streamline your workflow, this guide is for you. By the end of this tutorial, you'll have the skills and knowledge to edit Freepik templates like a pro.
Let's dive in and explore the world of creative possibilities that open up when you combine the extensive resources of Freepik with the powerful editing capabilities of Photoshop.
Also Read This: Master Football Skills Like Messi with Dailymotion Tutorials
What is Freepik?
Freepik is a renowned online platform that provides a vast array of high-quality graphic resources, templates, and design elements. It has gained immense popularity among designers, illustrators, and creatives worldwide. This resource-rich platform offers a multitude of benefits for anyone involved in design or creative projects.
Here are some key details about Freepik:
1. Extensive Graphic Resources
Freepik hosts an extensive collection of graphic resources, including vector graphics, icons, illustrations, and photos. These resources cover a wide range of categories, making it a valuable asset for various design projects, from web design and marketing materials to presentations and more.
2. Versatile Templates
One of the standout features of Freepik is its impressive collection of templates. These templates are designed to simplify and enhance the creative process. Whether you need presentation templates, website layouts, or social media designs, Freepik offers templates for diverse purposes. These templates serve as a great starting point for your projects, saving you time and effort in the design process.
3. User-Friendly Interface
Freepik's website is known for its user-friendly interface. Navigating through the extensive collection of resources is straightforward, and you can easily filter and search for specific items. This intuitive interface ensures that designers can quickly find the graphics and templates they need.
4. Licensing Options
Freepik offers various licensing options, including free and premium plans. The free plan provides access to a substantial selection of resources, while the premium plan offers additional benefits, such as access to more exclusive content and the ability to use resources without attribution. The flexibility in licensing caters to the diverse needs of both amateur and professional designers.
5. Freepik Pro
Freepik Pro is a subscription-based service that provides even more advantages to its users. Subscribers gain access to an expanded collection of premium resources and enjoy the freedom to use them without attribution. This is a fantastic option for those who heavily rely on Freepik for their design projects and want the full range of benefits it offers.
6. Community and Inspiration
Freepik's platform also fosters a sense of community among designers. You can interact with fellow creatives, share your work, and find inspiration. This collaborative environment can be a valuable resource for those looking to stay updated with design trends and connect with like-minded individuals.
Now that you have a better understanding of what Freepik is and its numerous advantages, you're ready to explore how to edit Freepik templates in Photoshop, further enhancing your creative capabilities.
Also Read This: Craft Pamphlets Using Canva Pamphlet Templates
Why Edit Freepik Templates in Photoshop?
Editing Freepik templates in Photoshop offers a multitude of advantages for designers and creatives. While Freepik provides an extensive range of resources and templates, combining them with the power and versatility of Photoshop takes your design projects to a whole new level. Here's why you should consider editing Freepik templates in Photoshop:
1. Unmatched Editing Precision
Photoshop is renowned for its precision in editing. You have fine control over every aspect of your design, allowing you to make detailed adjustments, perfecting your work down to the pixel. This level of control is invaluable when you want to customize Freepik templates to align with your vision.
2. Limitless Creative Possibilities
With Photoshop's wide range of tools and features, your creative possibilities are virtually limitless. You can easily manipulate shapes, colors, and effects, enabling you to transform Freepik templates into unique creations. Whether it's adjusting colors, adding textures, or blending elements, Photoshop provides the freedom to experiment and innovate.
3. Seamless Integration of Custom Elements
Often, you may want to include custom elements in your designs, such as your brand logo, specific text, or personal artwork. Photoshop makes it simple to integrate these elements into Freepik templates while maintaining a cohesive and professional look. You can seamlessly blend the template with your unique content.
4. Advanced Text and Typography Control
Typography plays a crucial role in design. Photoshop offers advanced text control features, allowing you to experiment with fonts, sizes, spacing, and effects. This is especially valuable when you're customizing text-based templates from Freepik, ensuring your text aligns with your project's theme and style.
5. High-Resolution Output
Photoshop is designed for high-resolution work, making it ideal for projects that require sharp and detailed output. When editing Freepik templates, you can be confident that your final design will look crisp and professional, whether it's for digital use or printing.
6. Layer Management
Photoshop's layer system is a game-changer for design projects. It allows you to work on different elements of your design separately, making it easy to make adjustments and corrections without affecting other parts of the template. This level of organization and control is invaluable when customizing complex templates.
7. Non-Destructive Editing
Non-destructive editing means that you can make changes to your design without permanently altering the original template. If you ever want to revert to the template's original state or make additional adjustments later, Photoshop preserves the template's integrity while allowing you to experiment freely.
By combining Freepik's resource library with Photoshop's robust editing capabilities, you have the tools and creative freedom to take your design projects to the next level. In the following steps of this guide, we'll show you how to effectively edit Freepik templates in Photoshop, empowering you to unlock your full creative potential.
Also Read This: Visualize Your Goals with Canva Vision Board Templates
Step 1: Downloading the Freepik Template
Before you can start editing a Freepik template in Photoshop, you need to obtain the template file. Here's a step-by-step guide on how to download a Freepik template:
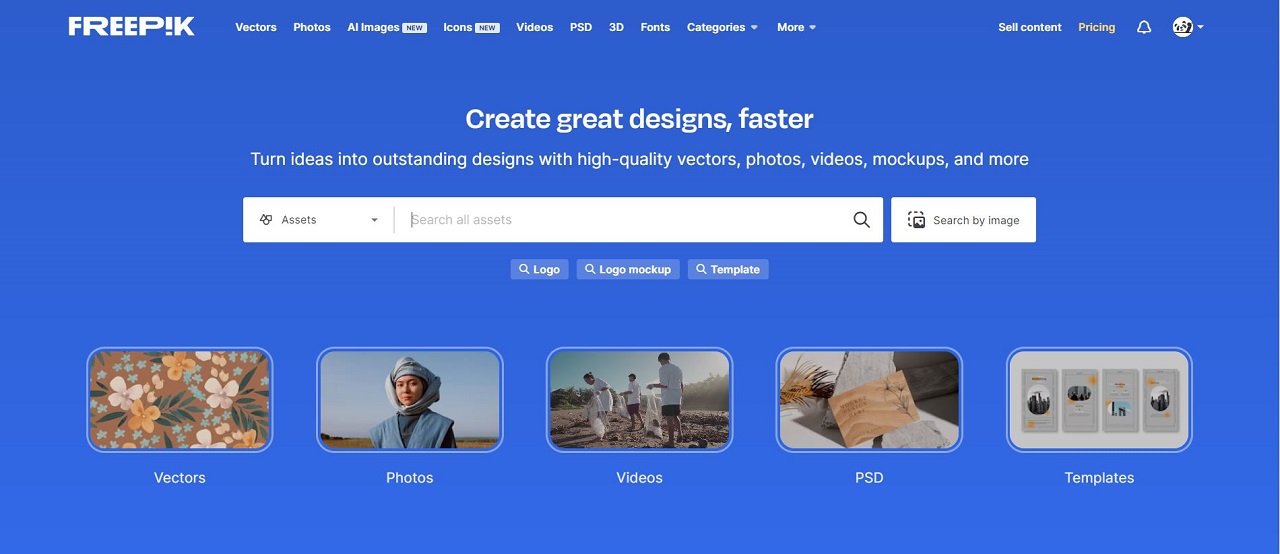
1. Visit the Freepik Website
First, open your web browser and go to the Freepik website (https://www.freepik.com/). Ensure that you are logged into your Freepik account or create one if you don't have an account already.
2. Search for the Template
Use the search bar on the Freepik website to find the template you need. You can enter keywords or browse through categories to narrow down your search. Freepik's extensive library offers a wide variety of templates, so you're likely to find one that suits your project.
3. Choose the Template
Once you've found the template you want, click on it to open the template's details page. Here, you'll see a preview of the template and information about its contents. Make sure it's the right one for your project.
4. Download the Template
To download the template, look for the download button. Depending on your subscription (free or premium), you may have different options. Premium subscribers often have access to more resources and faster downloads. Click on the appropriate download button to start the download process.
5. Choose the File Format
Freepik templates are usually available in multiple file formats. Select the format that is compatible with Photoshop. The most common format is PSD (Adobe Photoshop file), which allows for easy editing in Photoshop. If you're unsure, check the file extension or description provided by Freepik.
Tip: Keep in mind that premium subscribers can often access more file formats and resources, providing greater flexibility for their projects.
6. Save the Template
Choose a location on your computer to save the downloaded template file. It's a good practice to create a dedicated folder for your Freepik resources to stay organized.
With the Freepik template now downloaded to your computer, you're ready to proceed to the next step in the process of editing it in Adobe Photoshop. In the upcoming steps, we'll guide you through the process of preparing your workspace and opening the template in Photoshop.
Also Read This: Unlocking Todoroki in My Hero Ultra Rumble
Step 2: Preparing Your Workspace
Before you start editing a Freepik template in Photoshop, it's essential to set up your workspace for optimal productivity. This step ensures that you're organized and ready to tackle the customization process. Here's how to prepare your workspace:
1. Open Adobe Photoshop
If you haven't already, launch Adobe Photoshop on your computer. Ensure that you have the latest version of Photoshop installed to access all the features and improvements that enhance your editing experience.
2. Create a Project Folder
Begin by creating a dedicated project folder on your computer where you'll save all the files related to your editing project. This folder should include the downloaded Freepik template and any additional resources you plan to use. Organizing your files in one location helps you stay efficient and prevents clutter.
3. Set Canvas Dimensions
Open the Freepik template in Photoshop. Once the template is open, you can customize the canvas dimensions to match the requirements of your project. To do this, navigate to "Image" in the top menu, select "Canvas Size," and adjust the dimensions accordingly. Be sure to consider the output medium and size requirements.
4. Choose Color Profile
Select the appropriate color profile for your project. Photoshop allows you to work in various color modes such as RGB for digital projects or CMYK for print. Ensure that your color settings match the intended output to maintain color accuracy.
5. Create Layers and Folders
Effective layer management is key to organized editing. Create layers and folders for different elements of your project. For example, have separate layers for text, images, and background elements. Group related layers into folders for easy access and editing. This approach will save you time and simplify the design process.
6. Save Your Workspace
Customize your Photoshop workspace layout to suit your preferences. You can arrange tool panels, palettes, and windows to your liking. Once you've set up your ideal workspace, save it as a custom workspace layout. This ensures that you can easily return to your preferred layout in future editing sessions.
Tip: Take advantage of keyboard shortcuts and familiarize yourself with essential tools and commands in Photoshop to enhance your editing efficiency.
With your workspace well-prepared, you're now ready to open the downloaded Freepik template in Photoshop and begin the process of customization. In the following steps, we'll guide you through opening the template and making the necessary edits to bring your creative vision to life.
Also Read This: Top Flickr Photographers: A Comprehensive Overview
Step 3: Opening the Freepik Template in Photoshop
Now that your workspace is prepared, it's time to open the downloaded Freepik template in Adobe Photoshop. Follow these steps to get started with the customization process:
1. Locate the Template File
Go to the project folder where you saved the downloaded Freepik template. Ensure you can easily locate the template file in your dedicated folder to avoid any confusion.
2. Open Photoshop
If Photoshop isn't already open, launch the application on your computer. You should see the Photoshop workspace with its various tools and panels.
3. Drag and Drop or Use the 'Open' Command
There are two primary ways to open the Freepik template in Photoshop:
| Drag and Drop: | Simply drag the template file from your project folder and drop it into the Photoshop workspace. Photoshop will automatically open the file for you. |
| 'Open' Command: | Alternatively, you can use the 'Open' command in Photoshop. Navigate to 'File' in the top menu, select 'Open,' and then browse your computer to locate and select the template file. |
4. Choose the Right File Format
When opening the Freepik template, ensure you select the correct file format. Freepik templates are typically available in PSD format (Adobe Photoshop). Be certain you are opening the file in the appropriate format for seamless editing.
5. Confirmation and Initial Assessment
Once you've successfully opened the Freepik template in Photoshop, take a moment to confirm that the file is correct and review its contents. Familiarize yourself with the template's layers, elements, and organization. This will help you understand the template structure and plan your customization effectively.
6. Save Your Progress
Before you begin making edits to the template, it's a good practice to save your progress. Use the 'Save As' command and choose a new name for your file to avoid overwriting the original template. This way, you'll have a backup of the original template if needed.
With the Freepik template now open in Photoshop, you're ready to start customizing it to suit your project's needs. In the upcoming steps, we'll guide you through the process of making adjustments, adding your content, and creating a personalized design that meets your creative vision.
Also Read This: Use PLR Templates from Canva for Your Needs
Step 4: Customizing the Template
With the Freepik template now open in Adobe Photoshop, it's time to dive into the customization process. This step allows you to make the template your own by adding your unique design elements and making necessary adjustments. Here's a detailed guide on how to customize the template:
1. Familiarize Yourself with Layers
Begin by exploring the layers panel in Photoshop. The layers contain different elements of the template, such as images, text, and shapes. Familiarizing yourself with the layer structure will help you understand the template's composition and make targeted edits.
2. Adjust Colors and Images
To change colors or images within the template, select the layer that corresponds to the element you want to edit. Use the color picker or the 'Paint Bucket' tool to modify colors. If you want to replace images, use the 'Place' command to insert your own images into the template.
3. Edit Text and Typography
For text-based templates, select the text layer and make the necessary changes to the text content. You can also modify font styles, sizes, and text effects. Photoshop offers extensive typography options for customization.
4. Add Your Graphics and Elements
If your project requires additional graphics or elements, use the 'Place' command to insert your own graphic files into the template. Ensure that these elements blend seamlessly with the template's design.
5. Blend and Mask Elements
To create a cohesive design, you may need to blend or mask elements within the template. Use blending modes and layer masks to achieve the desired visual effects. This step allows you to integrate custom elements seamlessly with the existing design.
6. Save Versions and Maintain Layers
As you make edits, consider saving different versions of your project. This can be especially helpful if you want to compare changes or revert to a previous state. Additionally, maintain the original layers in the template as backups, ensuring that you can always access the template's unaltered components.
7. Test and Preview
After making customizations, it's important to test and preview your design. Check for any visual inconsistencies or issues that may have arisen during the editing process. Make adjustments as needed to ensure a polished final result.
8. Save Your Customized Template
Once you're satisfied with the changes you've made, use the 'Save As' command to save your customized template with a new name. This will preserve the original template and your personalized version for future use.
9. Export for Your Project
Finally, export your customized template in the desired file format for your project. This could be a high-resolution image for printing, a web-friendly format for digital use, or any other format that fits your project's requirements.
Tip: Consider maintaining a record of the changes you've made, including color codes, fonts, and specific editing steps. This documentation can be valuable for consistency in future design work.
With the customization process complete, you now have a personalized Freepik template ready to be used in your design project. In the following steps, we'll guide you on how to save and export your edited template for your specific project needs.
Also Read This: How to Apply Perfect Foundation for a Smooth Base on Dailymotion
Step 5: Saving and Exporting Your Edited Template
After customizing your Freepik template in Adobe Photoshop, the final step is to save and export your edited template in the appropriate format for your project. This step ensures that your customized design is ready for use. Here's how to save and export your edited template:
1. Save Your Photoshop File
Before exporting, make sure to save your Photoshop file (.PSD). This preserves all the layers and elements of your design, allowing you to make further edits in the future if needed. To do this, use the 'Save' command and choose a location to store your PSD file.
2. Flatten Layers (Optional)
If you're satisfied with your design and don't anticipate any further changes, you can choose to flatten the layers. Flattening combines all layers into one, reducing the file size and making it easier to work with in other applications. To flatten layers, go to 'Layer' in the top menu, then select 'Flatten Image.'
3. Choose the Appropriate File Format
Depending on your project requirements, select the appropriate file format for your edited template. Common formats include:
| JPEG (Joint Photographic Experts Group): | Use for web graphics and images. JPEG files provide good compression and are suitable for photographs and images with gradients. |
| PNG (Portable Network Graphics): | Opt for PNG for graphics with transparency or when you need high-quality images. It's ideal for digital designs with sharp edges and text elements. |
| PDF (Portable Document Format): | Choose PDF when you need a format that maintains the layout and can be easily viewed and printed. It's great for documents and presentations. |
| PSD (Adobe Photoshop): | Keep a copy in PSD format if you want to retain all editable layers for future reference or additional modifications. |
4. Adjust Image Quality and Settings
Depending on the chosen format, adjust image quality and settings as needed. For JPEG and PNG, you can specify the compression level and resolution. For PDF, you can set page size and quality settings. Ensure that your settings match your project's requirements.
5. Save the File
Once you've configured the settings, use the 'Save' or 'Export' command in Photoshop to save the edited template in your chosen format. Specify the file name and location for storage on your computer.
6. Additional Formats (If Needed)
If your project requires the edited template in multiple formats, repeat the export process for each format. This ensures that you have the right file types for various applications and platforms.
7. Back Up Your Files
As a best practice, back up your edited template files to prevent data loss. You can store them on an external drive, cloud storage, or another secure location to ensure that your hard work is safe and accessible in the future.
Tip: Consider creating a compressed ZIP file containing all versions of your edited template for convenient archiving and sharing.
With your edited Freepik template saved and exported in the appropriate format, you're now ready to use it in your design project. Whether it's for web design, printed materials, or any other creative endeavor, your customized template is a reflection of your unique vision and skills.
Lonely little tree in a forest deep pic.twitter.com/EZxO7JlOHq
— Markus Stock Photography (@MarkusStockPho1) October 29, 2023
Also Read This: How to Request a Recommendation on LinkedIn for Professionals
FAQ
Here are some frequently asked questions about editing Freepik templates in Photoshop:
What is Freepik?
Freepik is a popular online platform that offers a vast collection of graphic resources, templates, and design elements for creative projects. It provides designers with a wide range of assets to enhance their work, making it a valuable resource in the design community.
How do I download a Freepik template?
To download a Freepik template, visit the Freepik website, search for your desired template, and choose the appropriate file format. Click on the download button and save the file to your computer. Make sure to select the format compatible with Adobe Photoshop for editing.
Can I edit Freepik templates in software other than Photoshop?
While Photoshop is a popular choice for editing Freepik templates, you can also use other graphic design software like Adobe Illustrator, CorelDRAW, or GIMP, depending on the template's file format. Just ensure that the software you choose supports the template format you're working with.
Do I need a Freepik subscription to edit templates?
No, you can download and edit Freepik templates with a free account. However, a premium subscription offers additional benefits, such as access to a wider range of resources and the ability to use them without attribution.
Are there any licensing restrictions for edited templates?
When you edit a Freepik template, the resulting design is subject to the original template's licensing terms. If the template requires attribution, you must provide it when using the edited design. Premium subscribers, however, can use resources without attribution as per their subscription terms.
Can I sell or distribute templates I've edited from Freepik?
Generally, you cannot sell or distribute edited Freepik templates as standalone templates or resources. The original template's licensing terms still apply, and redistribution without proper authorization may violate copyright and licensing rules.
If you have more questions or need further assistance with editing Freepik templates in Photoshop, feel free to explore additional resources on the Freepik website or contact their support team for specific inquiries.
Conclusion
In conclusion, learning how to edit Freepik templates in Adobe Photoshop opens up a world of creative possibilities for designers and creatives. Freepik, as a valuable resource, provides an extensive collection of graphic resources and templates that can significantly streamline your design projects. By following the step-by-step guide outlined in this blog post, you can effectively customize Freepik templates to align with your unique vision and project requirements.
Throughout the process, we covered the following key steps:
- Downloading the Freepik Template: We explained how to find and download the template from Freepik's website, ensuring you choose the correct file format.
- Preparing Your Workspace: We provided tips on setting up your Photoshop workspace for efficient editing and organization.
- Opening the Freepik Template in Photoshop: We outlined the steps to open the downloaded template in Adobe Photoshop and make it ready for customization.
- Customizing the Template: We detailed how to edit and personalize the template, including adjusting colors, text, images, and integrating your own elements.
- Saving and Exporting Your Edited Template: We discussed the final steps of saving and exporting your customized template in the appropriate format for your specific project needs.
As you work on your design projects, remember that attention to detail, creative experimentation, and effective use of Photoshop's tools will empower you to create professional and polished designs. Your edited Freepik templates can serve as a strong foundation for a wide range of projects, from web design and marketing materials to presentations and more.
With the knowledge and skills gained from this guide, you are well-equipped to make the most of Freepik's resources and Adobe Photoshop's capabilities. The combination of these powerful tools can help you bring your creative vision to life and produce outstanding design work that stands out in your field.
So, go ahead and explore the world of design with Freepik templates and Photoshop, and let your creativity flow. Your personalized, professionally edited templates are just the beginning of your journey in the world of design, and we look forward to seeing the amazing projects you'll create. Happy designing!