Deleting your Storyblocks account might seem like a daunting task, especially if you're not familiar with the process. Whether you’re looking to cut down on subscriptions, have found an alternative service, or simply don’t need stock media anymore, it’s important to understand how to navigate this. In this guide, we’ll walk you through the reasons you might want to delete your account and provide you with the steps to do so effectively. Let’s dive in!
Reasons for Deleting Your Storyblocks Account

There are several reasons why someone might choose to delete their Storyblocks account. Understanding your motivation can help you make an informed decision. Here are some common reasons:
- Cost Management: As subscriptions add up, some users may find it necessary to cut back on expenses. If you no longer use Storyblocks frequently, it might be time to cancel.
- Changing Needs: Your project requirements might evolve. Perhaps you’ve transitioned to a different type of content or found a service that better fits your needs.
- Quality Concerns: If you’ve found that the quality of the stock media doesn’t meet your expectations, or if other platforms offer better options, it could be a valid reason to move on.
- User Experience: If you’ve encountered frustrating user interface issues or have had a poor experience with customer service, this could deter you from continuing with Storyblocks.
- Privacy Concerns: In an age where data privacy is crucial, if you have reservations about how your information is handled, it’s reasonable to want to delete your account.
Ultimately, whatever your reason may be, it's important to weigh your options and ensure that deleting your account aligns with your current needs and future goals.
Also Read This: How to Apply Lipstick Perfectly
Step 1: Log into Your Storyblocks Account
Before you can delete your Storyblocks account, you need to log in. This is a straightforward process, but here are a few tips to ensure everything goes smoothly:
- Visit the Storyblocks Website: Open your preferred web browser and head over to www.storyblocks.com.
- Click on 'Login': Look for the 'Login' button, usually located in the upper right corner of the homepage. It’s hard to miss!
- Enter Your Credentials: Type in the email address and password associated with your account. If you've forgotten your password, don't worry! Just click on 'Forgot Password?' and follow the prompts to reset it.
Once you’ve successfully logged in, you’ll be taken to your dashboard, where you can manage your subscriptions and access your projects. Ensure that you’re logged in with the correct account, especially if you have multiple accounts with different email addresses. If everything looks good, you’re ready to move on to the next step!
Also Read This: Navigating Changes: Understanding Shutterstock Layoffs
Step 2: Navigate to Account Settings
Now that you’re logged in, the next step is to find the account settings. This is where you’ll be able to make changes or, in this case, delete your account. Here’s how to do it:
- Locate the Profile Icon: In the upper right corner of your dashboard, you should see your profile icon or your initials. Click on it to reveal a dropdown menu.
- Select 'Account Settings': From the dropdown, click on 'Account Settings.' This will take you to a new page containing all the details about your account.
In the account settings section, you'll find various options related to your subscription, payment information, and account preferences. It’s essential to familiarize yourself with this area, as it provides comprehensive details about your account. Now, you’re just a couple of clicks away from deleting your Storyblocks account!
Also Read This: Creating Friendship Bracelets Using Rubber Bands on Dailymotion
5. Step 3: Locate the Account Deletion Option
Alright, you’re doing great so far! Now that you’ve logged into your Storyblocks account, it’s time to find the option to delete your account. This is usually tucked away, so don’t worry if it takes a moment to locate it. Here’s how to navigate your way there:
- Account Settings: Look for your profile icon or name, usually found in the top right corner of the screen. Click on it to reveal a dropdown menu.
- Settings Menu: From the dropdown, select "Account Settings" or simply "Settings." This will take you to a page where you can manage your account details.
- Privacy or Security Section: Once in the settings, look for a section labeled "Privacy," "Security," or "Account Management." This is often where account deletion options are located.
- Find the Delete Option: Scroll through that section to find something like "Delete Account," "Close Account," or "Deactivate." Each platform has its own wording, so keep an eye out!
Once you find it, click on that option to proceed. It’s a crucial step, so take a moment if you need to gather your thoughts.
Also Read This: Quick Steps to Access Your YouTube Recap and Highlights
6. Step 4: Follow the Deletion Instructions
You’ve found the account deletion option—great job! Now, let’s tackle the instructions that come next. Most platforms will require a few confirmations to ensure you truly want to delete your account, and Storyblocks is no different. Here’s what typically happens:
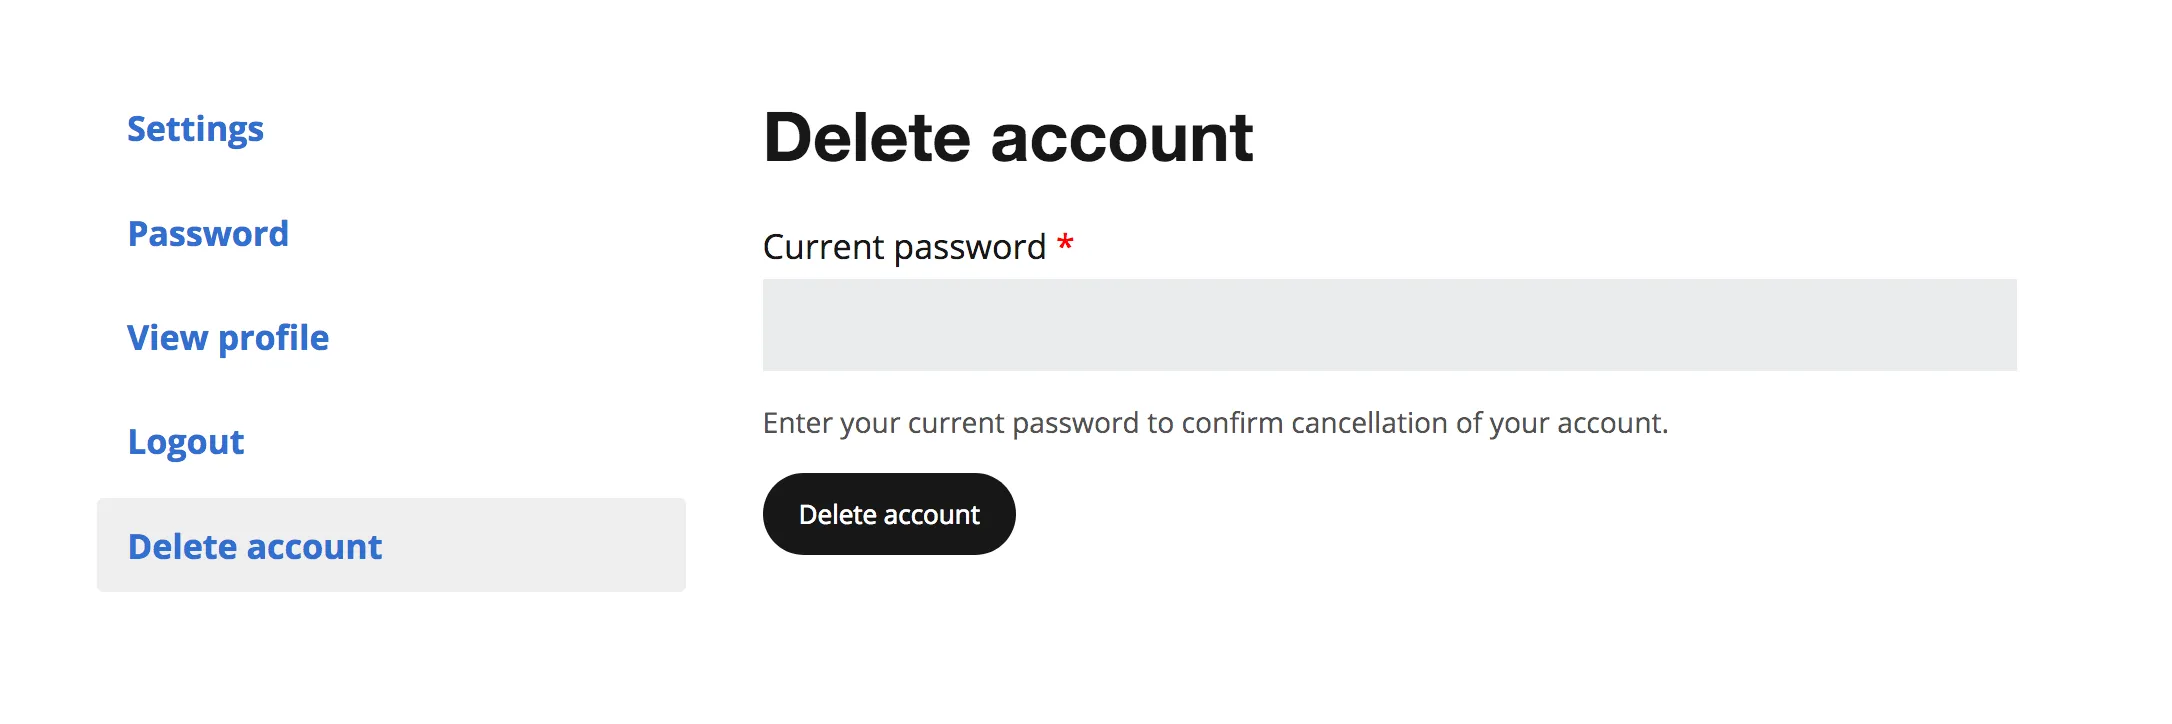
- Confirmation Prompt: You might receive a pop-up or a new page asking you to confirm that you want to delete your account. This is their way of double-checking your decision.
- Enter Your Password: For security reasons, you may be asked to enter your password again. This step confirms that it’s really you making this request.
- Feedback Opportunity: Some platforms like Storyblocks will ask for feedback—this is optional! Feel free to share why you’re leaving, or you can skip it.
- Final Confirmation: After all that, you’ll likely see a final confirmation button saying something like "Delete My Account" or "Confirm Deletion." Once you click that, your account will be on its way to deletion.
Remember, once you complete this process, your account and all associated data may be permanently removed. So if you’re sure, go ahead and hit that button!
Also Read This: Where to Watch the Royal Rumble Streaming and TV Guide
7. Step 5: Confirm Account Deletion
Alright, you’ve made it to the final step of deleting your Storyblocks account! This part is crucial because it ensures that you truly want to go ahead with the deletion process. Here’s how to confirm your decision:
- Review Your Decision: Before you click that final button, take a moment to review what deleting your account means. You’ll lose access to all your stored content, downloads, and any remaining credits. If you’re sure, proceed to the next step.
- Confirmation Prompt: After clicking the deletion button, a confirmation prompt will pop up. This is your last chance to change your mind. It usually states, “Are you sure you want to delete your account?”
- Enter Your Credentials: To ensure that it’s really you making this request, you might be asked to enter your password again. This adds an extra layer of security.
- Final Confirmation: Once you’ve verified your identity, you’ll see a final confirmation button. Clicking this will officially start the deletion process.
And just like that, your account will be on its way to deletion. Make sure you stay informed about any additional emails or notifications that might arrive after confirming your deletion.
Also Read This: Exploring the Scale of Colossal Titans in the Rumbling
8. What to Expect After Deletion
So, you’ve successfully deleted your Storyblocks account. What happens next? Here’s a rundown of what you can expect:
- Loss of Access: You will no longer have access to your account, including any saved collections, downloads, or credits. If you’ve downloaded assets, they remain available, but any future access will be cut off.
- Email Confirmation: Shortly after your account is deleted, you should receive an email confirmation. This email serves as an official reminder that your account and all associated data have been removed.
- Data Retention Period: While your account is deleted, Storyblocks may retain some of your data for a limited time, as outlined in their privacy policy. This is typically for legal or billing purposes.
- Reactivation Option: If you change your mind, you might have the option to reactivate your account within a certain period. Check Storyblocks’ policies for specifics, as this may vary.
In summary, deleting your account is a big step, and it’s essential to understand the implications. Stay informed and make sure you’re completely ready for this change!
How to Delete Your Storyblocks Account
Deleting your Storyblocks account is a straightforward process, but it’s essential to follow the correct steps to ensure everything is handled properly. Whether you're no longer using the service or seeking alternatives, here's a guide on how to delete your account effectively.
Before you proceed with the deletion, it's crucial to consider the following:
- Backup Your Content: Ensure that you have saved any projects or downloads you want to keep, as deleting your account will result in losing access to all your content.
- Understand the Policy: Familiarize yourself with Storyblocks' cancellation and deletion policies to avoid any surprises.
Follow these steps to delete your Storyblocks account:
- Log in to your Storyblocks account using your credentials.
- Navigate to the Account Settings section, usually found in the dropdown menu under your profile icon.
- Look for the Billing or Subscription tab.
- Find the option for Cancel Subscription and follow the prompts.
- Once your subscription is canceled, return to Account Settings and locate the Delete Account option.
- Confirm your choice by following the instructions provided, and make sure to provide any necessary feedback.
After confirming the deletion, you will receive a notification that your account has been successfully deleted. Remember that this action is irreversible, and you will lose access to all your data.
In conclusion, deleting your Storyblocks account is a simple process if you follow the outlined steps and ensure that you have backed up any important content. Always review the cancellation policy to avoid any unexpected issues.