Creating engaging content on YouTube is easier than ever, especially with the introduction of YouTube Shorts. If you’re an iPad user looking to dive into this exciting format, you’re in the right place! In this blog post, we’ll guide you step-by-step on how to make captivating
Understanding YouTube Shorts
YouTube Shorts is a relatively new feature that allows creators to produce short, catchy videos that are 60 seconds or less. Think of it as YouTube's answer to TikTok or Instagram Reels! But what makes
- Quick Consumption: Shorts are designed for quick viewing. They’re perfect for grabbing attention in a fast-paced digital world.
- Vertical Format: Shorts are specifically made for vertical viewing, which suits how most people hold their phones nowadays.
- Creative Tools: YouTube offers various tools to enhance your Shorts, including music, effects, and text overlays, making it fun to create.
- Discoverability: Shorts have their own dedicated shelf on the YouTube app, giving your content a better chance of being discovered by new audiences.
To create a successful YouTube Short, it’s essential to understand the audience and the trends that resonate with viewers. Think about what captivates you when watching Shorts. Is it humor, quick tips, or impressive skills? Pinpointing your niche can help you craft videos that not only engage but also entertain. Remember, the key to a great Short is to capture attention quickly and keep it dynamic!
Also Read This: How to Achieve a Glowing Makeup Look with Simple Tips
3. Setting Up Your iPad for Video Creation
Getting your iPad ready for creating YouTube Shorts is a breeze! The first step is to ensure that your device is updated to the latest version of iOS. This will give you access to the newest features and improvements that can enhance your video-making experience.
Next, let’s check the camera settings. Here’s how you can optimize them:
- Open the Settings app on your iPad.
- Scroll down and tap on Camera.
- Ensure the Record Video option is set to the highest quality available (preferably 4K).
- Activate Grid lines to help with composition.
Now that your camera is set, it’s important to clear some space on your device. Video files can be large, so make sure you have enough storage. You can do this by:
- Going to Settings > General > iPad Storage to see what's taking up space.
- Deleting unnecessary apps or media files.
Lastly, consider investing in a tripod or stabilizer to keep your shots steady. If you don't have one, you can simply prop your iPad against a stable surface. Lighting is also key—find a well-lit area or use a ring light to make your video pop!
Also Read This: Understanding Alamy's Customer Base
4. Planning Your Short Video Content
Before hitting that record button, it’s essential to plan your content. A well-structured video not only engages viewers but also increases your chances of going viral! Here’s how you can organize your thoughts:
Start by defining your video’s purpose. Ask yourself:
- What message do I want to convey?
- Who is my target audience?
- What action do I want viewers to take after watching?
Next, sketch out a rough script or outline. Keep it concise since YouTube Shorts are typically under 60 seconds. Here’s a simple framework to follow:
| Segment | Details |
|---|---|
| Hook (0-10 seconds) | Grab attention with an intriguing question or statement. |
| Content (10-45 seconds) | Deliver the main message or story. Keep it engaging and visually stimulating! |
| Call to Action (45-60 seconds) | Encourage viewers to like, comment, or subscribe, or direct them to your other content. |
Lastly, don’t forget to have fun! Authenticity shines through, so let your personality come alive in your Shorts. With a bit of planning and creativity, you’ll be on your way to creating captivating videos that resonate with your audience.
Also Read This: Playing Team Rumble in Split Screen and Setting Up Local Multiplayer
5. Recording Your YouTube Short
Getting started with recording your YouTube Short on your iPad is an exciting step! Here’s a simple guide to help you capture those moments perfectly.
First things first, you want to make sure you’re in a well-lit area. Natural light works wonders, but if you’re indoors, consider using softbox lights or ring lights for that perfect glow. Next, think about your background; it should be clean and not too distracting.
Now, let’s dive into the recording process:
- Open the Camera App: Your iPad’s built-in camera is more than capable of shooting high-quality videos.
- Select Video Mode: Swipe to the video mode. You’ll notice a record button; that’s your best friend!
- Set Up Your Shot: Frame your shot; you want to be the star of the video! Make sure you’re centered and have enough headroom.
- Press Record: Tap that record button and start speaking or performing your content! Remember, you have a maximum of 60 seconds, so keep it snappy!
- Review Your Footage: Once you’re done, play back your video to see if it captured everything you wanted. If not, don’t hesitate to hit record again!
Recording your YouTube Short can be a lot of fun. Just relax, be yourself, and let your creativity shine through!
Also Read This: Enhancing Your Social Selling Index on LinkedIn
6. Editing Your Video on iPad
Editing your YouTube Short on your iPad is where the magic really happens! With just a few taps, you can transform your raw footage into a polished video ready for uploading. Let’s explore how you can do this effectively.
There are several great editing apps available, but for simplicity, we’ll focus on iMovie, which comes pre-installed on most iPads. Here’s how to use it:
- Open iMovie: Launch the app and create a new project by tapping the “+” icon.
- Import Your Video: Select your recorded footage from the camera roll. It’s as easy as dragging and dropping!
- Trim Your Clips: If you’ve got extra footage, simply tap on the clip and drag the edges to trim it down to the best parts.
- Add Text and Titles: Consider adding a catchy title or captions. Tap on the “T” icon and choose your style.
- Incorporate Music: Enhance your video with some background music. Tap on “Audio” and select a track that fits your vibe.
- Export Your Video: Once you’re satisfied, hit “Done” and then the share button to export your masterpiece!
Editing doesn’t have to be overwhelming! Just remember to keep it simple and stay true to your style. Happy editing!
Also Read This: HTML Mastery: Adding Flaticon Icons Effortlessly
Uploading Your Short to YouTube
Once you’ve created your YouTube Short, the next step is to upload it to the platform. This process is pretty straightforward, especially on your iPad. Let’s break it down into simple steps:
- Open the YouTube App: Start by launching the YouTube app on your iPad. Make sure you’re logged into your account.
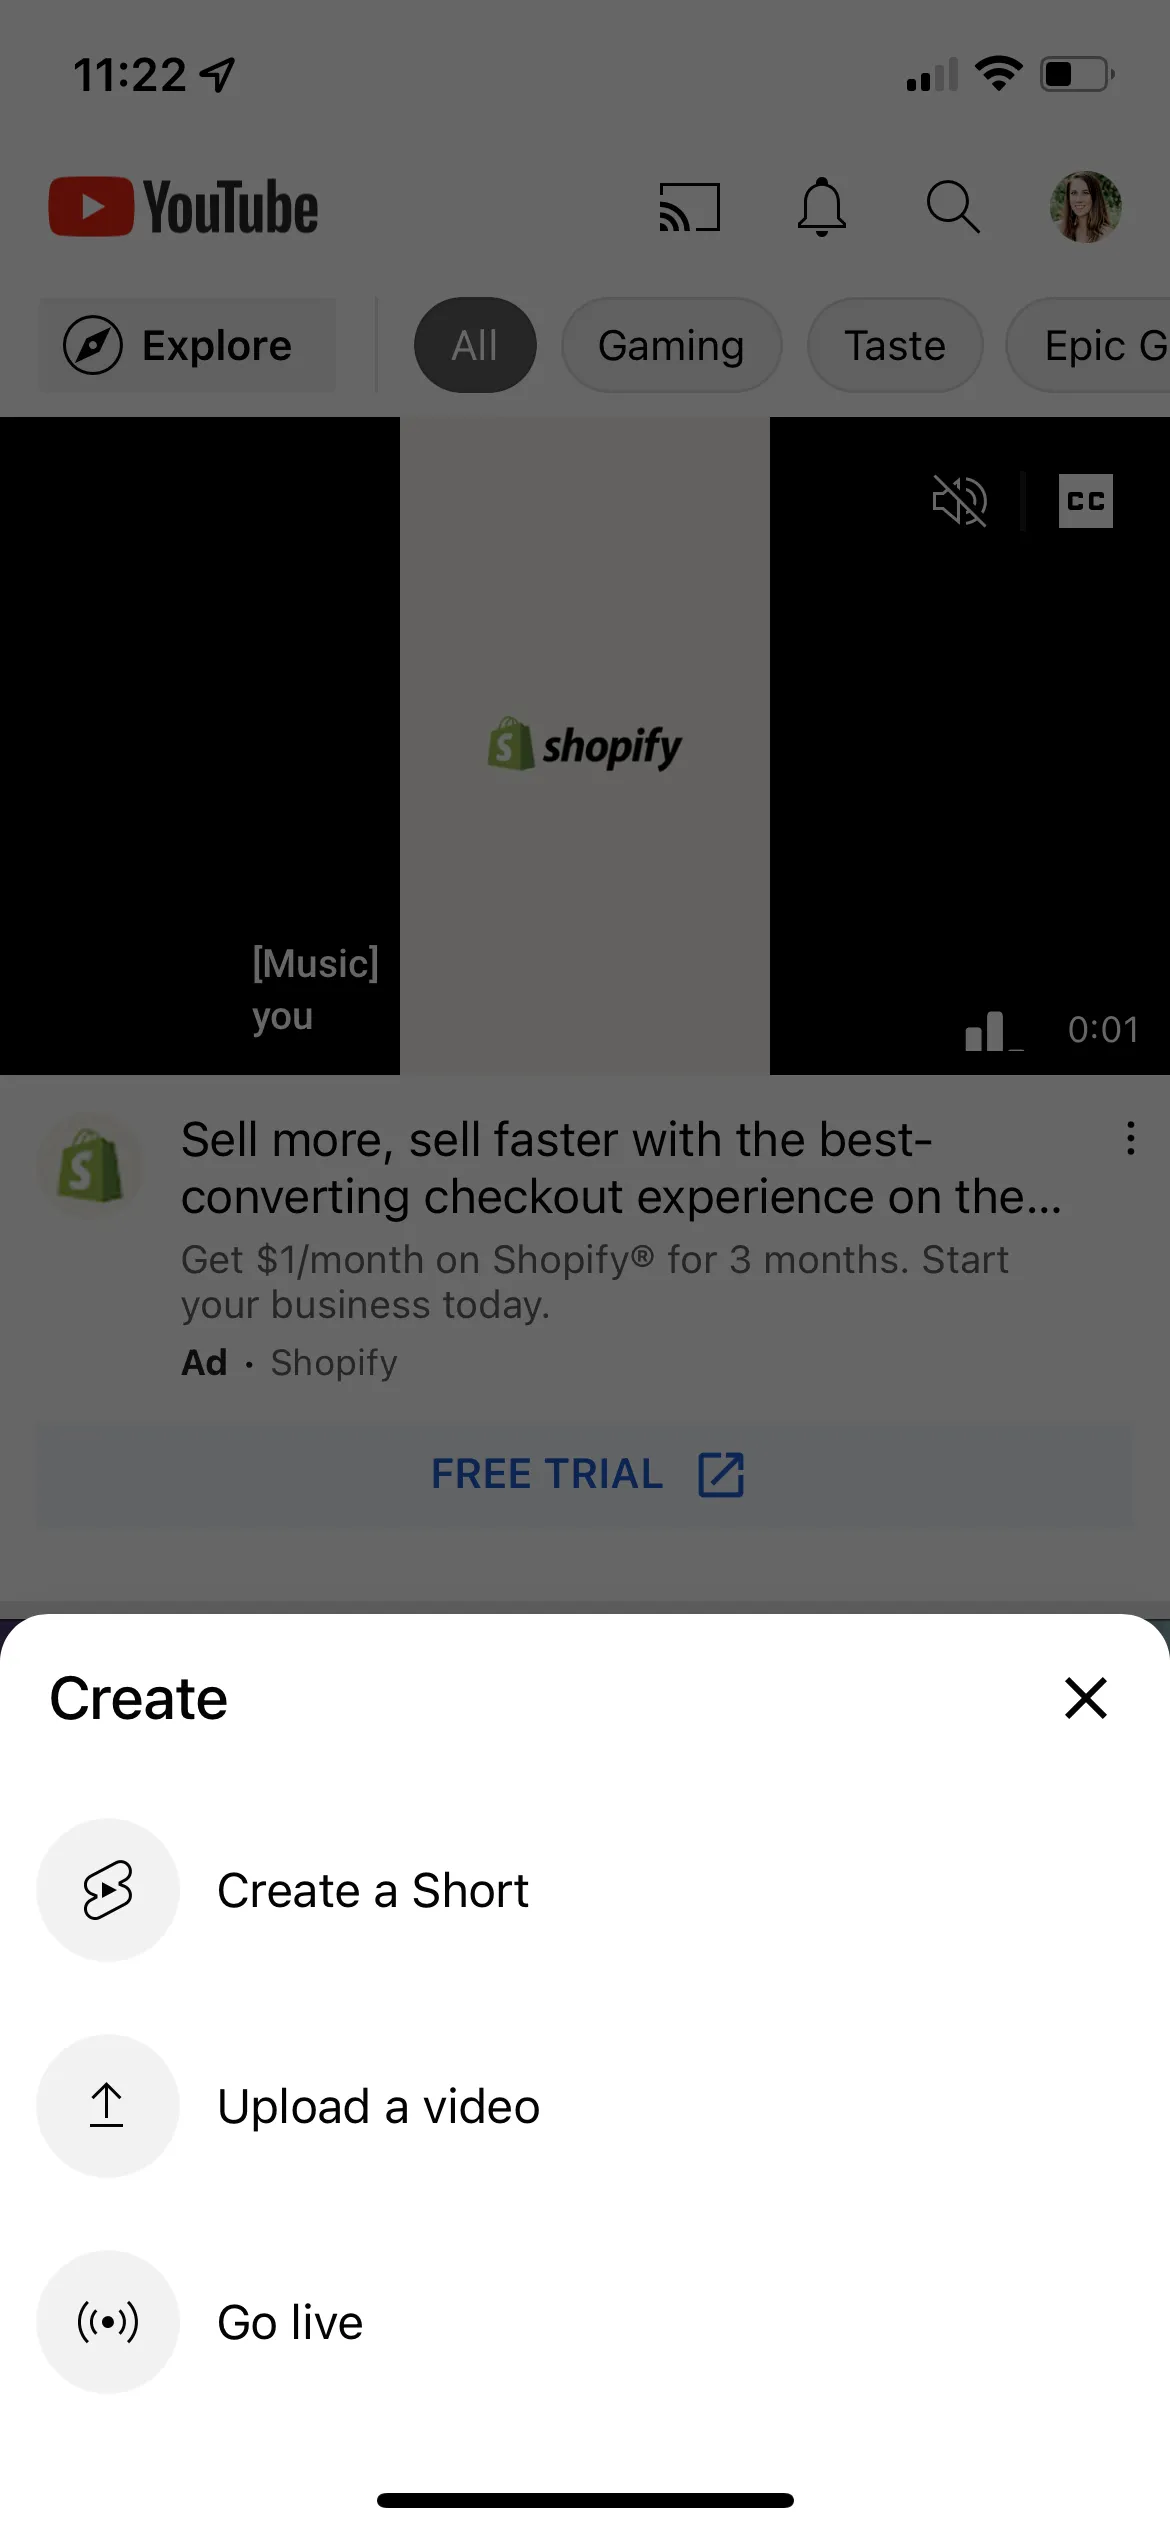
- Click on the Create Button: Look for the "+" icon or the "Create" button at the bottom of the screen. This is where the magic begins!
- Select Upload a Video: After tapping the create button, choose “Upload a video” from the options presented.
- Choose Your Short: Browse through your camera roll and select the Short you just created. Don’t forget to double-check that it’s the right video!
- Add a Title and Description: Now, it’s time to get creative! Give your Short a catchy title and write a brief description. This helps viewers understand what your video is about.
- Set Visibility: Decide whether you want your video to be public, unlisted, or private. For maximum reach, public is usually the way to go!
- Upload: Finally, hit the “Upload” button and watch as your Short makes its way into the YouTube universe!
And there you go! Your YouTube Short is now uploaded and ready for the world to see. It’s a thrilling moment, isn’t it?
Also Read This: Eliminate YouTube Ad Block Popup for Seamless Viewing
Tips for Optimizing Your YouTube Short
Creating great content is just the first step; optimizing your YouTube Short ensures it reaches the right audience. Here are some handy tips to make your Short stand out:
- Engaging Thumbnails: Even though Shorts are often viewed in a vertical format, a captivating thumbnail can attract viewers. Make sure it’s eye-catching!
- Use Trending Hashtags: Including popular hashtags related to your content can help your Short appear in search results. Think about what’s trending and relevant.
- Keep it Concise: Remember, Shorts are designed to be quick! Aim for clarity and engagement within the first few seconds to hook your viewers.
- Include a Call to Action: Encourage viewers to like, comment, and subscribe. A simple “Don’t forget to subscribe for more!” can be effective!
- Post Consistently: Consistency is key! Regular uploads can help you build an audience and keep them engaged.
- Analyze Your Performance: Use YouTube analytics to see how your Shorts are performing. Pay attention to viewer retention and engagement metrics.
By following these tips, you’ll give your YouTube Short a fighting chance to shine in the vast sea of content out there. Happy creating!
How to Create a YouTube Short Video on Your iPad
Creating a YouTube Short video on your iPad is a simple yet effective way to share quick, engaging content with your audience. YouTube Shorts are designed to be short, vertical videos that capture attention quickly, making them perfect for mobile viewers. Follow the steps below to create your own YouTube Short on your iPad.
Step 1: Prepare Your Content
Before you start recording, it’s essential to plan your content. Consider the following:
- Choose a topic that resonates with your audience.
- Keep your video under 60 seconds.
- Think about a catchy hook to grab viewers' attention.
Step 2: Record Your Video
Use your iPad's built-in camera or an external app to record your video. Here’s how:
- Open the Camera app or a video editing app.
- Select the video mode and ensure it's set to 1080p or higher.
- Hold your iPad vertically for the best format.
- Tap the record button when you’re ready to start, and stop when you’re done.
Step 3: Edit Your Video
Editing is crucial for making your video engaging. Use iMovie or any preferred editing app to:
- Trim unnecessary parts.
- Add music or sound effects.
- Include text overlays or captions.
Step 4: Upload Your YouTube Short
Once your video is ready, upload it to YouTube:
- Open the YouTube app and tap the "+" icon.
- Select "Create a Short."
- Upload your edited video and add a catchy title and description.
- Hit "Upload" to share your Short with the world!
By following these steps, you can create engaging YouTube Shorts that captivate and entertain your audience. Start experimenting with different content ideas to see what resonates best!
Conclusion: Creating YouTube Shorts on your iPad is an accessible way to engage your audience with brief yet impactful videos, allowing you to showcase your creativity and connect with viewers in a fun format.