Ever found yourself lost in the endless rabbit hole of YouTube videos? Autoplay can make this experience even smoother by automatically playing the next video in line. In this blog post, we'll explore how to implement this feature directly into your own HTML code. Whether you're building a personal site or a professional portfolio, understanding YouTube's autoplay functionality is essential. Let's dive in!
Understanding YouTube's Autoplay Feature
YouTube's autoplay feature is designed to enhance viewer engagement by automatically playing the next video once the current one ends. This can be particularly useful for content creators and web developers looking to keep visitors on their pages longer. But how does this feature actually work? Let's break it down:
- Automatic Playback: Once you enable autoplay, YouTube will automatically queue the next suggested video based on the current video's content and your viewing history.
- User Control: Viewers can easily disable the autoplay feature if they prefer to have control over what plays next. This is a crucial aspect of user experience.
- Embedding Autoplay: When you embed a YouTube video on your website, you can include parameters in the embed code to enable autoplay. This allows you to provide a seamless viewing experience for your visitors.
Here’s a quick look at the parameters you can use when embedding a YouTube video:
| Parameter | Description |
|---|---|
| autoplay=1 | Starts playing the video automatically when the page loads. |
| loop=1 | Repeats the video automatically after it finishes. |
| playlist=VIDEO_ID | Specifies a playlist of videos to play one after another. |
By understanding how YouTube's autoplay feature works, you can create an engaging video experience on your website that keeps viewers hooked and coming back for more!
Also Read This: Understanding LinkedIn Impressions and Their Significance in Analytics
3. Setting Up Your HTML Document
Before we dive into autoplaying a YouTube video, let's ensure your HTML document is properly set up. It’s like preparing your canvas before painting a masterpiece!
Start by creating a new HTML file. You can name it something like autoplay.html. Here’s a simple structure to follow:
<!DOCTYPE html>
<html>
<head>
    <title>Autoplay YouTube Video</title>
</head>
<body>
    <!-- Your content will go here -->
</body>
</html>
In this basic layout:
- <!DOCTYPE html>: This declaration defines the document type and version of HTML.
- <html>: This tag wraps the entire HTML document.
- <head>: This section contains meta-information about the document, such as the title.
- <body>: This is where all the visible content goes.
Once your document is set up, you’re ready to move on to embedding your YouTube video. It’s a breeze!
Also Read This: Compile Recipes with Canva Recipe Book Template
4. Embedding the YouTube Video
Now that your HTML document is ready, let’s embed the YouTube video. This is the fun part where you bring your content to life!
To embed a YouTube video, you’ll need to grab the embed code from the YouTube website. Here’s how you do it:
- Go to the YouTube video you want to autoplay.
- Click on the Share button beneath the video.
- Select Embed from the options provided.
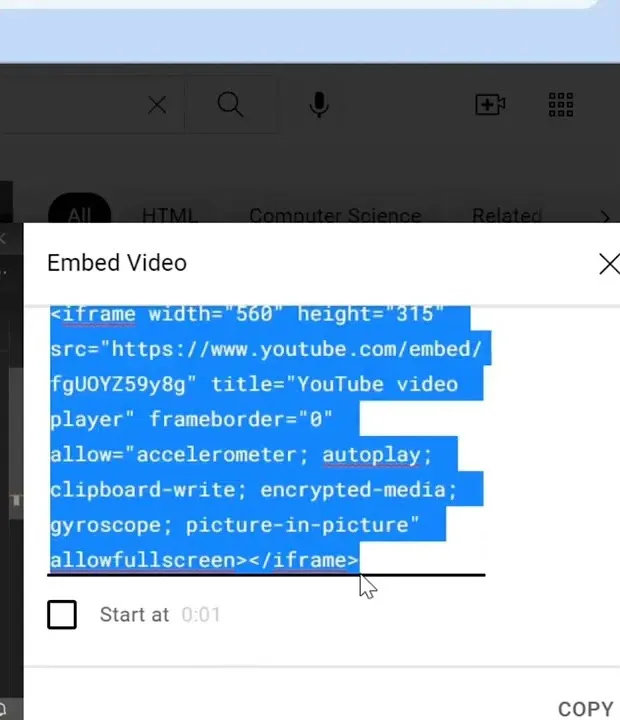
- You’ll see an iframe code. Copy this code (it looks something like this):
<iframe width="560" height="315" src="https://www.youtube.com/embed/VIDEO_ID?autoplay=1" frameborder="0" allowfullscreen></iframe>
Replace VIDEO_ID with the actual ID of your YouTube video. The critical part here is adding ?autoplay=1 at the end of the URL inside the src attribute. This tells the browser to start playing the video automatically when the page loads.
Now, paste this iframe code inside the <body> section of your HTML document:
<body>
    <iframe width="560" height="315" src="https://www.youtube.com/embed/VIDEO_ID?autoplay=1" frameborder="0" allowfullscreen></iframe>
</body>
And voilà! When you open your HTML file in a web browser, your YouTube video will start playing automatically. Isn’t that easy?
Also Read This: Discovering iStock Vectors for Designers
5. Enabling Autoplay in the Embed Code
Enabling autoplay for your YouTube videos is a straightforward process that requires a small tweak to the embed code. This feature can be useful for grabbing visitors' attention immediately when they land on your page. Let's dive into how to do this!
First, you need to obtain the embed code for your YouTube video. Here’s how:
- Go to the YouTube video you want to embed.
- Click on the Share button below the video.
- Select Embed from the options presented.
- Copy the provided embed code.
Now, to enable autoplay, you simply need to add a parameter to the embed code. Look for the URL that starts with https://www.youtube.com/embed/. You’ll append ?autoplay=1 to this URL.
Your final code should look something like this:
<iframe width="560" height="315" src="https://www.youtube.com/embed/VIDEO_ID?autoplay=1" frameborder="0" allow="autoplay; encrypted-media" allowfullscreen></iframe>Make sure to replace VIDEO_ID with the actual ID of your YouTube video. This simple addition tells the browser to start playing the video automatically as soon as the page loads. Just remember, some browsers may restrict autoplay functionality based on user settings, particularly if the video includes sound.
Also Read This: How to Delete Your YouTube Channel in 2024 and Permanently Remove Content
6. Testing the Autoplay Functionality
After you’ve set up your embed code with autoplay, it’s crucial to test whether it works as expected. Here’s a step-by-step guide to ensure everything is functioning properly:
1. *Open your HTML file: Load the HTML file in your preferred web browser where you included the autoplay embed code.
2. Observe the video: As the page loads, pay attention to whether the video starts playing automatically. If it does, congratulations! You’ve successfully enabled autoplay.
3. Check for sound: If your video has sound, make sure the volume is set appropriately. Some browsers may prevent autoplay if the video is set to play with sound by default.
4. Try different browsers: It’s essential to test the functionality across various browsers (Chrome, Firefox, Safari, etc.) as each may handle autoplay differently due to user settings.
5. Mobile testing:* Don’t forget about mobile devices! Open your webpage on a smartphone or tablet to see if the autoplay feature works there as well.
By following these steps, you can ensure your YouTube video is set to autoplay seamlessly across all platforms. If things aren’t working as they should, double-check your embed code for any mistakes and consider consulting the browser’s documentation on autoplay restrictions.
Also Read This: How to Delete Your Behance Account with Ease
7. Common Issues and Troubleshooting
Autoplaying YouTube videos in HTML can be a fantastic way to engage your audience, but it’s not without its hiccups. Here are some common issues you might encounter and tips on how to resolve them:
- Muted Autoplay Restrictions: Many web browsers have implemented policies that restrict autoplay functionality unless the video is muted. If your video isn’t playing automatically, ensure you've added the
mutedattribute to your video tag. - Browser Compatibility: Different browsers may handle autoplay differently. While Chrome may allow it, Firefox or Safari might not. Always test your implementation across various browsers to ensure consistent behavior.
- Ad Blockers: Some users may have ad blockers installed that can interfere with autoplay features. Be aware that if your video is flagged as an ad, it might not autoplay.
- Embedding Issues: If you’re embedding a video, double-check the embed code. Any discrepancies can prevent the video from functioning as intended. Ensure that the
allowattribute includesautoplay. - HTML/CSS Conflicts: Sometimes, CSS styles or JavaScript can conflict with the video player. Inspect your code for any conflicts that might be preventing the video from playing.
By being aware of these issues and utilizing the tips above, you can troubleshoot and fix autoplay problems, ensuring a smoother user experience on your site.
8. Conclusion
In conclusion, enabling autoplay for YouTube videos in your HTML can significantly enhance the engagement level of your content. It allows you to catch your audience's attention right from the start. However, it’s crucial to do this thoughtfully, keeping user experience in mind. Here are some key takeaways:
- Use the Proper Syntax: Ensure you’re using the correct HTML syntax for embedding videos. Remember to include the
autoplayandmutedattributes. - Test Across Platforms: Regular testing on different devices and browsers will help you identify any playback issues early on.
- Respect User Preferences: Always consider the user experience. Offering an option to control autoplay can be a great way to respect your audience's preferences.
- Stay Updated: Keep an eye on updates from YouTube and browser policies regarding autoplay to adapt your strategies accordingly.
By understanding the intricacies of autoplay and applying the best practices discussed, you can create a more dynamic and engaging web experience. Happy embedding!