Transferring videos from your iPhone to YouTube can seem daunting at first, but it doesn't have to be! Whether you want to share your latest vacation videos, creative projects, or vlogs, the process can be smooth and straightforward. In this guide, we’ll walk you through the essential steps and tips to effortlessly upload your videos from your iPhone to YouTube, letting you focus on sharing your creativity with the world.
Prerequisites for Video Transfer

Before diving into the process of transferring videos from your iPhone to YouTube, it’s essential to ensure that you have everything you need. Here’s a quick checklist to get you started:
- A YouTube Account: Make sure you have an active YouTube account. If you don’t have one, signing up is quick and free!
- iPhone with Video Content: Ensure your iPhone has the videos you want to upload. You can check your camera roll or photo library to find them.
- Stable Internet Connection: A reliable Wi-Fi connection is crucial for uploading videos without interruptions. Uploading over mobile data may consume a lot of your plan’s data.
- YouTube App: Download the latest version of the YouTube app from the App Store. This will ensure compatibility and access to all the latest features.
- Video Editing Apps (Optional): If you want to polish your videos before uploading, consider downloading video editing apps like iMovie or Adobe Premiere Rush. They can help you trim, add effects, or enhance your videos.
Having these prerequisites in place will make the video transfer process seamless and enjoyable. Once you’re set, you’ll be ready to share your amazing content with your audience!
Also Read This: How to rotate an Image 90 Degrees?
Steps to Transfer Videos from iPhone to YouTube
Transferring videos from your iPhone to YouTube is a breeze once you know the steps. Let’s break it down into easy-to-follow instructions:
- Open the YouTube App: First things first, launch the YouTube app on your iPhone. Make sure you're logged into your account. If you don’t have the app, you can download it from the App Store.
- Tap the Create Button: Look for the plus (+) icon at the bottom center of your screen. This is where the magic starts! Tap on it to begin.
- Select Upload a Video: Once you tap the create button, a menu will pop up. Choose “Upload a video” from the options that appear. This will take you to your photo library.
- Choose Your Video: Browse through your videos and select the one you want to upload. You can use filters to make your search easier. Once you find it, tap on it to proceed.
- Edit Your Video: You’ll have the option to edit your video’s title, description, and privacy settings. Make it catchy and informative! You can also add tags to help people find your video.
- Hit Upload: After you’ve made all your edits, tap on “Next” and then “Upload.” Your video will start uploading, and you’ll see a progress bar indicating how much time is left.
And voilà! You’ve successfully transferred your video from your iPhone to YouTube. It’s that simple!
Also Read This: Understanding the Cost and Features of Adobe Stock Premium Plan
Troubleshooting Common Issues
Even though transferring videos from your iPhone to YouTube is usually straightforward, you might encounter a few hiccups along the way. Here are some common issues and easy fixes:
| Issue | Possible Solutions |
|---|---|
| Video Won't Upload |
|
| Video Quality is Poor |
|
| App Crashes When Uploading |
|
If you continue to face issues, consider checking the YouTube Help Center for more detailed guidance. Happy uploading!
Effortlessly Transfer Videos from Your iPhone to YouTube
Transferring videos from your iPhone to YouTube can seem daunting, but with the right methods, it can be an effortless process. Whether you're a vlogger, a content creator, or just someone who wants to share memories, uploading videos to YouTube from your iPhone is easier than ever. Here are some methods you can use:
Method 1: Using the YouTube App
The simplest way to upload videos is through the YouTube app itself. Follow these steps:
- Open the YouTube app on your iPhone.
- Tap on the '+' icon at the bottom of the screen.
- Select 'Upload a video'.
- Choose the video you wish to upload from your camera roll.
- Add a title, description, and tags as needed.
- Set your privacy settings (Public, Unlisted, or Private).
- Tap 'Upload' to start the process.
Method 2: Using iMovie and YouTube
If you want to edit your videos before uploading, you can use iMovie:
- Open iMovie and create a new project.
- Edit your video as desired.
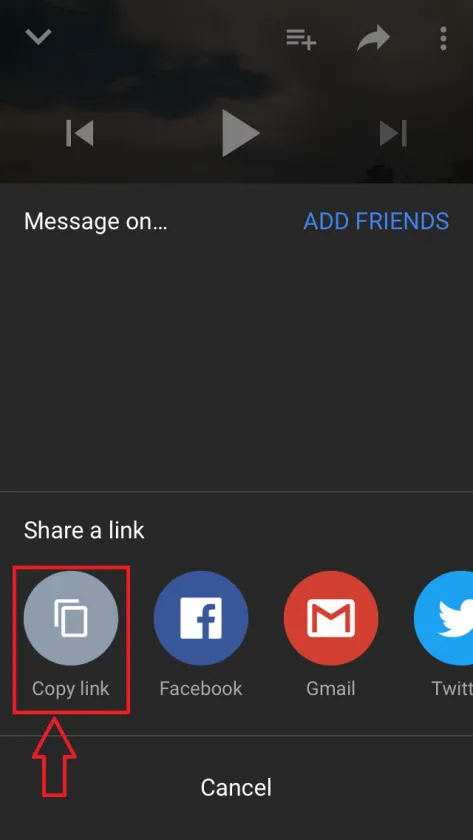
- Once done, tap the 'Share' button.
- Select 'YouTube' and fill in the required information.
- Tap 'Publish' to upload directly to your channel.
Method 3: Transfer via Computer
If you prefer to upload videos from your computer:
- Connect your iPhone to your computer using a USB cable.
- Transfer the video files to your computer.
- Log in to YouTube on your browser and click 'Upload'.
- Select the video files from your computer to upload.
In conclusion, transferring videos from your iPhone to YouTube can be done quickly and easily through various methods, whether using the YouTube app directly, editing with iMovie, or transferring via a computer. Choose the method that best fits your needs to share your creativity with the world.