Changing your name on LinkedIn can be a significant step, whether you're married, divorced, or simply wish to use a different name professionally. It's essential to ensure your online presence reflects your true identity, as LinkedIn is a platform where networking and professional connections thrive. In this guide, we’ll walk you through the steps to update your name on
Step 1: Log into Your LinkedIn Account
Before you can make any changes to your name, you need to access your LinkedIn account. Here’s how to do it:
- Open Your Browser: Launch your preferred web browser on your computer or mobile device.
- Go to LinkedIn: Type in the URL www.linkedin.com and hit enter.
- Enter Your Credentials: On the homepage, enter your registered email address and password in the respective fields. Make sure you’re using the account you want to change.
- Click on 'Sign In': After entering your details, click the 'Sign In' button to access your profile.
If you have enabled two-factor authentication for added security, you’ll need to verify your identity using the method you’ve set up (like a text message or authentication app).
Once logged in, you’re ready to navigate to your profile settings, where you can initiate the name change process. Remember, keeping your LinkedIn profile current is crucial for making professional connections and showcasing your career journey.
Also Read This: Design Playbills with Canva Playbill Template
Step 2: Navigate to Your Profile
Alright, let’s dive into the next step! To change your name on LinkedIn, the first thing you need to do is navigate to your profile. It’s super simple! Just follow these steps:
- Log in to your LinkedIn account.
- Once you're logged in, look for your profile photo or name at the top of the homepage. Click on it!
- This will take you directly to your profile page, where you can see your current information, including your name, headline, and experience.
Now that you’re on your profile, take a moment to look around. You’ll see all the sections that make up your professional identity. This is where the magic happens! If you’ve never updated your profile before, you might be surprised at the amount of information you can share.
As you scroll down, don’t forget that this is also a great opportunity to review other elements of your profile. Make sure your photo is up-to-date and that your headline accurately reflects your current role or aspirations. A polished profile can make a huge difference in how you're perceived on LinkedIn!
Also Read This: Evaluating the Legitimacy and Reliability of Storyblocks for Stock Footage and Audio
Step 3: Click on the 'Edit' Icon
Now that you’re on your profile page, it’s time to make that name change! This step is as straightforward as it gets. Here’s what you need to do:
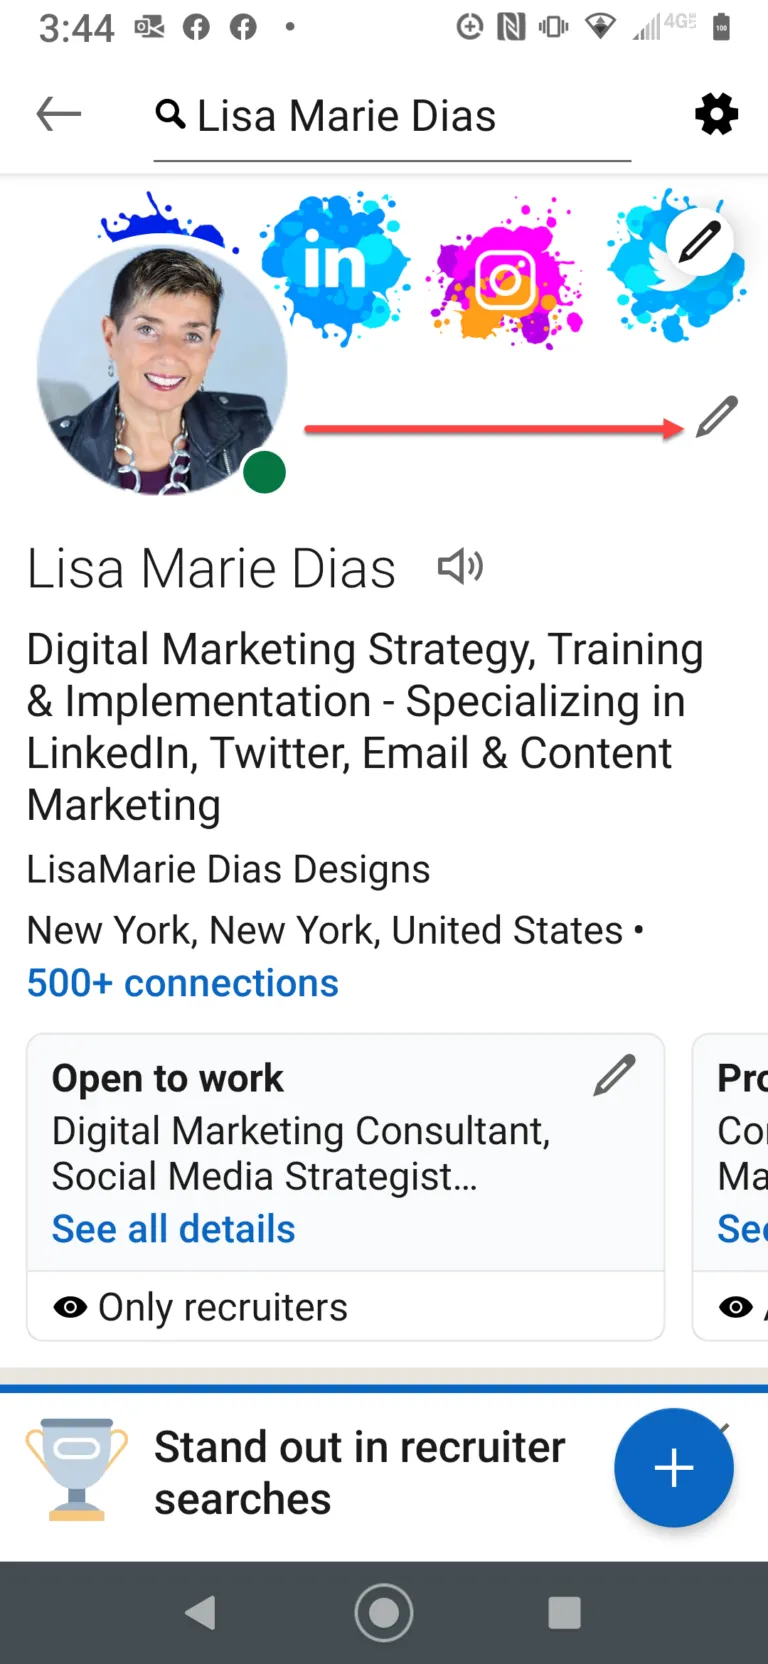
- Look for the 'Edit' icon, which resembles a pencil. It’s usually located right next to your profile picture and your name.
- Click on that icon, and voilà! You’ll be taken to a new page where you can edit your personal information, including your name.
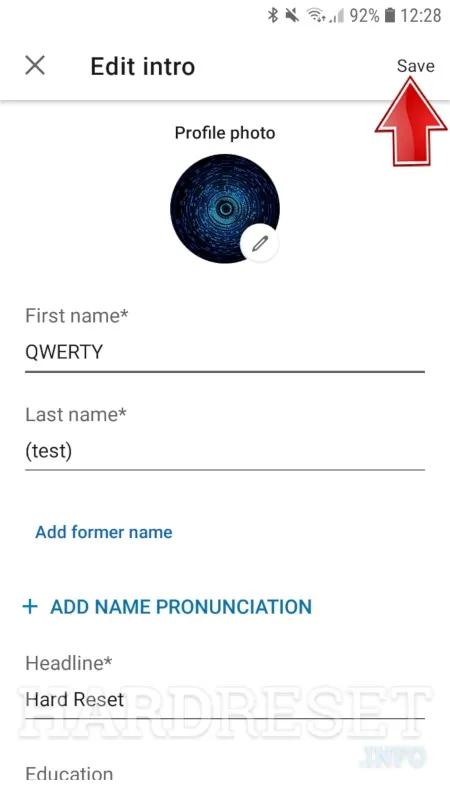
In this edit mode, you’ll see fields for your first name, last name, and possibly even a spot for your preferred pronunciation. This is your chance to input the new name you want to display. Make sure you double-check the spelling and that it matches how you want others to recognize you.
Don’t forget to click ‘Save’ once you’re done. It’s a small step, but it’s crucial to make sure that your changes are applied!
Also Read This: Tips for Using ShootProof Correctly
Step 4: Update Your Name
Now that you’re in the name settings section, it’s time to make the change you’ve been waiting for. Start by clearing out your old name. Don’t worry; this is just a temporary step! You can either type in your new name directly or copy and paste it from a document if you’ve prepared it beforehand.
As you type, keep these tips in mind:
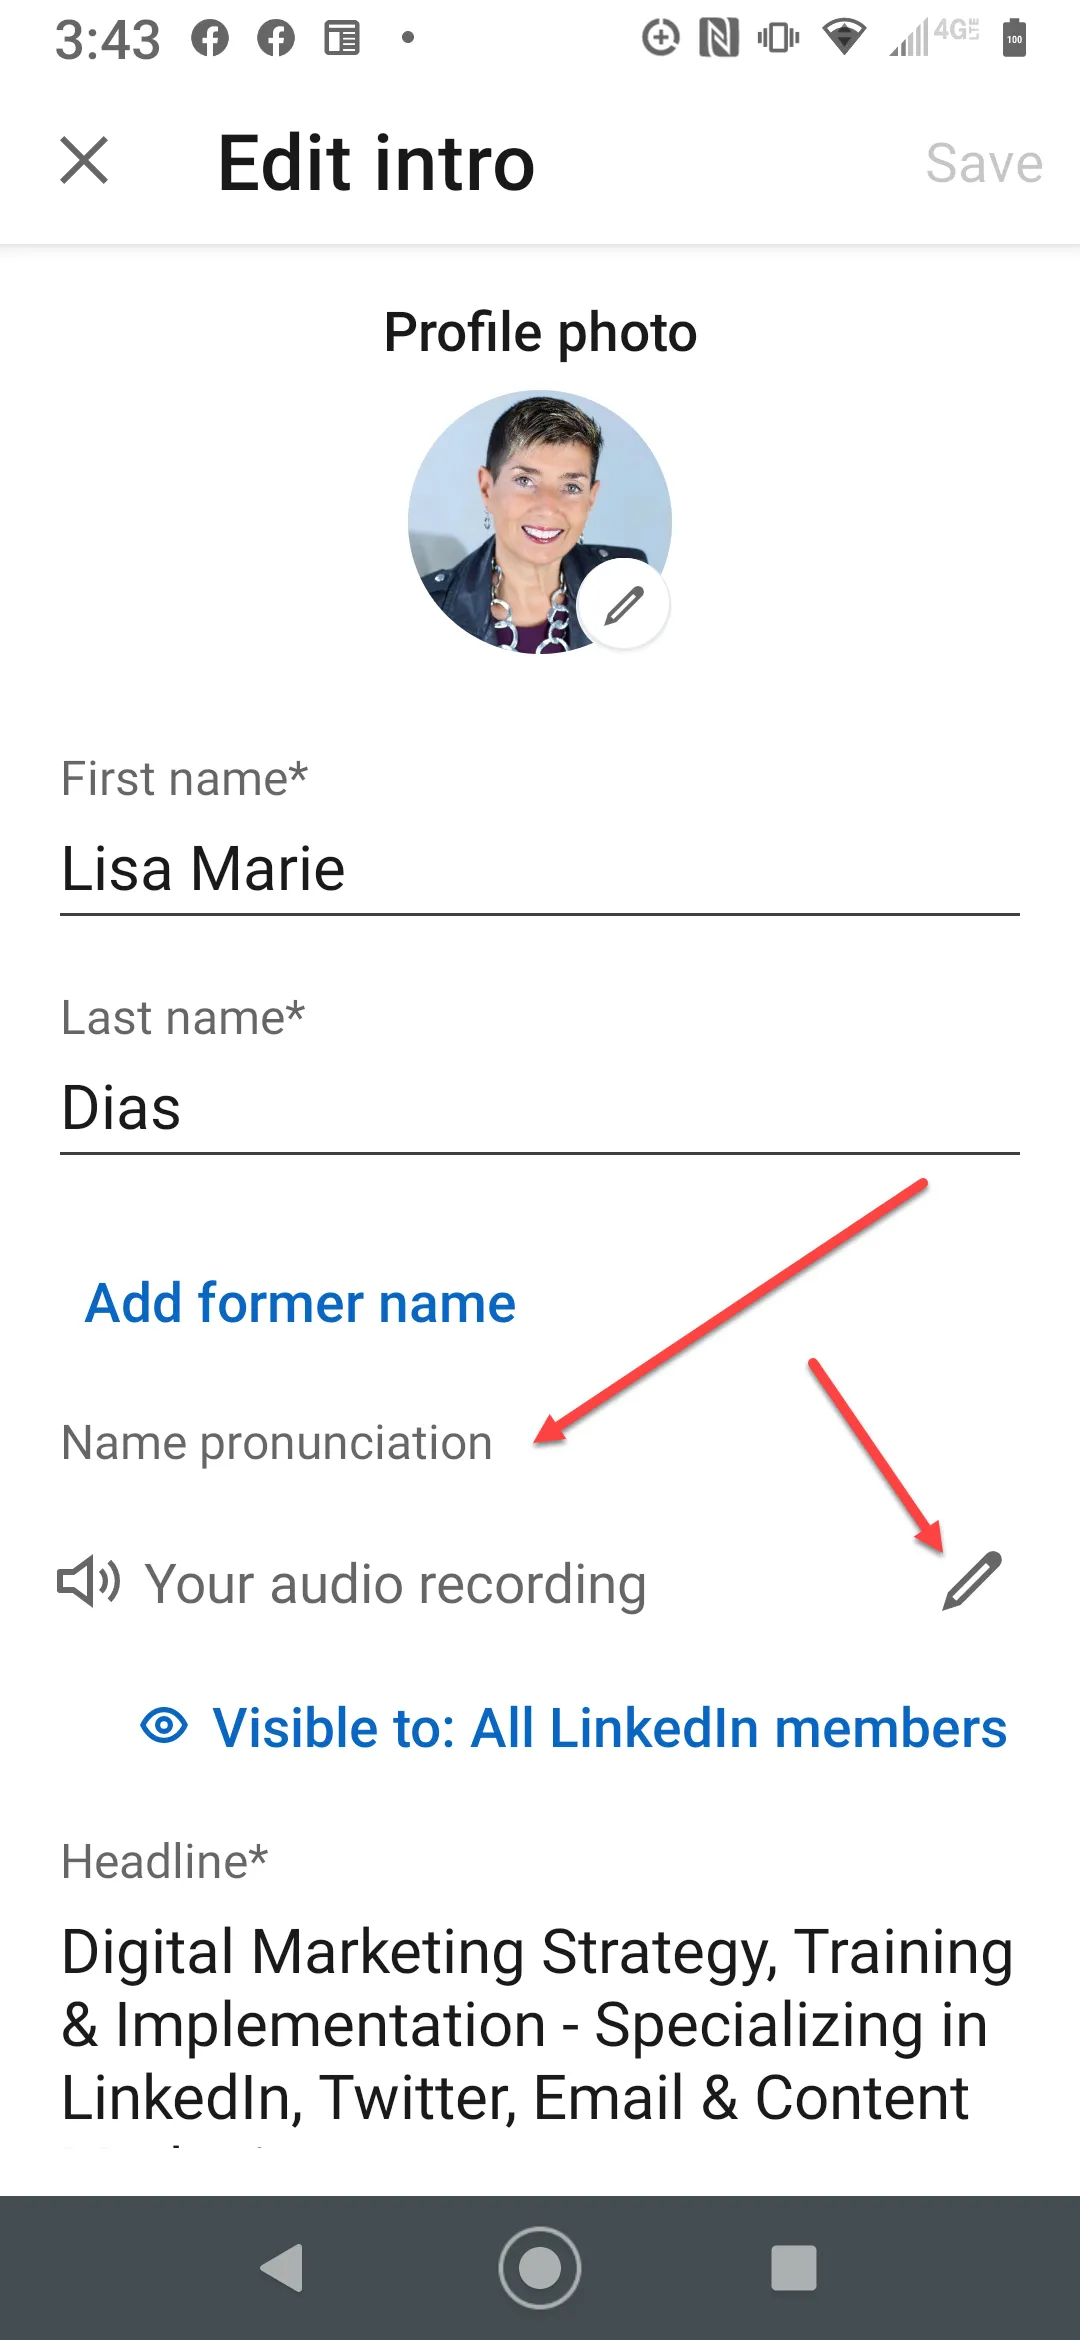
- First Name: Here, you should place your first name as you want it displayed. If you have a middle name or initial you want to include, feel free to add it in this field.
- Last Name: This is where your surname goes. Ensure that it reflects how you want to be recognized professionally.
- Pronunciation: LinkedIn allows you to add pronunciation guides for your name. This is particularly useful if your name is often mispronounced in professional settings.
After entering your new name, double-check for any spelling mistakes. LinkedIn is your professional platform, and you want to make a great impression right from the start!
Also Read This: Does Mark Zuckerberg Have a LinkedIn Profile
Step 5: Save Changes
You’re almost there! After updating your name, the final step is to ensure your changes are saved. Look for the “Save” button, usually located at the bottom of the page. Clicking this button is crucial—if you skip this step, your new name won’t be updated, and you’ll have to redo everything!
Once you hit save, LinkedIn will likely prompt you with a confirmation message, letting you know your profile has been updated. It’s a good idea to review your profile afterward to see how your new name looks in context.
Here’s a quick checklist:
| Action | Status |
|---|---|
| Entered First Name | ✔️ |
| Entered Last Name | ✔️ |
| Saved Changes | ✔️ |
And just like that, you’re all set! Your LinkedIn profile now reflects your new name, ready to connect with professionals under your updated identity.
Also Read This: Understanding the Cost of Rumble Boxing Classes and How to Reserve Your Spot
Step 6: Verify Your Updated Profile
Once you've taken the necessary steps to change your name on LinkedIn, it’s crucial to verify that everything looks just right. This not only ensures your profile reflects your current identity but also helps maintain your professional image. Here’s how you can go about it:
- Check Your Profile Visibility: Make sure your new name appears correctly on your profile page. It should be displayed at the top, right under your profile picture.
- Review Your Connections: Navigate to your connections and see if they can still recognize you. This can help you determine if any additional updates are needed.
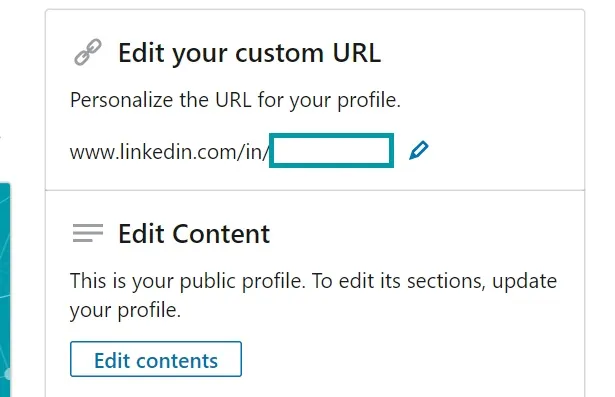
- Examine the URL: When you change your name, your LinkedIn profile URL might also need updating. To ensure consistency, check if your old name still appears in the URL.
- Look for Notifications: Sometimes, LinkedIn sends out notifications when a significant change occurs. Check your notifications to see if your name change is acknowledged.
- Ask for Feedback: Don’t hesitate to reach out to a trusted connection for their thoughts. They can give you a fresh perspective on how your profile appears to others.
Taking a few moments to verify these details can save you from potential misunderstandings in your professional network. It’s all about making sure your online presence aligns perfectly with your professional identity!
Conclusion
Changing your name on LinkedIn might seem like a small task, but it’s a significant step in managing your professional identity. By following the steps outlined above, you ensure that your profile accurately reflects who you are. Here’s a quick recap:
| Steps to Change Your Name | Status |
|---|---|
| Log into LinkedIn | ✅ Completed |
| Access your Profile Settings | ✅ Completed |
| Update your name | ✅ Completed |
| Save Changes | ✅ Completed |
| Verify Your Updated Profile | ✅ Completed |
Don’t forget, this is just one aspect of your LinkedIn journey. Keep your profile updated, engage with your network, and continue building your personal brand. With the right tools and a bit of effort, you can make LinkedIn work for you!