Uploading a video to YouTube can seem daunting, especially if you're new to video editing or content creation. But don't worry! If you're using iMovie, the process is both straightforward and user-friendly. In this guide, we'll walk you through the steps to get your masterpiece from iMovie to YouTube, ensuring your content reaches your audience effortlessly. Let’s dive in and make video sharing a breeze!
Preparing Your Video in iMovie
Before you upload your video to YouTube, it's essential to ensure that everything is polished and ready to shine. Here’s how to prepare your video in iMovie:
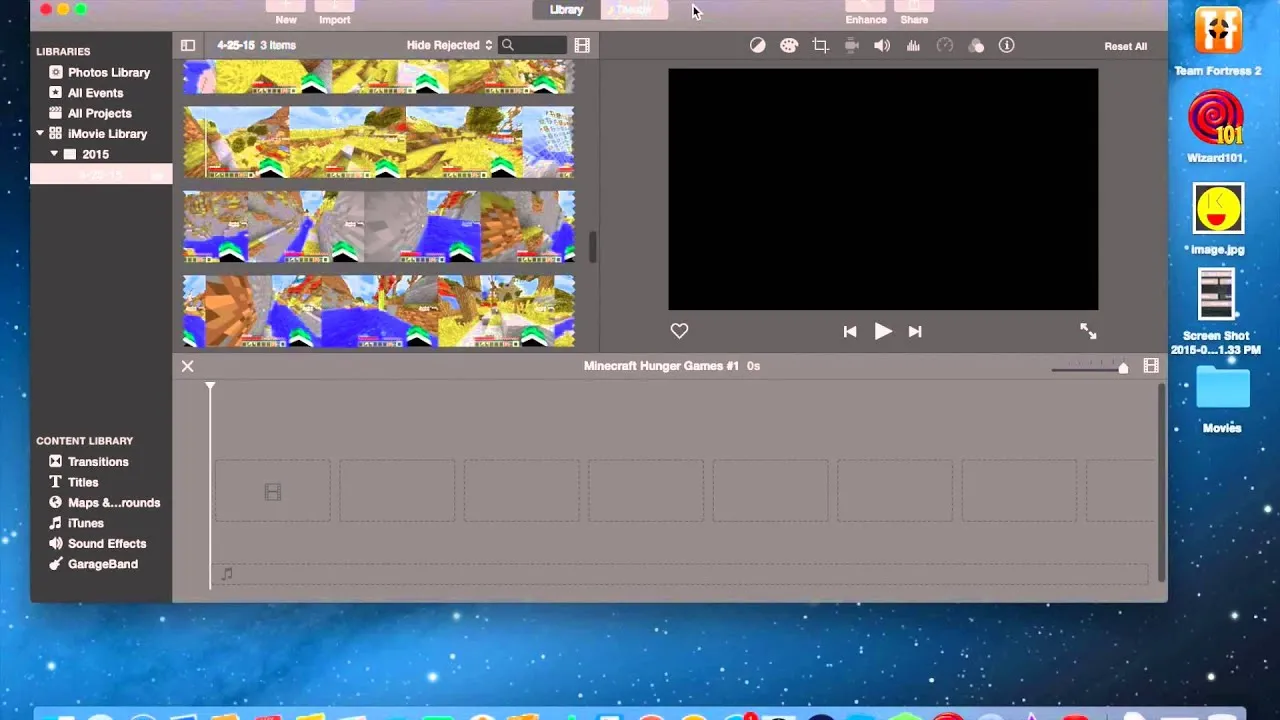
- Open iMovie: Launch the iMovie application on your Mac or iOS device.
- Create a New Project: Click on “Create New” and select “Movie.” This will open a fresh workspace for your video.
- Import Your Clips: Drag and drop your video files into the project timeline or use the “Import Media” option to select videos from your library.
Now that you have your clips ready, it’s time to start editing! Here are some crucial steps:
- Trim and Arrange Clips: Select clips in the timeline and trim them to remove unnecessary parts. Rearrange them by dragging to achieve the desired flow.
- Add Transitions: To make your video smooth, add transitions between clips. Simply click on the “Transitions” tab and drag your choice between clips.
- Incorporate Titles and Text: Make your video engaging by adding titles or captions. Click on the “Titles” tab, select a style, and customize the text.
- Use Audio: Don’t forget sound! You can add background music or voiceovers by going to the “Audio” tab. Ensure the audio levels are balanced for clarity.
Once you're satisfied with your edits, it's time to export your video for uploading. Just click on the “File” menu, select “Share,” and then “File” to export your project in the best quality for YouTube.
Also Read This: Why Your YouTube Shorts Are Not Getting Views
Exporting Your Video from iMovie
Once you've finished editing your video in iMovie, the next step is to export it. This is a crucial part of the process because it prepares your video for uploading to YouTube. Here’s how to do it:
- Open your project in iMovie.
- Click on the File menu at the top left corner.
- Select Share and then choose File from the submenu.
- A dialog box will pop up. Here, you can adjust settings such as:
- Resolution: Choose from options like 720p, 1080p, or 4K, depending on the quality you desire.
- Quality: Options include Low, Medium, High, and Best (ProRes). Higher quality means larger file size.
- Compress: Select Better Quality or Faster depending on your needs.
Once exporting is complete, your video is ready for upload to YouTube!
Also Read This: Removing a Playlist from Your YouTube Library
Creating a YouTube Account (If Necessary)
If you’re new to YouTube or haven’t created an account yet, fear not! Setting one up is a breeze and only takes a few minutes. Here’s a step-by-step guide:
- Visit the YouTube website at www.youtube.com.
- Click on the Sign In button located in the top right corner.
- If you don’t have a Google account, you’ll be prompted to create one. Click on Create account.
- You’ll have the option to create an account for yourself or for your business. Choose the appropriate option.
- Fill in the required information such as your name, email address, and password. Make sure to choose a strong password!
- After entering your details, click Next. You may need to verify your email address.
- Once verified, return to YouTube and sign in with your new Google account credentials.
And just like that, you have your YouTube account ready to go! You can now begin uploading your videos and sharing your content with the world.
Also Read This: eStockPhoto: Essential for Marketing
5. Uploading Your Video to YouTube
Uploading your masterpiece to YouTube is a breeze, especially when you've created it using iMovie. Once you've put the finishing touches on your video, follow these simple steps to get it online!
- Export Your Video: First, you need to export your video from iMovie. Click on the File menu, then select Share and choose File again. Adjust the resolution and quality settings according to your preference, and click Next to save it to your desired location.
- Open YouTube: Navigate to the YouTube website or open the YouTube app on your device. Make sure you’re signed into your account. If you don’t have one, you’ll need to create it first!
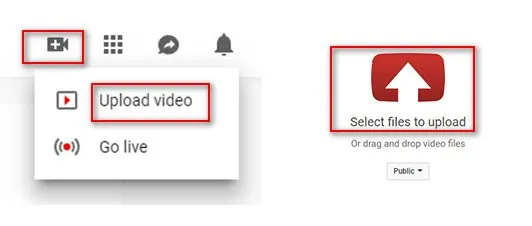
- Upload Your Video: Click on the camera icon with a "+" sign (usually found at the top right corner). Select Upload Video. This opens the YouTube Studio.
- Select Your File: Drag your exported video file into the upload window or click Select Files to browse for it. YouTube will start to upload your video.
- Processing: While your video is uploading, YouTube will process it. This could take a few minutes, depending on the size of your video.
And just like that, your video is on its way to YouTube!
Also Read This: How to Change and Upload Your Facebook Profile Picture
6. Adding Titles, Descriptions, and Tags
Now that your video is uploaded, it’s time to make it shine with a catchy title, a detailed description, and relevant tags. These elements are crucial for attracting viewers and improving your video’s discoverability.
- Crafting a Title: Your title should be engaging and reflect the content of your video. Keep it under 60 characters for the best visibility. For example, instead of “My Trip to the Beach,” consider “Exploring Hidden Beach Gems!”
- Writing a Description: Use the description box to give viewers a sneak peek of what they can expect. Include keywords that relate to your content. Start with a brief summary, then add links to your social media or related videos. A good format might look like this:
- Intro: What is this video about?
- Details: Any additional information or context.
- Call to Action: Encourage viewers to like, subscribe, or comment!
By carefully crafting these elements, you're setting your video up for success on YouTube!
Also Read This: Strategies to Get Around Fortiguard Downloader Restrictions
7. Publishing Your Video
Once you’ve finished editing your video in iMovie, it’s time to share your masterpiece with the world! Publishing your video on YouTube from iMovie is a straightforward process that will have your content online in no time. Here’s a simple step-by-step guide to help you through it:
- Export Your Project: First, you need to export your video from iMovie. Click on the File menu, then select Share and choose File.... Here, you can adjust the resolution, quality, and compression settings to fit your needs.
- Save the Video: Choose a name and location for your exported file, then click Next and hit Save. Wait for iMovie to finish exporting your video; this might take a few minutes depending on the length and complexity of your project.
- Open YouTube: Navigate to YouTube and sign in to your account. If you don’t have an account, you’ll need to create one first.
- Upload Your Video: Click on the camera icon with a "+" sign (located at the top right corner). Select Upload Video, and then drag and drop your exported video file into the upload window or click Select Files to browse your computer.
- Add Details: While your video uploads, fill in the title, description, and tags. Make sure to create a catchy title and an informative description to attract viewers.
- Set Visibility: Decide if you want your video to be public, unlisted, or private, and then click Publish when you're ready!
And just like that, your video is live on YouTube! Don’t forget to share your new creation on social media to get the word out!
8. Conclusion
Congratulations! You've successfully uploaded your video to YouTube using iMovie. This process not only allows you to share your creativity but also connects you with a vast audience eager for fresh content. Remember, every great video begins with careful planning, editing, and sharing.
As you continue to create, keep in mind the following tips:
- Engage Your Audience: Respond to comments and ask for feedback to build a community around your content.
- Consistency is Key: Regular uploads can help maintain audience interest and grow your channel.
- Learn and Adapt: Analyze your video performance through YouTube Analytics and adjust your strategies accordingly.
Whether you're creating vlogs, tutorials, or entertaining skits, every video is a step toward honing your skills and finding your unique voice in the digital world. So, keep creating, keep sharing, and most importantly, have fun with it!