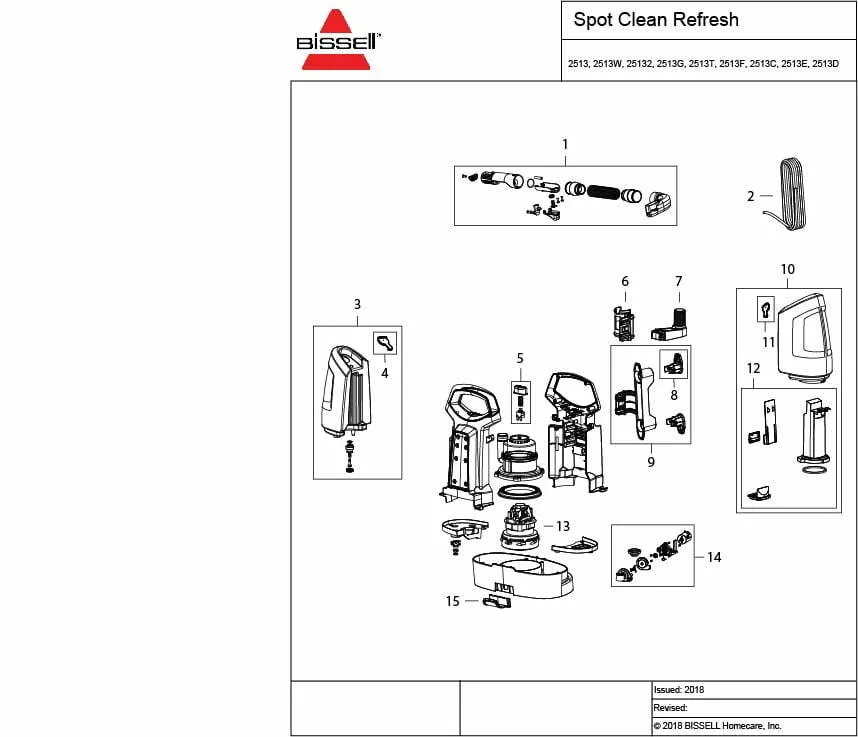
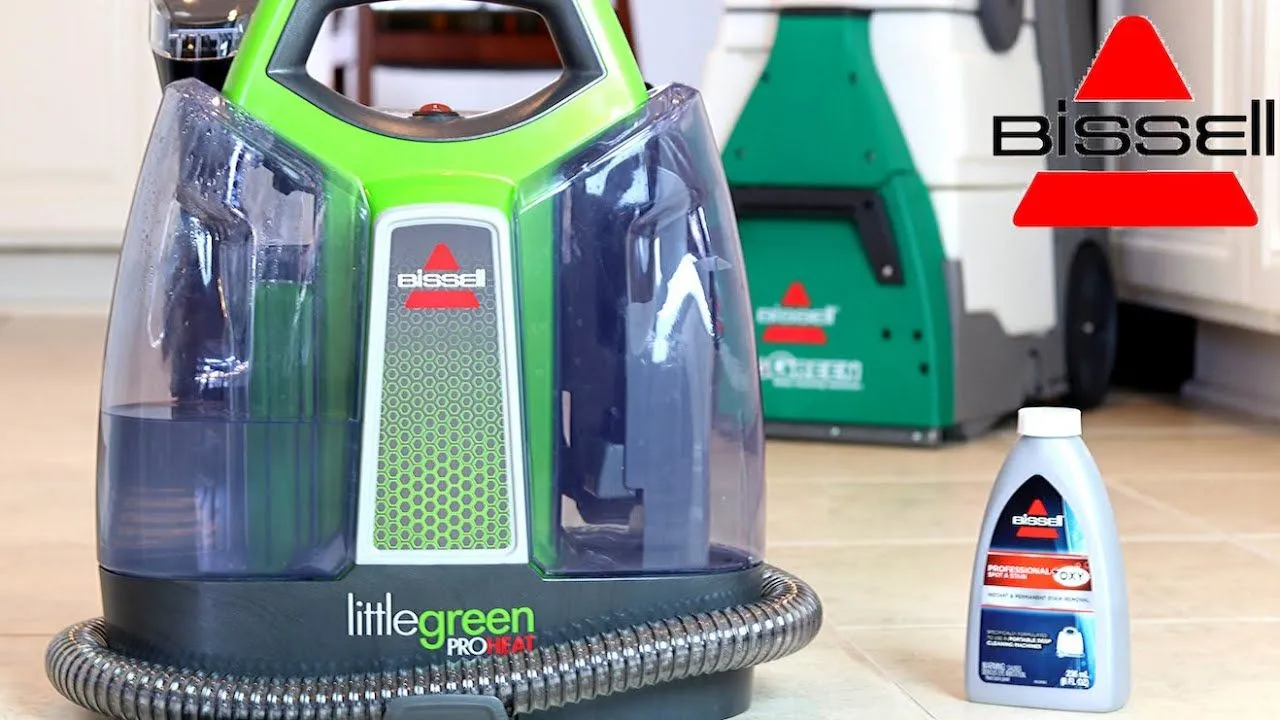
If you're a DIY enthusiast looking to dive into the world of cleaning and maintenance, understanding the inner workings of your tools can be incredibly rewarding! Today, we’re focusing on the Bissell Little Green collection tank. This compact yet powerful cleaner is a favorite among many for tackling tough stains and spills. Knowing how to disassemble the collection tank not only helps you keep it in tip-top shape, but it’s also a fun project that can enhance your cleaning skills. Let’s jump right into it!
Tools and Materials Needed
Before you start disassembling the Bissell Little Green collection tank, it's essential to gather the right tools and materials. Having everything ready will make the process smoother and more enjoyable. Here’s what you’ll need:
- Screwdriver Set: A set of Phillips and flathead screwdrivers will help you remove any screws holding the tank together.
- Plastic Pry Tools: These are great for gently prying open parts without damaging the plastic.
- Soft Cloth: Use this to wipe down any dust or residue inside the tank.
- Bucket or Basin: To catch any leftover water or debris when you disassemble the tank.
- Rubber Gloves: Protect your hands from any cleaning solutions or dirt during the process.
- Flashlight: A bright light can help you see inside the tank clearly, especially in those hard-to-reach areas.
Having these tools and materials on hand ensures a hassle-free experience as you take apart your Bissell Little Green collection tank. Remember, working carefully and methodically will not only protect your equipment but also enhance your DIY skills!
Also Read This: How to Get 1st Degree Connections on LinkedIn
Step-by-Step Disassembly Process
Disassembling the Bissell Little Green Collection Tank is a straightforward task, perfect for DIY enthusiasts eager to maintain or repair their cleaning machine. Follow these steps to ensure a smooth process:
- Gather Your Tools: Before starting, make sure you have the following items:
- Phillips screwdriver
- Flathead screwdriver
- Soft cloth or rag
- Bucket or basin (for any residual water)
And there you have it! A simple disassembly process that can extend the life of your Bissell Little Green.
Also Read This: How to Block YouTube Ads on Your iPhone App for a Better Viewing Experience
Common Issues and Troubleshooting

Even the most reliable machines can have hiccups. Here are some common issues you might encounter with the Bissell Little Green Collection Tank, along with troubleshooting tips:
| Issue | Possible Cause | Solution |
|---|---|---|
| Water Leakage | Misaligned lid or cracked tank | Check alignment and ensure the lid is sealed properly. Inspect for cracks and replace if necessary. |
| Poor Suction | Clogged filter or hose | Remove and clean the filter. Check hoses for blockages and clear them out. |
| Tank Won't Detach | Debris or debris buildup | Inspect the area around the tank for any debris or buildup that may be causing it to stick. |
By being proactive and addressing these issues, you can ensure your Bissell Little Green remains in top shape for all your cleaning needs!
Also Read This: How to Upload a Video on LinkedIn
Reassembly Tips
Reassembling your Bissell Little Green Collection Tank can feel like putting together a jigsaw puzzle, but it doesn't have to be overwhelming! Here are some handy tips to make sure everything goes back together smoothly:
- Organize Your Parts: Lay out all the components in the order you removed them. This visual aid will help you remember how everything fits together.
- Clean as You Go: Before reassembling, take a moment to clean any parts that may have accumulated dirt or debris during disassembly. A clean tank will ensure optimal performance.
- Check Seals and Gaskets: Inspect any seals or gaskets for wear and tear. Replacing worn components can prevent leaks and extend the lifespan of your machine.
- Follow the Manual: Refer back to your user manual for guidance on the correct order of assembly. It can be a lifesaver!
- Take Your Time: Don’t rush the process. If something doesn’t seem to fit, double-check your alignment and try again.
Once you’ve reassembled the tank, make sure to test it out before tackling a full cleaning job. Fill it with water and check for any leaks. If everything holds, you’re good to go!
Conclusion
Disassembling the Bissell Little Green Collection Tank can be a rewarding project for DIY enthusiasts. Not only does it give you a better understanding of your cleaning machine, but it also allows you to maintain and extend its lifespan. By carefully following the steps outlined above and keeping your reassembly tips in mind, you’re well on your way to becoming a pro at tank maintenance.
Remember, regular cleaning and occasional disassembly can keep your Little Green running like new. Plus, you’ll save money on repairs and replacements in the long run! Embrace your inner DIY spirit, and don’t hesitate to dive into your next cleaning project with confidence. Happy cleaning!