Getty Images is a renowned platform that connects photographers and visual creators with businesses and individuals seeking high-quality images. Founded in 1995, it has grown into one of the largest stock photography agencies in the world. With millions of images, videos, and music clips, Getty Images offers a vast library that caters to various needs—from marketing campaigns to editorial use. For photographers, it's not just a marketplace; it's an opportunity to showcase your talent and earn money. So, if you're considering uploading your photos, you're in for an exciting journey!
Understanding the Requirements for Submission
Before diving into the exciting world of Getty Images, it’s crucial to understand the submission requirements. This ensures that your photos have the best chance of being accepted and showcased. Here’s a breakdown of what you need:
- Image Quality: Getty Images prioritizes high-resolution images. Always aim for a minimum resolution of 300 DPI (dots per inch). This means your images should be at least 3000 pixels wide to meet printing standards.
- Content Guidelines: Adhere to the content guidelines set by Getty. Your photos should be original, well-composed, and free from excessive noise or blur.
- Model and Property Releases: If you're photographing people or private property, you’ll need to secure model and property releases. This legal documentation gives you permission to use their likeness or property in your images.
- Metadata: Providing accurate metadata is essential. This includes titles, descriptions, and keywords that help your images get discovered. Think about what potential buyers might search for!
- Copyright Ownership: Ensure you own the copyright to your images. Submitting photos you’ve taken yourself is the best way to avoid legal issues.
By understanding these requirements, you can streamline your submission process and increase your chances of success on Getty Images!
Also Read This: How to Clear History on Dailymotion for a Clean Slate
Creating an Account on Getty Images
Getting started with Getty Images is pretty straightforward, and it all begins with creating your account. Here’s a step-by-step guide to help you through the process:
- Visit the Getty Images website: Open your preferred web browser and go to Getty Images.
- Sign Up: Look for the “Sign Up” or “Join” button, usually located at the top right corner of the homepage. Click it to start.
- Select an Account Type: Choose whether you want a contributor account or a buyer account. For uploading photos, you’ll need the contributor account.
- Fill in Your Details: Provide your email address, create a secure password, and fill out any required personal information. Make sure your email is valid since you’ll need it for verification.
- Agree to Terms: Carefully read Getty Images' terms and conditions. It’s important to understand the rules of the platform before agreeing.
- Verify Your Email: After signing up, check your email for a verification message from Getty Images. Click the link provided to confirm your account.
- Complete Your Profile: Once verified, log in to your account and complete your profile. Add a profile picture and a short bio that showcases your photography style.
And there you have it! Your account is ready, and you’re one step closer to sharing your beautiful photos with the world.
Also Read This: Earnings Potential with Adobe Stock
Preparing Your Photos for Upload
Once your Getty Images account is set up, it’s time to prepare your photos for upload. Proper preparation ensures that your images meet the site’s standards and stand out to buyers. Here’s how to do it:
- Choose the Right Photos: Select images that are high-quality, visually engaging, and relevant to current trends. Consider subjects that appeal to a wide audience, like nature, lifestyle, or business.
- Edit Your Images: Use photo editing software to enhance your images. Adjust the brightness, contrast, and sharpness, and consider cropping for better composition. Tools like Adobe Lightroom or Photoshop are great options.
- Check Resolution: Ensure your images have a minimum resolution of 300 dpi (dots per inch) for print quality. Most stock sites prefer images that are at least 4000 x 3000 pixels.
- Name Your Files Wisely: Use descriptive filenames that include relevant keywords. For example, instead of “IMG1234.jpg,” use “sunset-beach-vacation.jpg.” This helps with SEO and makes your images easier to find.
- Add Metadata: Filling in metadata like title, description, and keywords is crucial for discoverability. Use specific keywords that potential buyers might search for.
- Review Licensing Options: Understand the different licensing types available on Getty Images, such as royalty-free or rights-managed, and choose the best option for your images.
By following these steps, you’ll ensure your photos are not only ready for upload but also optimized for success on Getty Images!
Also Read This: A Beginner's Guide to Bookmarking YouTube Videos for Quick Access
Uploading Your Photos to Getty Images
So, you’ve taken some stunning photos and are ready to share them with the world through Getty Images! The process is pretty straightforward, but let’s break it down step by step to ensure you don’t miss anything crucial.
- Create a Contributor Account: First things first, you need an account. Head over to the Getty Images Contributor portal and fill out the registration form. Make sure to use a valid email address and keep your password secure.
- Prepare Your Photos: Before uploading, ensure your images meet Getty's quality standards. High-resolution images (at least 4 MB) with proper lighting and composition are essential. Don’t forget to edit your photos for the best results!
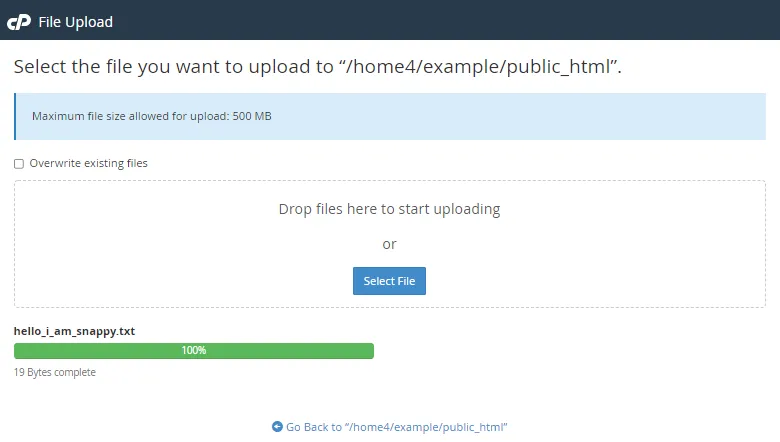
- Upload Your Images: Once your account is set up and your photos are ready, it’s time to upload! Navigate to the "Upload" section of the Contributor portal. You can drag and drop your files or click to upload them directly from your computer.
- Add Metadata: After uploading, you’ll need to add metadata. This includes titles, descriptions, and keywords. Think about what potential buyers might search for. Use relevant, specific keywords to improve your photos' visibility!
- Submit for Review: Finally, submit your images for review. Getty’s team will evaluate your submissions based on quality and relevance. This process can take a few days, so be patient!
And voilà! Once approved, your photos will be available for purchase on Getty Images, giving you the chance to earn money while showcasing your talent.
Also Read This: Downloading Adobe Stock Vector for Free: How-To
Managing Your Portfolio on Getty Images
Now that you’ve uploaded your images, it’s important to manage your portfolio effectively. This not only keeps your work organized but also helps maximize your visibility and sales potential.
- Regular Updates: Keep your portfolio fresh by regularly updating it with new images. Aim to upload at least a few new photos each month. This shows potential buyers that you’re active and engaged.
- Track Your Sales: Use the analytics tools provided by Getty to monitor which images are selling well. This can give you insights into what types of photos buyers are looking for. Adjust your shooting style accordingly!
- Adjust Pricing: Depending on your sales and exposure, consider adjusting your pricing strategy. Getty allows you to set your prices for certain types of licenses, so keep an eye on market trends and adjust as needed.
- Engage with Feedback: Take note of any feedback you receive from buyers or Getty’s review team. Constructive criticism can be invaluable for improving your photography and understanding market demands.
- Promote Your Work: Don’t just rely on Getty to promote your images. Share your portfolio on social media, blogs, or photography forums. Building a personal brand can drive more traffic to your Getty portfolio.
By managing your portfolio thoughtfully, you’ll not only enhance your chances of making sales but also build a reputation as a reliable contributor in the photography community.
Also Read This: Taking Photos from Alamy to a Print Shop What You Should Know
7. Marketing Your Work and Maximizing Sales
Once you've uploaded your stunning photos to Getty Images, the next crucial step is marketing your work effectively to maximize sales. Here are some strategies to help you get noticed:
- Utilize Social Media: Share your photos on platforms like Instagram, Facebook, and Pinterest. Create engaging posts that tell the story behind your shots. Use relevant hashtags to reach a broader audience.
- Build a Personal Website: Having a dedicated website can showcase your portfolio and provide potential buyers with more information about you. Include a blog section to share your experiences and tips on photography.
- Networking: Connect with other photographers and creatives. Attend workshops, join online forums, or participate in local photography meetups. Collaborating with others can lead to new opportunities.
- Email Marketing: Create a newsletter to keep your audience updated on your latest works, promotions, or photography tips. Consider offering exclusive content to subscribers to encourage sign-ups.
- Targeted Advertising: Consider using paid advertising on social media platforms. Options like Facebook Ads allow you to target specific demographics interested in your niche.
Remember, marketing is an ongoing process. Track your progress and analyze which strategies yield the best results. Adjust your approach based on performance to continue maximizing your sales potential on Getty Images.
8. Conclusion and Next Steps
Congratulations on taking the leap into the world of stock photography with Getty Images! You’ve learned how to upload your photos, understand the market, and now, effectively market your work. So, what’s next?
First, keep creating. The more quality content you have, the better your chances of making sales. Stay informed about trends and demands in the stock photography world.
Second, review your analytics. Getty Images provides valuable insights into how your photos are performing. Use this data to refine your portfolio and focus on what resonates with buyers.
Finally, don’t hesitate to seek feedback. Join online photography communities or forums to share your work and get constructive criticism. This can help you improve and grow as a photographer.
In summary, the journey doesn’t end with your first upload; it’s just the beginning. Keep learning, experimenting, and connecting with your audience. Happy shooting!