Uploading videos to Behance can be a great way to showcase your creative work. Behance is a platform that allows artists and designers to share their projects and connect with others. Videos can add depth to your portfolio, providing a dynamic way to present your ideas. Before diving in, it's important to understand the upload process. This involves preparing your video correctly, ensuring it meets Behance's requirements, and knowing how to upload it effectively.
Preparing Your Video for Upload
Before you upload your video, some preparations will help ensure a smooth process. Here are a few tips to consider:
- Check File Format: Behance supports various video formats, including MP4 and MOV. Make sure your video is in a compatible format.
- Resolution and Aspect Ratio: Aim for a resolution of at least 720p (1280x720 pixels). The standard aspect ratio is 16:9 for widescreen.
- File Size: Keep your video file size manageable. Behance allows uploads of up to 1GB, but smaller files are quicker to upload and easier to manage.
- Edit Your Video: Trim unnecessary sections, add transitions, and make sure your video flows well. Tools like Adobe Premiere or iMovie can help.
- Consider Adding Captions: Adding captions can make your video accessible to a wider audience.
Also Read This: How to Fix the Issue of a Small Logo on ShootProof
Steps to Upload Your Video on Behance
Now that your video is prepared, it’s time to upload it to Behance. Follow these simple steps:
- Log In to Your Account: If you don’t have an account, you’ll need to create one.
- Navigate to Your Profile: Click on your profile icon to access your dashboard.
- Start a New Project: Click on “Create a Project” or “Upload Work” to begin the process.
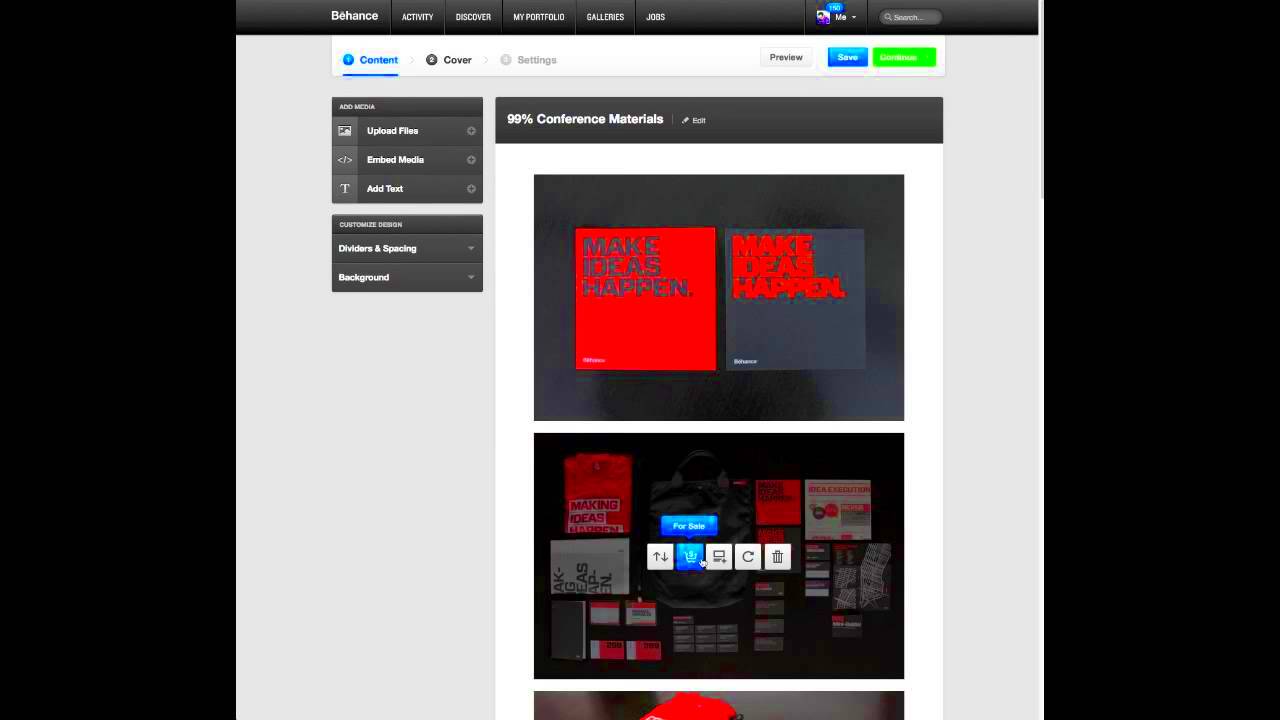
- Upload Your Video: Select the video file from your device. You can drag and drop it into the upload area.
- Add Project Details: Provide a title, description, and relevant tags. These help others find your work.
- Customize Your Project: You can add images, text, and other media to enhance your project.
- Publish Your Video: Once everything looks good, hit the “Publish” button to share your video with the community.
Following these steps can help you upload videos seamlessly, allowing you to share your creativity with a broader audience.
Also Read This: How to Access Shutterstock for Free and Find Quality Images
Optimizing Video Settings for Better Quality
When you upload a video to Behance, quality matters. High-quality videos grab viewers' attention and help convey your message effectively. To optimize your video settings, consider the following factors that can enhance your video's visual appeal and clarity.
- Resolution: Choose a resolution that balances quality and file size. A minimum of 720p (1280x720) is recommended, but 1080p (1920x1080) is even better for crisp visuals.
- Bitrate: This affects video quality. A higher bitrate typically means better quality, but it also increases file size. For 1080p videos, aim for a bitrate between 8 Mbps and 12 Mbps.
- Frame Rate: Common frame rates include 24, 30, or 60 frames per second (fps). For most videos, 30 fps works well, while action-packed content may benefit from 60 fps for smoother motion.
- Encoding Format: MP4 (H.264) is widely recommended as it provides a good balance between quality and compression. Avoid formats that are less compatible.
- Color Correction: Adjusting brightness, contrast, and saturation can make your video more appealing. Use editing software to enhance colors and correct any lighting issues.
By optimizing these video settings, you can ensure your project stands out on Behance and engages your audience effectively.
Also Read This: How to Print a Resume from LinkedIn
Adding Relevant Information to Your Video

Once your video is uploaded, adding relevant information is essential for context and engagement. This helps viewers understand your work better and encourages interaction. Here are some key elements to consider:
- Title: Use a clear and catchy title that reflects the content of your video. It should be descriptive enough to give viewers an idea of what to expect.
- Description: Write a detailed description of your video. Include background information, your inspiration, and what viewers will learn. This not only adds value but also improves SEO.
- Tags: Tags help categorize your video and make it easier for others to find. Use relevant keywords that reflect your video's content and themes.
- Thumbnail: Choose an eye-catching thumbnail that represents your video. A good thumbnail can attract more clicks and views.
- Call to Action: Encourage viewers to comment, share, or follow your profile. A simple line like “Let me know your thoughts in the comments!” can increase engagement.
By adding these details, you create a richer experience for your audience, making it more likely that they'll interact with your content.
Also Read This: Is iStock Images Worth It? Evaluating the Value and Benefits of iStock Images
Sharing Your Video with the Community
Sharing your video on Behance is just the beginning. Engaging with the community is key to gaining visibility and building connections. Here are some effective ways to share your video:
- Project Feed: Once published, your video will appear in your project feed. This is where followers can see your latest work. Ensure your profile is active to attract more views.
- Social Media: Promote your Behance video on platforms like Instagram, Twitter, and Facebook. Share the link, post clips, or use stories to drive traffic to your project.
- Behance Groups: Join groups related to your video’s theme and share your project there. Engaging with group members can lead to valuable feedback and networking opportunities.
- Engage with Others: Take time to comment on other projects. Being an active participant in the community encourages reciprocity, and others may check out your work in return.
- Ask for Feedback: Reach out to your followers or fellow creators for constructive feedback. This can help improve your future projects and build relationships.
Sharing your video and interacting with the community can enhance your visibility on Behance, fostering growth in your creative journey.
Also Read This: How to Create a Behance Portfolio in 2022
Common Issues When Uploading Videos
Uploading videos to Behance should be a straightforward process, but sometimes you might encounter issues that can be frustrating. Knowing these common problems can help you troubleshoot effectively and ensure a smooth upload. Here are some issues you might face:
- File Format Errors: One of the most common issues is trying to upload a video in an unsupported format. Behance accepts MP4 and MOV formats, so make sure your video is compatible.
- File Size Limit: Behance allows videos up to 1GB. If your file exceeds this limit, consider compressing it or reducing its quality slightly.
- Slow Internet Connection: A weak or unstable internet connection can cause upload failures. Ensure you have a reliable connection before starting the upload.
- Buffering or Playback Issues: Sometimes, videos may buffer or not play smoothly after uploading. This can be due to the encoding settings or the video resolution being too high for certain devices.
- Video not Appearing: If your video doesn’t show up immediately after uploading, give it some time. It may take a while for Behance to process and display your video.
- Metadata Problems: Inaccurate or missing titles, descriptions, and tags can limit your video’s reach. Always double-check that you’ve filled in all relevant fields.
By being aware of these common issues, you can save time and frustration when uploading your videos to Behance.
Also Read This: Effective Strategies to Boost Visibility for Your LinkedIn Posts
FAQ About Uploading Videos to Behance
Here are some frequently asked questions about uploading videos to Behance. These can provide quick answers to common concerns:
- What video formats does Behance support? Behance supports MP4 and MOV formats for video uploads.
- What is the maximum file size for videos? The maximum file size for videos on Behance is 1GB.
- How can I improve my video quality? Use a resolution of at least 720p and choose a bitrate of 8 to 12 Mbps for 1080p videos.
- Can I edit my video after uploading? You cannot edit the video file once it's uploaded, but you can update the title, description, and tags.
- Why is my video not showing up on my profile? Sometimes it takes time for Behance to process your video. If it’s not visible after a few hours, check your project settings.
- Can I upload videos from my phone? Yes, you can upload videos directly from your mobile device using the Behance app.
These FAQs can help clear up any confusion and make your video uploading experience on Behance much smoother.
Conclusion on Uploading Videos to Behance
Uploading videos to Behance is an excellent way to showcase your creativity and connect with a broader audience. By following the right steps and optimizing your video settings, you can make a significant impact. Remember to prepare your video properly, include relevant information, and engage with the community. If you run into any issues, knowing the common problems can help you troubleshoot effectively. With dedication and creativity, your videos can attract attention and foster connections in the vibrant Behance community. Happy uploading!
