Uploading your footage to Adobe Stock can seem daunting, especially if you're new to the process. But fear not! This guide will walk you through the entire procedure using FTP (File Transfer Protocol). By the end, you'll have a clear understanding of how to get your creative work on Adobe Stock efficiently. So, grab a cup of coffee, and let’s dive in!
What is Adobe Stock?
Adobe Stock is a powerful platform for creatives, connecting photographers, videographers, and designers with those looking to purchase high-quality stock assets. With millions of images, videos, and templates available, it’s an essential resource for anyone in the creative industry. Here’s why Adobe Stock stands out:
- Wide Reach: Adobe Stock serves a vast global market, allowing your work to be seen and purchased by a diverse audience.
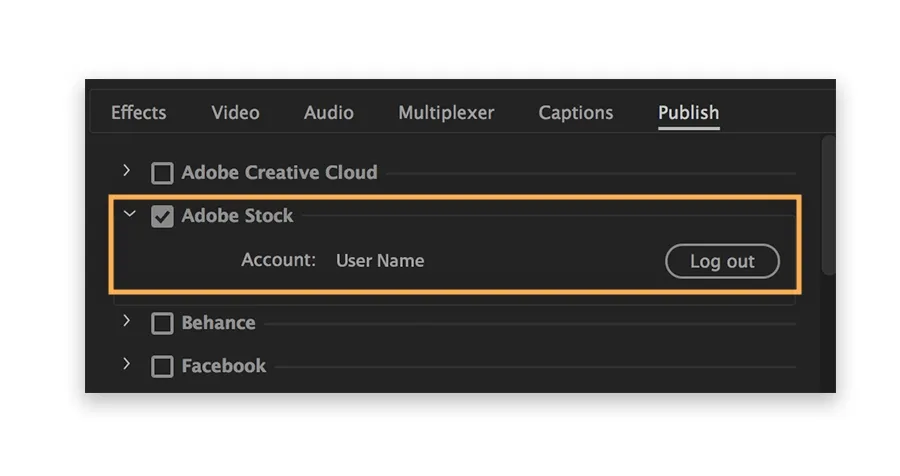
- Integration with Adobe Creative Cloud: If you use Adobe apps like Photoshop or Premiere Pro, you can access Adobe Stock directly from within those applications, streamlining your workflow.
- Royalty Payments: Contributors earn a percentage of each sale, providing an opportunity to monetize your creative efforts effectively.
- Easy Upload Process: With options like FTP, uploading your footage is straightforward, making it easier for you to showcase your work.
Whether you're a seasoned professional or just starting, Adobe Stock offers tools and resources to help you succeed. The platform not only allows you to sell your work but also provides insights into market trends and customer preferences, empowering you to create and upload tailored content.
Also Read This: Accessing the NBA League Pass via YouTube TV
Benefits of Using FTP for Uploading
Uploading footage to Adobe Stock can be a straightforward process, but using FTP (File Transfer Protocol) comes with some distinct advantages that can enhance your experience. Let’s dive into why you might want to consider using FTP for your uploads.
- Faster Upload Speeds: FTP is often faster than web-based uploads, especially for large files. This is because FTP establishes a direct connection that can handle big data more efficiently, reducing the time you spend waiting for your uploads to complete.
- Batch Uploading: If you have multiple files to upload, FTP allows you to transfer them all at once. This is a huge time-saver compared to uploading each file individually through a web interface.
- Resume Capability: One of the best features of FTP is its ability to resume interrupted uploads. If your internet connection drops or you need to pause, you can pick up right where you left off without starting over.
- More Control: With FTP, you have greater control over your uploads. You can manage your files more efficiently, organize them into folders, and easily delete or rename files without hassle.
- Enhanced Security: FTP connections can be secured through protocols like FTPS or SFTP, adding an extra layer of protection for your valuable footage.
In short, using FTP to upload your footage to Adobe Stock not only streamlines the process but also enhances your overall efficiency and security.
Also Read This: Understanding Career Breaks on LinkedIn
Preparing Your Footage for Upload
Before you upload your footage to Adobe Stock via FTP, it's essential to prepare it properly. Taking the time to organize and format your files will help ensure a smooth upload process and improve your chances of getting your work accepted. Here’s what you need to do:
- Check File Formats: Ensure your footage is in an accepted format, such as MP4, MOV, or AVI. Adobe Stock has specific requirements, so verify these on their site for the latest updates.
- Optimize File Sizes: Large files can slow down uploads and may even cause failures. Use video editing software to compress your footage without sacrificing quality. Aim for the best balance between size and clarity.
- Rename Your Files: Use clear, descriptive names for your footage. Avoid generic terms like "video1.mp4." Instead, name it something like "sunset-ocean-waves.mp4" to help you identify the content easily.
- Add Metadata: Prepare accompanying metadata such as titles, descriptions, and keywords. This information is crucial for potential buyers and helps your footage get discovered.
- Review and Edit: Before upload, review your footage for quality. Make sure there are no unwanted artifacts, and consider adding basic edits to enhance the overall look.
Taking these steps will ensure your footage is not only ready for upload but also positioned for success in the Adobe Stock marketplace!
Also Read This: Earnings from Custom Projects on Shutterstock
5. Setting Up Your FTP Client
Setting up your FTP client is a breeze, and it’s essential for uploading your footage to Adobe Stock efficiently. First things first, you need to choose an FTP client. Some popular options include FileZilla, Cyberduck, and WinSCP. Each of these clients has its unique features, but they all serve the same purpose: facilitating file transfers.
Once you’ve selected your FTP client, follow these steps:
- Download and Install: Head to the official website of your chosen FTP client and download the appropriate version for your operating system. Installation is usually straightforward—just follow the prompts.
- Open the Client: After installation, launch the FTP client. You’ll be greeted with a user-friendly interface that typically includes fields for you to enter your connection details.
- Enter Connection Details: You will need the following information to connect:
- Host: This is your FTP server address provided by Adobe Stock.
- Username: Your Adobe Stock contributor username.
- Password: The password associated with your Adobe Stock account.
And just like that, you’re all set up! Now you're ready to upload your stunning footage to Adobe Stock.
Also Read This: Mobile Makeover: Change Profile Picture on DeviantArt
6. Steps to Upload Footage via FTP
Now that your FTP client is set up, let’s dive into the actual uploading process. The steps are simple and straightforward, designed to make your workflow as smooth as possible.
- Navigate to the Correct Directory: Upon connecting to the FTP server, you’ll see a directory structure. Make sure to navigate to the specific folder where you need to upload your footage. This is typically labeled as “incoming” or “uploads”.
- Select Your Files: In your local file explorer, locate the footage files you want to upload. You can select multiple files at once by holding down the Shift or Ctrl key.
- Drag and Drop: The easiest way to upload is to simply drag the selected files from your local directory and drop them into the FTP client window. Alternatively, you can right-click and select Upload.
- Monitor the Transfer: Watch the progress bar in your FTP client to ensure files are uploading without issues. Any errors will typically show up here.
- Verify Upload: Once the upload is complete, navigate through the directories in your FTP client to confirm that your files are present in the correct location.
And that’s it! You’ve successfully uploaded your footage to Adobe Stock using FTP. Now, give yourself a pat on the back and get ready for the next steps in the submission process!
Also Read This: How to Create an Online Portfolio on Behance
7. Common Issues and Troubleshooting Tips
When uploading footage to Adobe Stock using FTP, you might encounter a few hiccups along the way. Don’t worry; it’s a common experience! Here are some typical issues and their solutions to help you navigate the process smoothly.
- Connection Errors: If you can't connect to the FTP server, double-check your FTP credentials (username and password). Make sure there's no firewall blocking your connection or try switching to a different internet network.
- File Size Limitations: Adobe Stock has specific file size limits. If your footage exceeds these limits, consider compressing the files using video editing software or splitting them into smaller segments.
- Incorrect File Formats: Ensure that your video files are in the supported formats, such as .mp4 or .mov. If unsure, convert your footage to the recommended formats before uploading.
- Upload Timeouts: Long uploads can sometimes time out. If your connection is slow, consider uploading smaller batches of files to avoid timeouts.
- Missing Metadata: If your footage lacks proper metadata, it may not get approved. Always include essential information like title, description, and keywords during the upload process.
If you run into any issues not covered here, Adobe Stock's support team is just a click away. They’re super helpful and can guide you through any complications you may face!
8. Conclusion
Uploading footage to Adobe Stock using FTP can be a game-changer for your creative workflow. Not only does it streamline the submission process, but it also allows you to manage large files efficiently. As you embark on this journey, remember to follow the guidelines, keep an eye on your uploads, and stay informed about best practices.
In summary:
- Ensure your files meet Adobe Stock's specifications.
- Use reliable FTP software for an easy transfer.
- Stay proactive in troubleshooting common issues.
By keeping these tips in mind, you’ll find that uploading footage to Adobe Stock not only enhances your portfolio but also opens up new avenues for monetizing your creativity. Happy uploading!