Welcome to the world of video editing! If you're looking to dive into the intricacies of editing, you might have come across Sony Vegas Pro 13. This powerful software has been a favorite among both beginners and seasoned professionals for its user-friendly interface and robust features. In this post, we’ll explore why Sony Vegas Pro 13 can be your go-to tool for crafting stunning videos.
Getting Started with the Interface
When you first open Sony Vegas Pro 13, you might feel a bit overwhelmed by the array of tools and features at your disposal. But don’t worry! Let’s break it down to make it more approachable.
The main interface is designed to be intuitive, consisting of several key components:
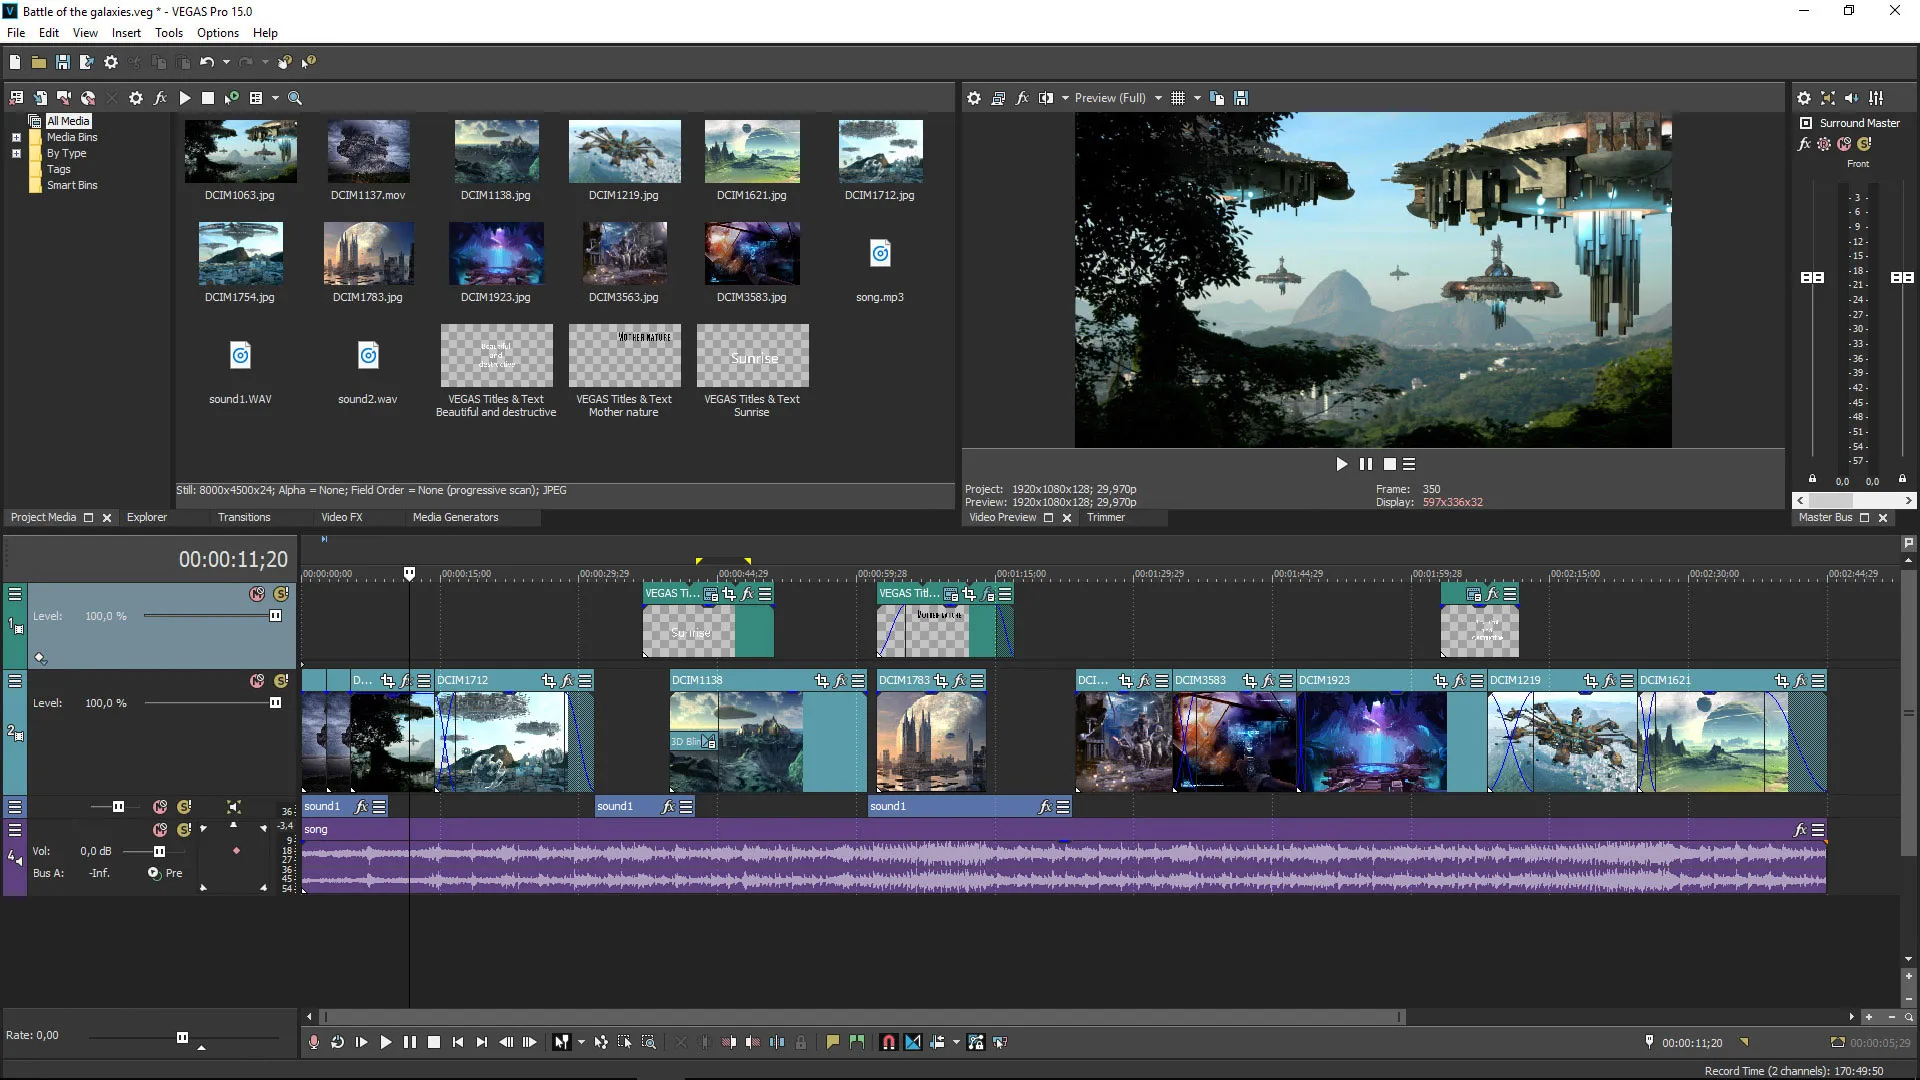
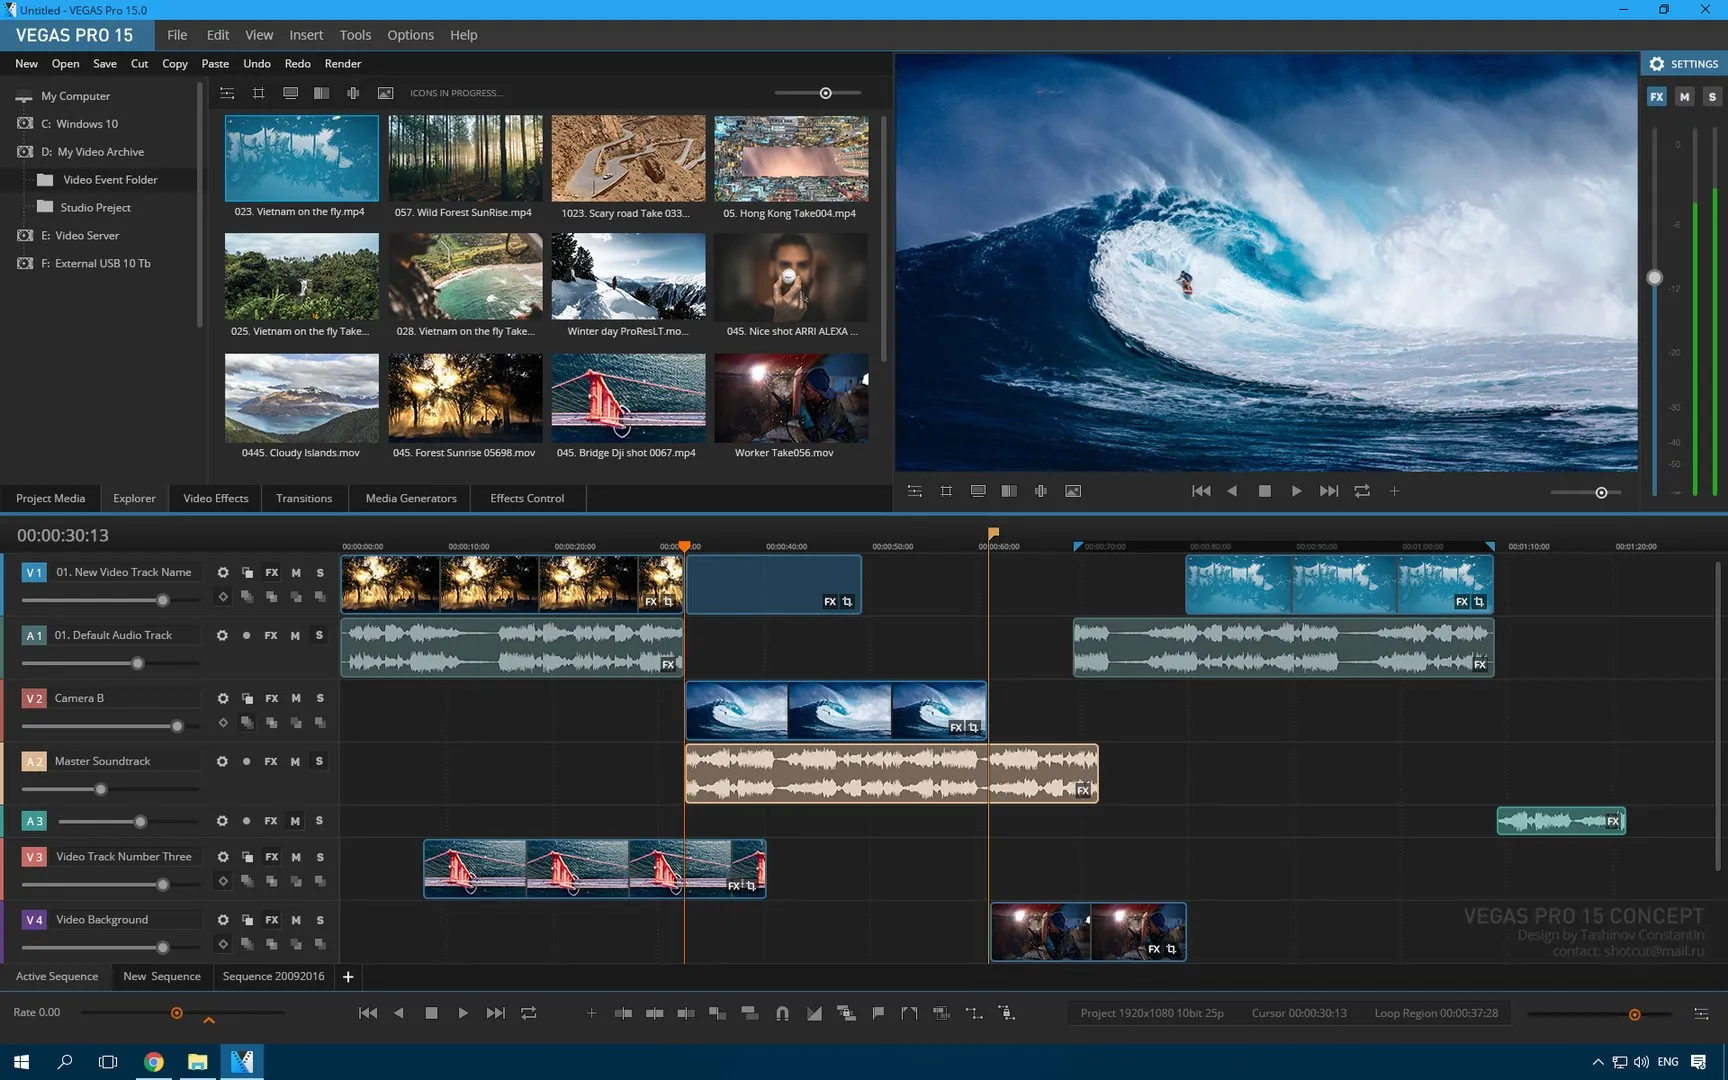
- Timeline: This is where the magic happens! You’ll arrange your video clips, audio tracks, and effects in a linear fashion. It’s easy to drag and drop items, helping you see your project come to life.
- Media Pool: Here, you can import and manage all your media. Whether it's video, audio, or images, organizing them in the Media Pool will save you time later on.
- Preview Window: This allows you to see your edits in real-time. You can play, pause, and scrub through your project to ensure everything looks just right.
- Toolbar: Located at the top, this features essential tools like the selection tool, trim tool, and more, making it straightforward to access what you need quickly.
Additionally, you can customize the layout to suit your workflow. If you prefer a larger preview window or a more compact timeline, it’s all adjustable!
Before diving into editing, take some time to familiarize yourself with these components. A little exploration goes a long way in mastering Sony Vegas Pro 13!
Also Read This: Can You Pay for YouTube Premium with Google Play
Importing and Organizing Your Media
Getting started with video editing in Sony Vegas Pro 13 requires a solid foundation, and that begins with importing and organizing your media. This process might seem straightforward, but it sets the stage for a smooth editing experience.
First, you’ll want to import your media files. Here’s a quick guide:
- Open Sony Vegas Pro 13 and create a new project.
- Go to the “File” menu and select “Import” or simply drag and drop your files into the timeline.
- Choose your video, audio, and image files from your computer. You can import multiple files at once for convenience.
Once you have your media imported, organizing it effectively is crucial for efficiency. Consider creating folders in the Project Media window:
- Footage: Store all your video clips here.
- Audio: Keep your soundtracks and voiceovers organized.
- Images: Save any graphics or stills you plan to use.
By maintaining a clean workspace, you’ll save time when you’re deep in the editing process. Don’t hesitate to label clips clearly; this will help you locate them quickly later on!
Also Read This: Can You Feel the Rumble? Exploring the Science Behind the Phenomenon
Basic Editing Techniques
Now that you’ve imported and organized your media, let’s dive into some basic editing techniques that will enhance your video projects in Sony Vegas Pro 13.
Here are some essential techniques you’ll want to master:
- Cutting and Trimming: Use the Split tool (shortcut: S) to cut clips at desired points. Trimming can be done by dragging the edges of a clip in the timeline.
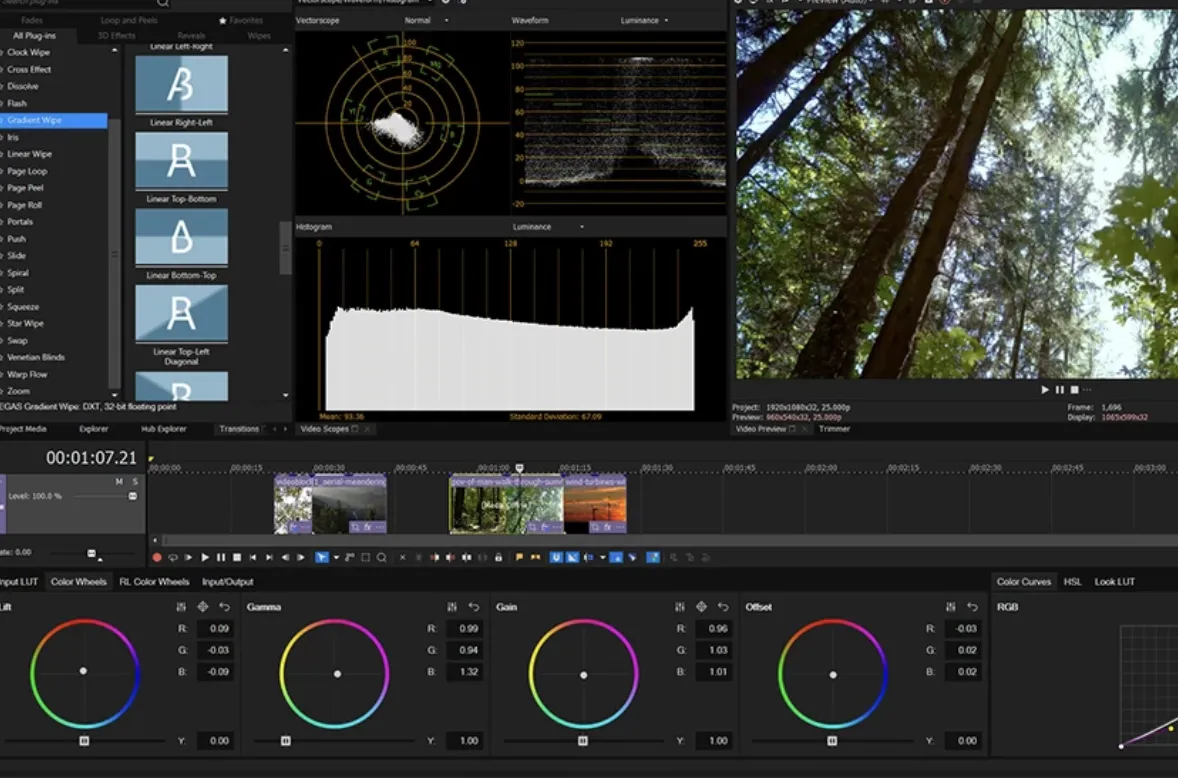
- Transitions: To add a professional touch, implement transitions between clips. Simply drag a transition from the Transitions tab and place it at the junction of two clips.
- Audio Editing: Adjust audio levels by clicking on the audio track and dragging the volume line up or down. You can also apply fades to audio clips for smoother transitions.
Remember, practice is key! Experiment with these techniques to develop your unique style. As you become more comfortable, you can explore advanced features like color correction and effects to take your videos to the next level.
Also Read This: Master Umbrella Dress Cutting Techniques with Dailymotion Video Guidance
5. Advanced Features and Tools
If you’re looking to elevate your video editing game, Sony Vegas Pro 13 is packed with advanced features and tools that can help you create stunning visuals. Let’s dive into some of these powerful functionalities that set this software apart.
- Multi-camera Editing: This feature allows you to switch seamlessly between different camera angles during editing, making it perfect for events or interviews. You can sync up to 16 cameras!
- Video Stabilization: Have shaky footage? The built-in stabilization tool smooths out those jitters, giving your footage a professional touch without needing additional equipment.
- 3D Editing: With support for 3D video formats, you can create captivating 3D projects. Import, edit, and export your 3D content effortlessly!
- Soundtrack Creation: Sony Vegas Pro 13 includes tools for generating soundtracks. You can mix audio and apply effects to create a rich auditory experience that complements your visuals.
These advanced tools not only enhance your editing capabilities but also inspire creativity. Whether you’re a seasoned pro or a beginner, exploring these features can vastly improve your projects.
Also Read This: Can ShootProof Handle Video Files? Exploring Its Capabilities
6. Applying Effects and Transitions
Effects and transitions are the icing on the cake in video editing, and Sony Vegas Pro 13 makes this process intuitive and enjoyable. Let’s explore how to apply them effectively!
- Drag-and-Drop Functionality: Applying effects is as simple as dragging your chosen effect from the Effects tab onto your video clip. This user-friendly approach saves time and keeps your workflow smooth.
- Keyframe Animation: Want to create dynamic effects? Use keyframing to animate properties over time. For instance, you can gradually increase a clip's brightness or scale it up to create a zoom effect.
- Transition Options: Sony Vegas Pro 13 offers a variety of transitions to choose from. Whether you prefer a classic fade or a more flashy wipe, just select the transition and drag it between clips in the timeline.
- Previewing Effects: Always preview your effects before finalizing. This allows you to tweak settings in real-time, ensuring that the final output meets your creative vision.
With these tools at your disposal, you can craft engaging videos that captivate your audience. Experimenting with different effects and transitions can lead to unique storytelling and enhance the overall viewing experience.
Also Read This: Sell Your Templates with Canva How to Sell a Template
7. Working with Audio
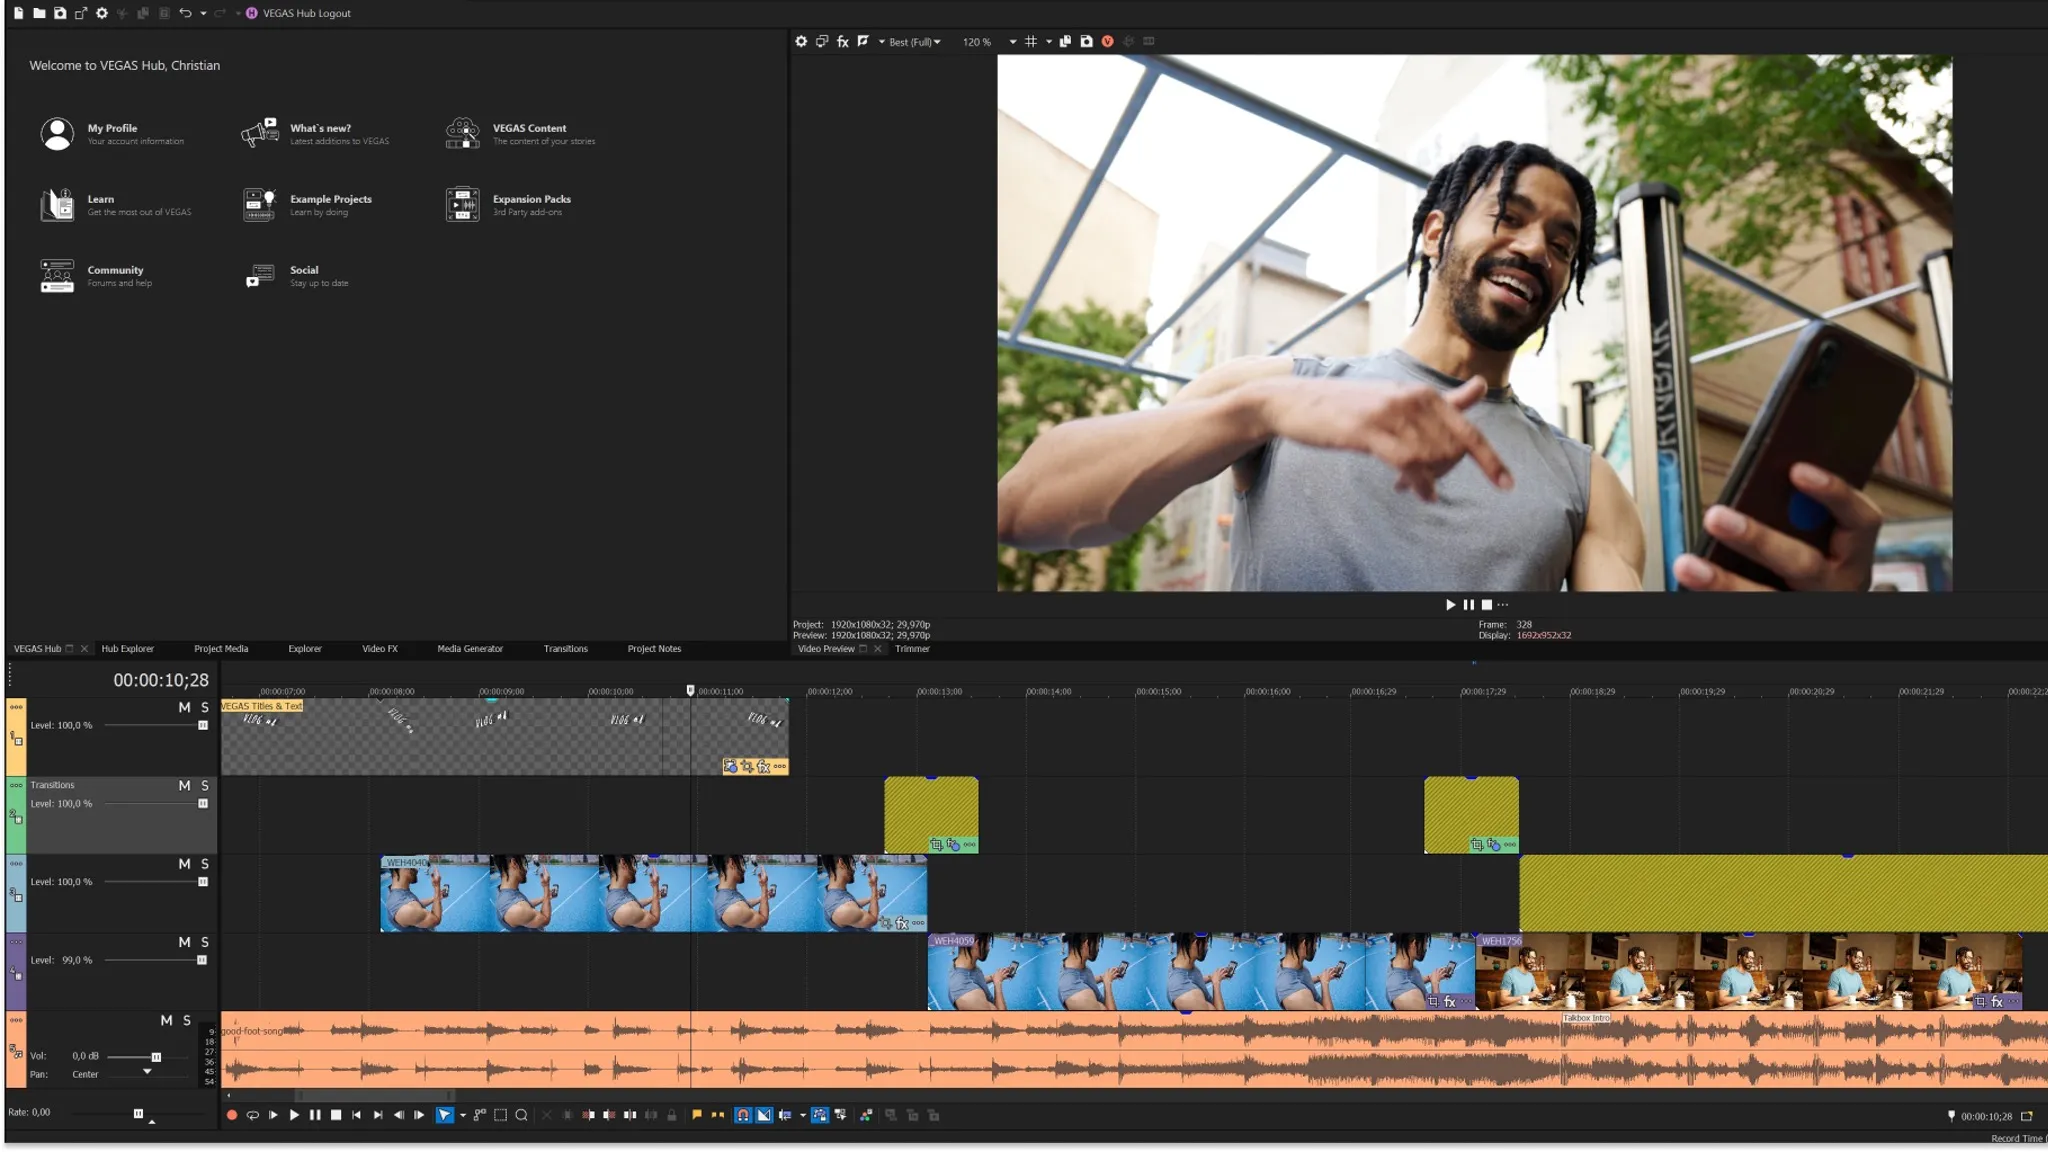
When it comes to video editing, audio is often an overlooked element, yet it is crucial for creating an immersive experience. Sony Vegas Pro 13 gives you all the tools you need to work with audio seamlessly. First off, let’s talk about how to import audio tracks into your project.
You can easily drag and drop audio files from your media pool into the timeline. Once imported, you’ll notice that each audio track allows for various editing options, such as adjusting volume levels, panning, and adding effects.
Here are some key features to enhance your audio:
- Volume Adjustment: Simply drag the volume line up or down on the audio track to increase or decrease the sound.
- Audio Effects: Explore the Audio Effects tab to add reverb, echo, or equalization to make your audio pop.
- Keyframing: Create dynamic audio by keyframing volume changes directly within the timeline.
If you want to manage background noise or improve audio quality, the Noise Gate and Compressor effects in the audio plugin can be a lifesaver. By adjusting these settings, you can ensure your audio sounds clear and professional.
Finally, always remember to listen to your audio with good headphones or speakers. It makes a significant difference in detecting any imperfections you might want to fix.
8. Exporting Your Final Video
After countless hours of editing, tweaking, and perfecting your video, the final step is exporting your masterpiece. Sony Vegas Pro 13 makes this process straightforward and user-friendly. Here’s how to do it effectively.
To start exporting, go to File > Render As. This option takes you to a window where you can choose from various formats and settings tailored to your needs.
Consider the following tips when exporting your video:
- Choose the Right Format: Depending on your distribution platform, you might prefer MP4 for online sharing or AVI for higher quality.
- Resolution Settings: Select your desired resolution (1080p, 4K, etc.) based on where you plan to showcase your video.
- Bitrate: Adjust the bitrate for a balance between quality and file size; higher bitrate means better quality but larger files.
Once you've selected your settings, click Render, and sit back as Sony Vegas Pro processes your video. This may take some time depending on the length and complexity of your project.
After rendering, always review your final product. Check for any audio mismatches or visual errors that may have slipped through the cracks. With practice and patience, you’ll be able to master the art of exporting like a pro!