Are you looking to share your photography or artwork with a wider audience and potentially earn some income? Uploading images to Adobe Stock is a fantastic way to do just that! In this step-by-step tutorial, we’ll guide you through the process of uploading your images to Adobe Stock, from preparation to submission. Whether you’re a seasoned professional or just starting out, we’ve got you covered. Let’s dive in!
Preparing Your Images for Upload
Before you hit that upload button, it’s crucial to ensure your images meet Adobe Stock’s specific requirements. Proper preparation can significantly enhance your chances of acceptance and increase your visibility on the platform. Here’s a comprehensive rundown of what you need to do:
- Image Quality: Make sure your images are high-resolution, ideally at least 4 MP. Higher quality images not only look better but also stand a better chance of being sold.
- File Format: Adobe Stock accepts JPEG files. Ensure your images are saved in this format for a smooth upload process.
- Color Profile: Use the sRGB color profile for your images, as this is the standard for web usage and will ensure your images look their best online.
- Editing: Edit your images to enhance their quality. Adjust the exposure, contrast, and colors to make them pop. However, avoid over-editing, as this can lead to unrealistic representations.
- Keywording: Think about the keywords that will help potential buyers find your images. Use relevant, descriptive keywords that accurately reflect what’s in the image.
Lastly, always double-check for any copyright issues. Ensure that any recognizable people or branded products in your images have the necessary releases. By following these steps, you’ll be well on your way to successfully uploading your images to Adobe Stock!
Curl error: Connection timed out after 50003 milliseconds
Also Read This: DIY Loom Bands with Pencils Easy Ideas on Dailymotion
5. Adding Metadata to Your Images
Adding metadata to your images is a crucial step in the submission process for Adobe Stock. Think of metadata as the behind-the-scenes information that helps potential buyers find your work amidst the vast sea of images. It includes details like titles, keywords, and descriptions that describe your image accurately.
Here's how to add metadata effectively:
- Title: Start with a clear and concise title that reflects the content of your image. Aim for something catchy yet descriptive.
- Description: Provide a detailed description of your image. This should include the subject matter, context, and any relevant information that buyers might find useful.
- Keywords: Keywords are vital for searchability. Include at least 5 to 50 relevant keywords that describe your image. Think about what users might type into the search bar when looking for images like yours.
- Categories: Select appropriate categories for your image. This helps in organizing your submissions and makes it easier for potential buyers to find them.
Remember, the more informative and accurate your metadata is, the higher the chances your images will be discovered and purchased. Putting in this extra effort can make a significant difference in your sales!
Also Read This: How to Sell Images on Adobe Stock to Maximize Your Earnings
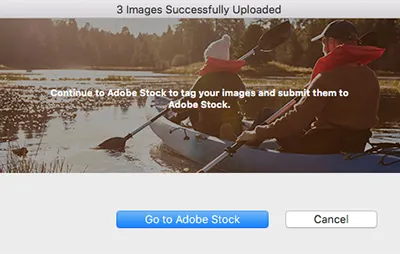
6. Submitting Your Images for Review
Once you've added all the necessary metadata to your images, it's time to submit them for review. This is the moment where your hard work pays off, but how do you ensure a smooth submission process? Let’s break it down:
Follow these simple steps to submit your images:
- Review Your Work: Before hitting that submit button, double-check everything. Make sure your images meet Adobe Stock's quality standards, and all metadata is filled out correctly.
- Upload Images: Use the upload feature on the Adobe Stock contributor portal. You can drag and drop your files or select them manually from your computer.
- Submission Process: After uploading, you’ll see a summary of your images along with their metadata. If everything looks good, proceed to submit your images for review.
- Wait for Approval: Once submitted, Adobe will review your images. This process can take anywhere from a few hours to several days. Be patient!
After your images are approved, they will be available for sale on Adobe Stock. If any images are rejected, don’t get discouraged. Review the feedback provided, make necessary adjustments, and resubmit! With persistence and creativity, you'll be well on your way to making your mark in the stock photo world.
Also Read This: Uploading a Video to YouTube Using Your iPhone
7. Tracking Your Submissions and Earnings
Once you’ve uploaded your images to Adobe Stock, you might be wondering how to keep tabs on your submissions and monitor your earnings. Fortunately, Adobe Stock provides a user-friendly dashboard that makes this process straightforward. Here’s how you can effectively track your submissions:
- Accessing Your Contributor Dashboard: Start by logging into your Adobe Stock Contributor account. Once you're in, navigate to the "Dashboard" section. Here, you’ll find a wealth of information about your submissions.
- Submission Status: In the Dashboard, you can see the status of your uploaded images. They could be in various stages such as "Pending," "Accepted," or "Rejected." This helps you understand how your content is performing in the review process.
- Earnings Overview: The earnings section gives you a breakdown of your sales. You can view your total earnings, how many images have sold, and even the types of licenses that have been purchased. This can help you identify trends in what types of images sell best.
- Performance Analytics: Adobe Stock also offers insights into how your images are performing over time. You can track metrics like views and downloads, allowing you to refine your strategy and enhance your portfolio.
- Payout Information: Make sure to regularly check your payout settings. Adobe Stock typically pays out monthly, and you can set your preferred payment method to ensure you receive your earnings promptly.
By actively monitoring your submissions and earnings, you can adapt your approach, focus on creating more of what sells, and ultimately maximize your success on the platform!
8. Conclusion
Uploading images to Adobe Stock can be an exciting venture, whether you’re a professional photographer or a hobbyist looking to monetize your creativity. In this tutorial, we walked through the essential steps, from setting up your account to understanding the submission process, and finally, tracking your performance and earnings.
Here’s a quick recap of what we covered:
- Creating an Account: Start by signing up and setting up your profile.
- Uploading Images: Prepare your images, ensuring they meet Adobe's quality standards, and upload them seamlessly.
- Keywording and Categorization: Optimize your images for searchability by adding relevant keywords and categories.
- Tracking Your Submissions: Monitor your uploads and earnings through the Contributor Dashboard.
Remember, the key to success is consistency. Regularly upload high-quality images, stay updated on market trends, and engage with the Adobe Stock community. With time and effort, you can turn your passion for photography into a rewarding source of income.
So go ahead, start uploading, and watch your creativity flourish on Adobe Stock!