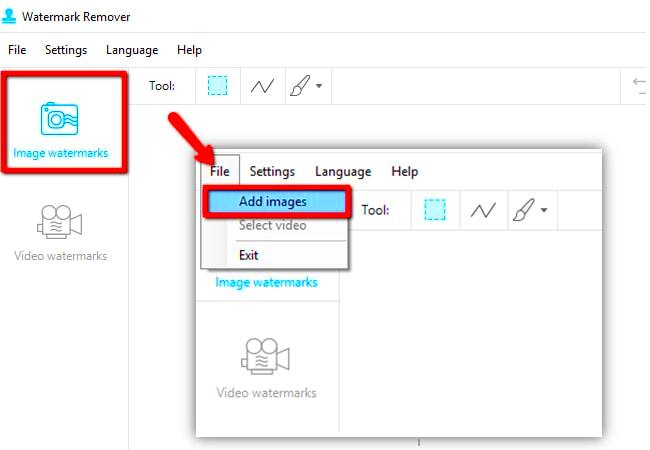
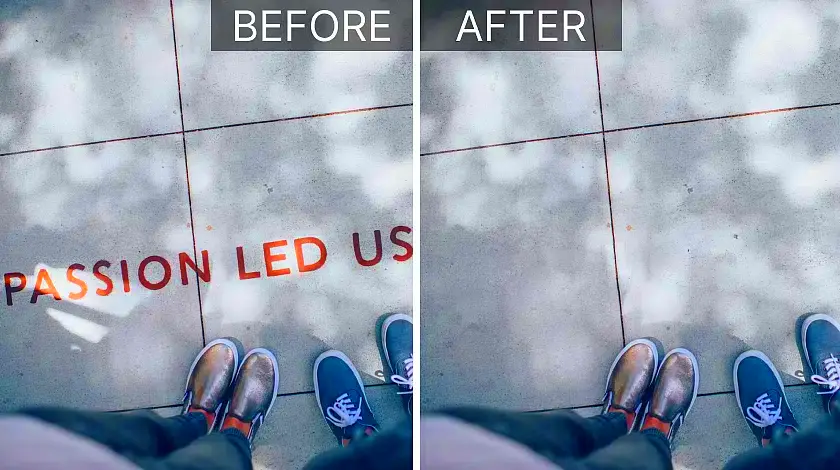
Removing text from Shutterstock images can be essential for a variety of reasons. Perhaps you want to use a specific image for a project but find the overlay text distracting. Or maybe you want to customize an image for branding purposes. Whatever your motivation, it's important to approach this task professionally to ensure that the final product looks polished.
By removing text effectively, you can:
- Enhance the visual appeal of your images.
- Align the images better with your project's theme.
- Create a cohesive look across different marketing materials.
In today’s digital landscape, professional-quality images are key to grabbing attention. Let's explore how you can achieve this!
Tools You Can Use for Editing Images

There are several tools available that can help you remove text from Shutterstock images. Choosing the right one depends on your comfort level and the complexity of the image. Here’s a list of popular editing software:
- Adobe Photoshop: A powerful tool that offers a range of features for detailed editing.
- GIMP: A free alternative to Photoshop that still packs a punch.
- Canva: Great for beginners, offering a user-friendly interface and various templates.
- Inpaint: Specifically designed for removing unwanted elements from images quickly.
- Paint.NET: A simple tool that is easy to use for basic edits.
Each of these tools has unique features, so take some time to explore and see which one fits your needs the best.
Also Read This: Exploring How Much You Can Make from Shutterstock Contributions
Steps to Professionally Remove Text from Shutterstock Images

Now that you have your tools ready, let's get into the steps for removing text from an image. Following these steps will help you maintain the quality of the image while achieving a professional look.
- Open the Image: Start by opening your Shutterstock image in your chosen editing software.
- Select the Text Area: Use the selection tool to highlight the area around the text you want to remove.
- Use the Clone or Healing Tool: These tools allow you to blend the selected area with the surrounding pixels. Be sure to adjust the brush size for more precise editing.
- Refine the Edges: Zoom in and carefully touch up any edges to make sure it looks seamless. Adjusting brightness and contrast can also help integrate the edit.
- Save Your Work: Once you’re satisfied with the result, save the image in the desired format.
Remember, practice makes perfect! The more you work with these tools, the better you’ll become at making precise edits.
Also Read This: Mastering LinkedIn: A Guide to Searching and Exploring Connections
Tips for Maintaining Image Quality After Editing

After removing text from an image, it’s crucial to ensure that the overall quality remains intact. Poor editing can lead to blurriness, pixelation, or artifacts that detract from the image's appeal. Here are some tips to help you maintain high quality during and after your editing process:
- Work with High-Resolution Images: Always start with the highest resolution available. This provides more pixels to work with, reducing the risk of losing detail during edits.
- Use Non-Destructive Editing Techniques: Opt for layers or masks instead of directly altering the original image. This allows you to make changes without permanently affecting the base image.
- Zoom In for Detail: Working at a higher zoom level can help you make more precise edits. Don’t be afraid to get up close and personal with those details!
- Adjust Sharpness: After editing, you may need to sharpen the image slightly to counteract any softening that occurred during the process.
- Save in the Right Format: Save your final image in formats like PNG or TIFF for the best quality. Avoid using overly compressed formats like JPEG for final outputs.
By following these tips, you can ensure that your edited images look just as good, if not better, than the originals!
Also Read This: Visual Excellence: 4K Unleashed with Getty Images Downloader
Common Mistakes to Avoid When Removing Text

When it comes to editing images, there are a few pitfalls that can lead to less-than-satisfactory results. Here are some common mistakes to steer clear of when removing text from Shutterstock images:
- Not Making a Backup: Always create a copy of the original image before starting your edits. This way, you can revert to the unedited version if needed.
- Overusing the Clone Tool: While the clone tool is helpful, overusing it can create unnatural patterns. Try to blend with surrounding pixels instead.
- Ignoring Lighting and Shadows: When removing text, be mindful of the light source in the image. Make sure any changes you make don’t disrupt the natural shadows and highlights.
- Rushing the Process: Take your time! Hasty edits often lead to mistakes. Spend the necessary time to get it right.
- Neglecting to Zoom In: Many mistakes happen when you don’t zoom in enough. Details matter, so always zoom in for a clearer view of your edits.
Avoiding these mistakes can save you time and frustration, leading to a more professional outcome in your image editing journey.
Also Read This: Add Templates to Google Slides Easily with Canva
How to Choose the Right Editing Software
Choosing the right editing software is crucial for successfully removing text and ensuring the quality of your images. With so many options available, it can be overwhelming. Here are some tips to help you make an informed decision:
- Consider Your Skill Level: If you’re a beginner, opt for user-friendly software like Canva or Paint.NET. For more advanced editing, Adobe Photoshop or GIMP may be more appropriate.
- Check for Features: Look for tools that offer specific features you need, such as clone stamps, healing brushes, or layer options. A feature-rich program can greatly enhance your editing experience.
- Evaluate Compatibility: Ensure that the software is compatible with your operating system (Windows, macOS, etc.) and supports the file formats you frequently use.
- Look for Tutorials and Support: Choose software with a strong community or available tutorials. This can be a lifesaver when you encounter challenges.
- Free Trials: Many editing programs offer free trials. Take advantage of these to test the interface and features before making a purchase.
Choosing the right software can make all the difference in your editing efficiency and the quality of your final images. Take your time to find the one that best fits your needs!
Also Read This: Create Price Lists with Canva Price List Template
Frequently Asked Questions About Removing Text from Images
When it comes to removing text from images, many people have similar questions. Here’s a look at some of the most frequently asked questions to help you navigate this process:
1. Is it legal to remove text from Shutterstock images?
Yes, but only if you have the proper license for the image. Always ensure that your use of the image complies with Shutterstock’s licensing agreements.
2. Can I use free tools to remove text from images?
Absolutely! There are many free editing tools available, like GIMP and Canva, that can help you remove text effectively. However, some free tools may have limitations in features.
3. Will removing text affect the quality of the image?
It can, but if you use the right techniques and tools, you can maintain or even enhance the quality. Always start with high-resolution images and use non-destructive editing methods.
4. How do I know which tool to use?
Your choice of tool depends on your skill level and the complexity of the task. Beginners may prefer simple, user-friendly options, while advanced users might opt for professional software like Adobe Photoshop.
5. What if I make a mistake during editing?
Don’t worry! Most editing software allows you to undo changes. Additionally, working on a copy of the original image ensures you can always revert to the unedited version.
Having answers to these common questions can ease your concerns and make the editing process smoother. Knowledge is key to achieving great results!
Conclusion on Professional Text Removal from Shutterstock Images
Removing text from Shutterstock images can significantly enhance their usability and visual appeal. By understanding the tools available, following professional editing techniques, and avoiding common mistakes, you can achieve high-quality results. Remember to choose the right software that fits your needs and take the time to refine your edits. With practice, you'll become more confident in your ability to transform images effectively!
