LinkedIn is more than just a platform for job seekers; it’s a powerful networking tool that helps professionals connect, share, and grow. Having a polished profile is essential for making great first impressions, attracting potential employers, and building your personal brand. In this guide, we’ll walk you through the process of editing your LinkedIn profile to ensure it stands out in the digital crowd. Ready to enhance your online presence? Let’s dive in!
Step-by-Step Guide to Editing Your LinkedIn Profile
Editing your LinkedIn profile is a straightforward process that can make a significant difference in how you present yourself to the professional world. Follow these simple steps to update your profile effectively:
- Log In to Your Account:
Start by visiting the LinkedIn website or opening the mobile app. Enter your credentials to log into your account.
- Navigate to Your Profile:
Once logged in, click on your profile picture or the “Me” icon at the top of the homepage. Select “View Profile” from the dropdown menu.
- Edit Your Profile:
On your profile page, look for the “Edit” button (represented by a pencil icon) next to the section you want to change, such as:
- Profile Photo: A professional photo can increase your profile views.
- Headline: Make sure it reflects your current role and career aspirations.
- About Section: Craft a compelling summary that highlights your skills and experiences.
- Experience: Update your work history, including job titles, responsibilities, and achievements.
- Skills: Add relevant skills that showcase your expertise.
- Save Changes:
After making your edits, don’t forget to click “Save” to ensure your updates are reflected on your profile. You can always revisit this section to make further adjustments.
With these steps, you can easily edit and optimize your LinkedIn profile to better represent your professional journey and goals. Remember, keeping your profile up-to-date is key to staying relevant in your industry!
Also Read This: How to Cancel Adobe Stock Photos Subscription
Updating Your Profile Picture
Your profile picture is often the first impression others will have of you on LinkedIn. A professional photo can set the tone for your entire profile, making it crucial to choose wisely. Here’s how to update it effectively:
- Select the Right Photo: Choose a clear, high-resolution image where you’re dressed professionally. Ideally, your face should take up about 60% of the frame. Avoid distracting backgrounds.
- Access Your Profile: Log into your LinkedIn account and click on your profile picture at the top left corner. This will take you to your profile page.
- Click on the Photo: Hover over your current profile picture and click on the camera icon that appears. This will allow you to upload a new photo.
- Upload Your New Image: Browse your device for the new image you’ve selected and click “Open.” LinkedIn supports JPEG, PNG, and GIF file formats.
- Adjust the Cropping: Use LinkedIn’s cropping tool to ensure your face is centered and the image looks just right. You can zoom in or out as needed.
- Save Changes: Once you’re happy with your new profile picture, click “Save.” Your updated image will now be visible to your connections and other LinkedIn users.
Remember, your profile picture should reflect your professional persona. Regularly updating it, especially if your appearance changes, can help keep your profile current and engaging.
Also Read This: Inserting video in Behance project
Modifying Your Headline and Summary
Your LinkedIn headline and summary are key components of your profile. They provide a snapshot of who you are and what you offer. Here’s how to modify them effectively:
- Navigate to Your Profile: Start by logging into LinkedIn and clicking on your profile. You’ll see your current headline right below your name.
- Edit Your Headline: Click on the pencil icon near your profile picture. This will allow you to edit various sections, including your headline. Aim for a concise, impactful statement that summarizes your professional identity.
- Use Keywords: Think about the keywords relevant to your industry and incorporate them into your headline. This helps in search visibility. For example, “Digital Marketing Specialist | SEO | Content Creator” gives clear insights into your expertise.
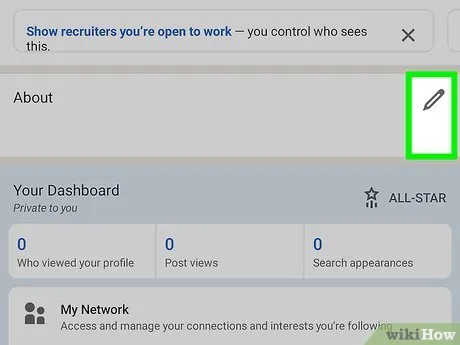
- Update Your Summary: Scroll down to the “About” section. Click the pencil icon to edit your summary. This is your chance to tell your story!
- Be Authentic: Write in a conversational tone, share your career journey, achievements, and what you’re passionate about. Aim for 3-5 short paragraphs for clarity.
- Call to Action: End your summary with a call to action, inviting readers to connect or reach out for collaboration.
By updating your headline and summary regularly, you ensure that your profile accurately represents your current professional self and goals. This can make a significant difference in attracting the right opportunities!
Also Read This: How to Create Khajuri Chutiya Traditional Hairstyles
5. Adding Your Work Experience
When it comes to creating an impactful LinkedIn profile, adding your work experience is like laying the foundation of a strong building. This section is essential as it showcases your career journey and highlights your professional accomplishments. So, how do you go about adding your work experience? Let’s break it down!
To add your work experience, follow these steps:
- Log into your LinkedIn account and navigate to your profile.
- Click on the “Add profile section” button.
- Select “Work Experience” from the dropdown menu.
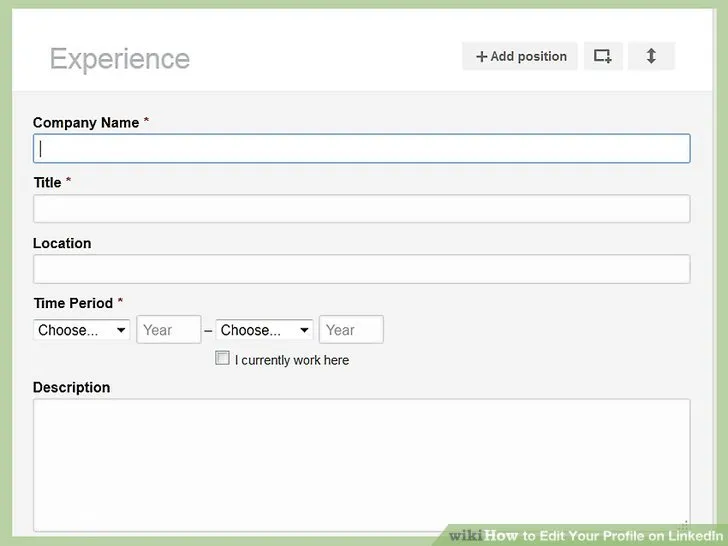
Once you’re in the work experience section, fill in the following details:
- Job Title: Make sure it accurately reflects your role.
- Company Name: Enter the official name of the organization.
- Location: Specify the location of the company, if applicable.
- Dates Employed: Include your start and end dates (month and year).
- Description: Write a brief summary of your responsibilities, achievements, and any notable projects. Use bullet points for clarity!
Remember, the key is to be concise yet informative. Make sure to incorporate industry-relevant keywords that can enhance your profile's visibility. Once you’re done, don’t forget to hit “Save.” This will make your profile more attractive to potential employers and connections!
6. Enhancing Your Skills and Endorsements
Skills and endorsements on LinkedIn are like the icing on the cake of your professional profile. They give potential employers a quick overview of what you can bring to the table. So how do you enhance this crucial section? Let’s dive in!
To add skills, follow these simple steps:
- Go to your profile and click on the “Add profile section” button.
- Select “Skills” from the dropdown menu.
In the skills section, you can:
- Add Skills: You can add up to 50 skills. Think about what you’re proficient in and what is relevant to your career goals.
- Prioritize Skills: Drag and drop to rearrange your skills, placing the most relevant ones at the top.
Now, let’s talk endorsements. These are like little badges of honor that come from your connections:
- Get Endorsed: Ask colleagues, friends, or supervisors to endorse your skills. The more endorsements you have for a skill, the more credible it appears.
- Endorse Others: Don’t forget to return the favor! Endorsing others can often prompt them to endorse you in return.
Enhancing your skills and endorsements can significantly boost your profile’s visibility and attractiveness. So, take the time to curate and manage this section well! Happy networking!