Creating a paper butterfly is a delightful and engaging craft project that anyone can enjoy! Whether you’re a seasoned crafter or just looking for a fun activity to do with kids, this easy step-by-step tutorial will guide you through the process. Not only is making paper butterflies a great way to enhance your creativity, but they can also serve as beautiful decorations for parties, gifts, or just as a lovely addition to your home. Let’s spread our wings and dive into this colorful world of paper crafts!
Materials Needed
Before we get started, let’s gather all the materials you’ll need to create your stunning paper butterfly. Here’s a handy list to ensure you have everything on hand before we begin:
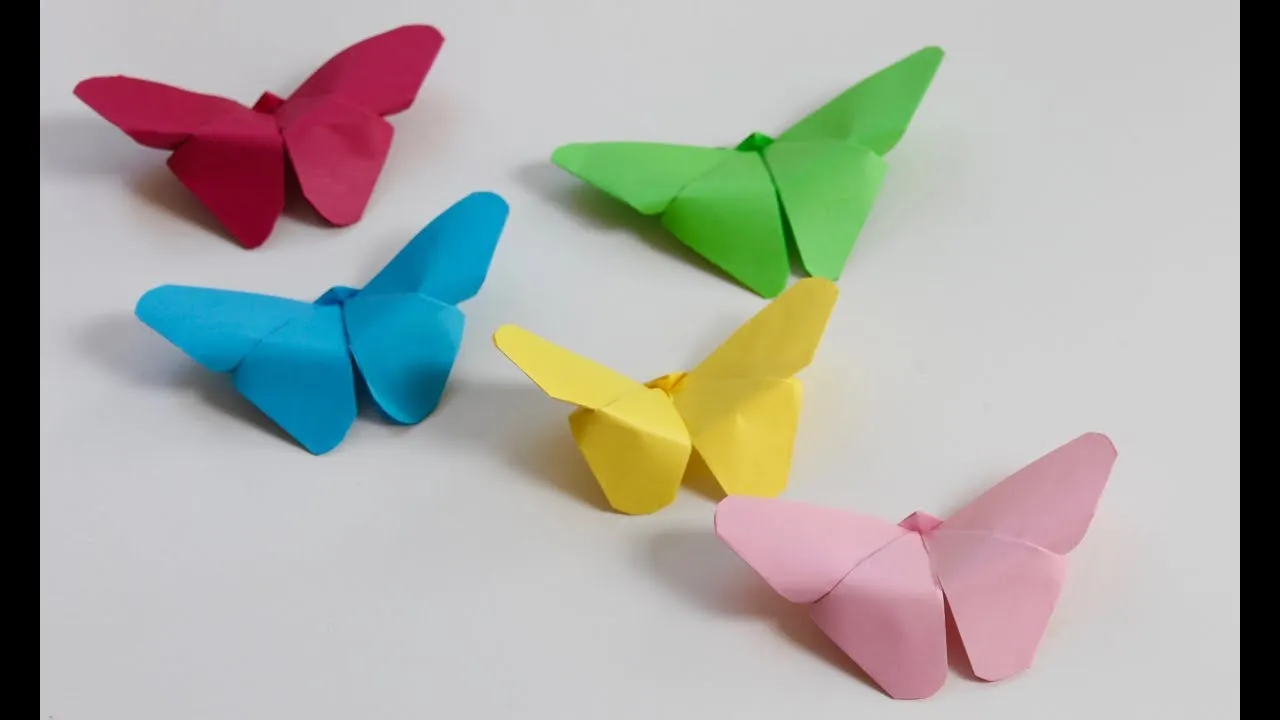
- Colored Paper: Choose vibrant colors like pink, blue, yellow, or any shades you love. You can use construction paper, origami paper, or any scrap paper you have lying around.
- Scissors: A good pair of scissors is essential for cutting out your butterfly shapes. Safety scissors work well for kids.
- Glue or Tape: To attach different parts of the butterfly or to secure it in place.
- Pencil: For sketching your butterfly design before cutting.
- Markers or Crayons: Great for adding details and patterns to your butterflies once they’re cut out.
- Optional Decorations: Think about embellishments like glitter, stickers, or sequins to make your butterfly extra special!
Once you have all these materials ready, you're set to embark on your crafting journey! This simple collection of items will ensure that you create beautiful paper butterflies that you can proudly display or give as gifts. Happy crafting!
Also Read This: Create Eye-Catching Price Tags with Canva Price Tag Template
Step 1: Preparing the Paper
Before you dive into creating your beautiful paper butterfly, it’s essential to prepare your materials. This step sets the foundation for a successful crafting experience!
First, you’ll need some colorful paper. Here are a few options:
- Origami Paper: Available in vibrant colors and patterns, this is a great choice for intricate designs.
- Construction Paper: Thicker and sturdier, construction paper works well for beginners and adds a robust look to your butterfly.
- Wrapping Paper: For a delicate touch, use wrapping paper with beautiful prints. It can give your butterfly a unique flair.
Once you’ve chosen your paper, cut it into a square. A size of 6 inches by 6 inches is perfect for a traditional butterfly shape. If you want a larger butterfly, feel free to increase the size! Just remember, the proportions of the folds will remain the same.
Next, make sure your workspace is clear and that you have all your tools handy. You’ll need:
- Scissors
- A ruler
- A pencil (for marking, if needed)
Now that you have everything in place, you’re ready to move on to the next step—folding the paper!
Also Read This: Imago Stock Photos: Stunning Website Content
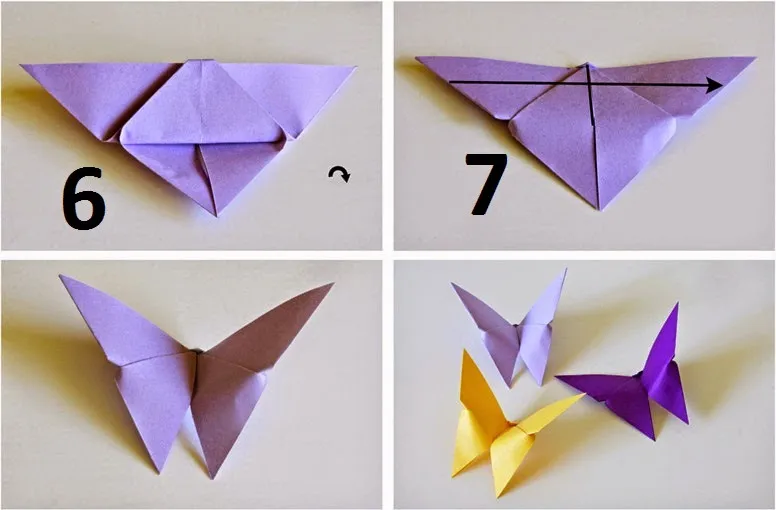
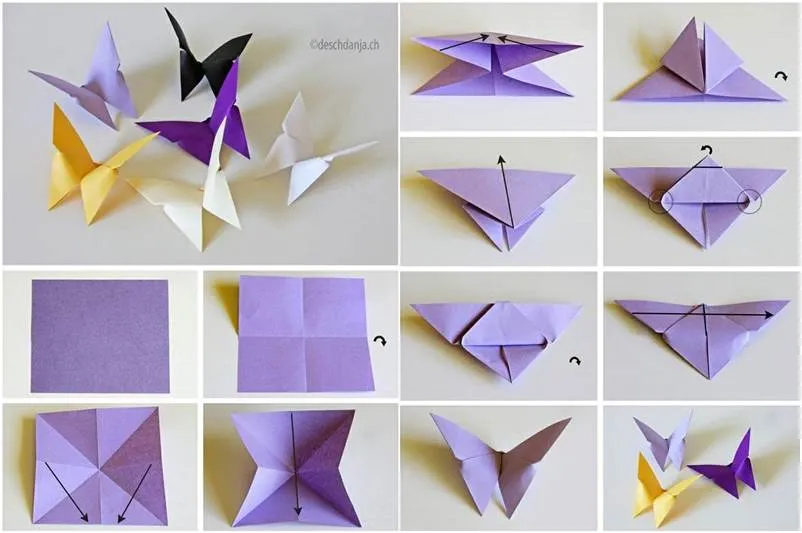
Step 2: Folding the Paper
Folding is where the magic begins! This step involves a series of simple yet precise folds that will transform your square paper into a charming butterfly.
Start by placing your square paper in front of you so it looks like a diamond (a point facing you). Follow these steps:
- First Fold: Fold the diamond in half diagonally to create a triangle. Crease sharply, then unfold.
- Second Fold: Fold the top point of the triangle down to meet the bottom point, creating a smaller triangle. This will form the wings.
- Third Fold: Now, take the left and right points of the triangle and fold them inward towards the center crease. This shapes the wings further.
- Fourth Fold: Flip the paper over and fold the top point down slightly to give the butterfly a rounded head.
Throughout folding, remember to make clean creases. You can run your fingernail along the edges to press down firmly. Don't worry if it's not perfect; the beauty of handmade crafts lies in their uniqueness!
Once you’ve completed these folds, you’ll see your butterfly beginning to take shape. Exciting, right? Keep it flat for now as we prepare for the final touches in the next steps!
Also Read This: Canva Canvas Image Change
Step 3: Cutting the Wings
Alright, let’s get into the fun part—cutting those beautiful wings! This is where your butterfly starts to take shape. Grab your scissors and make sure you have a clean, flat surface to work on.
First, take your folded paper (you should have a nice crease from Step 2). Here’s what you need to do:
- Outline Your Wings: Using a pencil, lightly draw the shape of the wings. You can choose a simple oval or get creative with a more intricate design. Remember, butterflies come in all shapes and sizes!
- Cut the Wings: Carefully cut along the lines you just drew. If you’re working with kids, make sure they’re supervised as scissors can be tricky.
- Unfold and Check: Once you’ve cut the wings, gently unfold the paper. You should see two symmetrical wings that mirror each other beautifully. If you notice any rough edges, trim them for a cleaner look.
Congratulations! You’ve just created the wings of your paper butterfly. Now, let’s move on to assembling everything together.
Also Read This: Exploring Alternatives and Ethical Practices for Adobe Stock
Step 4: Assembling the Butterfly
We’re almost there! Assembling your paper butterfly is like putting together the final pieces of a jigsaw puzzle. This is where your hard work starts to shine!
Here’s how to do it:
- Position the Wings: Take the two cut wings and lay them flat. You can decide if you want them in a traditional butterfly position or slightly angled for a more dynamic look.
- Create the Body: Fold a small piece of paper or use a pipe cleaner for the butterfly’s body. If you're using paper, cut it to about 1 inch wide and 4 inches long. Roll or fold it to give it some structure.
- Attach the Body: Use glue or tape to secure the body between the two wings. Press down gently to ensure it sticks well.
Lastly, you can add details like antennae using small pieces of pipe cleaners or markers for decoration. Your paper butterfly is now fully assembled and ready to be displayed!
Also Read This: How to Make Easy Sweet Dish at Home
Step 5: Adding Decorations
Now that you’ve successfully crafted your paper butterfly, it’s time to unleash your creativity! Adding decorations can really transform your butterfly from simple to stunning. Here are some fun ways to adorn your creation:
- Markers and Colored Pencils: Use vibrant markers or colored pencils to add intricate designs on the wings. Swirls, dots, and lines can mimic the natural patterns found on real butterflies.
- Glitter: If you want your butterfly to sparkle, sprinkle some glitter on the wings. A little bit of glue on the areas where you want the glitter to stick can create a magical effect!
- Stickers: Consider using small stickers or washi tape for a unique touch. Flower stickers can complement the butterfly theme beautifully.
- Ribbons: Attach a small ribbon at the base of the butterfly’s wings to give it a lovely 3D effect and add a touch of elegance.
- Paint: If you’re feeling adventurous, try using watercolor paints. They can give your butterfly a soft, dreamy appearance.
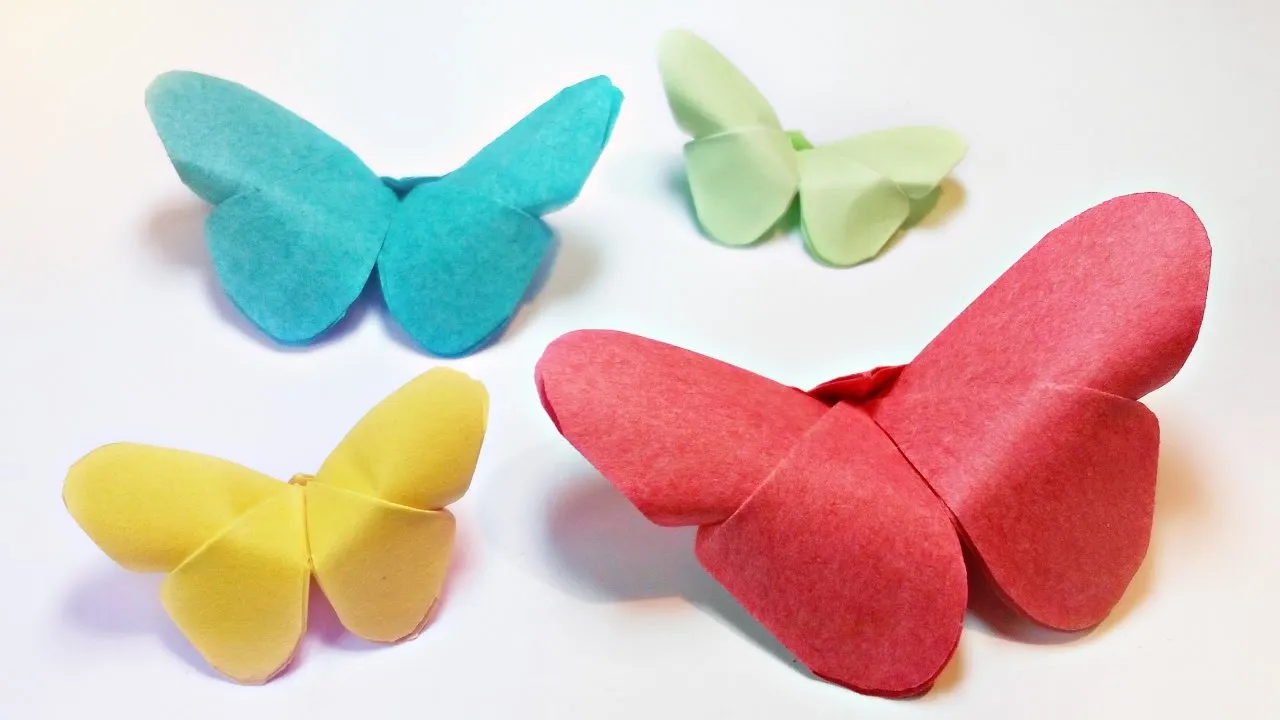
Remember that there’s no right or wrong way to decorate. Let your imagination run wild! You could even use different materials for different butterflies, creating a whole family of unique creations!
Conclusion
Creating a paper butterfly is not just an enjoyable craft, but it also sparks creativity and builds fine motor skills. Whether you’re making these butterflies for fun, decoration, or a special event, the process is rewarding and the results are absolutely charming.
As you’ve seen, it’s a simple step-by-step tutorial that can be tailored to your personal taste. From choosing your paper to adding delightful decorations, each stage allows for personal flair and creativity. Here’s a quick recap of what we covered:
- Choosing the right materials
- Folding and cutting techniques
- Assembling your butterfly
- Decorating options to enhance beauty
So gather your supplies, bring some friends or family into the fun, and start making your own lovely paper butterflies. Who knows? You may even start a butterfly garden in your home! Happy crafting!