Changing your LinkedIn email address might seem like a simple task, but it can have a significant impact on how you connect with professionals and manage your online presence. Whether you’ve switched jobs, want to consolidate your accounts, or simply prefer a new email, updating your LinkedIn profile is essential for staying connected. In this guide, we'll walk you through why you might need to change your email and how to do it seamlessly.
Why You Might Need to Change Your Email Address
There are several reasons why you might find yourself needing to update your LinkedIn email address. Let's explore some of the most common ones:
- Job Change: If you’ve recently changed jobs, it’s a good idea to switch to your new company email or a personal email that reflects your current professional identity.
- Email Consolidation: Many people have multiple email accounts. If you’re trying to simplify your online life, consolidating your LinkedIn account to a single email can make communication easier.
- Security Concerns: If your email has been compromised or you suspect phishing attempts, it’s crucial to change your email address to protect your account and personal information.
- Personal Preference: Sometimes, you just want a change. Whether you’ve switched to a more professional address or want one that’s easier to remember, updating your email can reflect your personal branding better.
- Inactive Email: If your previous email is no longer active or you plan to stop using it altogether, it’s important to update your LinkedIn to ensure you don’t miss out on important notifications.
In summary, changing your LinkedIn email address can help you maintain your professional connections, enhance security, and ensure that you’re always reachable. Whatever your reason, it’s a straightforward process that can make a big difference!
Also Read This: How to Optimize Your Website for Search Engines
3. Step-by-Step Guide to Changing Your Email Address on LinkedIn
Changing your email address on LinkedIn is a straightforward process, but it's essential to follow the steps carefully to ensure that your account remains secure and accessible. Here's a step-by-step guide to help you through the process:
- Log into Your Account: Start by opening LinkedIn and logging into your account using your existing email address and password.
- Go to Your Settings: Once you're logged in, click on your profile picture or the "Me" icon at the top right corner. From the dropdown menu, select "Settings & Privacy."
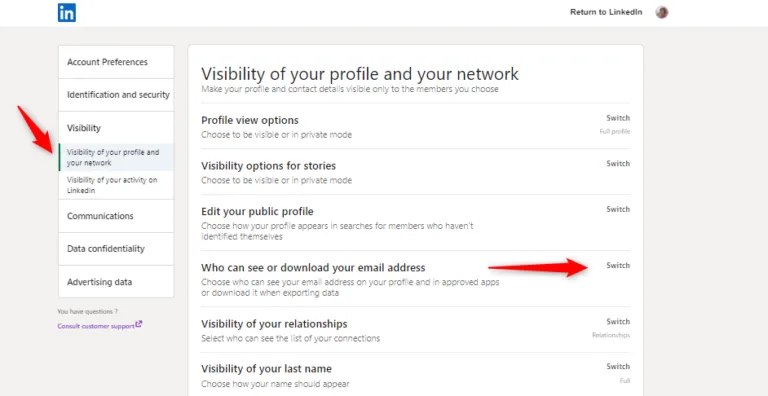
- Access the Email Addresses Section: In the Settings & Privacy menu, click on the "Account" tab, and then find the "Email addresses" section. Here, you will see your current email address listed.
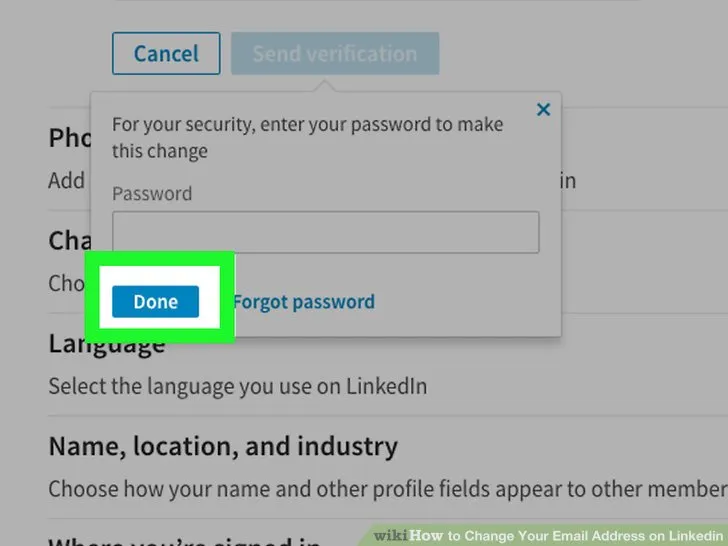
- Add a New Email Address: Click on the "Add email address" option. Enter the new email address you want to use and click "Send verification." LinkedIn will send a verification email to the address you just entered.
- Verify the New Email: Check your inbox for the verification email from LinkedIn. Click on the link in the email to confirm your new address. If you don't see it, check your spam or junk folder.
- Set New Email as Primary (Optional): After verification, you can return to the "Email addresses" section and set your new email as your primary contact by clicking the "Make primary" link next to it.
- Remove Old Email (Optional): If you no longer want to keep your old email, you can remove it by clicking on the "Remove" button next to it. Just make sure you are comfortable with the new email as your primary contact before doing this!
And that’s it! You've successfully changed your email address on LinkedIn. Just remember to keep your account information up to date to avoid any issues in the future.
Also Read This: How to Delete Your YouTube Channel in 2024 and Permanently Remove Content
4. Verifying Your New Email Address
Once you've added your new email address to your LinkedIn account, it's crucial to verify it. Verification ensures that you have access to the email and helps LinkedIn maintain the security of your account. Here’s how to verify your new email address:
- Check Your Email Inbox: After adding the new email address, head over to your email inbox associated with that address. Look for an email from LinkedIn with the subject line "Verify your email address."
- Click the Verification Link: Open the email and click on the verification link provided. This link is essential as it confirms your ownership of the email address.
- Confirmation Message: After clicking the link, you should see a confirmation message that your email address has been verified. If you don’t see the message, ensure that you are logged into the correct LinkedIn account.
- Resend Verification (if needed): If you didn't receive the verification email, you can go back to the "Email addresses" section in your LinkedIn settings and select the option to resend the verification email.
Verifying your email can take just a few minutes, but it’s an essential step to ensure that your LinkedIn account remains secure. It helps LinkedIn safeguard your information and keeps your connections informed. Once verified, you can enjoy a seamless experience on the platform without any worries!
Also Read This: A Step-by-Step Guide to Selling Your Photos to Shutterstock
Updating Your Email Preferences
Once you've successfully changed your LinkedIn email address, it’s a good idea to update your email preferences. This ensures that you receive the notifications and updates that matter most to you. Here’s how to do it:
- Log into Your LinkedIn Account: Start by logging into your LinkedIn profile using your new email address and password.
- Go to Settings & Privacy: Click on your profile picture in the top right corner, then select “Settings & Privacy” from the dropdown menu.
- Navigate to Communications: In the settings menu on the left, click on “Communications.” This section allows you to customize how and when you receive notifications.
- Adjust Your Preferences: Here, you can modify your email preferences. You can toggle notifications for connection requests, messages, job alerts, and more. Make sure to check or uncheck the boxes according to your needs.
- Save Changes: Don’t forget to save any changes you make. There’s usually a button at the bottom of the page that says “Save changes.”
By updating your email preferences, you ensure that you’re not inundated with irrelevant notifications while still staying informed about important updates. This can greatly enhance your LinkedIn experience, keeping it tailored to your professional needs.
Also Read This: How to Access Smart YouTube Content on OnlyFans
Troubleshooting Common Issues
Sometimes, even after following the proper steps, you might run into issues when trying to change your LinkedIn email address. Here are some common problems and how you can tackle them:
| Issue | Solution |
|---|---|
| Didn’t Receive Confirmation Email | Check your spam or junk folder. If it's not there, try resending the confirmation email from your LinkedIn settings. |
| Unable to Save Changes | Ensure your new email address is correctly entered and not already in use on another LinkedIn account. If the problem persists, try logging out and back in. |
| Email Already Exists | If you receive a message stating that the email is already associated with another account, you may need to access that account to remove or update the email address. |
| Account Locked | In rare cases, LinkedIn may temporarily lock your account for security reasons. Follow the prompts sent to your registered email for verification. |
If you encounter any issues not listed here, LinkedIn has a comprehensive help center where you can find additional support. Remember, it’s crucial to keep your email address updated for account recovery and communication purposes, so don’t hesitate to reach out for help if needed!
How to Change Your LinkedIn Email Address
Changing your LinkedIn email address is a straightforward process that can enhance your account's security and ensure that you receive important notifications. Follow these simple steps to update your email address on LinkedIn:
- Log into Your LinkedIn Account: Start by going to the LinkedIn website and signing in with your current credentials.
- Access Your Account Settings: Click on the “Me” icon at the top of your LinkedIn homepage. From the dropdown menu, select “Settings & Privacy.”
- Navigate to Email Addresses: Under the “Account preferences” section in the settings menu, find the “Email addresses” option.
- Add a New Email Address: Click on “Add email address.” Enter the new email address you want to use and click “Send verification.”
- Verify the New Email: Check your inbox for a verification email from LinkedIn. Click on the verification link in the email to confirm your new email address.
- Remove Old Email Address (Optional): If desired, you can now remove your old email address. Simply click on “Remove” next to the email you want to delete.
- Update Notifications: Ensure your notification preferences are set according to your new email address to receive alerts promptly.
Changing your email address on LinkedIn is essential for maintaining account security and ensuring seamless communication. Always remember to keep your email up-to-date to avoid missing any important updates from your professional network.
Conclusion: By following the outlined steps, you can easily change your LinkedIn email address, enhancing your account security and ensuring you stay connected with your professional network.