Initially, I was overcome by the instructions provided by stock photography sites such as those used on www.shutterstock.com. The importance of knowing what is needed when submitting images cannot be overstated; it can mean the difference between success and failure as a contributor. Shutterstock has its own stringent specifications for photographs aimed at ensuring their top-notch quality and uniformity. For not only getting your pictures accepted but also for attracting customers looking for superb visuals understanding these conditions is necessary.
In simpler terms, when it comes to photo submissions, Shutterstock mostly seeks for:
- High resolution, ideally above 4MP
- Properly exposed with good color balance
- Free from noise or distortion
- Relevant to current trends and themes
Fundamentally, fulfilling these conditions raises the possibility of distinguishing yourself in a wide market, thus making a name for yourself. Its all about ensuring that your photos have the highest chance of flourishing!
Importance of Image Resolution
Resolution of image depicts visual quality. I recall once submitting a picture that I was very fond of and later realizing that it was not high enough in resolution. It seemed as if my creativity was being diminished to nothing. When it comes to stock pictures, the higher the resolution the clearer your images are and hence they can be used for variety of purposes – from online advertisements to print works. The buyers normally look for clear and hard written pictures which catch their eyes whereas low resolution can spoil all your efforts.
That’s why resolution matters:
- Print Quality: High-resolution images are essential for print materials, ensuring they don’t look pixelated.
- Versatility: Higher resolutions allow buyers to crop and resize images without losing quality.
- Professionalism: Submitting high-resolution images reflects your commitment to quality, which can enhance your reputation as a contributor.
From what I’ve seen, keeping tabs on resolution has afforded me a chance at better chances as my images are published in top-class magazines.
Also Read This: How to Download Music from YouTube Directly to Your iPhone
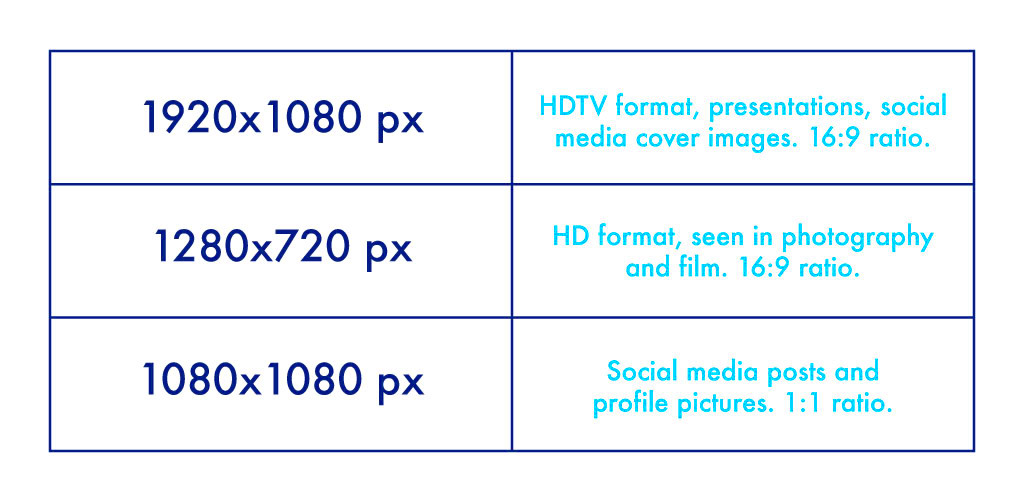
Ideal Pixel Dimensions for Shutterstock
Look, I know that when discussing pixel dimensions, there are no absolutes, but following some rules of thumb can help you succeed. Shutterstock’s minimum pixel size is 4,000 on the longest side and I learned that this helps in satisfying buyers’ various specifications through my own experience of doing it wrong and later doing it right. A summary of the acceptable pixel sizes is given below:
| Use Case | Minimum Dimensions (Pixels) |
|---|---|
| Web Usage | 1200 x 800 |
| Print Ads | 3000 x 2000 |
| Billboards | 6000 x 4000 |
Though concentrating on fulfilling minimal dimensions might seem luring, striving for better resolutions often leads to more desirable results according to my experience. It gives room for variations hence making it possible for clients to apply your pictures in any way they deem fit without necessarily thinking about the same at that time. Keep in mind that if your images are versatile they will appeal more to buyers looking for them. Accept it is a journey and allow innovation in you!
Also Read This: Discover Your Content Creator Personality with Our YouTuber Quiz
Tips for Maintaining Image Quality

Taking care of the image lucidity is, in some ways, giving the flowers a bath and watering them. It is a bit difficult but it needs a lot of caution, meticulousness and sometimes experimentation before you achieve the desired results. When I started out as a photographer, I rarely paid attention to this issue and was often left with images that didn’t match up to my expectations. Here are some suggestions, based on personal experience, which can lead to great photographs.
- Use Proper Lighting: Natural light is your best friend. Whenever possible, shoot during the golden hour—just after sunrise or before sunset. The soft, warm tones enhance your images significantly.
- Avoid Over-Editing: It’s tempting to apply every filter in the book, but less is often more. Keep your edits subtle to preserve the image’s original quality.
- Choose the Right Format: Save images in formats like TIFF or PNG for high-quality results. JPEG can be good for web use, but it compresses images, which can lead to loss of quality.
- Utilize Tripods: A steady shot is a sharp shot. Using a tripod can help eliminate blurriness, especially in low-light conditions.
- Regularly Clean Your Equipment: Dust and smudges on your lens can drastically affect image quality. Make it a habit to clean your gear after every shoot.
By following these suggestions consistently, my photography has been revolutionized – now the pictures I take are aesthetically pleasing and have meaning for many people.
Also Read This: How to Download YouTube Videos Without a Premium Account
Common Mistakes to Avoid
I have counseled for a long time photographers on how to avoid making the same mistakes I made which in turn would help them achieve their dreams. Nevertheless, it’s possible to dodge a number of issues just by being informed about them beforehand. The following are some mistakes I found out that needed avoidance:
- Poor Composition: Don’t underestimate the power of composition. A well-framed image can capture attention instantly. Always consider the rule of thirds and balance in your shots.
- Ignoring the Background: A cluttered background can distract from your subject. Take a moment to assess what’s behind your main focus and adjust your angle or settings accordingly.
- Neglecting Color Profiles: Using the wrong color profile can result in unexpected hues. Always shoot in Adobe RGB or sRGB, depending on your needs.
- Forgetting to Back Up: Losing your images due to technical issues can be heartbreaking. Make it a routine to back up your photos in multiple places.
- Not Reviewing Work: It’s easy to get caught up in the excitement of shooting and forget to review your images. Always take time to evaluate your work and learn from it.
A lesson is hidden in any error. When you learn from common mistakes, you will be able to concentrate on polishing your talent and producing the images that leave people breathless.
Also Read This: How to Make Money with Adobe Stock Leveraging Your Photography Skills
Tools to Check Image Quality
In this epoch of technology, possessing appropriate apparatus is critical for maintaining photo superiority. I have used several instruments, and some have become essential to my process. Below are examples of dependable instruments worth consideration:
| Tool | Purpose |
|---|---|
| Adobe Photoshop | Advanced editing and checking resolution |
| Lightroom | Organizing and basic editing with quality checks |
| ImageMagick | Command-line tool for image manipulation and analysis |
| GIMP | Free software for editing and checking quality |
| PicMonkey | Easy online editing with built-in quality tools |
If you use such tools correctly this will enable you to judge the quality of images before uploading them onto stock platforms. Sometimes when I am working on my pieces of artwork I take a few minutes to look at them with these programs which makes me realize potential faults in them hence helping me become better at them. Get yourself the proper devices since they have the potential of making or breaking everything; thus discover what suit’s you more and incorporate it into your works!
Also Read This: Behind the Scenes: WireImage Photographers’ Stories and Tips
Best Practices for Uploading Images
Submitting photographs to Shutterstock is overwhelming due to many parameters that come into play. There are blueprints for everything in uploading hence nobody should be surprised that I wasn’t able to learn more than one lesson during my first months as an amateur. However, experience taught me as an experienced photographer that a photographer needs to know how he/she needs to take photographs in order for such works not be rejected. The following are some of the things I have learnt from experience.
- Organize Your Files: Before uploading, create folders to categorize your images. This simple step saves you from the chaos of a disorganized library. I often use themes or projects as folder names, which makes it easier to find images later.
- Optimize Your Images: Before you hit that upload button, make sure your images are optimized for web use. This means compressing the files without losing quality. I use tools like TinyPNG, which effectively reduces file sizes.
- Write Descriptive Keywords: Keywords are crucial for discoverability. Think from the buyer's perspective and use relevant terms. I always try to include both broad and specific keywords to widen my reach.
- Include Detailed Captions: Captions give context to your images. Describe what’s happening, the emotions involved, or any unique aspects of the shot. This not only aids buyers but also enhances the chances of approval.
- Stay Updated on Guidelines: Shutterstock’s policies may evolve, so regularly checking their guidelines is essential. I’ve found that dedicating a few minutes each month to review any updates helps me stay compliant.
These are the best practices leads to the smooth uploading of images and also increases their chances of getting featured.
Also Read This: Sharing my Behance profile
FAQs about Shutterstock Image Quality
Being an active contributor to Shutterstock, I have faced numerous inquiries about the quality of images. This could be very confusing for new people in this business but asking appropriate questions really helps a lot. Below are some of those questions that frequently come up and which I’ve come to find useful:
- What is the minimum resolution for Shutterstock images?
The minimum resolution is 4MP, but higher resolutions are encouraged to ensure better quality. - Can I upload images taken with a smartphone?
Absolutely! Many smartphones today capture high-quality images. Just ensure that the images meet Shutterstock's resolution and quality standards. - What file formats are accepted?
Shutterstock accepts JPEG, TIFF, and EPS formats. However, JPEG is the most common and preferred format for uploads. - How can I ensure my images are approved?
To enhance your chances of approval, focus on high resolution, good lighting, and proper composition. Reviewing Shutterstock’s guidelines beforehand is also crucial. - Do I need model releases for portraits?
Yes, if your images feature recognizable people, having a model release is necessary to avoid legal issues.
When you are trying to comprehend their image quality expectations about Shutterstock, you can find some guidance in these FAQs.
Conclusion on Image Quality for Shutterstock
Looking back at my experience with Shutterstock, I comprehend that quality of the picture is more than just conforming to technical requirements. It involves expressing feelings, narrating tales and reflecting what happened at a point in time. Every single picture you upload should be able to talk to your potential clients and trigger sentiments that will make them want to acquire it.
The aspects to master for one to stand out or be noticeable in a world dominated by images require commitment to high standards and a good comprehension of the market. Just to recap on some of the main points we highlighted:
- Understanding and adhering to Shutterstock’s image requirements is essential.
- Maintaining high resolution and quality through careful planning and execution can elevate your work.
- Using the right tools and techniques helps in producing images that catch the eye of potential buyers.
- Staying informed about best practices and common mistakes ensures a smoother uploading experience.
To conclude, the journey of becoming an effective Shutterstock contributor runs through learning and adjustments. Adhere to all processes, continue exploring, but mainly allow your love for art to flow through your pictures. Always know that quality is not just a target; it’s a road that demonstrates what kind of creative person you are.