In this era, iCloud has become a vital asset in our lives particularly for those who hold dear their cherished moments and memories. I vividly recall the moment I truly understood the significance of my pictures after misplacing my phone. Fortunately I had saved everything on iCloud and it turned out to be a game changer. With its smooth compatibility across all Apple devices iCloud enables us to effortlessly store, share and access our photos. Here are some compelling reasons to think about using iCloud:
- Automatic Backup: Your photos are automatically backed up, reducing the risk of losing precious memories.
- Access Anywhere: Whether you’re on your iPhone, iPad, or Mac, your photos are always at your fingertips.
- Shared Albums: You can create albums that family and friends can view and contribute to, making it easier to share experiences.
- Optimized Storage: iCloud manages storage intelligently, ensuring your device doesn’t get filled up while keeping your images safe.
From my perspective iCloud has completely changed the way I handle my pictures. Its truly invaluable to have the reassurance that my cherished moments are safely backed up.
Preparing Your Photos for Upload
Before getting into the upload it crucial to get your photos ready. I usually go through a ton of pictures and remember old times. Its a great opportunity to decide what I want to hold onto. Here are some steps you can follow.
- Organize Your Photos: Create folders based on events or dates. This not only helps with easy access later but also makes the upload process smoother.
- Edit Your Images: Take a moment to enhance your photos using editing apps. This adds a personal touch and ensures your images look their best.
- Check File Sizes: Large files can slow down the upload process. Consider resizing your photos if needed.
Taking the time to curate your pictures helps you upload only the most cherished moments to iCloud. As I sort through my photos I often feel a sense of nostalgia, reliving memories that are worth sharing.
Also Read This: Connecting Communities: Niche Exploration on Imgur
Accessing iCloud from Your Device
Setting up iCloud is a breeze, especially if you’re already using Apple products. I still recall the moment I activated it on my iPhone, it felt like discovering a hidden vault of cherished moments. Here’s a simple guide on how to access iCloud on your device.
- On iPhone/iPad:
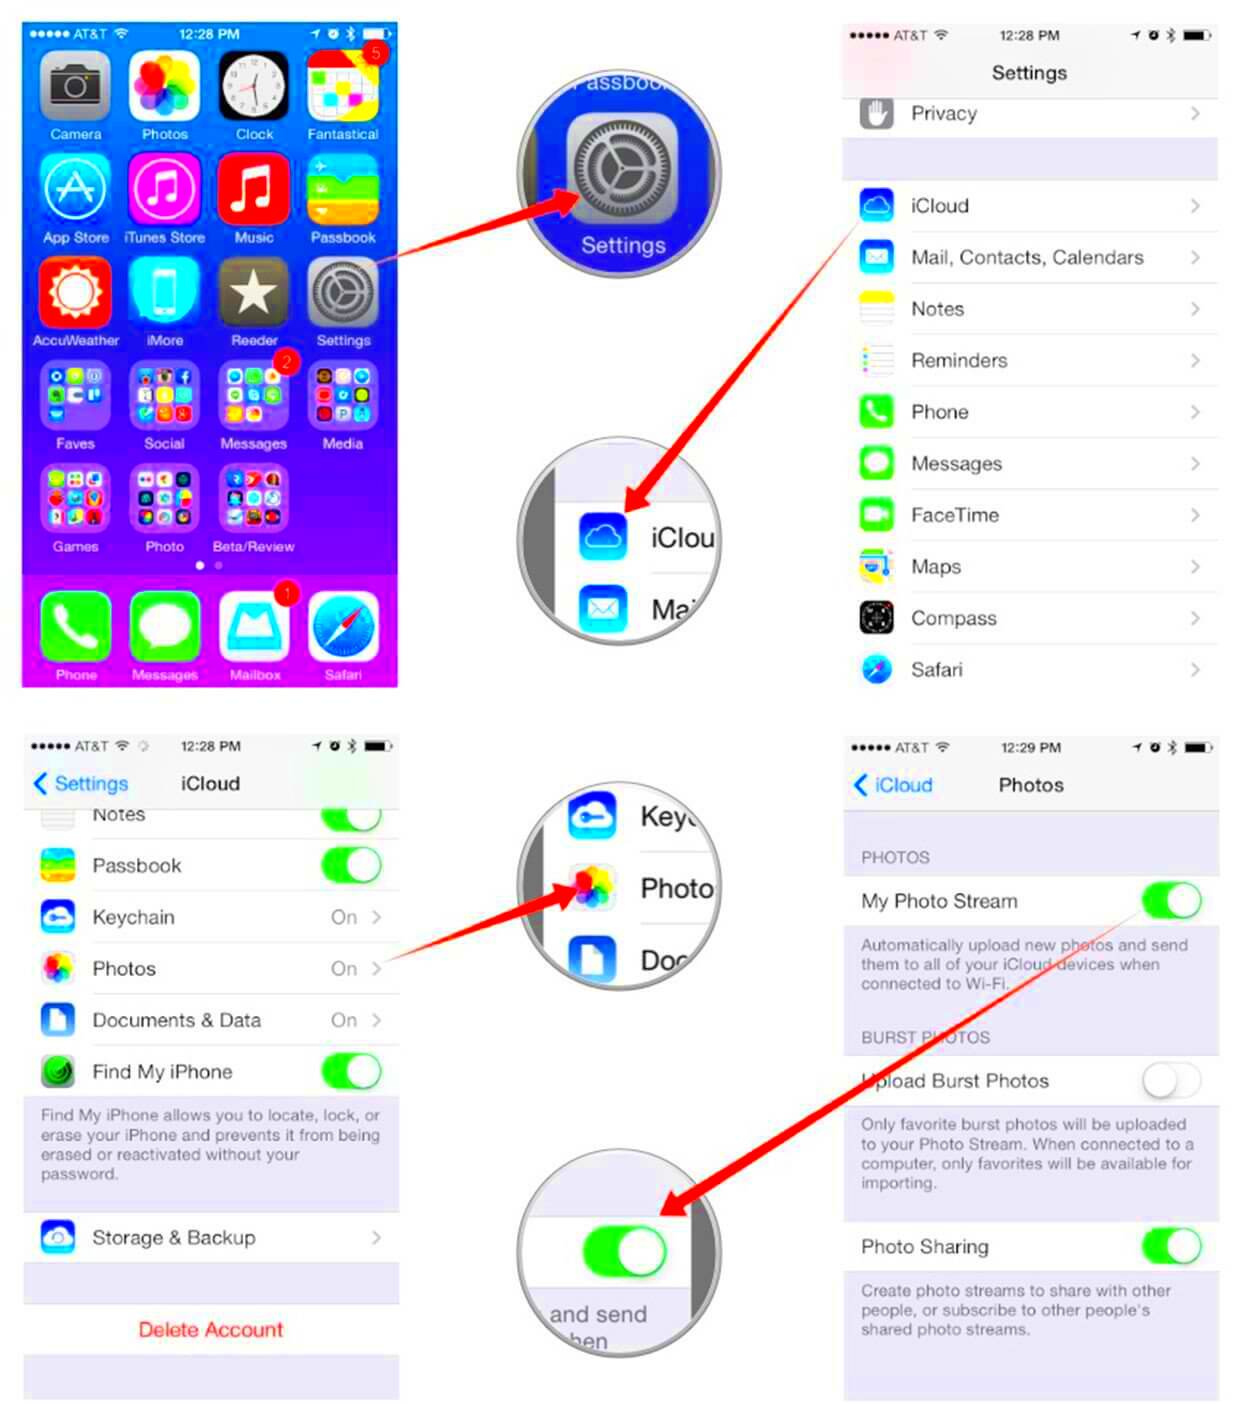
- Open the Settings app.
- Tap your name at the top to access Apple ID settings.
- Select iCloud to see all available services.
- On Mac:
- Click on the Apple logo in the top-left corner.
- Select System Preferences and then Apple ID.
- Click on iCloud in the sidebar.
Once you get in there you'll come across choices to handle your storage check out your pictures and even share them. Its really comforting to realize that all your cherished moments are only a few taps, away. Believe me this convenience simplifies the process of organizing your photos!
Also Read This: Is the YouTube App Down? How to Troubleshoot Issues with the YouTube App
Uploading Photos via iCloud Website
I remember feeling a blend of anticipation and apprehension when I attempted to upload pictures via the iCloud site for the first time. The thought of safely keeping my cherished moments in the cloud was exhilarating, though I had some doubts about the simplicity of the process. Fortunately it proved to be quite easy! Here's a guide on how you can accomplish it as well:
- Visit the iCloud Website: Open your web browser and go to iCloud.com. Sign in using your Apple ID and password.
- Navigate to Photos: Once you’re logged in, click on the Photos icon. This will take you to your photo library, where you can see all your uploaded images.
- Upload Your Photos: Click on the Upload button, which looks like a cloud with an upward arrow. Select the photos you want to upload from your computer and hit Open.
The process of uploading photos could take a little while, depending on how fast your internet is and how large the files are. I recall nervously watching the progress bar, praying that everything would go well. And it did! Once the upload is complete your pictures are securely stored in iCloud, accessible on any device you use. This approach is great, especially when you’re working on a computer and want to swiftly save some precious memories.
Also Read This: Next Royal Rumble Date and Schedule for Upcoming Events
Using iCloud on iOS Devices
Using iCloud on your iOS devices is like having a helper for your pictures. I really appreciate how smoothly it fits into my day to day life. If you’re looking for a quick overview of using iCloud on your iPhone or iPad here’s a straightforward guide.
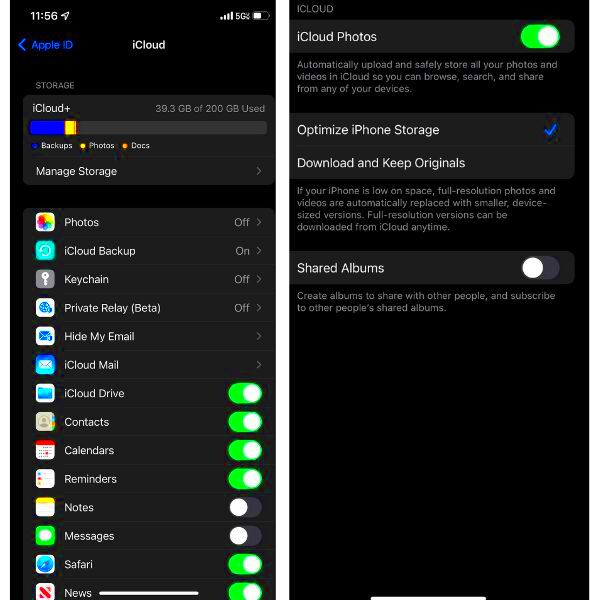
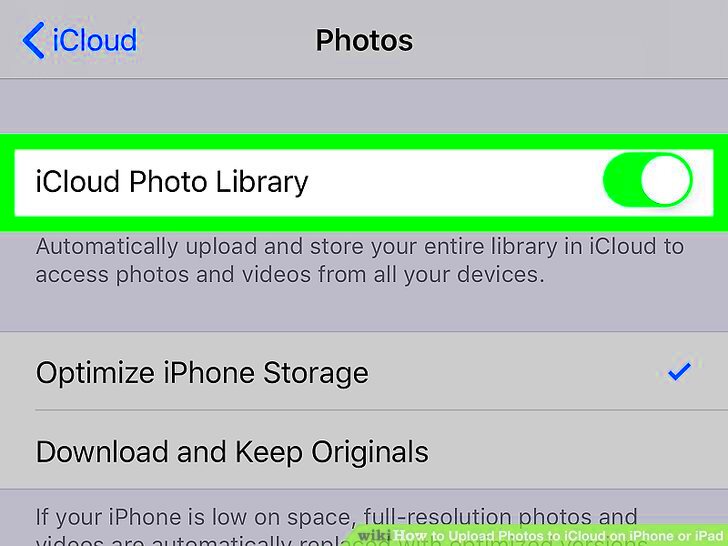
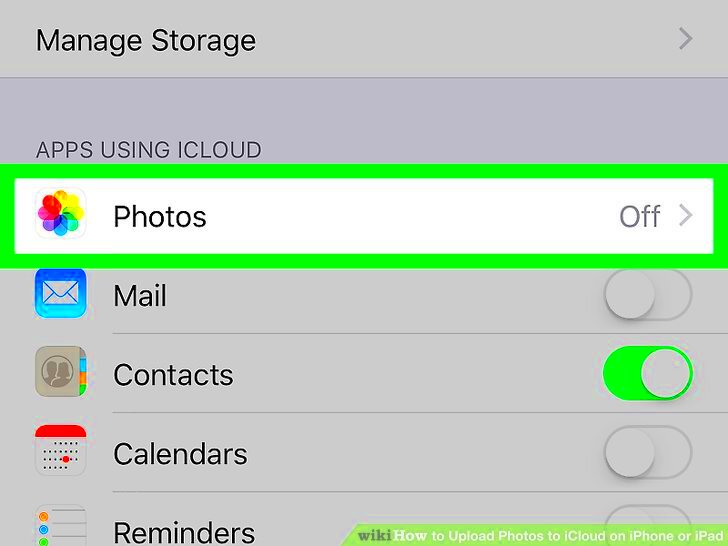
- Enable iCloud Photos: Go to Settings, tap on your name, then select iCloud. From there, tap on Photos and toggle on iCloud Photos.
- Uploading Automatically: Once enabled, your photos will upload automatically whenever you’re connected to Wi-Fi. This feature has saved me so much time and worry about losing important pictures.
- Accessing Your Photos: To view your photos, simply open the Photos app. You’ll see all your pictures organized by date, events, and more.
Being able to tap into my memories whenever and wherever I want has really transformed things for me. Whether Im looking back on a family wedding or sharing my recent travel escapades iCloud ensures that my cherished moments are always within reach.
Also Read This: How to Delete from LinkedIn
Uploading Photos from a Mac
Transferring pictures from a Mac to iCloud is quite simple. I usually sit at my desk and move my photos over after a weekend. If you want to upload your pictures here’s a straightforward guide on how to do it.
- Open the Photos App: Launch the Photos app on your Mac. If you haven’t already, make sure iCloud Photos is enabled in the app’s preferences.
- Select Your Photos: Browse through your library and select the photos you wish to upload. You can hold down the Command key to select multiple photos at once.
- Upload Your Photos: After selecting, simply click on File in the menu bar, then select Import. Choose the photos from your files or drag and drop them directly into the Photos app.
Im always in awe of how smoothly my photos sync. There was this occasion when I uploaded pictures from a trip to Kerala—every single photo took me back to the rich culture and breathtaking scenery. Thanks to iCloud those cherished moments are always within reach.
Also Read This: Choosing the Perfect Card Stock in Adobe Reader for Your Projects
Troubleshooting Common Upload Issues
We've all been there, right? Those frustrating instances when technology decides to play hardball. I remember a particular moment when I attempted to upload my pictures to iCloud only to be greeted by error messages and an incessant spinning wheel. Its definitely disheartening but the majority of upload hiccups come with fixes. Here are a few issues you might encounter along with ways to address them.
- Slow Internet Connection: A slow or unstable connection can hinder your uploads. Try switching to a different network or resetting your router.
- Insufficient iCloud Storage: If you're out of space, your uploads won't complete. Check your iCloud storage settings and consider upgrading your plan or deleting unused files.
- File Format Issues: Ensure your photos are in compatible formats (like JPEG or PNG). If not, try converting them before uploading.
- Software Updates: Outdated software can cause problems. Regularly update your device and the iCloud app for smooth functioning.
Whenever I face a challenge I like to remind myself that finding a solution is just part of the process. Usually taking a breath and following these steps can help me fix the issue. It's really about staying calm and not giving up!
Also Read This: Is FYI Available on YouTube TV? A Guide to Lifestyle and Reality Channels
Frequently Asked Questions
Having explored the realm of iCloud I often come across some queries during my journey. Here are some commonly asked questions that could be of assistance to you too
- How do I access my photos on different devices?
You can access your photos by logging into iCloud.com or using the Photos app on any Apple device with iCloud enabled. - Is my data secure in iCloud?
Yes, Apple employs strong encryption methods to keep your data safe. However, it's always wise to enable two-factor authentication for added security. - Can I recover deleted photos?
Yes, deleted photos are stored in the “Recently Deleted” album for 30 days before being permanently removed, giving you a chance to recover them. - What if I run out of iCloud storage?
You can either delete unnecessary files or upgrade your storage plan via your device settings.
Seeking clarification through questions is essential for gaining knowledge. If you find yourself still uncertain about something dont hesitate to contact Apple Support or browse through online forums for assistance.
Wrapping Up Your iCloud Experience
Looking back on my experience with iCloud I can't help but appreciate the ease and reassurance it has provided me. Storing my photos has changed the way I document and share moments. Be it a family get together or an impromptu adventure with friends the comfort of being able to access and arrange these cherished memories effortlessly fills me with joy.
To sum up fully embracing iCloud for storing your photos goes beyond mere tech; it’s about treasuring those special moments. If you haven’t made the switch yet I urge you to give it a try. Revel in the ease of keeping your memories organized and readily accessible and remember to share your stories with loved ones on the journey. Ultimately it’s these shared experiences that add beauty to life!