Welcome to the delightful world of Oreo cakes! If you’re a fan of the iconic chocolate sandwich cookie, then you’re in for a treat. This Oreo Cake Recipe Guide will walk you through creating a mouthwatering cake that captures all the rich flavors of Oreos. Whether it’s for a birthday, a special occasion, or just a sweet craving, this cake is sure to impress family and friends. Let’s dive into the ingredients needed to whip up this delicious dessert!
Ingredients Needed
To make a scrumptious Oreo cake, you'll need a mix of simple ingredients that can easily be found in your kitchen or local store. Here’s a handy list to get you started:
- For the Cake:
- 1 ½ cups all-purpose flour
- 1 cup granulated sugar
- ½ cup unsweetened cocoa powder
- 1 teaspoon baking powder
- 1 teaspoon baking soda
- ½ teaspoon salt
- 2 large eggs
- 1 cup whole milk
- ½ cup vegetable oil
- 2 teaspoons vanilla extract
- 1 cup boiling water
- For the Oreo Frosting:
- 1 cup unsalted butter, softened
- 4 cups powdered sugar
- ½ cup cocoa powder
- 1 teaspoon vanilla extract
- ¼ cup heavy cream (adjust for consistency)
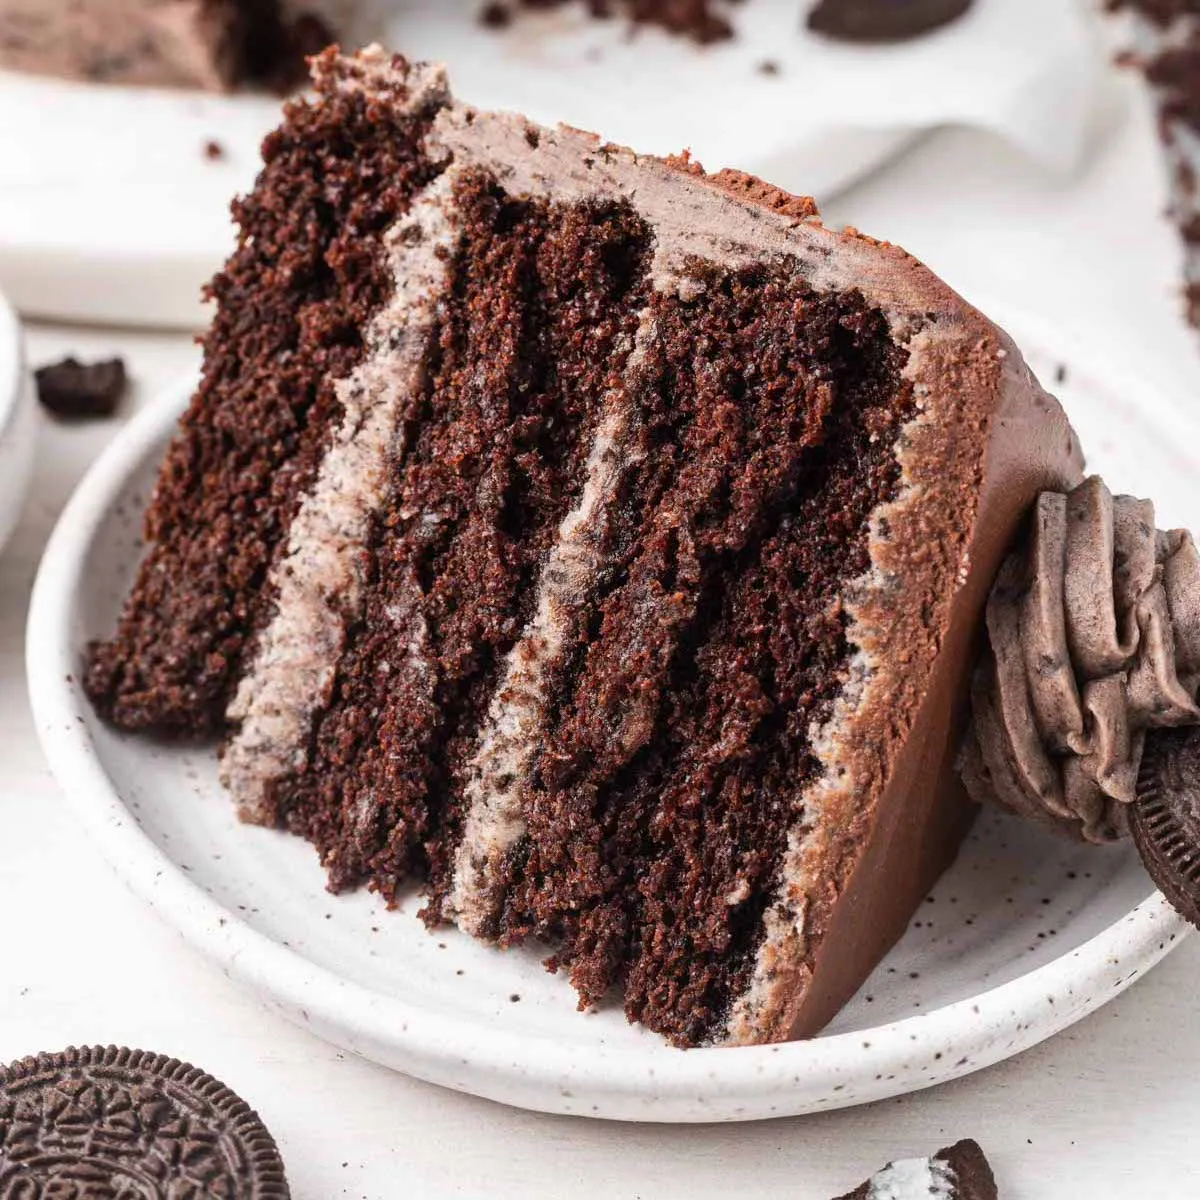
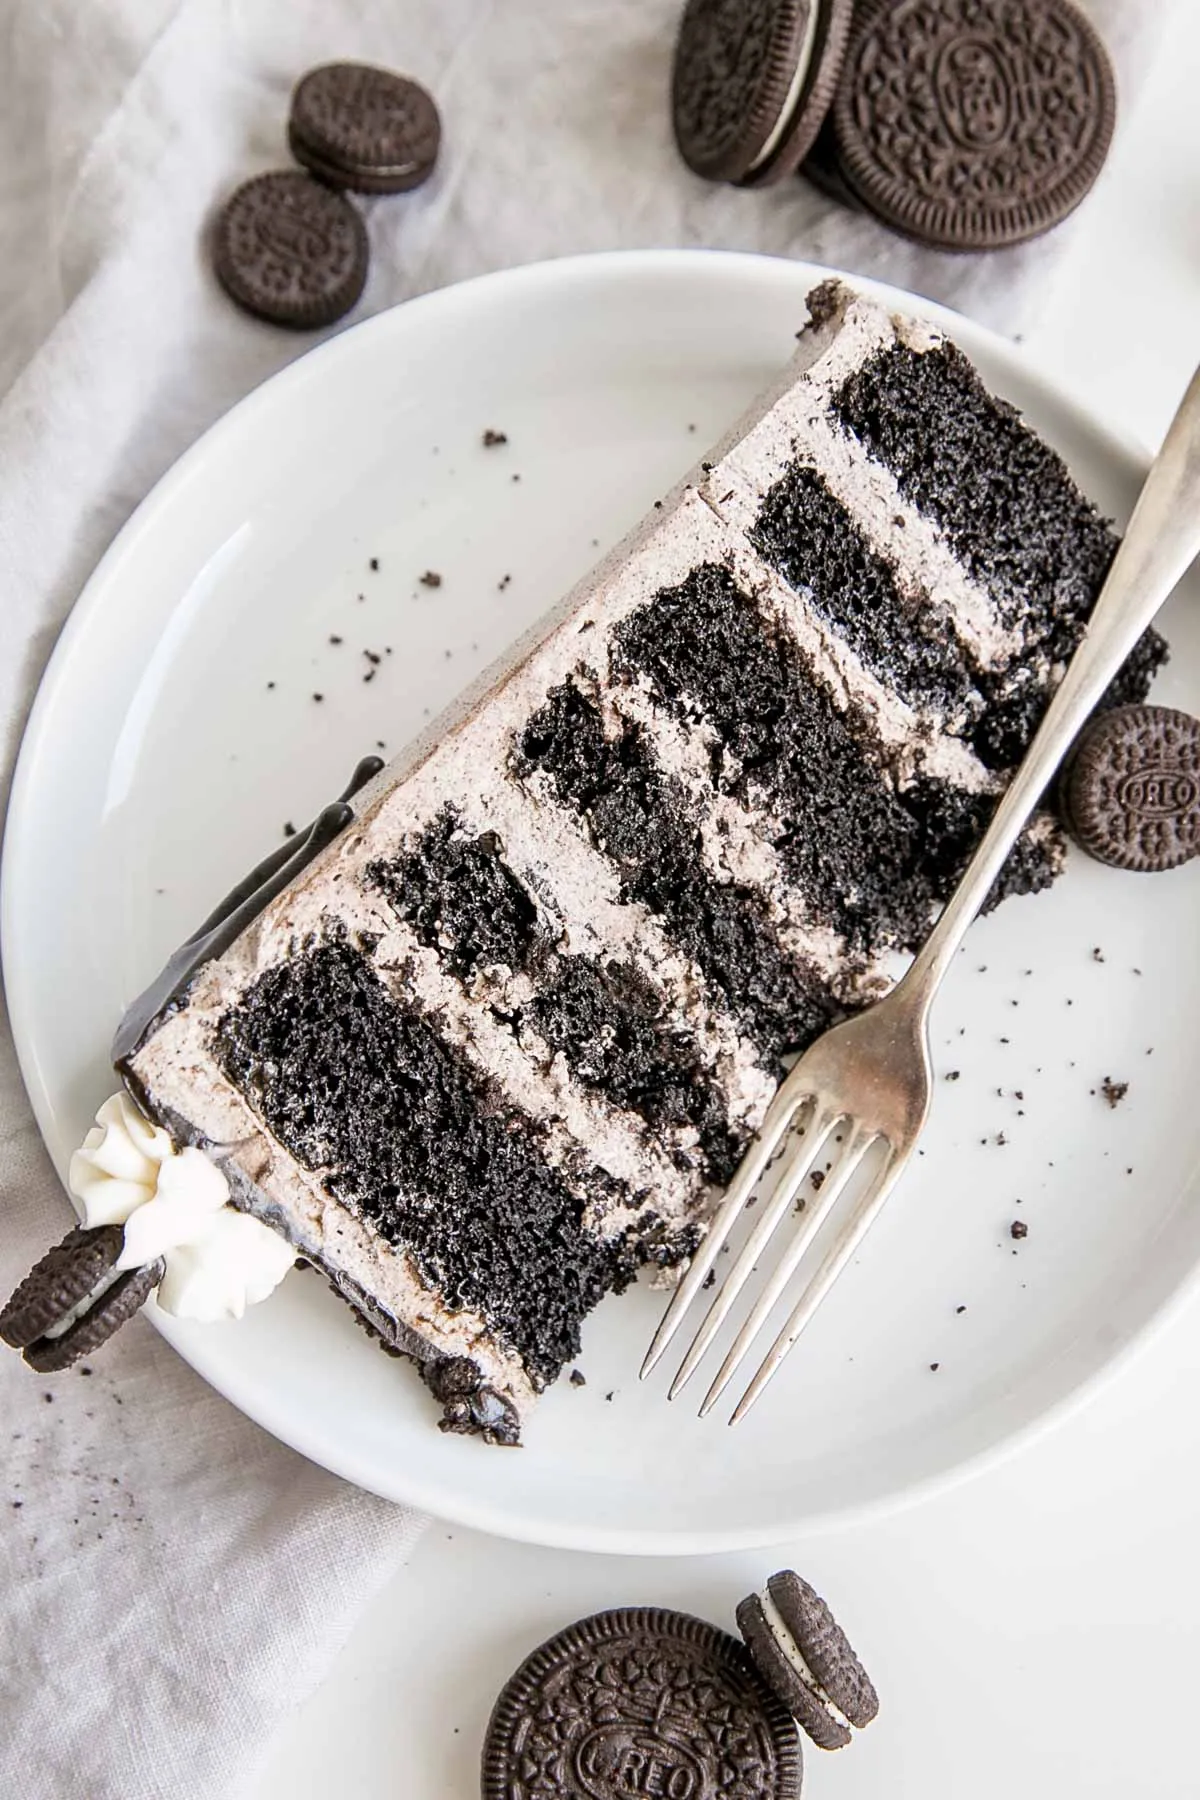
- 1 cup crushed Oreos (for mixing in and garnishing)
With these ingredients in hand, you're well on your way to baking an Oreo cake that’s not only delicious but also visually stunning. Let’s get baking!
Also Read This: Countdown to Royal Rumble 2024
3. Step-by-Step Instructions
Ready to dive into making this delicious Oreo cake? Let’s break it down step-by-step so you can create a delightful dessert that’s sure to impress!
-
Gather Your Ingredients:
- 1 ¾ cups all-purpose flour
- 1 ½ cups granulated sugar
- ¾ cup unsweetened cocoa powder
- 1 ½ tsp baking powder
- 1 ½ tsp baking soda
- 1 tsp salt
- 2 large eggs
- 1 cup whole milk
- ½ cup vegetable oil
- 2 tsp vanilla extract
- 1 cup boiling water
- 1 package of crushed Oreo cookies (about 15 cookies)
-
Preheat the Oven:
Set your oven to 350°F (175°C) and grease two 9-inch round cake pans. This helps prevent the cake from sticking!
-
Mix the Dry Ingredients:
In a large mixing bowl, whisk together the flour, sugar, cocoa powder, baking powder, baking soda, and salt until well combined.
-
Add Wet Ingredients:
Add in the eggs, milk, oil, and vanilla extract. Mix on medium speed for about 2 minutes until the batter is smooth.
-
Incorporate Boiling Water:
Carefully stir in the boiling water. The batter will be thin, but that’s exactly what you want!
-
Fold in Oreos:
Gently fold in the crushed Oreos into the batter. This adds that signature Oreo flavor that you can’t resist!
-
Pour and Bake:
Divide the batter evenly between the prepared pans and bake for 30-35 minutes. Use a toothpick to check for doneness—if it comes out clean, it’s ready!
-
Cool and Frost:
Let the cakes cool in the pans for 10 minutes, then transfer to a wire rack. Once completely cool, frost with your favorite Oreo frosting and enjoy!
Also Read This: Promoting work on Behance
4. Tips for Baking the Perfect Oreo Cake
Want to elevate your Oreo cake game? Here are some handy tips to ensure your cake turns out moist, fluffy, and utterly delicious!
-
Use Room Temperature Ingredients:
Let your eggs and milk sit out for about 30 minutes before mixing. This helps create a smoother batter and ensures even baking.
-
Don’t Overmix:
When combining the wet and dry ingredients, mix just until incorporated. Overmixing can lead to a dense cake.
-
Check Your Oven Temperature:
Ovens can vary, so consider using an oven thermometer to ensure accurate baking temperatures. This simple step can make a big difference!
-
Experiment with Fillings:
Try adding a layer of chocolate ganache or a cream cheese frosting between the cake layers for an extra indulgent treat.
-
Store Properly:
If there are leftovers (which is unlikely!), keep your cake in an airtight container at room temperature for up to 3 days. You can also refrigerate it to extend freshness.
With these steps and tips, you’ll bake an Oreo cake that’s sure to be the star of any gathering. Enjoy your baking adventure!
Also Read This: Understanding YouTube TV's Sign-In Requests and Troubleshooting Tips
5. Serving Suggestions
When it comes to serving your delightful Oreo cake, the presentation can elevate the experience from simply delicious to utterly irresistible! Here are some creative serving suggestions to make your cake the star of the show:
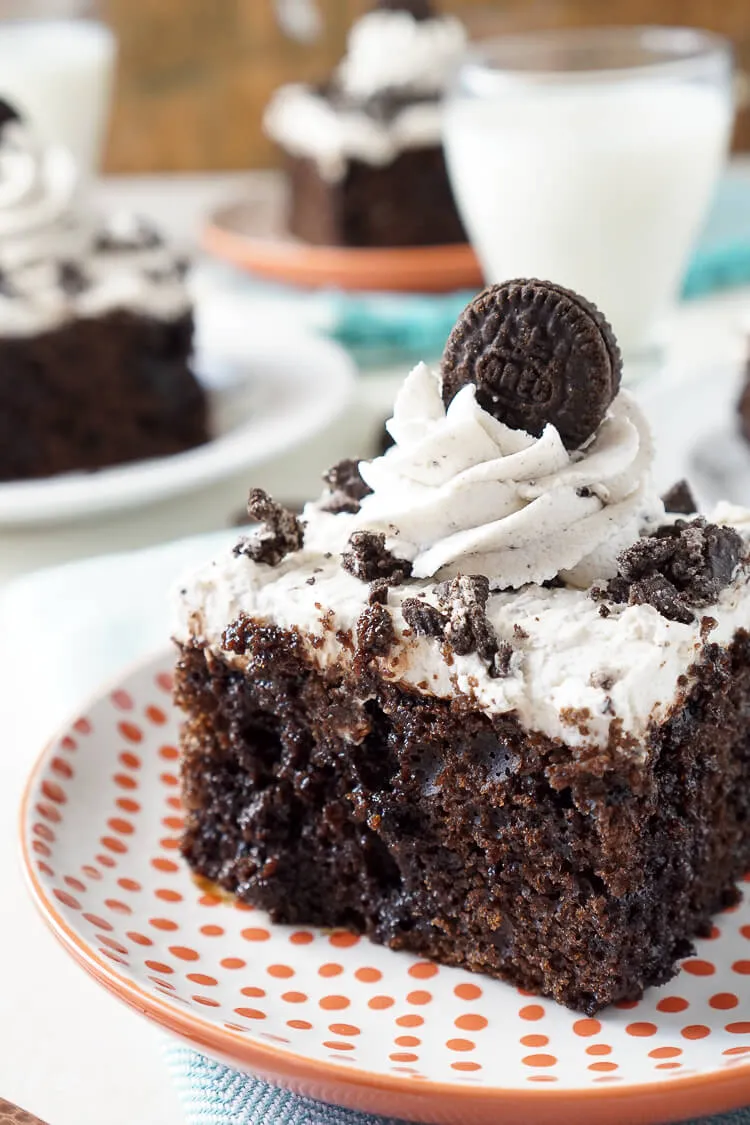
- Garnish with Whipped Cream: A dollop of freshly whipped cream on top of each slice adds a light, airy contrast to the rich chocolate and cream flavors of the cake.
- Chocolate Drizzle: Drizzling some melted chocolate over the cake can add a professional touch. Use a spoon or a squeeze bottle for artistic flair!
- Crushed Oreo Crust: Sprinkle crushed Oreos on the plate around the cake slice for a crunchy texture and a pop of color.
- Ice Cream Pairing: Serve each slice with a scoop of vanilla or cookies and cream ice cream. The cold creaminess perfectly complements the cake’s richness.
- Fruit Accents: Fresh berries, such as strawberries or raspberries, can add a refreshing contrast. Place them on the side or even on top of the cake for a vibrant look.
For a more festive occasion, consider serving the cake on a decorative platter and adding some themed decorations that match your celebration. Let your creativity shine!
6. Conclusion
In conclusion, this Oreo cake recipe is not just a treat; it’s an experience that brings joy to every bite. From its rich chocolate layers to the creamy filling that captures the essence of Oreos, it’s sure to become a favorite in your dessert repertoire.
Remember, the beauty of baking is that you can make it your own. Feel free to experiment with different toppings or fillings. Want to make it a layered cake? Go for it! Looking to add a twist with mint or peanut butter flavors? Why not!
Whether it’s a birthday celebration, a cozy family gathering, or just a sweet indulgence after a long day, this Oreo cake is perfect for any occasion. So gather your ingredients, preheat that oven, and let the magic happen!
Happy baking, and may your Oreo cake be as delicious as it is memorable!