Quilling, also known as paper filigree, is a delightful and intricate art form that involves rolling, shaping, and gluing strips of paper to create beautiful designs. Originating in the Renaissance, this craft has since evolved into a popular pastime for many. If you're looking to add a personal touch to your cards, quilling offers endless possibilities. With just a few simple tools and materials, you can transform plain cardstock into stunning works of art that are perfect for any occasion.
Whether you're a seasoned crafter or a complete beginner, quilling is accessible and allows for creative expression. You can design everything from elegant floral patterns to whimsical animals, making your greeting cards truly unique. As you dive into the world of quilling, you'll discover not only the joy of crafting but also the satisfaction of gifting something handmade and heartfelt. So, grab your tools and let’s explore the essential items you’ll need to get started!
Essential Tools and Materials for Quilling
Before you embark on your quilling journey, it’s important to gather the right tools and materials. Here’s a handy list of essentials that will make your quilling experience smoother and more enjoyable:
- Quilling Paper Strips: These are the backbone of your quilling projects. You can find them in various colors, widths, and lengths. A standard width is 1/8 inch, but you can experiment with different sizes for varied effects.
- Quilling Tool: A quilling tool is a must-have. It usually has a slotted tip that helps you roll the paper strips easily. You can also use a toothpick or a needle for smaller rolls.
- Glue: A good quality craft glue is essential for securing your quilled pieces. Look for a fine-tip applicator for precision.
- Scissors: Sharp scissors will help you cut your paper strips to the desired length or size.
- Slotted Board: This tool is handy for shaping and organizing your quilled pieces. It helps keep everything in place while you work.
- Tweezers: A pair of tweezers can help you place small pieces accurately and manipulate them without smudging your work.
- Cardstock: The base for your cards. Choose a sturdy cardstock that can support the weight of your quilled designs.
Having these essential tools on hand will set you up for success in your quilling projects. As you grow more comfortable with the techniques, feel free to explore additional materials like glitter, beads, or colored pens to add an extra flair to your cards. Happy quilling!
Also Read This: History of the WWE Royal Rumble: When It All Began
3. Basic Quilling Techniques
Quilling, also known as paper filigree, is a delightful craft that involves rolling, shaping, and gluing strips of paper to create intricate designs. Before diving into your quilling card project, it’s essential to familiarize yourself with some basic techniques. Here’s a rundown of the foundational skills you’ll need:
- Rolling: This is the core of quilling. Use a slotted tool to insert one end of a paper strip, then gently roll it around the tool. Keep tension steady to maintain an even shape.
- Pinching: After rolling, you can pinch the rolled strip to create different shapes. For example, pinching one end forms a teardrop, while pinching two sides creates a leaf.
- Shaping: Once you have your coils, you can shape them into various forms. Use your fingers to gently manipulate the coils into shapes like squares, triangles, or even more complex designs.
- Gluing: A good adhesive is crucial. Use a fine-tip glue applicator to apply glue sparingly, ensuring that your pieces stick without oozing out.
- Layering: To add depth and dimension, layer different shapes and sizes. This technique can help create a more dynamic and visually appealing card.
With these basic techniques in your toolkit, you’re well on your way to crafting stunning quilling cards. Remember, practice makes perfect, so don’t be discouraged if your first few attempts don’t turn out as expected!
Also Read This: Should You Message a Recruiter on LinkedIn After Applying
4. Step-by-Step Guide to Creating Quilling Cards
Now that you’re acquainted with the basic quilling techniques, let’s walk through a simple step-by-step guide to creating your very own quilling card. Follow these easy steps to craft a lovely card that’s sure to impress!
- Choose Your Design: Start with a theme. Whether it's a birthday, anniversary, or just a friendly hello, having a clear idea will guide your design.
- Gather Your Materials: You’ll need:
- Prepare Your Card Base: Fold a piece of cardstock in half to create the card. You can cut it into any size you prefer.
- Create Your Quilling Shapes: Using the techniques you learned earlier, roll and shape your paper strips into the desired forms. Remember to experiment with sizes and shapes!
- Arrange Your Design: Before gluing, lay out your quilled pieces on the card to visualize how they’ll look. Adjust as needed.
- Glue Everything Down: Once you’re happy with the arrangement, carefully glue each piece onto the card, ensuring they are firmly attached.
- Add Finishing Touches: Consider adding embellishments like glitter, gems, or a handwritten note inside the card for a personal touch.
| Materials | Description |
|---|---|
| Quilling Paper Strips | Various colors for your design |
| Quilling Tool | For rolling the paper strips |
| Glue | Craft glue or a glue pen |
| Cardstock | Your card base |
| Scissors | For cutting paper strips if necessary |
And there you have it! With these steps, you can create beautiful quilling cards that showcase your creativity. Don’t forget to sign your masterpiece and share it with someone special!
Also Read This: How to Block YouTube Ads on Your iPhone App for a Better Viewing Experience
Creative Design Ideas for Quilling Cards
Quilling is an art form that allows you to create intricate designs using strips of paper. When it comes to making quilling cards, the possibilities are virtually endless. Here are some creative design ideas to get your imagination flowing:
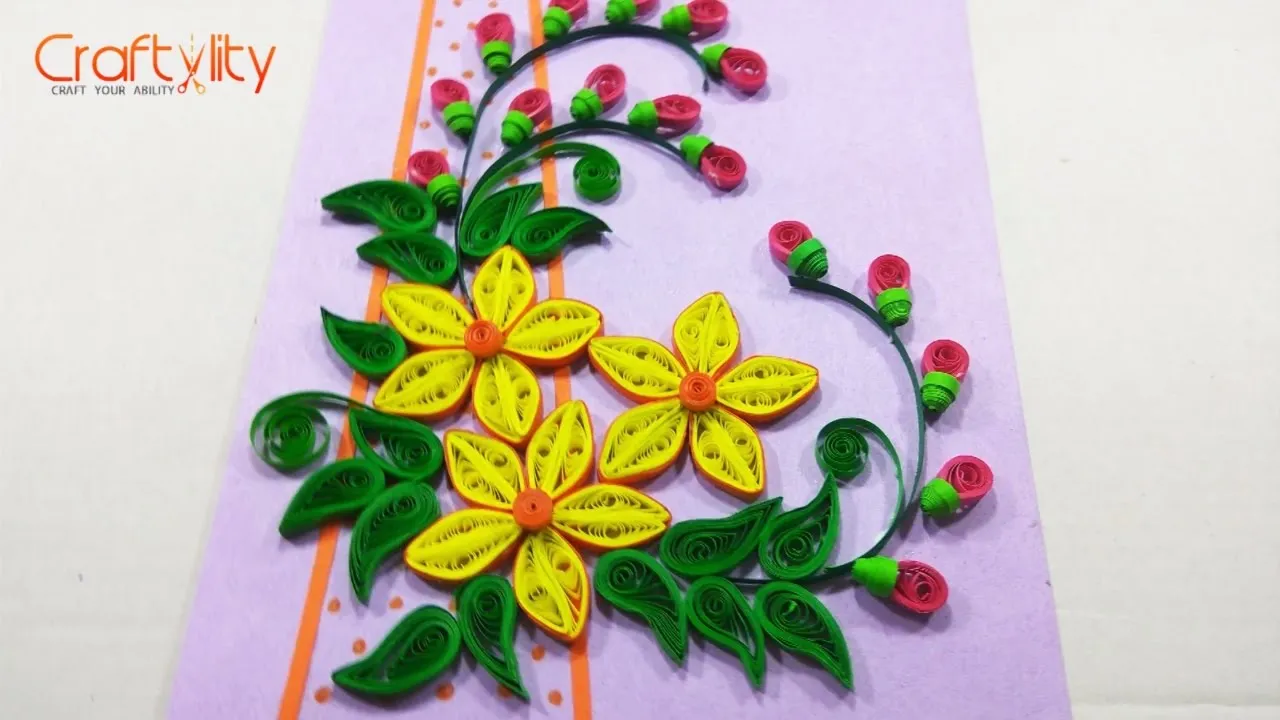
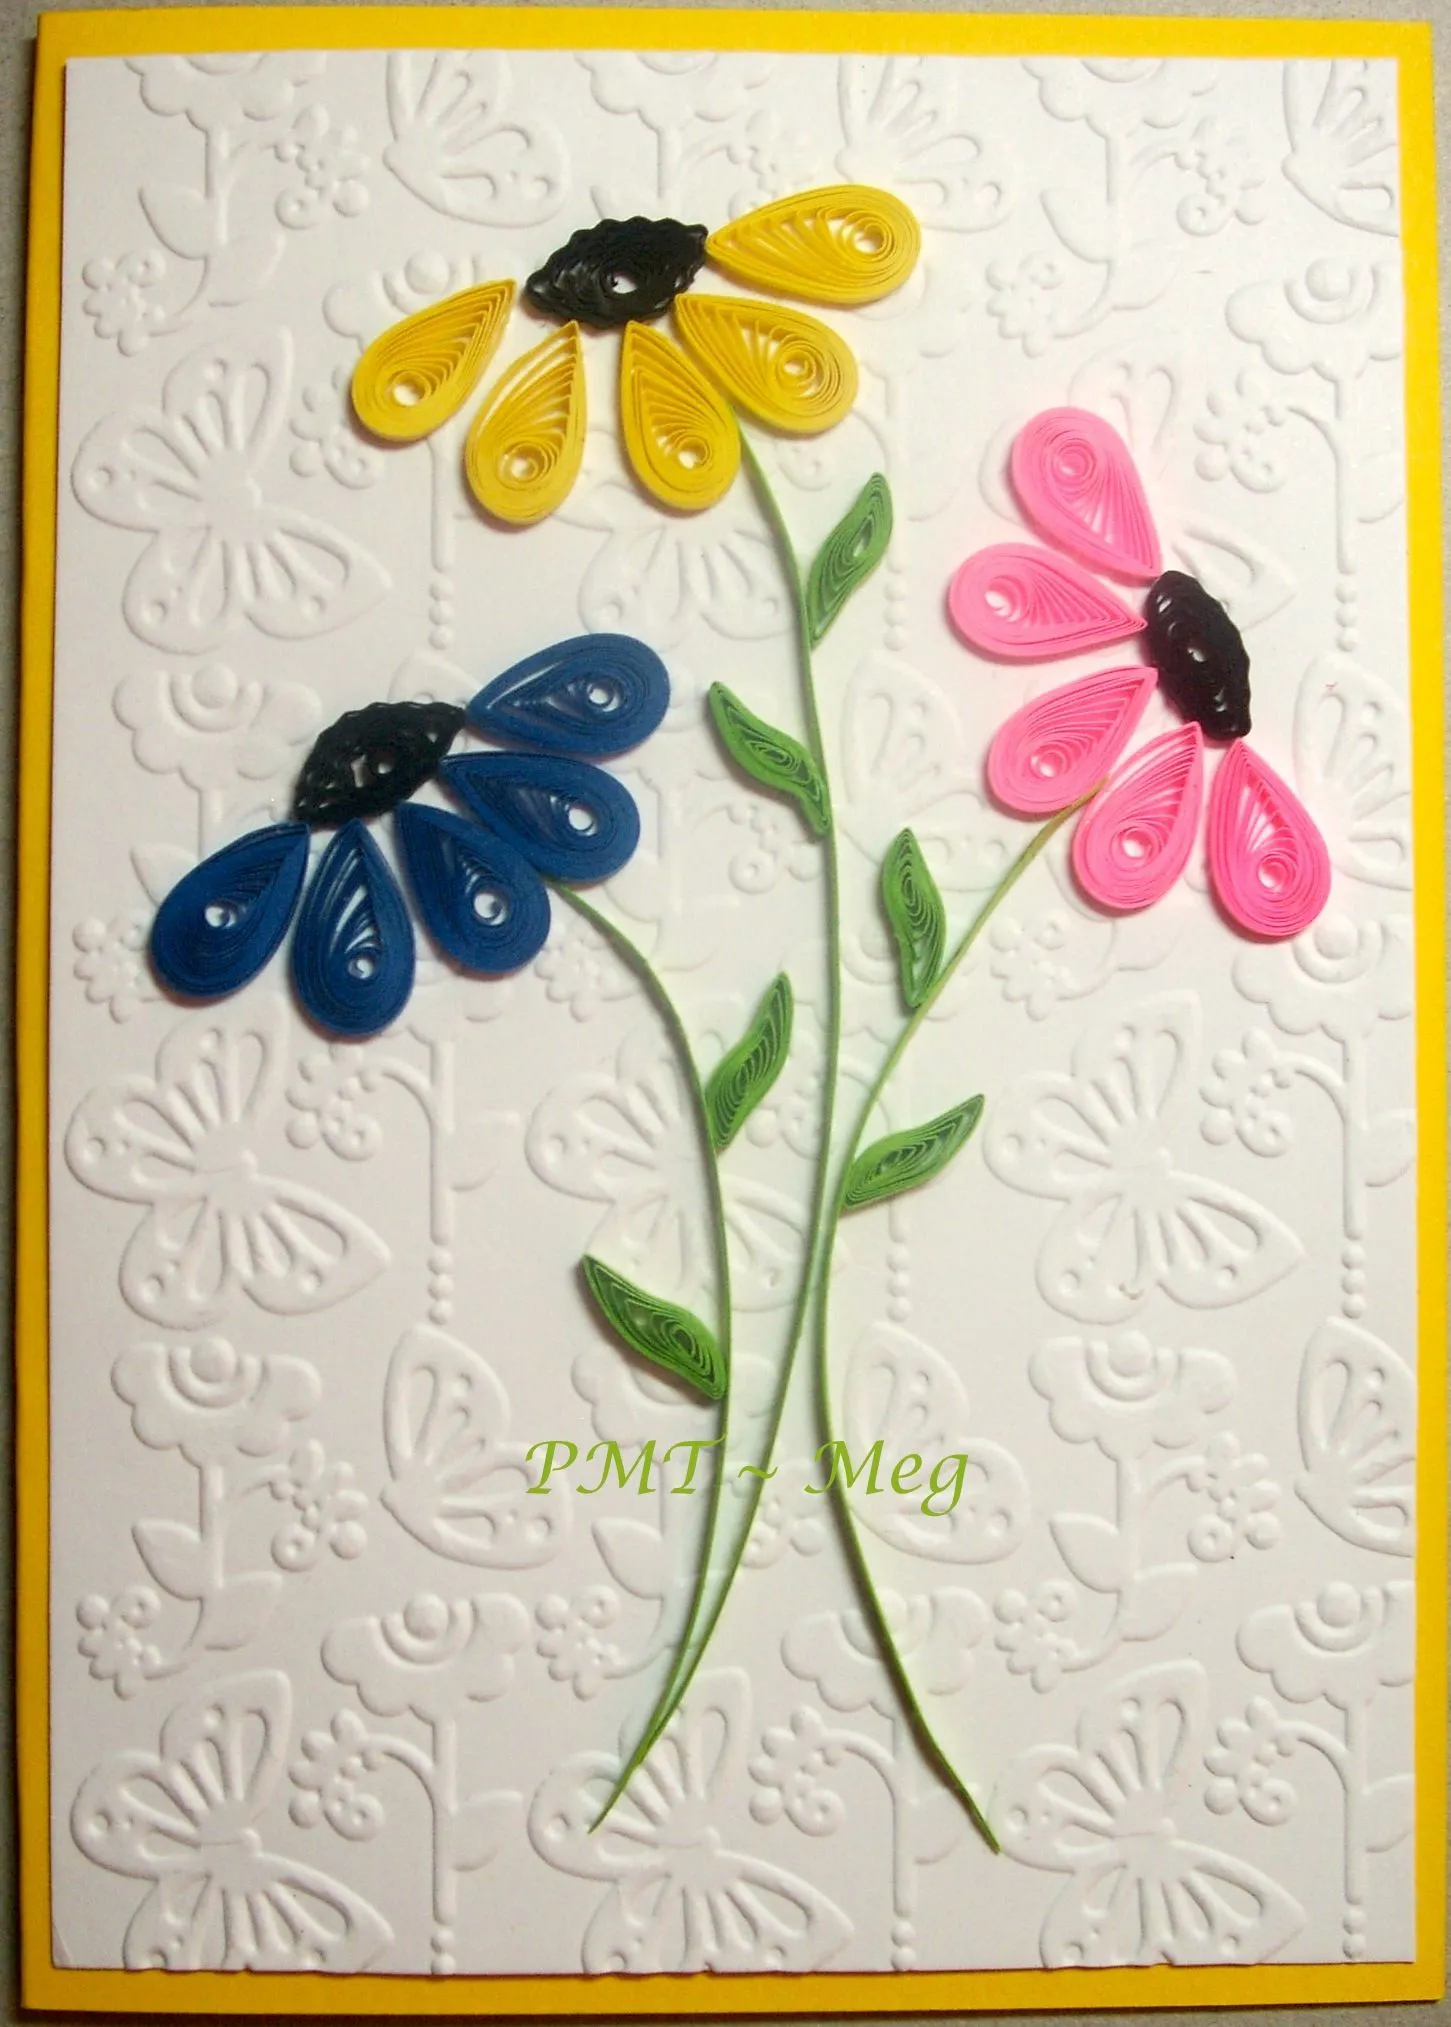
- Floral Patterns: Flowers are a classic choice in quilling. You can create a bouquet using various quilled flowers like roses, daisies, and tulips. Mix and match colors for a vibrant look.
- Seasonal Themes: Tailor your quilling designs to the seasons. For example, use pastel colors for spring cards, warm tones for autumn, and icy blues for winter. You could even create a snowman or a pumpkin!
- Animal Shapes: Why not bring some adorable animals into your designs? Quilled birds, butterflies, or even a cute cat can add character to your cards. Use simple shapes to create recognizable forms.
- Geometric Patterns: For a modern twist, explore geometric designs. Combine circles, triangles, and squares in different colors to create striking patterns that catch the eye.
- Quotes and Words: Personalize your cards by incorporating meaningful quotes or names. You can quill the letters themselves or create a decorative frame around them.
Remember, the beauty of quilling lies in its versatility. Don’t be afraid to experiment and combine different ideas to create something truly unique!
Tips for Personalizing Your Quilling Cards
Personalizing your quilling cards can make them extra special, turning a simple greeting into a cherished keepsake. Here are some practical tips to help you add that personal touch:
- Use Favorite Colors: Incorporate the favorite colors of the recipient into your design. This small detail can make your card feel more thoughtful and tailored.
- Incorporate Hobbies: Consider the interests of the person you’re making the card for. If they love music, you could quill musical notes; if they enjoy gardening, a quilled plant might be perfect.
- Handwritten Messages: While quilling is beautiful, nothing beats a handwritten note. Add a heartfelt message inside the card to convey your feelings in a genuine way.
- Use Photos: You can blend quilling with photography! Attach a small printed photo of a shared memory or a loved one and surround it with quilled decorations.
- Include Dates or Milestones: If you’re celebrating a special occasion like a birthday, anniversary, or graduation, include the date or the age in your quilling design. This makes the card a memorable keepsake.
Ultimately, personalizing your quilling cards allows you to express your creativity while also showing the recipient that you care. So, let your imagination run wild and create something truly special!