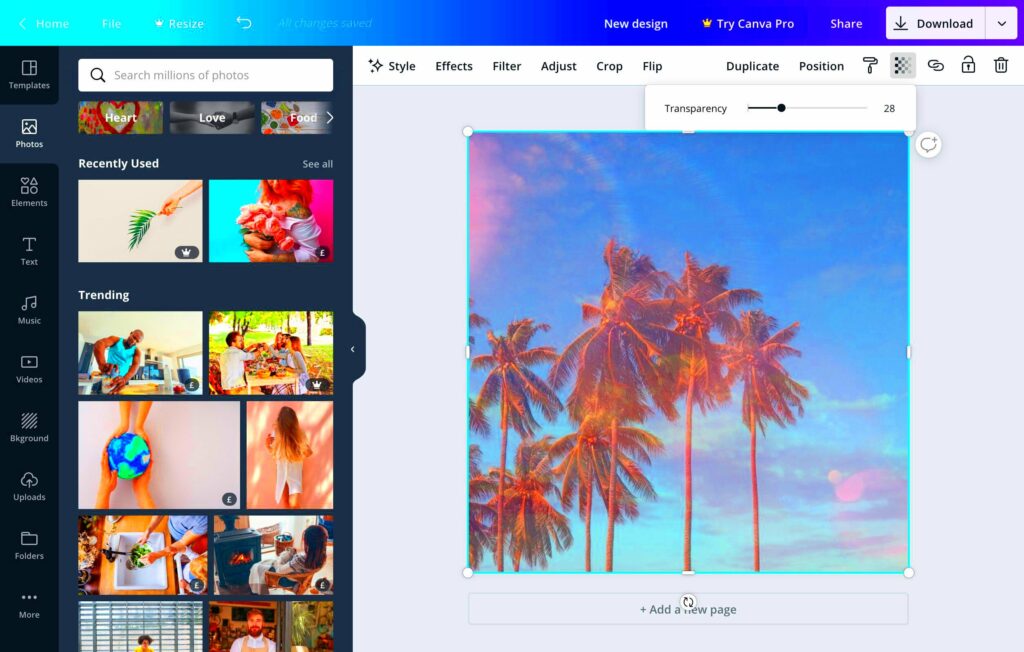
Canva image transparency is a feature that allows you to adjust the opacity of an image. This means you can make an image more see-through, blending it smoothly with other elements on your design. Transparency is an essential tool for creating layered graphics, making backgrounds less obtrusive, or focusing attention on a specific area of your design.
When working with images in Canva, you’ll often want to balance visibility and aesthetics. Understanding how to manipulate transparency can elevate your designs and make them visually appealing. Let’s dive deeper into the topic to see how transparency can be effectively used in your projects.
Importance of Image Transparency in Design
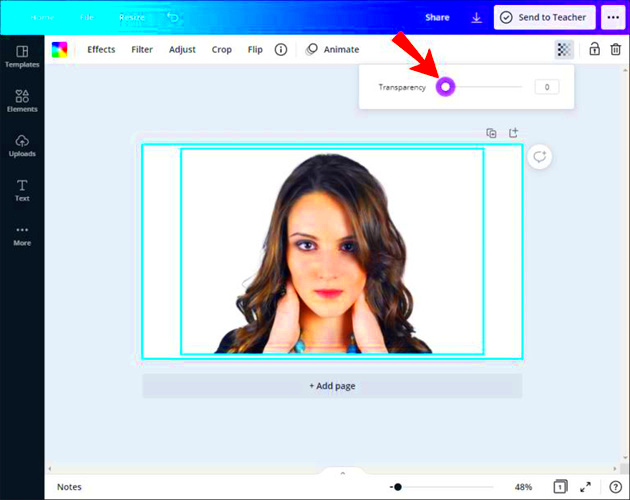
Image transparency plays a crucial role in design for several reasons:
- Enhances Visual Hierarchy: By adjusting transparency, you can direct viewers’ attention to the most important elements in your design.
- Improves Aesthetics: A transparent image can create a more polished and professional look, especially when used with other design elements.
- Facilitates Layering: Transparency allows you to layer multiple images and text, creating a cohesive design without overwhelming the viewer.
- Encourages Creativity: It opens up new possibilities for your designs, allowing you to blend different visuals harmoniously.
Understanding and utilizing transparency can greatly enhance your design work, making it more engaging and visually appealing.
Also Read This: Safe and Legal Tips for Extracting Music from YouTube Music
How to Use Canva Image Transparency Effectively
Using transparency effectively in Canva involves more than just adjusting opacity. Here are some tips to help you get the most out of this feature:
- Start with a Purpose: Always have a clear reason for adjusting transparency. Are you creating a background, highlighting text, or layering images? Knowing your goal will guide your adjustments.
- Use the Right Opacity Levels: A subtle change often works best. Aim for an opacity level between 30% to 70% for backgrounds or less important elements to ensure they don’t distract from focal points.
- Combine with Text and Graphics: Transparency works well when combined with text and other design elements. Make sure your text is legible against the transparent background by choosing contrasting colors.
- Preview Your Design: Before finalizing, always preview how the transparency looks in the context of your overall design. This will help you spot any adjustments needed.
By following these tips, you can effectively utilize image transparency in your Canva projects, enhancing the overall visual appeal and effectiveness of your designs.
Also Read This: Mastering the Pancake Foundation for a Flawless Natural Look
Steps to Make an Image Transparent in Canva
Making an image transparent in Canva is a straightforward process that can significantly enhance your design. Whether you want to soften a background or highlight an element, adjusting transparency is quick and easy. Here’s a simple step-by-step guide to help you through the process:
- Open Your Canva Project: Start by opening the design where you want to adjust the image transparency.
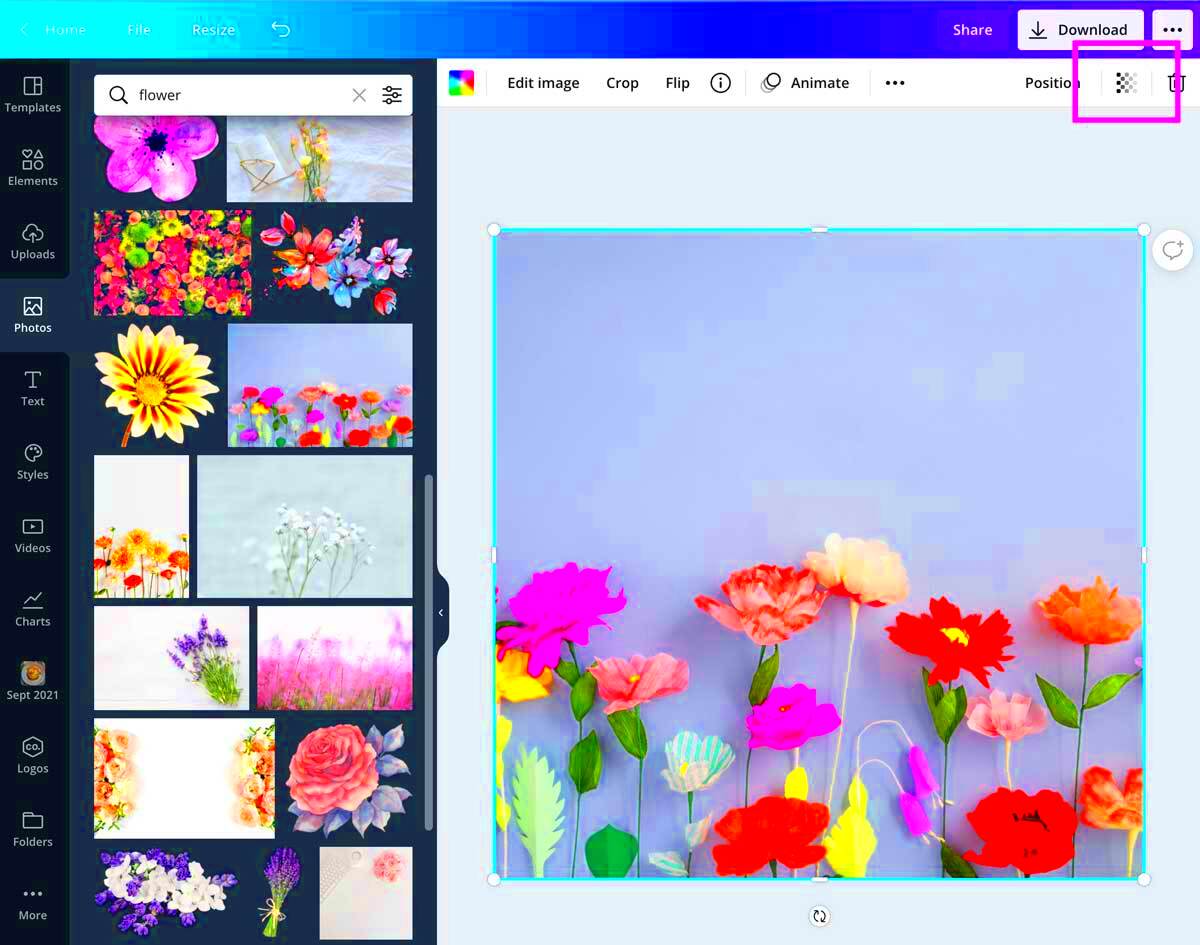
- Select the Image: Click on the image you want to modify. A toolbar will appear at the top of the screen.
- Adjust Transparency: Look for the transparency icon, which resembles a checkered square. Click on it, and a slider will appear.
- Move the Slider: Drag the slider left to decrease opacity or right to increase it. As you adjust, keep an eye on the image to see how it looks in real-time.
- Finalize Your Changes: Once you’re satisfied with the transparency level, click outside the image to see how it fits within your overall design.
And that’s it! You’ve successfully made an image transparent in Canva. It’s a quick process, and with a little practice, you’ll find yourself using this feature more often to enhance your designs.
Also Read This: Exploring Storyblocks Compatibility with 24p Video Format for Cinematic Projects
Best Practices for Using Transparency in Your Designs
Using transparency effectively can take your designs to the next level. Here are some best practices to consider:
- Keep It Subtle: Too much transparency can make your images lose detail. Aim for subtle adjustments that enhance rather than overwhelm.
- Prioritize Readability: Always ensure your text remains legible. If you’re placing text over a transparent image, consider using contrasting colors or outlines.
- Maintain Consistency: Use similar transparency levels throughout your design to create a cohesive look. This consistency helps tie your elements together.
- Utilize Layering: Combine images with different transparency levels to create depth in your designs. Layering adds visual interest and complexity.
- Experiment: Don’t be afraid to try different opacity levels. Sometimes the best designs come from a bit of experimentation!
By following these best practices, you can use transparency effectively to enhance your designs and make them more engaging for viewers.
Also Read This: A Simple Guide to Changing Your YouTube Thumbnail
Common Mistakes to Avoid with Image Transparency
While using image transparency can elevate your design, there are some common pitfalls to watch out for. Here are mistakes to avoid:
- Overusing Transparency: Applying transparency to too many elements can confuse viewers and create a cluttered look. Use it selectively for the best effect.
- Neglecting Image Quality: Sometimes, making an image transparent can reveal low resolution or pixelation. Ensure your base images are high-quality to start with.
- Ignoring Contrast: If your transparent image and text blend too closely in color, it can reduce readability. Always check for contrast between text and background.
- Forgetting to Preview: Not previewing your design can lead to oversights. Always review how transparency affects the overall look before finalizing your project.
- Inconsistent Use: Using different levels of transparency randomly can disrupt the visual flow. Stick to a consistent approach throughout your design.
By being aware of these common mistakes, you can make informed choices when working with transparency, leading to more polished and effective designs.
Also Read This: Canva Image Quality Enhancement
How Canva Image Downloader Can Help
Canva Image Downloader is a valuable tool for anyone looking to simplify their design process. This feature enables you to download images from Canva directly to your device, making it easier to use your creations across various platforms. Whether you need a quick way to save your work or want to share your designs, this tool can be a game changer. Let’s explore how the Canva Image Downloader can enhance your design experience.
- Quick Access to Your Designs: With the Canva Image Downloader, you can easily save your images without navigating away from your project. This quick access can save you time, especially when you're in the middle of designing.
- Multiple File Formats: The downloader allows you to save images in different formats, such as PNG and JPG. This flexibility ensures you have the right file type for your needs, whether for web use or print.
- High-Quality Downloads: You can download images in high resolution, preserving the quality of your designs. This is especially important for professional projects where quality matters.
- Simplified Sharing: Once you have downloaded your images, sharing them on social media or via email becomes hassle-free. This feature streamlines the process of showcasing your work.
- Easy Organization: By downloading your images, you can organize them on your device as you see fit. This makes it easier to find and use your designs later.
In summary, the Canva Image Downloader is an essential feature that simplifies the design and sharing process, making it easier for you to manage your creative projects.
Also Read This: Exploring the Legal Aspects of Dailymotion and What Makes It Unique
Frequently Asked Questions
When it comes to using Canva and its features, many users have common questions. Here are some frequently asked questions regarding Canva image transparency and the image downloader:
- Can I download transparent images from Canva? Yes, you can download images with transparency by saving them in PNG format.
- What is the best opacity level for transparency in designs? Generally, an opacity level between 30% and 70% works well for backgrounds or less important elements.
- Is there a limit to the number of images I can download? No, you can download as many images as you want, but keep in mind the file size and storage limitations of your device.
- Can I use Canva images for commercial purposes? Yes, as long as you follow Canva's licensing agreements. Make sure to review their terms for specific details.
- Can I edit my downloaded images later? Once downloaded, you cannot edit them in Canva. You would need to upload them back into Canva or use another editing tool.
If you have more questions, feel free to explore Canva’s help section or community forums for additional support!
Conclusion and Key Takeaways
In conclusion, understanding how to use image transparency in Canva can greatly enhance your design projects. Transparency allows you to create stunning visuals that draw attention and improve overall aesthetics. Coupled with the Canva Image Downloader, you can easily save and share your creations without hassle.
Here are some key takeaways to remember:
- Utilize Transparency: Use transparency strategically to enhance design hierarchy and aesthetics.
- Follow Best Practices: Keep transparency levels subtle, prioritize readability, and maintain consistency throughout your designs.
- Avoid Common Mistakes: Be aware of pitfalls like overusing transparency and neglecting image quality.
- Leverage the Image Downloader: Use the Canva Image Downloader to save your designs quickly and efficiently in various formats.
By applying these principles, you can elevate your Canva designs and create visually compelling projects that resonate with your audience. Happy designing!
