Curving images can add a dynamic touch to your designs, making them more visually appealing. With Canva, you can easily manipulate images to create curves that suit your projects. Whether you’re designing social media posts, presentations, or marketing materials, mastering image curving can enhance your work. In this section, we’ll explore the essentials of image curving in Canva and why it matters for your designs.
Understanding the Basics of Image Curving
Before diving into the practical steps, it’s important to understand what image curving is. Curving images involves bending or distorting them to fit a certain shape or path. This technique can make your designs look more polished and creative. Here are a few key points to consider:
- Purpose: Curving images can emphasize specific design elements or create a sense of flow.
- Types of Curves: You can create simple curves, circular shapes, or more complex paths depending on your design needs.
- Applications: Curved images are popular in branding, advertisements, and digital art.
Understanding these basics will help you make informed decisions as you work with curves in Canva.
Also Read This: How to Change Your Focus on Behance
Steps to Curve Images in Canva
Now that you know the importance of image curving, let’s get into the steps for curving images in Canva. Follow these easy steps:
- Open Canva: Start by logging into your Canva account or creating a new one.
- Create a New Design: Choose a template that fits your project or start with a blank canvas.
- Upload Your Image: Click on the "Uploads" tab and upload the image you want to curve.
- Add the Image to Your Design: Drag your uploaded image onto the canvas.
- Select the Image: Click on the image to select it.
- Use the Effects Tool: Go to the “Edit image” option and select “Effects.” Look for the “Curve” option.
- Adjust the Curve: Use the slider to adjust the curvature of your image. You can see the changes in real-time.
- Fine-tune the Position: Move and resize the curved image as needed to fit your design.
- Save Your Design: Once you’re satisfied, click on the "Download" button to save your work.
By following these steps, you can easily create stunning curved images that will elevate your designs.
Also Read This: How Much YouTube Editors Make Average Salaries and Career Insights
Adjusting Curvature for Best Results
Once you’ve curved your image in Canva, adjusting the curvature is crucial for achieving the best results. The right adjustments can turn an average design into something eye-catching. Here’s how to fine-tune your image curvature effectively:
- Use the Slider: When you apply the curve effect, a slider appears. This allows you to control how much curvature is applied. Move it slowly to see the changes clearly.
- Preview Your Design: Always preview your design before finalizing it. This helps you see how the curved image fits with other elements in your project.
- Experiment: Don’t be afraid to experiment with different curvature levels. Sometimes, a slight adjustment can make a big difference.
- Focus on Composition: Make sure the curved image complements your overall design. If it distracts from your message, consider reducing the curve.
- Use Color and Contrast: Adjusting the curvature also involves considering color and contrast. A well-curved image should stand out but not overpower the text or other elements.
Remember, the goal is to create a harmonious design where the curved image enhances your overall message.
Also Read This: Effective Ways to Block Ads on YouTube Using Android Devices
Using Advanced Techniques for Unique Designs
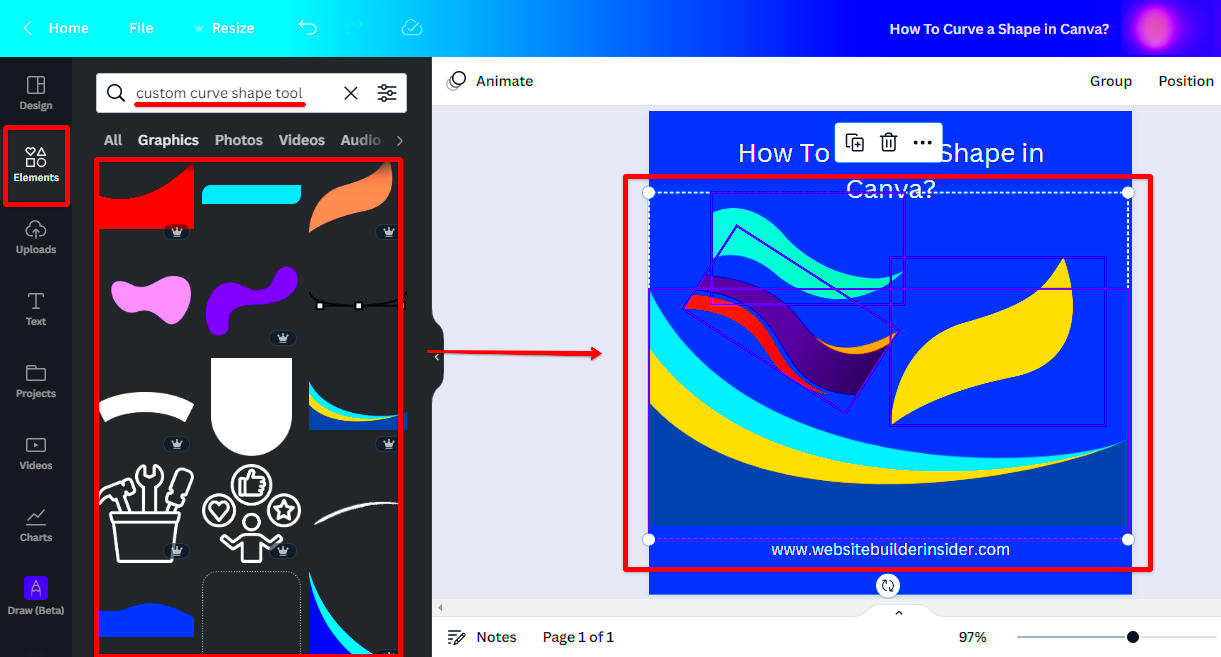
Once you’re comfortable with the basics of curving images, it’s time to explore advanced techniques to elevate your designs further. Here are some creative ways to use image curving in Canva:
- Layering Images: Try layering multiple curved images to create depth. Use different curves and opacities for a stunning effect.
- Combining Shapes: Use shapes like circles or stars as masks. Curve your image to fit these shapes, making your design more dynamic.
- Text and Image Integration: Curve both text and images together. This creates a cohesive look where both elements complement each other.
- Utilizing Gradients: Apply gradient backgrounds to curved images. This can create a beautiful transition that draws attention to your image.
- Incorporating Shadows: Adding shadows can enhance the curved effect. It gives a 3D look and helps the image stand out against the background.
These techniques will help you create unique and memorable designs that grab attention.
Also Read This: How Can Adobe Stock’s Free Assets Elevate Your Content Creation in 2025?
Common Issues and How to Fix Them
Even with the best tools, issues can arise when curving images in Canva. Here are some common problems and simple solutions:
- Image Distortion: If your image looks warped, it might be due to excessive curvature. Try reducing the curve slider until the image looks natural.
- Clipping Issues: Sometimes parts of your image might get clipped. Ensure that your image is adequately sized before applying the curve effect.
- Poor Alignment: If your curved image doesn’t align well with other elements, use Canva’s alignment tools to adjust its position easily.
- Loss of Quality: If your image looks pixelated after curving, consider using a higher resolution image before applying the effect.
- Unbalanced Design: If the curved image seems out of place, reassess your overall layout. You might need to adjust other elements for balance.
By keeping these common issues in mind, you can ensure a smoother design process and achieve great results.
Also Read This: How to Block Someone on Behance
Benefits of Using Curved Images in Your Designs
Incorporating curved images into your designs can bring numerous advantages that enhance both aesthetics and engagement. Let’s explore the key benefits of using curved images in your projects:
- Visual Appeal: Curved images add a unique and artistic touch to your designs, making them stand out in a crowded space. They break the monotony of straight lines and angles, creating a more dynamic layout.
- Emphasizes Creativity: Using curves showcases your creative side, allowing you to express ideas more vividly. This can help convey your message in a more engaging way.
- Improves Flow: Curved images can create a sense of movement in your designs. They guide the viewer's eye smoothly from one element to another, enhancing the overall experience.
- Enhanced Branding: If your brand identity incorporates curves or soft lines, using curved images can strengthen your brand consistency. This helps reinforce brand recognition and loyalty.
- Adaptability: Curved images work well in various contexts, from social media graphics to presentations. They can be adapted to fit different themes and styles, making them versatile design elements.
Overall, curved images can transform your designs, making them more engaging and visually appealing.
Also Read This: Understanding Alamy's Feature Space for Images and the Licensing Process
Frequently Asked Questions
Curious about image curving in Canva? Here are some frequently asked questions that might help clarify common concerns:
- Can I curve text as well as images? Yes, Canva allows you to curve text, which can create a cohesive look when paired with curved images.
- What file types can I upload to Canva? You can upload various file types, including JPEG, PNG, and SVG, which are ideal for curving effects.
- Is there a limit to how much I can curve an image? While you can curve images significantly, excessive curvature can lead to distortion. It's best to find a balance.
- Can I use curved images for printing? Yes, but ensure your images are high-resolution to maintain quality in printed formats.
- What if I don’t like the curved effect? You can easily revert to the original image or adjust the curvature using the slider until you achieve a satisfying look.
If you have more questions, don’t hesitate to explore Canva's help resources or community forums.
Conclusion on Canva Image Curving
Curving images in Canva is a simple yet powerful way to enhance your designs. Whether you’re creating social media posts, presentations, or marketing materials, the ability to manipulate image curvature can make your projects more engaging and visually appealing. With benefits like improved creativity, better flow, and stronger branding, curving images adds value to your work.
By mastering the techniques of image curving and addressing common challenges, you can elevate your design skills. So, go ahead and experiment with curves in your next project. You might just find that a little curve can go a long way in capturing attention and conveying your message effectively!