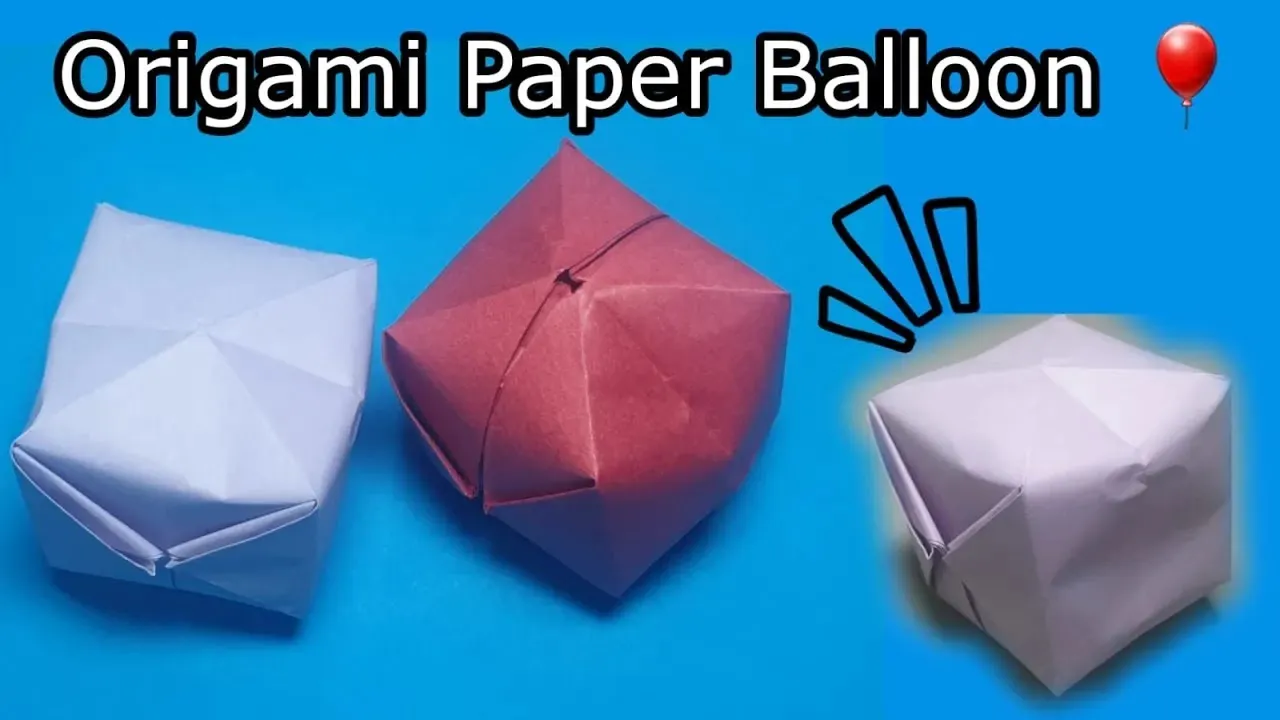
Crafting a paper balloon is a delightful and creative activity that can be enjoyed by people of all ages. Whether you're looking to add a personal touch to a party or simply want to engage in a fun DIY project, making a paper balloon is both simple and rewarding. In this guide, we will walk you through the step-by-step process of creating your very own paper balloon, ensuring that you have a fantastic time while doing it!
Materials Needed
Before diving into the fun of crafting your paper balloon, it's important to gather all the necessary materials. Here’s a concise list of what you’ll need:
- Colored Paper: Choose a variety of colors to brighten your balloon. Construction paper or origami paper works great!
- Scissors: A good pair of scissors is essential for cutting your paper into the right shapes.
- Glue or Tape: You'll need something to hold your balloon together. Liquid glue or double-sided tape are both effective options.
- Pencil: Useful for sketching your balloon shape before cutting it out.
- String or Ribbon: To create the balloon's "string" for hanging and added realism.
- Markers or Stickers: Optional, for decorating your balloon and adding personal touches.
Once you have gathered these materials, you’re all set to embark on your paper balloon-making adventure! It’s a great way to unleash your creativity, and you’ll be amazed at the colorful creations you can produce.
Also Read This: Easy Step-by-Step Guide to Making a Paper Kite
Step 1: Preparing Your Paper
Before diving into crafting your paper balloon, it’s essential to prepare your paper properly. The type of paper you choose can significantly affect the final product, so let's explore how to get started!
First, gather your materials. You’ll need:
- Colored craft paper or origami paper
- Scissors
- A ruler
- A pencil
Next, follow these steps:
- Select Your Paper: Choose a vibrant color or pattern that excites you! Thinner paper works best as it’s easier to shape.
- Measure Your Paper: Using the ruler, measure a rectangular piece of paper. A common size is 12 inches by 8 inches, but feel free to adjust according to how big you want your balloon.
- Cut the Paper: With your scissors, carefully cut along the lines you’ve drawn. This is where precision counts, as uneven edges might affect the shape of your balloon.
Now that your paper is ready, you should have a neat rectangle to work with. Remember, the key to a great paper balloon starts with this preparation!
Also Read This: How to Unsubscribe from Shutterstock and Manage Your Account
Step 2: Cutting the Paper
Now that you've prepared your paper, it’s time to cut it into the right shapes to create your balloon. This step is crucial because the way you cut will determine how your balloon looks when it's finished.
Here’s how to approach this step:
- Decide on the Balloon Shape: Most paper balloons are crafted in an oval or round shape. Visualize how you want your balloon to look—this will guide your cuts.
- Make Your Cuts: Begin by drawing a light outline of the balloon shape on the paper using your pencil. Make sure it is symmetrical to allow for a balanced look.
- Cut With Care: Using your scissors, gently cut along the outline. This part requires a steady hand for a smooth finish. If you prefer, you can also use a craft knife for more intricate designs.
After cutting, you should have the basic shape of your balloon. Take your time to ensure the edges are smooth, as this will enhance the overall look of your creation. Happy cutting!
Also Read This: How to Edit Your Backslash on Behance Correcting Issues in Your Profile
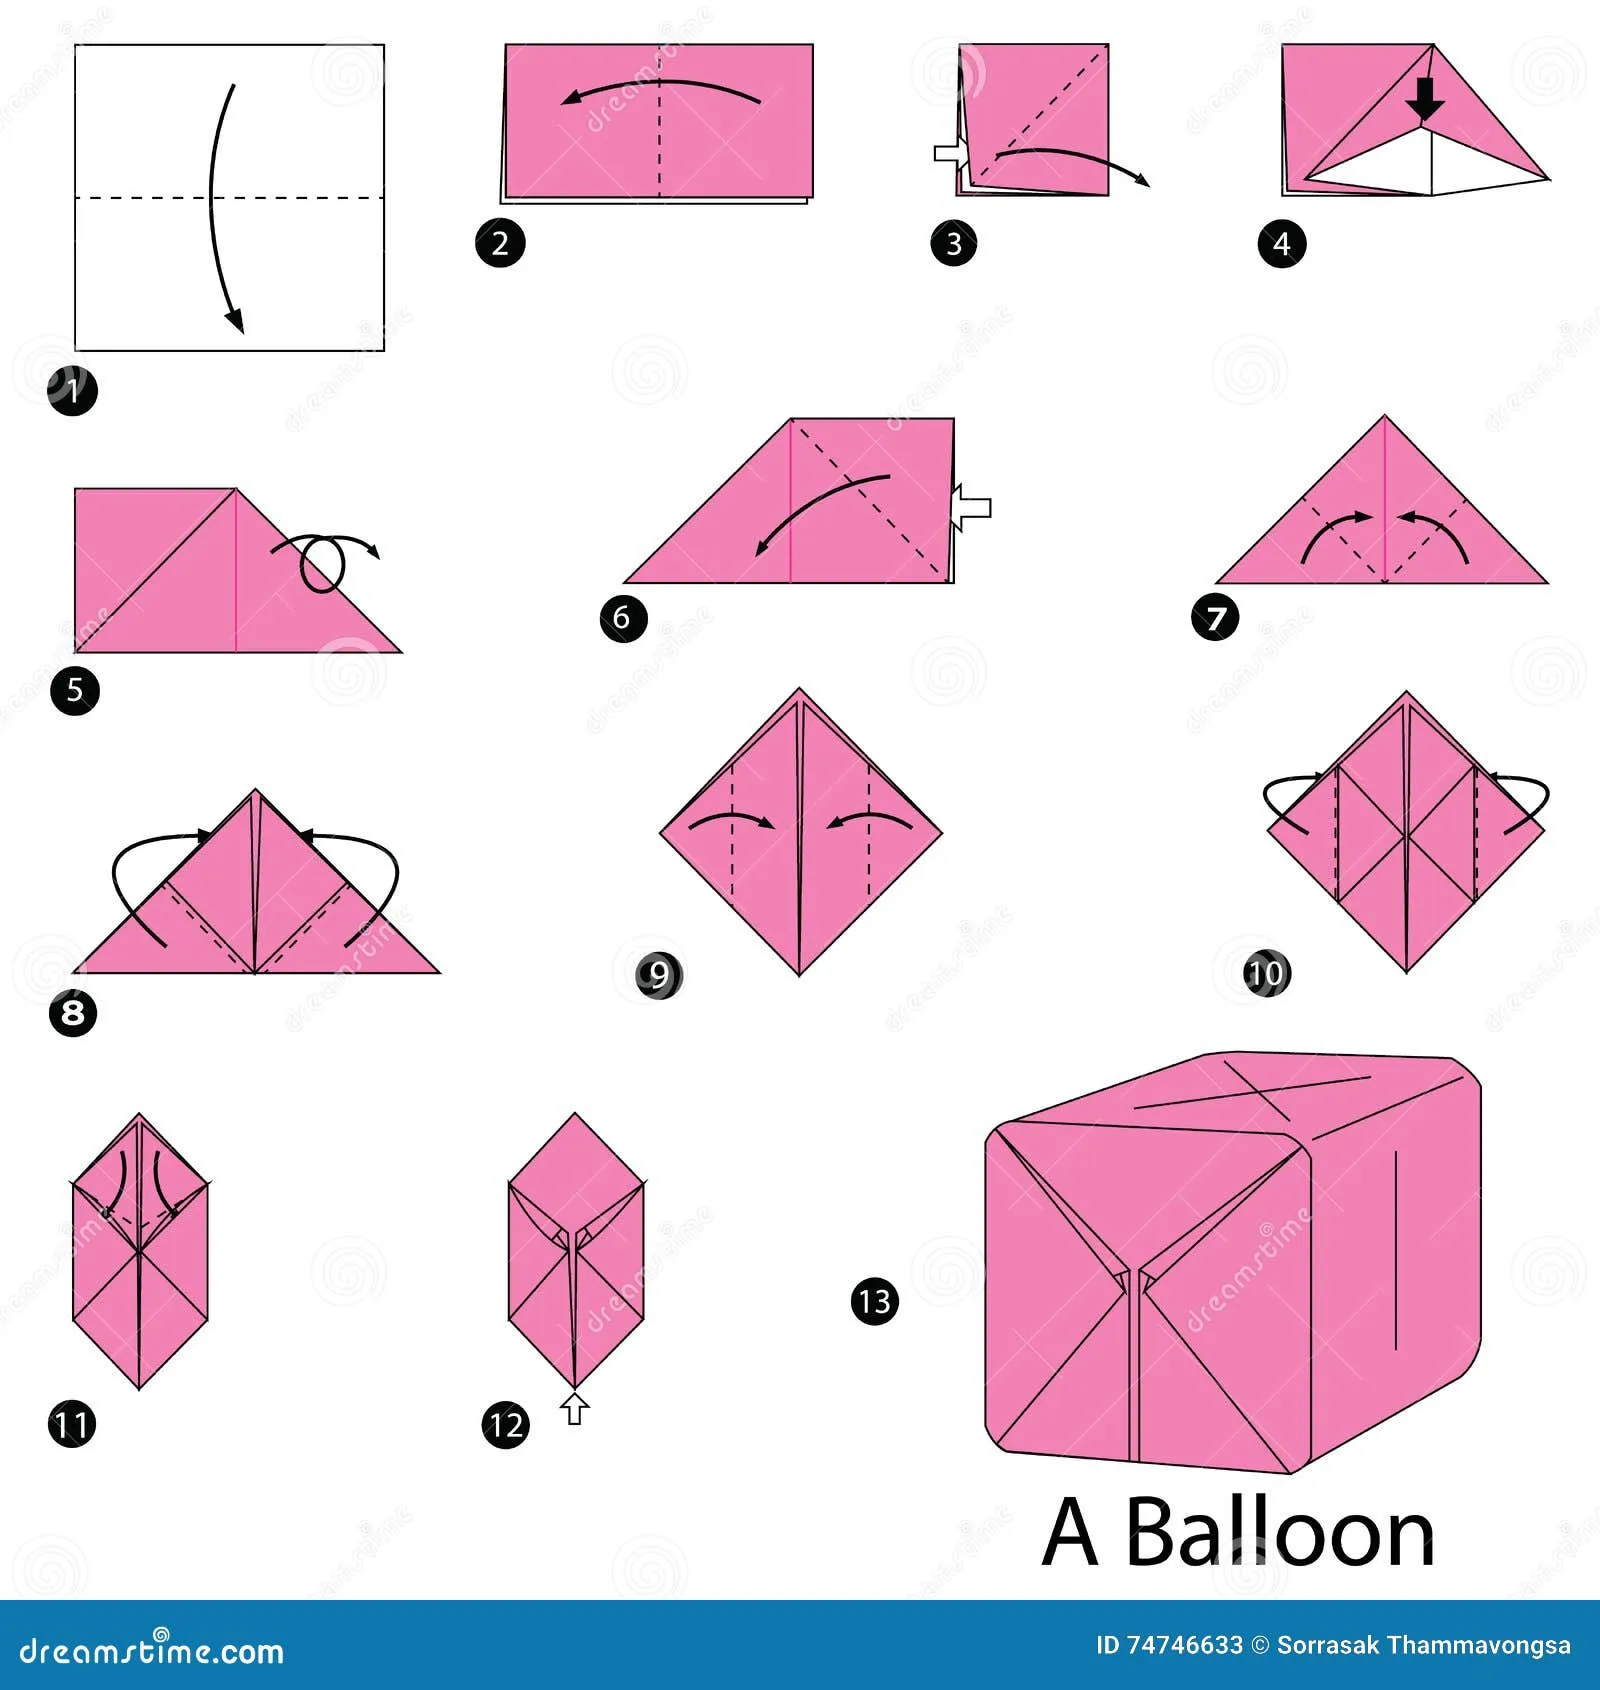
Step 3: Folding Techniques
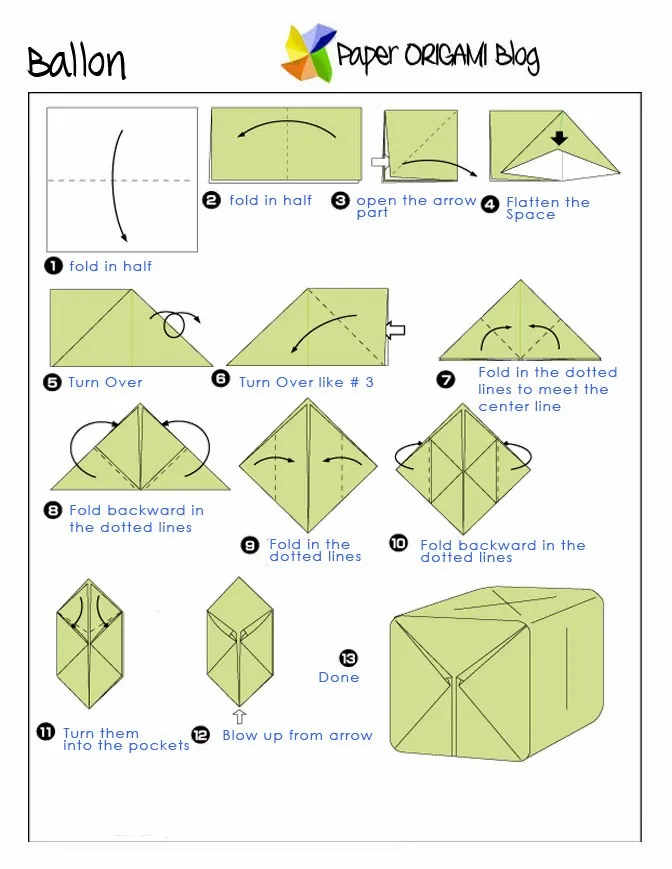
Folding is a crucial part of crafting your paper balloon, as it shapes the structure and ensures it holds air. Let’s break down the essential folding techniques you’ll need:
- Valley Fold: This is a basic fold where you bring two edges of the paper together, creating a “V” shape. It’s the foundation for many other folds.
- Mountain Fold: Opposite to a valley fold, here you fold the paper away from you. It looks like a mountain peak when completed.
- Reverse Fold: This technique is used to change the direction of a fold. Simply fold in the opposite direction along an existing crease.
- Squash Fold: This involves flattening a section of the paper to create a new crease, allowing for more intricate shapes.
To get the perfect balloon shape, you’ll need to combine these techniques. Start with a simple valley fold down the center of your paper, then add mountain folds to create the top and bottom sections of the balloon. Don’t be afraid to experiment; the more you practice, the better your folding will become!
Also Read This: Payment Overview for Footage on Shutterstock
Step 4: Assembling the Balloon
Now that you have your folds in place, it’s time to assemble your paper balloon. This is where your creativity can really shine. Follow these simple steps:
- Prepare the Base: Start with your folded paper, ensuring all edges are aligned. This will be the main body of the balloon.
- Form the Balloon Shape: Gently pull apart the folded sections while pinching at the bottom. This helps create the rounded shape of the balloon.
- Secure the Sections: Use glue or tape to attach the flaps at the bottom. This will hold your balloon together and keep the air inside.
- Add the Knot: For realism, create a small knot at the bottom using a piece of string or paper. This mimics the tied end of a real balloon.
And there you have it! Take a moment to admire your handiwork. If you want to add flair, consider decorating your balloon with markers or stickers for a personal touch. Have fun with it!
Also Read This: How to Update Your YouTube TV Payment Method
Step 5: Adding Finishing Touches
Now that your paper balloon is taking shape, it’s time to make it truly yours by adding some finishing touches. This step is all about personalization and ensuring your balloon is both beautiful and functional.
Here’s how you can add those special details:
- Coloring: Use markers, colored pencils, or paints to decorate your balloon. Think about fun patterns like polka dots, stripes, or even a gradient effect. Let your creativity flow!
- Stickers: Enhance your balloon with cute stickers. You can find various themes—everything from animals to space adventures. Stick them on before sealing your balloon to give it extra pizzazz.
- Personal Message: If this balloon is for a gift or a special occasion, consider writing a heartfelt message on it. Use a permanent marker for a clean and lasting impression.
- String or Ribbon: Attach a colorful string or ribbon to your balloon. This not only makes it easier to hold but adds an extra element of whimsy. You can even braid multiple colors for a fun twist!
Once you’ve added your personal touches, let everything dry completely before moving on to the next step. This ensures your decorations stay intact when you test your balloon.
Also Read This: Exploring Fortiguard Downloader’s Override Options
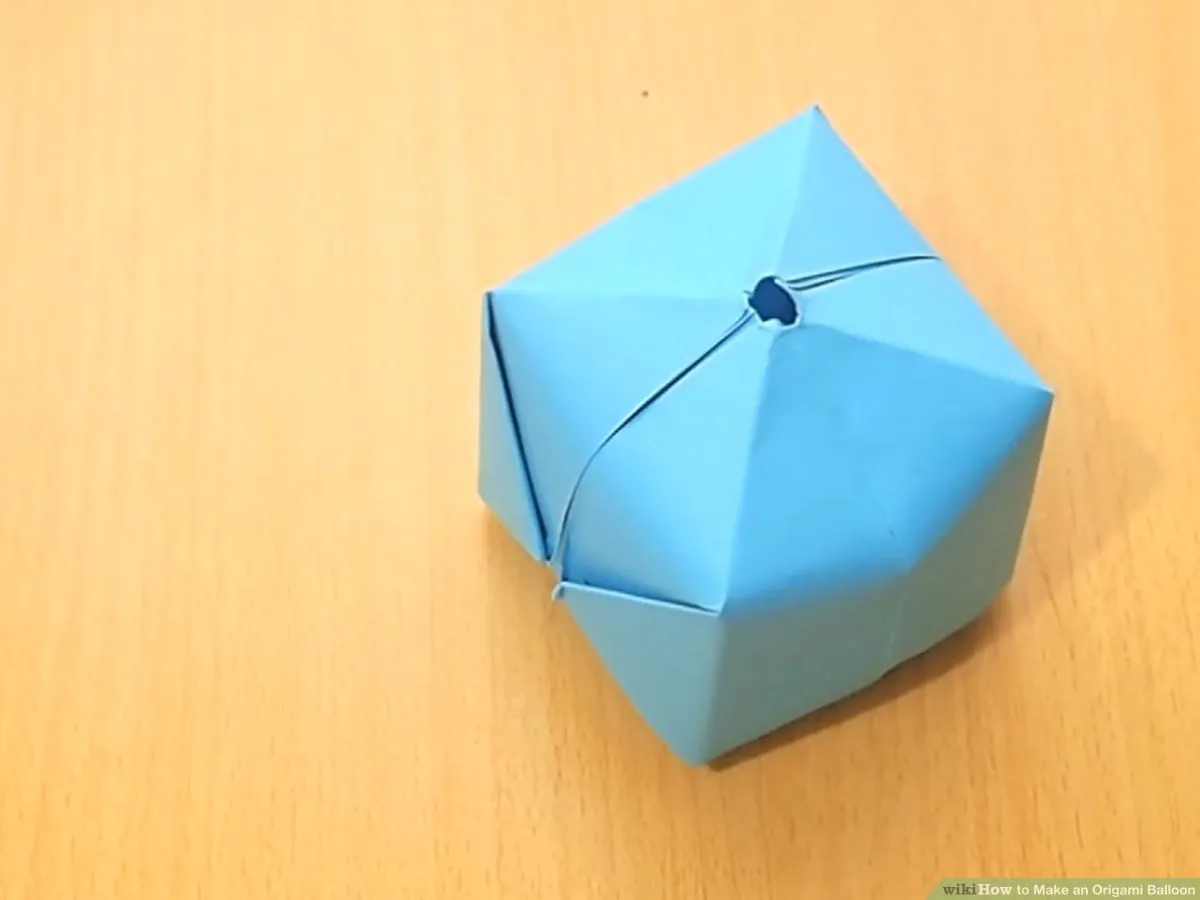
Step 6: Testing Your Paper Balloon
It’s time for the moment of truth! Testing your paper balloon is crucial to ensure it floats and performs as you intended. Here’s how to conduct a simple yet effective test.
Follow these steps:
- Choose the Right Environment: Find an open space with minimal wind, like a backyard or park. Indoor testing can work too, just avoid areas with fans or air conditioning.
- Fill Your Balloon: If you haven’t done so already, gently inflate your balloon using a pump or by mouth. Be careful not to overinflate, as this can cause it to burst.
- Release and Observe: Let go of your balloon. Watch how it behaves. Does it float gracefully? Does it have a tendency to tip over? Note any adjustments that might be needed.
- Stability Check: If your balloon doesn’t float well, consider adjusting its weight distribution. Adding small weights or adjusting the way it’s tied can sometimes help.
Testing your balloon can be a lot of fun! Don’t hesitate to tweak your design or decorations based on how it performs. Enjoy the process and celebrate your creativity!
Also Read This: How Often Do Images Get Downloaded on Shutterstock
9. Conclusion
Well, there you have it! Crafting a paper balloon is not only a fun and creative activity but also a fantastic way to exercise your hands and boost your artistic skills. Whether you're a beginner or someone with a knack for crafting, making a paper balloon can be a delightful experience.
Throughout this guide, we've covered everything from the materials needed to the step-by-step process. Remember, practice makes perfect! If your first balloon doesn't come out exactly as you envisioned, don’t get discouraged. Every attempt is a step toward improvement, and soon enough, you'll be making balloons like a pro.
Additionally, crafting offers a wonderful opportunity to bond with friends and family. Why not make it a group activity? Gather everyone around the table, share ideas, and see who can create the most imaginative balloon! It's a great way to foster creativity and have some laughs along the way.
So, grab your paper, scissors, and glue, and let your imagination take flight. Happy crafting!
10. Watch the Tutorial on Dailymotion
If you're a visual learner or simply want to see the entire process in action, I highly recommend checking out the tutorial available on Dailymotion. Watching someone else craft a paper balloon can provide invaluable insights and tips that are hard to capture in text alone.
The tutorial breaks down each step in a clear and engaging manner, allowing you to follow along at your own pace. Here’s what you can expect:
- Step-by-Step Instructions: Clear visuals that accurately depict each part of the process.
- Helpful Tips: The instructor shares tricks that might help you avoid common mistakes.
- Creative Ideas: Inspiration for personalizing your balloons with different designs and colors.
You can find the tutorial by searching for "Crafting a Paper Balloon" on Dailymotion. So, go ahead, click play, and let the crafting inspiration flow!