Have you ever thought about sharing your beautiful photos with a wider audience? Uploading your Google Photos to Shutterstock is a fantastic way to do just that. Not only can you showcase your work, but you can also potentially earn money from your photography. In this post, we'll walk you through the steps to make this process easy and effective.
Benefits of Uploading Your Photos to Shutterstock

Uploading your photos to Shutterstock comes with several advantages:
- Wider Audience Reach: Shutterstock has millions of users searching for high-quality images. Your photos can be seen by people worldwide.
- Monetization Opportunities: Each time someone licenses your photo, you earn money. This can turn your hobby into a source of income.
- Creative Exposure: Showcasing your work on a reputable platform can help build your portfolio and attract more clients.
- Feedback and Growth: As you upload more photos, you can receive feedback from the community, helping you improve your skills.
Also Read This: How to Download Full-Size Getty Images
Preparing Your Google Photos for Upload

Before you upload your photos, it's essential to prepare them properly. Here’s how you can do that:
- Review Your Photos: Go through your Google Photos and select the best images. Look for those that have high resolution and good composition.
- Edit Your Photos: Use photo editing tools to enhance your images. Adjust brightness, contrast, and saturation for a polished look.
- Check Licensing Rights: Ensure that you own the rights to the photos you want to upload. Avoid using images that contain copyrighted material.
- Organize Your Files: Create a folder on your computer for the images you plan to upload. This will make the process smoother.
- Prepare Metadata: Gather necessary information such as keywords, descriptions, and titles for each photo. This will help improve their visibility on Shutterstock.
Taking these steps will help ensure your photos are ready for submission and can enhance your chances of success on Shutterstock.
Also Read This: Reddit Insights on How Much You Can Earn on Shutterstock
Steps to Upload Google Photos to Shutterstock
Uploading your Google Photos to Shutterstock is a straightforward process. Here’s a step-by-step guide to help you get started:
- Sign Up or Log In: First, you need a Shutterstock account. If you don’t have one, sign up for free. If you already have an account, just log in.
- Navigate to the Contributor Section: Once logged in, go to the Contributor section. You can find it in the main menu.
- Click on Upload: Look for the upload button. It’s usually prominent on the contributor dashboard.
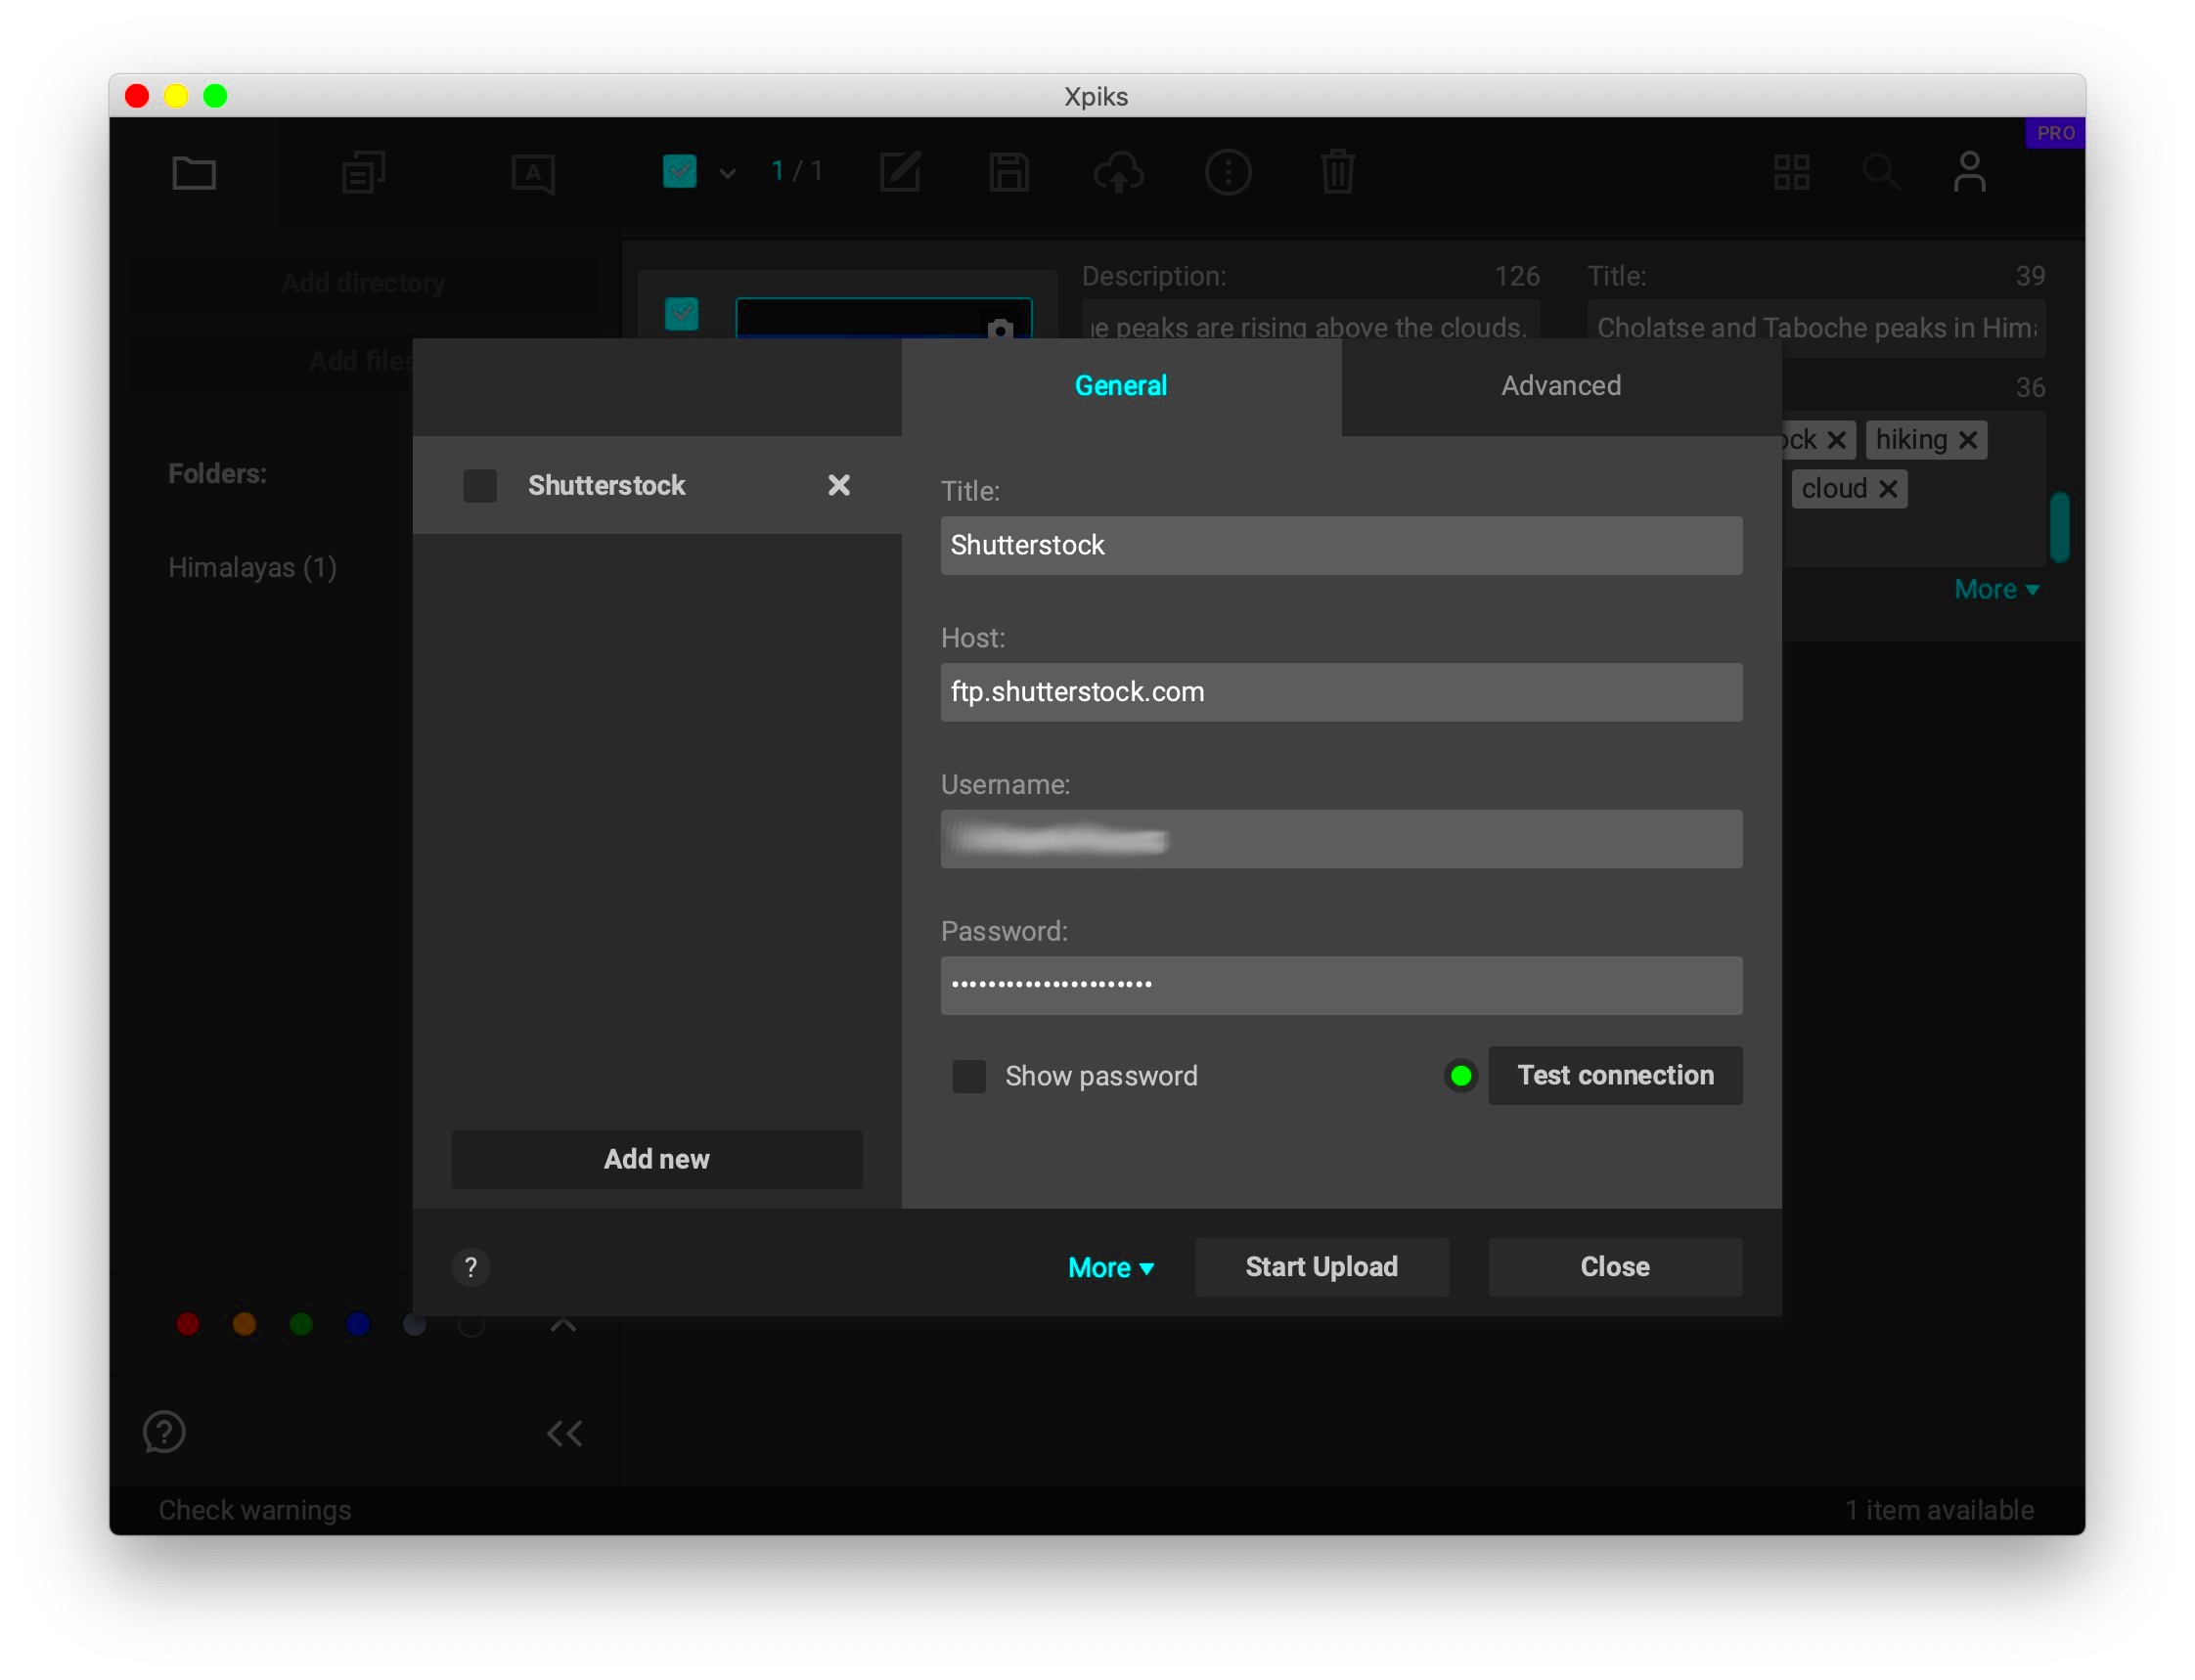
- Select Your Photos: A window will pop up allowing you to choose files. Navigate to the folder where you saved your edited Google Photos and select the ones you want to upload. You can upload multiple images at once!
- Add Metadata: After uploading, you’ll need to provide important information for each photo. This includes:
- Title: A brief description of your photo.
- Description: A more detailed account of what the photo shows.
- Keywords: Use relevant keywords to help users find your photo.
- Submit for Review: Once you’ve added all necessary information, submit your photos for review. Shutterstock will check them for quality and compliance with their guidelines.
- Wait for Approval: After submission, wait for a few days to get feedback. If approved, your photos will be available for sale!
Also Read This: How to Download a Video from Dailymotion Using Firefox
Best Practices for Successful Uploads
To increase your chances of success on Shutterstock, consider these best practices:
- Focus on Quality: Always upload high-resolution images. Low-quality photos are less likely to be approved.
- Use Relevant Keywords: Think like a buyer. Use keywords that accurately describe your photo and what users might search for.
- Submit Diverse Content: Different types of photos appeal to various audiences. Include landscapes, portraits, and lifestyle images.
- Stay Updated on Trends: Keep an eye on what’s trending in stock photography. This can guide your photo selection and submission strategy.
- Monitor Feedback: Pay attention to feedback from Shutterstock reviewers. This can help you improve future submissions.
Also Read This: Royal Rumble 2024 Participants Revealed
How to Optimize Your Photos for Searchability
Optimizing your photos for searchability on Shutterstock is key to getting noticed. Here’s how to do it effectively:
- Choose the Right Keywords: Use a mix of general and specific keywords. Think about what potential buyers might type in when searching for images like yours.
- Write Clear Titles: Your title should be concise yet descriptive. It should give users an immediate idea of what your photo represents.
- Craft Detailed Descriptions: Describe the scene, subjects, and context of your photo. The more detail, the better. This helps in search engine optimization.
- Utilize Categories: When uploading, select the appropriate categories for your images. This helps organize your work and makes it easier for buyers to find.
- Stay Consistent: Upload regularly and maintain a consistent style. This can build your brand and make you more recognizable to buyers.
By following these optimization tips, you'll improve the visibility of your photos and increase your chances of making sales on Shutterstock.
Also Read This: Can You Monetize on Rumble? A Step-by-Step Guide for Creators
Common Issues When Uploading and How to Fix Them
Even though uploading photos to Shutterstock is generally smooth, you might encounter some issues along the way. Here are some common problems and how to fix them:
- File Format Issues: Shutterstock accepts specific file formats like JPG and PNG. If your photo is in a different format, convert it before uploading. You can use free online converters to change formats easily.
- Image Quality Problems: Low-resolution images won’t be approved. Make sure your photos are at least 4 MB and have a resolution of 300 DPI or higher. Always check the quality before uploading.
- Metadata Errors: If you forget to add necessary information like title, description, or keywords, your upload may be delayed or rejected. Double-check that you fill out all required fields.
- Copyright Issues: If you include images that contain copyrighted material, your submission will be rejected. Always ensure that you own the rights to the photos you upload and avoid using recognizable logos or branded items.
- Slow Upload Speeds: A slow internet connection can cause uploads to fail. If this happens, try uploading smaller batches of photos or check your internet connection before proceeding.
By being aware of these issues, you can troubleshoot effectively and ensure a smoother uploading process.
Also Read This: Does LinkedIn Have a Resume Builder? A Comprehensive Guide to Creating Your LinkedIn Resume
Frequently Asked Questions
Got questions about uploading your Google Photos to Shutterstock? Here are some frequently asked questions that can help clarify your doubts:
- How long does it take for my photos to be approved? Typically, it takes about 1 to 3 days for Shutterstock to review your submissions.
- Can I upload the same photo multiple times? No, each photo can only be uploaded once. If you have similar images, consider making unique edits to differentiate them.
- What types of photos sell best on Shutterstock? Popular categories include lifestyle, business, nature, and travel. Researching trending images can also give you ideas.
- Can I edit my metadata after uploading? Yes, you can edit the metadata for your photos even after they’ve been submitted. Just go to your contributor dashboard.
- How do I get paid for my sales? Once your photos are sold, Shutterstock pays you through PayPal or bank transfer. You’ll receive your earnings once you reach the payout threshold.
Conclusion and Next Steps
Congratulations! You now have a better understanding of how to upload your Google Photos to Shutterstock and navigate the process effectively. Here are some next steps to consider:
- Start Uploading: Follow the steps outlined in this guide and begin uploading your photos. Remember to keep quality in mind.
- Keep Learning: Photography is an evolving field. Stay updated with new trends and techniques by reading blogs, watching tutorials, and joining photography communities.
- Monitor Your Performance: Keep track of your uploads and sales on Shutterstock. Analyzing which photos sell well can guide your future uploads.
- Engage with the Community: Join forums or social media groups focused on stock photography. Engaging with fellow photographers can provide valuable insights and support.
By taking these steps, you'll be on your way to not only showcasing your work but also potentially earning income from your passion for photography. Happy uploading!