When I discovered Canva for the time it was like finding a refreshing change in the realm of design. One standout feature that caught my attention is the image background removal tool. It has truly revolutionized my experience. Whether you're an entrepreneur looking to enhance your visuals or just someone who loves spicing up their social media posts this tool simplifies the process. With just a few clicks you can seamlessly erase backgrounds letting your subjects take center stage in ways.
How Canva Background Removal Works
Canva's tool for removing backgrounds is powered by advanced technology. But don't fret, it's super simple to use! Here's a breakdown of how it functions.
- Upload Your Image: Start by uploading the image you want to edit. It can be a family photo, a product shot, or anything else.
- Select the Image: Click on the image, and you’ll see the ‘Edit Image’ option on the toolbar.
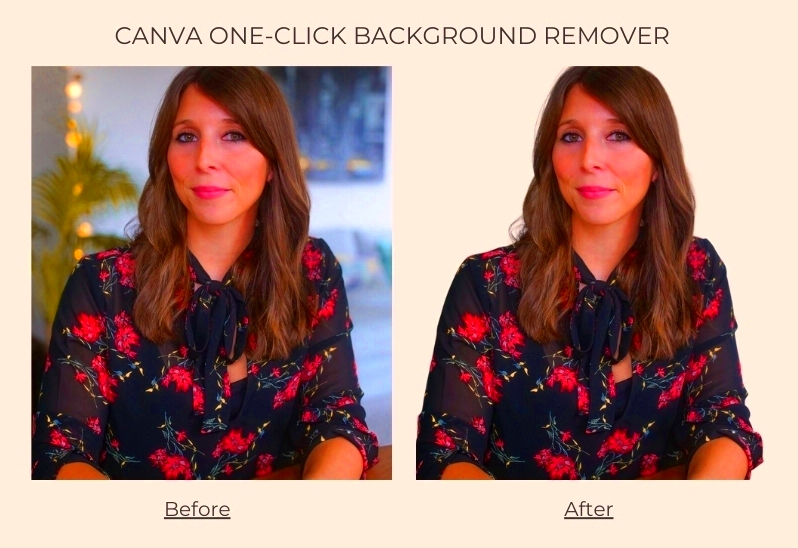
- Use the Background Remover: Click on ‘Background Remover,’ and watch the magic happen. In seconds, Canva will identify the background and remove it, leaving you with just the subject.
- Fine-Tune Your Image: If necessary, you can manually adjust the edges to ensure a clean cut. This feature is particularly handy for images with intricate details.
I still vividly recall my initial experience with this feature. While designing a poster for an upcoming event I was truly impressed by its smooth functionality. It was as if I had a dedicated designer collaborating with me.
Also Read This: Creative Nail Art Tutorial on Dailymotion
Benefits of Using Canva for Background Removal
There are several benefits to using Canva for removing backgrounds that set it apart.
- Ease of Use: You don’t need to be a tech wizard to navigate Canva. Its user-friendly interface allows even the most novice users to create beautiful designs.
- Time-Saving: Gone are the days of using complicated software that takes hours to learn. Canva lets you remove backgrounds quickly, which is a lifesaver when you’re on a deadline.
- Professional Results: The quality of the background removal is impressive. Your images look polished and professional, which can be a game-changer for branding.
- Cost-Effective: Canva offers this feature for free, making it accessible for anyone, from students to small business owners.
- Creative Freedom: Once the background is removed, you have the freedom to place your subject against any backdrop, be it a vibrant color or a stunning landscape.
From what I’ve seen the time I save on design lets me direct my attention towards crucial elements of my projects such as marketing and fostering engagement. I can hardly envision returning to an era with editing software!
Also Read This: How LinkedIn Generates Revenue Through Its Business Model
Step by Step Guide to Remove Backgrounds in Canva
Eliminating backgrounds in Canva is an easy and impactful method to improve your pictures. I was pleasantly surprised by the user friendliness of the procedure when I gave it a shot. Here’s a walkthrough that you can use to get the ideal cutout.
- Start with a Fresh Canvas: Open Canva and create a new design. Choose the dimensions that suit your project.
- Upload Your Image: Click on the “Uploads” tab on the left sidebar. Upload the image you want to edit by dragging it into the workspace or selecting it from your device.
- Select Your Image: Once uploaded, click on your image. You will see the toolbar appear at the top of the screen.
- Access the Background Remover: Click on the “Edit Image” button. You’ll find the “Background Remover” option. Click it and watch as Canva removes the background within seconds.
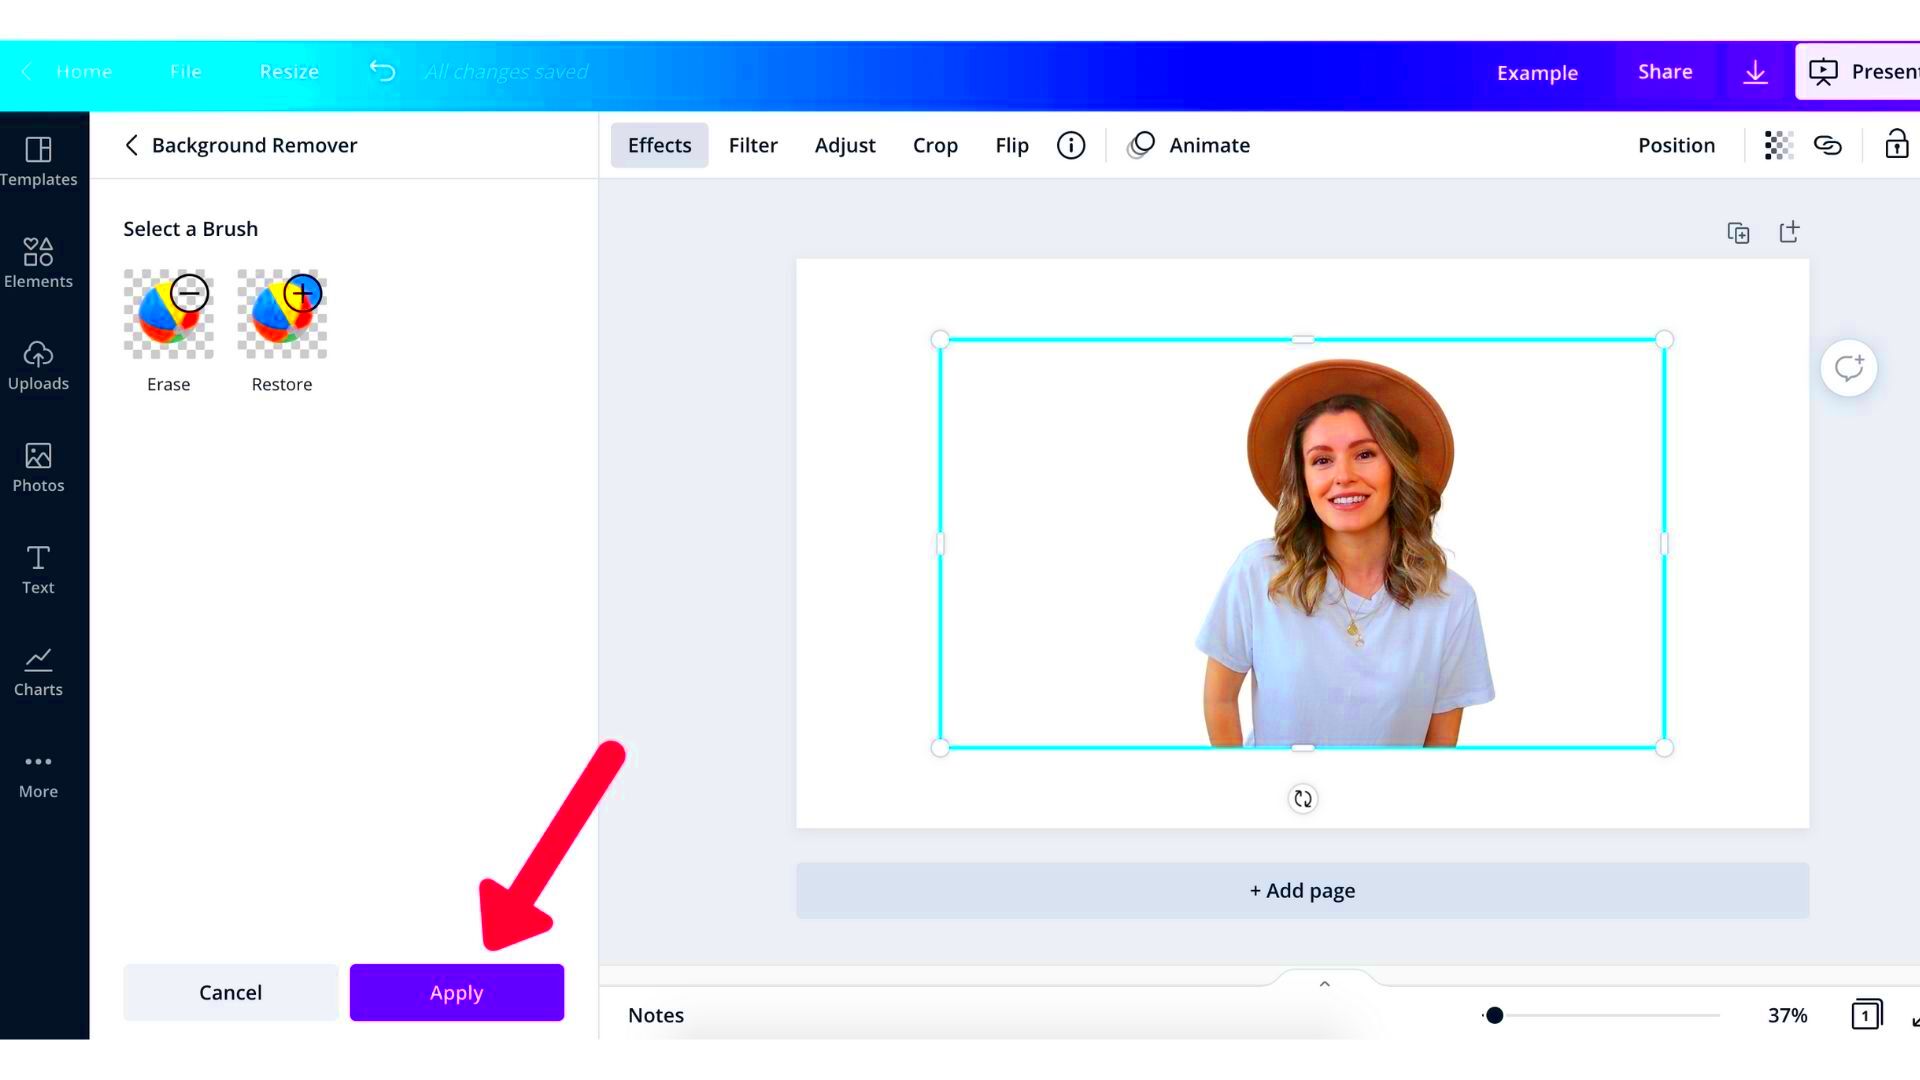
- Refine the Edges: After the background is removed, you may notice some rough edges. Use the “Erase” and “Restore” tools to fine-tune the image to your liking.
- Change Background: With the background gone, you can now add a new background or leave it transparent, depending on your design needs.
- Download Your Design: Once you’re happy with the final look, click on the “Download” button at the top right. Choose your preferred file format and save it to your device.
This experience brought back memories of my initial try at designing a flyer for a gathering. It was enchanting to witness the end result and it struck me just how impactful this resource can be for those seeking to enhance their visual materials.
Also Read This: Understanding Ear Rumbling: Causes and Remedies
Tips for Achieving the Best Results
To get the best out of Canva's background removal tool I've picked up a few tricks that can really enhance your results. Here are some tips to help you achieve impressive outcomes.
- Choose High-Quality Images: The better the quality of your original image, the smoother the final result will be. Always try to use high-resolution images.
- Avoid Busy Backgrounds: If your image has a complex background, it may confuse the removal tool. A plain or blurred background works best for clean extractions.
- Pay Attention to Edges: After removing the background, zoom in to inspect the edges. Use the eraser and restore tools to tidy up any rough spots.
- Experiment with Backgrounds: Once you’ve removed the background, don’t hesitate to try different colors or images for the background. Sometimes, a bold color can make your subject pop!
- Use Layers: If you are adding new elements, utilize Canva’s layering feature. Place your subject in front of other design elements for a professional look.
I recall trying out various backdrops while crafting an Instagram post for a festival. It was intriguing to witness how a mere shift in hue could completely alter the mood of the picture.
Also Read This: Optimal Posting Frequency on Behance
Common Issues and Troubleshooting
While Canva's background removal feature is easy to use you may encounter a few challenges along the way. Here are the common problems users come across and their solutions:
- Background Not Completely Removed: Sometimes, the tool may leave parts of the background. If this happens, use the erase tool to manually remove those sections.
- Edges Look Rough: If the edges of your subject appear jagged, try using the “Restore” tool to bring back parts that were accidentally erased or adjust the image settings.
- Slow Performance: If Canva is running slowly, it might be due to a poor internet connection or heavy file sizes. Try refreshing your browser or closing other tabs.
- Image Quality Decreases: If your final image seems pixelated, make sure you are downloading it in the correct format and resolution. Always opt for high-resolution downloads when possible.
When I started using Canva I encountered similar obstacles. However through perseverance and honing my skills I figured out how to overcome them. Now I can effortlessly whip up beautiful designs without any hassle. It's just a part of the artistic process!
Also Read This: How to Get More Engagements on Behance
Alternatives to Canva for Background Removal
Canva is great for removing backgrounds but there are other platforms that can work magic on your photos too. Based on my experience with a few of these alternatives I can attest to their efficiency. Here are some notable choices you might consider checking out.
- Remove.bg: This website specializes in background removal. Just upload your image, and it automatically removes the background in seconds. It's incredibly efficient for quick edits.
- Adobe Express: Formerly known as Adobe Spark, this tool offers a robust background remover. It integrates well with other Adobe products, making it a solid choice for those familiar with the Adobe ecosystem.
- PhotoScissors: This is another user-friendly tool that allows you to remove backgrounds easily. You can upload images and use manual tools for more precise adjustments.
- Fotor: Fotor is more than just a background remover; it offers a complete suite for photo editing. It’s perfect for those who want to explore various editing features alongside background removal.
- Pixlr: A cloud-based editor that provides multiple features, including background removal. Its interface is similar to Photoshop, making it a good option for those who want more control.
Based on what I've seen trying out different options has really expanded my editing abilities. For example there was a time when I turned to Remove.bg for a project that needed to be done quickly and it came to the rescue. Each tool brings its unique advantages to the table making it beneficial to explore and discover what suits you best.
Also Read This: Understanding Adobe Stock Credits and How to Purchase Them
Frequently Asked Questions about Canva Background Removal
As an avid Canva enthusiast I've come across a lot of queries and uncertainties from my fellow users. Let's address some of the commonly asked questions regarding the process of removing backgrounds in Canva.
- Is background removal free in Canva? Yes, Canva offers background removal for free, but it's available only to Pro users. However, there are many other editing tools you can use without the Pro subscription.
- Can I edit the background after removal? Absolutely! Once you’ve removed the background, you can add new colors, images, or effects to enhance your design further.
- Does Canva save my original image? Yes, your original image remains intact, so you can always revert back to it if needed.
- Can I remove backgrounds from videos in Canva? Currently, Canva only allows background removal for images. However, you can add effects and overlays to videos for a similar impact.
- What should I do if the background removal tool isn't working? If you encounter issues, try refreshing your browser or clearing your cache. If problems persist, consider checking Canva's support page for solutions.
I recall the moment I started questioning these aspects. Interacting with others and seeking insights really helped me navigate my design path with greater ease and pleasure.
Conclusion and Final Thoughts
As I conclude my journey through the background removal feature of Canva and its alternatives I find myself reflecting on my growth as a creator. Canva has genuinely made design accessible empowering people like us to turn our ideas into reality without requiring formal expertise. Whether you opt for Canva or venture into other platforms the important thing is to discover a tool that aligns with your creative workflow.
Through dedication, perseverance and a touch of imagination anyone can become proficient in the skill of removing backgrounds and take their designs to the level. I urge you to jump in, try things out and embrace the learning process, even if it involves making a few blunders along the way. Each misstep brings you closer to honing your design abilities. Keep in mind that there are no limits to creativity so feel free to unleash your wildest ideas!