If you have ever attempted to create a design on Canva you might be aware of the challenges that arise when striving for that perfect aesthetic. That’s when image frames prove to be useful! Consider them as a border or form that keeps your images contained within an area. These frames assist in crafting designs and add a touch to your visuals.
When I started using Canva I struggled to position images in an orderly manner. The pictures were either oversized or there was always something slightly misaligned. However when I discovered frames it was like a moment of clarity! My images suddenly fit seamlessly and my designs appeared much more polished.
Why Use Frames for Your Canva Designs?
- Neat and Tidy Layouts: Frames help you position images perfectly, especially when you want a clean, symmetrical look. Your designs will feel more organized.
- Creative Freedom: They come in all shapes and sizes! Whether it's a circle, square, or something more abstract, frames help you create a unique design that stands out.
- Time-Saver: For someone who’s not a professional designer (like me), frames save a lot of time that I would otherwise spend resizing or cropping images.
- Consistency: If you're working on multiple designs, using frames can help maintain a consistent look across your work.
To sum it up using frames is akin to having an additional set of hands you never realized you required but once you do you find it hard to revert back!
Also Read This: Best VPNs for Bypassing Fortiguard Downloader
Step-by-Step Guide to Adding Image Frames in Canva

Now that you understand the significance of frames lets dive into the exciting part—putting them to use! I recall my initial experience with incorporating a frame in Canva and it wasn't as smooth as I anticipated. So let me share my efforts to simplify the process for you:
- Open Canva: First things first, log in to Canva and open your design or start a new one.
- Go to Elements: On the left side of your screen, you’ll see a tab called "Elements." Click on that.
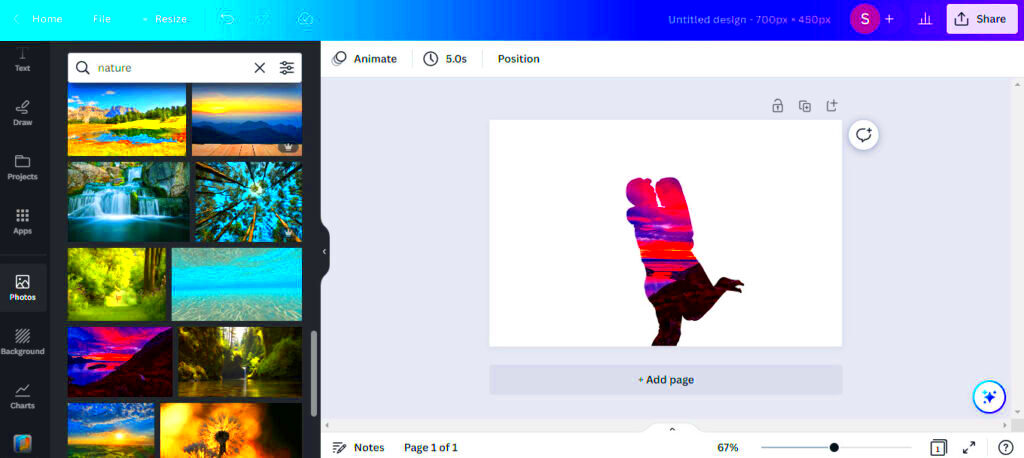
- Search for Frames: Type "frames" in the search bar. You’ll get a variety of shapes and sizes to choose from.
- Pick a Frame: Click on the frame you like, and it will appear on your canvas.
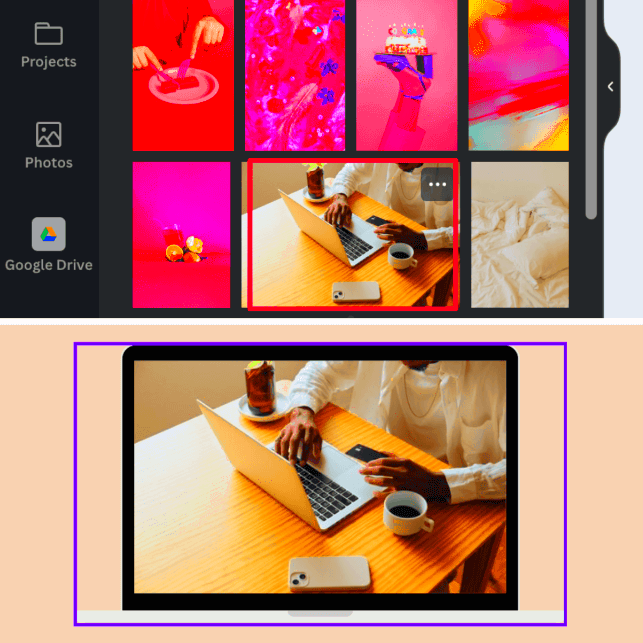
- Insert Image: To add an image to the frame, simply drag and drop the image into the frame space. Canva will automatically adjust the photo to fit inside the frame.
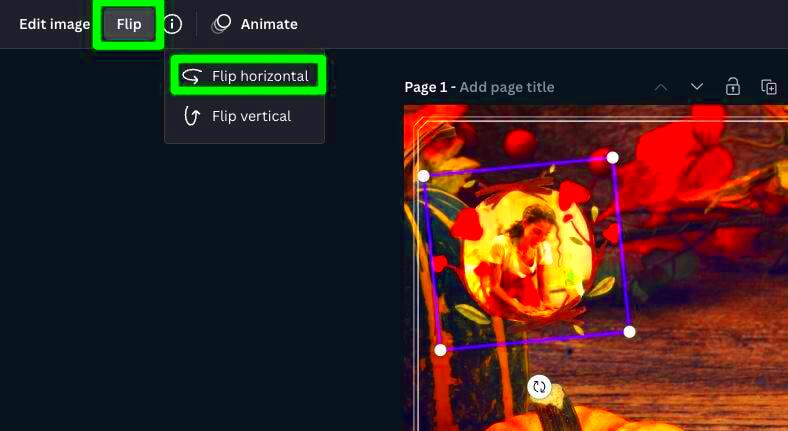
- Customize: After your image is placed in the frame, you can adjust its position within the frame by double-clicking it. You can also resize the frame itself by clicking on its edges.
And there you have it! Youve successfully incorporated an image frame into your Canva project and chances are your design now looks significantly more appealing.
Also Read This: A Silent Voice Full Movie on YouTube Availability for Free Viewing
How Frames Enhance Your Designs
When I began my journey with Canva I found my creations to be somewhat lackluster. They had the components like a nice image and some words but there was an element missing. That’s when it hit me; it was the absence of organization! Incorporating frames in Canva can really elevate your designs and take them to the next level. It’s akin to adding a touch to a meal you know it tastes good but the presentation enhances it even more!
Frames can truly enhance your design in a way that feels more down to earth.
- Add Structure and Focus: Frames act like boundaries that keep your design elements from feeling scattered. They help focus the viewer's attention on the key parts of your design, whether it’s an image, text, or a combination of both.
- Enhance Visual Appeal: A frame can turn a simple image into a centerpiece. I’ve noticed that my designs look a lot more professional when I use frames—it’s like they instantly level up.
- Bring Balance: Frames can create symmetry and balance in your design. When you’ve got multiple images or elements, a frame helps them look cohesive rather than chaotic.
- Flexibility in Layout: The variety of frames available in Canva—be it circles, rectangles, or even abstract shapes—allows you to play around with layouts. You can break the monotony of rectangular designs and bring in some fun shapes!
When I began incorporating frames into my work my designs went from appearing hastily put together to something I would be proud to showcase. It’s true what they say the real magic lies in the finer touches!
Also Read This: Essential Equipment for Starting a YouTube Channel From Scratch
Common Mistakes to Avoid While Using Frames in Canva
It’s tempting to believe that adding a border to a picture will instantly elevate your design. However I’ve had my fair share of blunders with frames that turned out to be more detrimental than beneficial. The key lies in using them wisely. Here are a few common pitfalls I’ve come to recognize and steer clear of through experience!
- Overusing Frames: One time, I added frames to literally every image in my design. The result? It looked cluttered and overdone. Less is more—use frames wisely, only when it enhances the design.
- Wrong Frame for the Image: Not every frame works with every picture. I once put a portrait in a circular frame, but it cut off important parts of the image. Make sure the frame complements the photo, not hinders it.
- Ignoring Consistency: I’ve seen designs (and even made some myself) where different types of frames were used in one project. It can throw off the whole look. Stick to one or two frame styles for a cleaner, more unified appearance.
- Neglecting Alignment: A frame is supposed to bring balance, but if you don’t align it properly with other elements, it can look off. I’ve learned that a little time spent on alignment makes a big difference.
Using frames can really enhance your visuals, but it's important to use them wisely. Take my word for it, steering clear of these missteps will give your designs a polished and professional touch.
Also Read This: How to Stop Shutterstock Ads on YouTube for a Better Viewing Experience
Tips for Choosing the Right Frame for Your Design
Choosing the perfect frame may appear to be a choice but it can significantly impact your overall design. I recall feeling overwhelmed by the selection of frames on Canva. Which one would be the most visually appealing? Here are some insights I've gained throughout this process.
- Consider the Content: If you’re designing something playful, like a birthday card, a fun, wavy frame might work. But if it’s something more serious, like a professional presentation, go for simple, sleek frames. The frame should match the mood of the design.
- Size Matters: Larger, bolder frames can draw attention to a specific element in your design. On the other hand, subtle frames are great when you don’t want the frame to overpower the content.
- Shape of the Frame: One of my favorite tricks is to play with the shape of the frame based on the design layout. Circular frames are great for drawing attention to a particular section, while rectangular frames are perfect for showcasing landscapes or widescreen images.
- Stick to a Theme: If you’re working on a series of designs—like social media posts—it helps to keep the frame style consistent across them all. It brings a sense of unity and makes your work look well-thought-out.
- Don’t Be Afraid to Experiment: I’ll admit, I’ve tried some odd combinations—hexagonal frames with abstract designs, anyone? Sometimes stepping outside the box works. Canva gives you the flexibility, so play around and see what clicks.
Ultimately when it comes to selecting the perfect frame its about discovering what resonates with your creative vision. Listen to your gut feelings and dont hesitate to experiment with fresh ideas. You might be amazed at how a carefully selected frame can elevate your project!
Also Read This: Effective Strategies for Connecting with Recruiters on LinkedIn to Enhance Your Job Search
FAQs About Canva Image Frames
When I began using frames in Canva I encountered my share of confusion. With time I gathered some tips and techniques but I also found myself with many questions. Allow me to address some of the inquiries that commonly arise regarding the use of frames in Canva, drawing from my experiences.
1. Can I customize the size of a frame after placing an image?
Absolutely! What I appreciate about Canva is its versatility. After placing an image in a frame you have the freedom to resize the frame and modify the image inside. Simply double click on the frame to move or zoom in/out on the image.
2. Are there any limitations on the types of images I can use in frames?
Not quite! Canva frames can hold a variety of content like pictures, drawings and even symbols. I’ve tested using JPEGs and PNGs without any problems. Just ensure that the image you select fits nicely within the frame shape you’ve chosen.
3. Can I layer frames on top of each other?
Absolutely! Canva lets you unleash your creativity by layering elements. I’ve tried putting frames on larger ones to achieve some really interesting 3D effects. You can also tweak the transparency and rearrange the layers to give your design a distinctive flair.
4. Can I change the frame's border style or color?
Regrettably, Canva does not allow you to modify the color of the frame border directly. Nevertheless, you have the option to place a shape behind the frame or choose an alternative frame style to achieve a border appearance. While this is a slight constraint it is something you can conveniently navigate around.
5. How do I remove a frame from an image?
I found this a bit tricky at first! If you want to get rid of a frame just click on it and hit delete. Your image will still be there and you can keep working on it. It’s really just a matter of pressing delete but it took me a while to realize that.
If you have any more questions, don't stress out. Canva is really user friendly and trying things out is all part of the experience. Once you get the hang of it you'll realize how much frames can make your design process smoother.
Conclusion: Make the Most of Canva Frames for Stunning Designs
Canva frames are not just a feature theyre like a hidden gem. When I incorporated them into my work my designs went from ordinary to stunning and it was easier than I expected! Whether youre designing for professional purposes or just for fun adding frames can elevate your creations with that extra touch. So go ahead and explore get creative and let your imagination run wild!