When it comes to creating visuals the size of your images can really impact the final result. Picture putting in hours of effort into a design only to have it appear blurry or pixelated when you share it online. This is why it's essential to grasp image sizes if you're involved in producing content. I learned this lesson during my initial experiences with Canva. I designed a stunning graphic for my social media, but upon uploading it I noticed the edges were cropped and I ended up feeling quite annoyed. Let's delve into, the significance of these image sizes.
Various platforms have specific image size requirements to showcase content effectively. Adhering to the right dimensions guarantees that your visuals retain their sharpness and resonance. Here are several reasons highlighting the significance of this practice.
- Professional Appearance: Proper dimensions create a polished look that attracts viewers.
- Optimized Performance: Correct sizes help images load faster, improving user experience.
- Increased Engagement: Images that fit perfectly capture attention and keep audiences engaged.
In a realm where images convey messages more powerfully than mere language, ensuring accurate proportions is a crucial yet subtle aspect of conveying ideas successfully.
Common Canva Image Dimensions for Various Platforms
As I delved into the realm of design I soon realized that every platform comes with its own set of specifications. Familiarizing yourself with these details can spare you the hassle of adjusting sizes down the line. Here's a useful guide to image dimensions.
| Platform | Recommended Dimensions |
|---|---|
| Facebook Post | 1200 x 630 pixels |
| Instagram Post | 1080 x 1080 pixels |
| Twitter Post | 1200 x 675 pixels |
| LinkedIn Banner | 1584 x 396 pixels |
| Pinterest Pin | 1000 x 1500 pixels |
As I reflect on my journey I’ve come to understand that adhering to these aspects not only elevates the visual appeal but also guarantees that your message reaches your audience without any interruptions. It’s akin to donning attire for an event; it simply feels appropriate!
Also Read This: Does iStock accept AI images? Exploring the compatibility of AI-generated images with iStock.
How to Adjust Image Dimensions in Canva
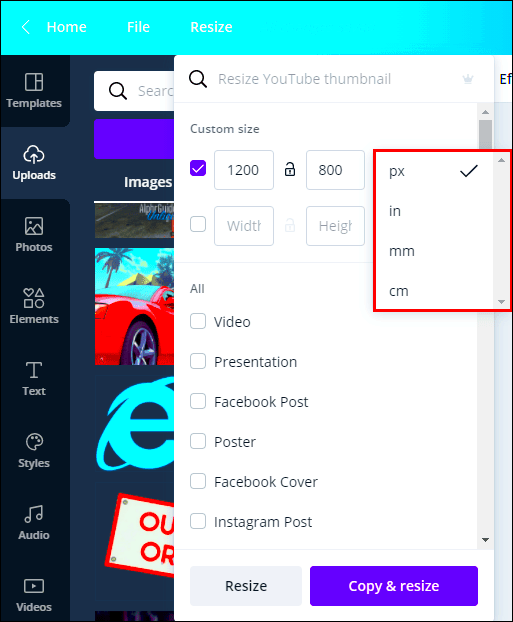
Resizing images in Canva is a simple task that can be accomplished in just a few steps. I recall my initial experience with this and I was pleasantly surprised by how intuitive the platform is. Here’s a guide on how to effortlessly adjust image dimensions.
- Open your design in Canva and select the image you want to resize.
- Click on the "Resize" option located in the top toolbar.
- Enter the new dimensions in pixels, or choose a preset size from the dropdown menu.
- Hit “Copy & Resize” to create a new design with the adjusted dimensions.
This approach lets you preserve the initial concept while also delving into various aspects. I frequently play around with dimensions to determine what works most effectively for my target audience.
An additional suggestion is to utilize the “Crop” option for fine tuning. This comes in handy when you want to highlight aspects of your picture while still preserving crucial details. Keep in mind that the goal is to produce visuals that not enhance their appearance but also convey your message effectively. Its a worthwhile adventure to embark upon!
Also Read This: Is Dailymotion Safe Now? A Comprehensive Review of Its Safety and Security Measures
Using Canva's Resize Feature Effectively
Canva’s resizing tool is a game changer for us creators. The moment I stumbled upon it I felt as though I had uncovered a hidden gateway to endless opportunities. Whether you’re crafting content for social media, slideshows or promotional materials nailing the dimensions can save you a lot of time and energy. Let’s explore how to maximize the potential of this amazing feature.
Resizing is a straightforward yet potent tool. Here’s a guide on how to use it efficiently.
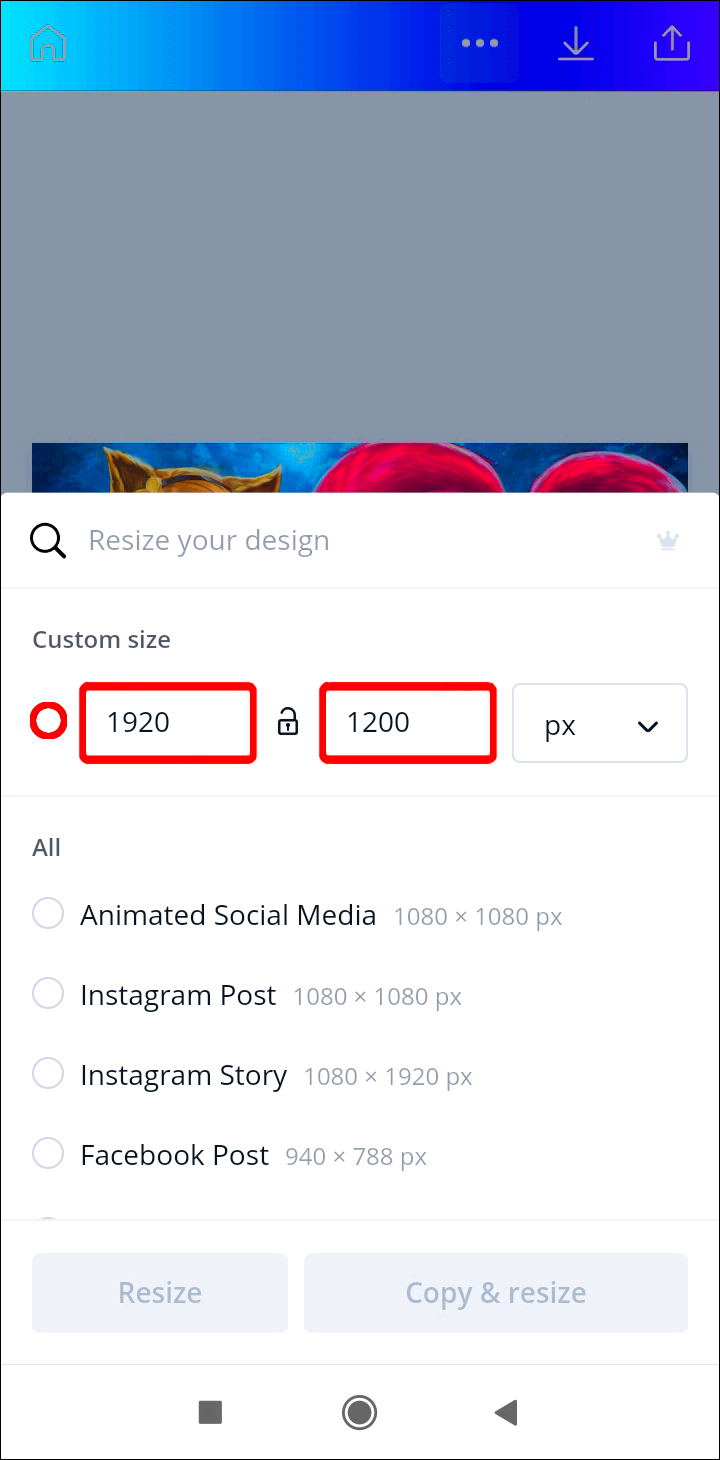
- Open your existing design and click on the “Resize” button located at the top of your screen.
- Input your desired dimensions. You can either enter custom sizes or choose from Canva’s preset options.
- Decide if you want to resize the current design or create a copy with new dimensions. I usually opt for creating a copy so I can experiment without losing my original work.
- Once resized, you can adjust the elements to fit the new dimensions perfectly.
This feature has the potential to revolutionize your design journey, streamlining it significantly. Nevertheless it's wise to exercise caution as resizing may occasionally result in unforeseen alterations in layout. I've discovered the importance of reviewing my design post resizing to ensure everything appears flawless. Embrace this tool and you'll witness how it enhances your design process.
Also Read This: Design Fake Plane Tickets with Canva Fake Plane Ticket Template
Best Practices for Maintaining Image Quality
Throughout my creative process I’ve come to understand the importance of preserving image quality to craft visuals. A pixelated or unclear image can really ruin the impact of your design, especially after all the hard work you’ve put in. So lets delve into some tips to keep your images sharp and well defined.
- Choose High-Quality Images: Always start with high-resolution images. Websites like Unsplash or Pexels offer stunning options that won’t compromise your design.
- Avoid Excessive Resizing: Every time you resize an image, it can lose some quality. Try to keep resizing to a minimum.
- Use the Correct File Format: Depending on your design, choose the right format. For example, PNG is great for images with transparency, while JPEG works well for photographs.
- Pay Attention to Color Profiles: Make sure your colors look vibrant and true to life by using the right color profile.
By adhering to these principles you can uphold the quality of your visuals. Believe me there's immense satisfaction in witnessing your efforts manifested in top notch quality. I frequently experience a sense of fulfillment when I observe my creations being shared, with precision and vividness.
Also Read This: Accessing the RedZone Channel on YouTube TV
How to Save and Export Images in the Right Dimensions
After pouring your creativity into your work the last crucial stage of your design journey is to save and export it properly. I recall my initial encounter with challenges when it came to exporting my creations. Its disheartening to witness a stunning design lose its allure upon saving. To help you steer clear of such setbacks and make sure your visuals are preserved at the dimensions heres a guide on how to do it.
Follow these simple steps:
- After finalizing your design, click on the “Download” button located in the top right corner.
- Select the file type that suits your needs. For high-quality images, I often recommend PNG or PDF formats.
- Check the dimensions displayed to ensure they match your requirements. If they don’t, consider resizing your design before exporting.
- Hit the “Download” button, and your image will be saved to your device in the correct dimensions.
By following these steps you can save your images while preserving their quality and size. I always recommend keeping a copy of the original Canva design for future adjustments. This ensures that when you share your creations with others they will look as beautiful as you envisioned!
Also Read This: When Will My Hero Ultra Rumble Be Available for Crossplay
Frequently Asked Questions About Image Dimensions in Canva
While exploring the realm of design using Canva I noticed that a lot of us have questions about image sizes. Getting these queries sorted out can really enhance our design process and make it more fun. So lets take a look at some common questions I come across along with my thoughts on them.
What are the best image dimensions for social media posts?
Different social media platforms have specific size guidelines for images. For example an Instagram post is most effective when sized at 1080 x 1080 pixels whereas a Facebook shared image shines at 1200 x 630 pixels. To keep things streamlined and productive I usually rely on a handy reference sheet that outlines these measurements.
Can I resize an image without losing quality?
Absolutely! You can definitely do that. Canva has a handy resize feature that lets you adjust the size without compromising on quality. Just make sure to begin with an image for the best results. I found this out the hard way when trying to resize a low resolution picture ended up looking all blurry.
How do I know if my image is the correct size?
Once you’ve resized an image make sure to verify the dimensions shown in the download section. It’s a detail that’s easy to miss but confirming that they align with your needs can save you a lot of trouble down the road. I always make it a habit to double check this step before wrapping up my designs.
What formats should I use for saving images?
For online purposes I suggest using PNG for images that need transparency and JPEG for pictures. I usually save my creations in different formats to ensure compatibility, with various platforms.
Can I customize dimensions for print materials?
Canva lets you adjust the dimensions of your print designs. I often rely on this option when making flyers or brochures that require sizes to ensure a flawless print.
Conclusion on Image Dimensions Adjustment in Canva
To wrap it up getting a grip on image sizes in Canva is crucial for crafting eye catching visuals that convey your message effectively. By recognizing the significance of dimensions making use of the resize tool thoughtfully and adhering to guidelines for preserving quality you can take your design skills to the level. Keep in mind that an image can be what sets you apart from being noticed and going unnoticed so make sure to invest time in perfecting it!