Canva is that buddy who effortlessly makes things look effortless and when it comes to design grouping images is one of those nifty tricks that can save you a ton of trouble. Whether you’re putting together a presentation, a flyer or just having fun with designs image grouping in Canva can feel like pure enchantment. I vividly recall the moment I first came across this feature – it felt like stumbling upon a secret weapon, for tidying up my messy designs. If you haven’t heard of it before get ready for a delightful surprise!
Why Grouping Images in Canva is Useful
Picture this, setting up your space and every time you shift a chair the table scoots across the room. That’s the challenge of design without grouping. Grouping images in Canva isn’t merely for ease; it’s a way to maintain control. It lets you adjust, resize or line up several elements without messing up their positions. I’ve found this feature handy, for creating posters with multiple visuals especially when time is tight and every moment matters.
Here’s why I believe that grouping can be a real game changer.
- Consistency: Once grouped, your elements stay together. No more accidental misalignment!
- Speed: Imagine adjusting a group of images at once, rather than tweaking each one individually. It saves so much time.
- Clean design: Grouped images maintain a consistent layout, which is perfect for creating a polished, professional look.
When I began using Canva, I would invest a lot of time trying to make everything align just right. However once I stumbled upon the grouping feature I felt like a seasoned designer even though I was still getting the hang of things.
Also Read This: Accessing College Sports on YouTube TV and the Availability of ACCN
Step-by-Step Guide to Grouping Images in Canva
Lets get down to business. If you're curious about organizing images in Canva fret not its simpler than putting together IKEA furniture (and there are no screws missing!). Here's the process for you.
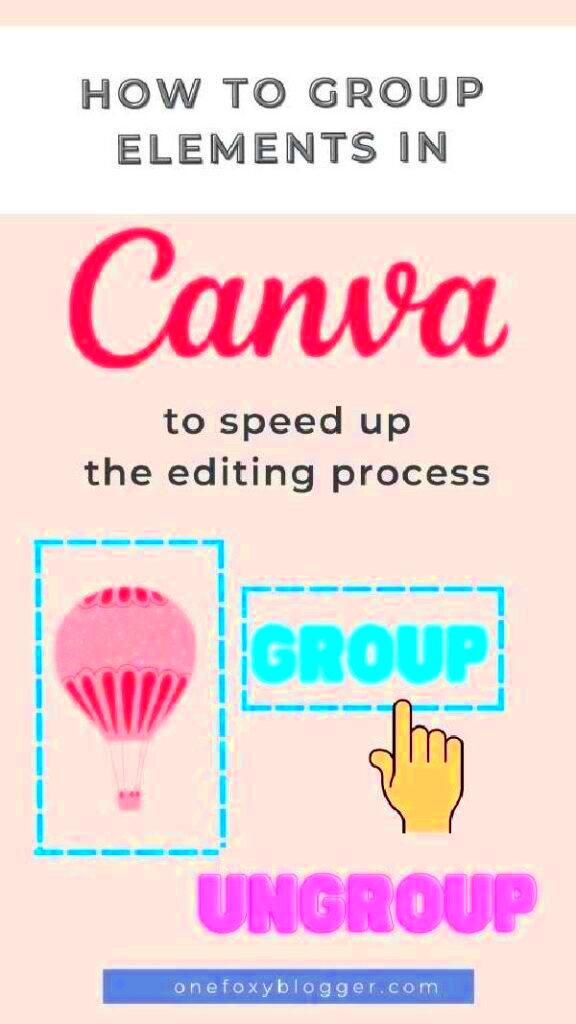
- Select Your Images: Click on the first image, hold down the Shift key, and then click on the other images you want to group. You’ll see them all highlighted.
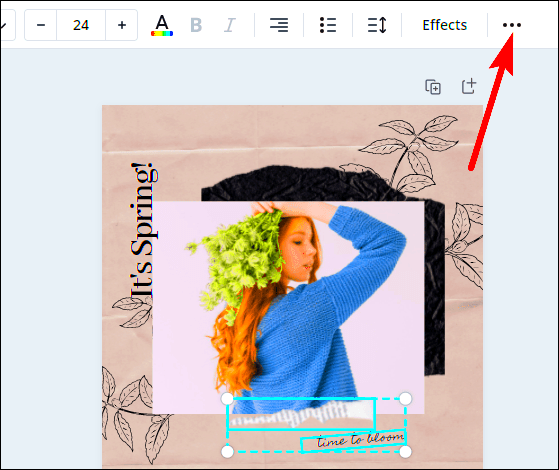
- Click the Group Button: Once selected, look at the top toolbar. There should be a button that says Group. One click, and voila – your images are now grouped!
- Move and Resize: Now that they’re grouped, you can move them around the canvas as a single unit. Resizing works the same way – just drag a corner and adjust the size. Easy peasy!
- Ungroup if Needed: Don’t worry if you change your mind. You can always ungroup the images by selecting the group and clicking the Ungroup button.
I recall struggling with this during my initial attempt but after a few tries it becomes instinctive. Grouping proves to be useful when managing various components in a design as it helps maintain order and prevents you from feeling overwhelmed!
Also Read This: Can You Earn Money on Rumble and How Content Creators Benefit
Common Mistakes to Avoid While Grouping Images
Weve all had that moment when we think weve created a design only to realize something is not quite right. While grouping images in Canva is really useful it does come with its own set of challenges. I recall a time when I spent hours working on a project only to discover that I had grouped the wrong elements! To help you steer clear of a similar mishap here are some mistakes that people often make when grouping images and tips on how to avoid them:
- Grouping the Wrong Elements: This might seem obvious, but it’s easy to accidentally select text or shapes along with your images. Always double-check your selection before clicking the group button. I’ve often found myself wondering why a text box was moving along with an image – turns out, I grouped it by mistake!
- Forgetting to Lock Background Elements: If you’re working with a background image or a static element, lock it in place before grouping. Otherwise, you might accidentally drag it around when moving your grouped images. Once, I ruined an entire layout just because I forgot to lock my background.
- Over-Grouping: Yes, grouping is convenient, but don’t overdo it. If you group too many elements, you might struggle to make precise adjustments later. It’s better to group in smaller chunks and then combine those groups if necessary.
- Not Ungrouping for Edits: Sometimes, it’s easier to ungroup, make small adjustments, and then group again. I used to stubbornly keep everything grouped, even when tweaking small details. It’s much faster to ungroup, fix things, and regroup rather than fighting with a single grouped unit.
Steering clear of these blunders can definitely streamline your design journey. Believe me, once you master the art of it you'll effortlessly group and ungroup elements just like an expert!
Also Read This: Bootlegging Getty Images Legal Risks and Copyright Violations to Avoid
How Canva Image Grouping Enhances Workflow
If you've ever been involved in a design project where it seemed like you had to juggle tasks simultaneously you'll understand the challenge of keeping everything in sync. The image grouping feature in Canva is a game changer, for those of us who enjoy multitasking. I can say that grouping images has spared me from feeling overwhelmed on occasions!
Here’s how it truly impacts your efficiency.
- Better Organization: Instead of trying to manage individual elements, you can group similar items together. It’s like putting things into folders rather than leaving them scattered all over your desktop.
- Consistency in Design: When you group, everything stays in place. I’ve often found that a design looks much more professional when elements are perfectly aligned, and grouping ensures you don’t accidentally shift things out of place.
- Time Saver: One of the most obvious benefits is the time you save. Instead of moving or resizing each image one by one, you can do it all in a single move. This feature really shone for me when I was rushing to finish a last-minute presentation.
- Ease of Collaboration: If you’re working with a team, grouping elements can make it easier for others to jump in and edit without messing up the layout. I’ve shared Canva files with friends, and the grouping feature made sure my design stayed intact.
In essence organizing images helps streamline your process and minimizes the risk of those minor design mishaps that can disrupt your flow.
Also Read This: Exploring the Features of the Rumble Video Platform
Tips for Advanced Image Grouping in Canva
Once you get the hang of things Canva’s image grouping feature can unlock a realm of creative potential. It’s similar to discovering that your pressure cooker has various settings – there’s always room for more versatility! Throughout my journey I’ve gathered some tips that have taken my designs to the next level and I’m excited to pass them on to you.
Throughout my journey, I’ve picked up a few handy tricks.
- Nesting Groups: Did you know you can group groups? This is especially useful when working on complex designs. You can group a set of images, then group that group with other elements. I’ve used this trick to manage large infographic projects with multiple layers.
- Using Transparency and Grouping: Play around with transparency within your grouped images to create cool overlay effects. Adjusting the opacity of certain elements within a group can give your design a unique layered feel.
- Keyboard Shortcuts: If you’re in a rush, keyboard shortcuts can be a lifesaver. Simply select your images and hit Ctrl+G (or Command+G for Mac users) to group them instantly. Similarly, use Ctrl+Shift+G to ungroup.
- Smart Alignment: Canva’s alignment tools work wonders with grouped images. If you want to make sure your grouped elements are perfectly centered or evenly spaced, use the alignment guides. This helps give your design a polished look without too much effort.
- Combining Text and Images: Sometimes, it’s not just about images. I often group images with text to ensure everything moves together. This is especially helpful for social media posts where text positioning is crucial.
The more you play around with grouping, the more you'll see just how impactful this tool is. No matter if you're just starting out or an experienced designer using grouping can bring that added touch to your creations.
Also Read This: How Clients Can Download Images from ShootProof
Frequently Asked Questions (FAQ)
Here are a few questions that frequently arise when individuals begin using the grouping feature in Canva. I’ve encountered some of these challenges too, so rest assured you’re not the only one facing them!
Q: Can I group elements other than images in Canva?
A: Absolutely! You can group text, shapes, icons, and even combinations of all these elements along with images. Personally, I love grouping text boxes with images for social media posts. It makes the layout neat and helps everything stay in place when I need to resize or adjust things.
Q: How do I ungroup images once they are grouped?
A: It’s as simple as grouping. Just click on the group, head to the toolbar at the top, and hit the Ungroup button. I find this especially useful when I’ve grouped a bunch of elements but later realize I want to tweak just one or two.
Q: Can I move a group of images to another design?
A: Yes! Just copy the group (Ctrl+C or Command+C), switch to the new design, and paste it. Your grouped elements will stay intact. I remember feeling so relieved the first time I tried this, especially when I needed to reuse a design element across different templates.
Q: What’s the shortcut for grouping and ungrouping?
A: Canva has keyboard shortcuts for almost everything. For grouping, it’s Ctrl+G (or Command+G on a Mac), and for ungrouping, it’s Ctrl+Shift+G (or Command+Shift+G on Mac). These shortcuts have saved me a ton of time!
Q: Does grouping affect the quality of the images when I download them?
A: Not at all. Grouping in Canva is purely for your design process. Once you download the final design, whether it’s grouped or not, the quality remains the same. I’ve tested this a few times, and everything looks just as crisp in the final download.
Conclusion: Making the Most of Canva's Grouping Feature
Once you get the hang of grouping in Canva, you'll wonder how you ever managed without it. It’s one of those simple yet powerful tools that can transform the way you design. For me, it’s saved time, reduced stress and helped me create cleaner more professional layouts. Whether you’re working on a quick social media post or a more complex project using Canva’s grouping feature smartly will definitely boost your design game.