Canva has gained popularity among people, including me for crafting eye catching visuals. One of its standout features is the ability to layer images adding depth and dimension to our designs. Think of it as being in a lively marketplace where each stall has its own distinct style and appeal. Just like that layering images in Canva enhances the narrative of our designs infusing them with energy and liveliness. By layering images we can control their interactions creating more captivating artwork.
Importance of Layering in Design
Layering plays a role in design for various reasons.
- Creating Depth: Just like in nature, where layers add complexity, layering images can create a sense of three-dimensionality.
- Focusing Attention: By adjusting layers, we can draw the viewer's eye to specific elements, guiding them through the design.
- Enhancing Creativity: Layering opens up a world of possibilities, allowing us to experiment and express ourselves freely.
As a designer for social media I believe that incorporating layers not only makes my posts visually appealing but also adds depth to the message I want to convey. Its similar to seasoning a meal – if you add just it tastes bland but if you go overboard it becomes overwhelming. Finding that balance can transform an ordinary image into something truly extraordinary.
Also Read This: Can You Set YouTube TV to Only Record New Episodes
How to Layer Images in Canva
Starting to layer in Canva is easy and user friendly. Here are the steps I usually take.
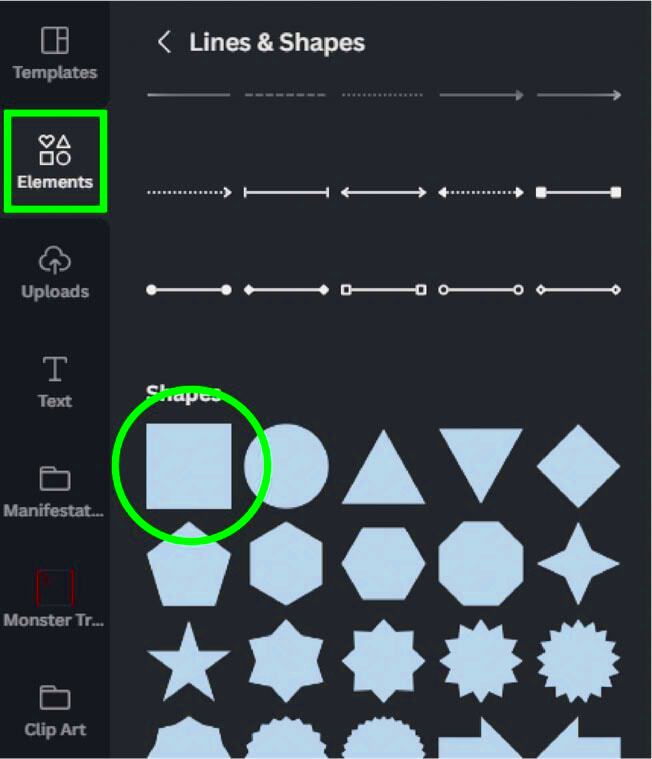
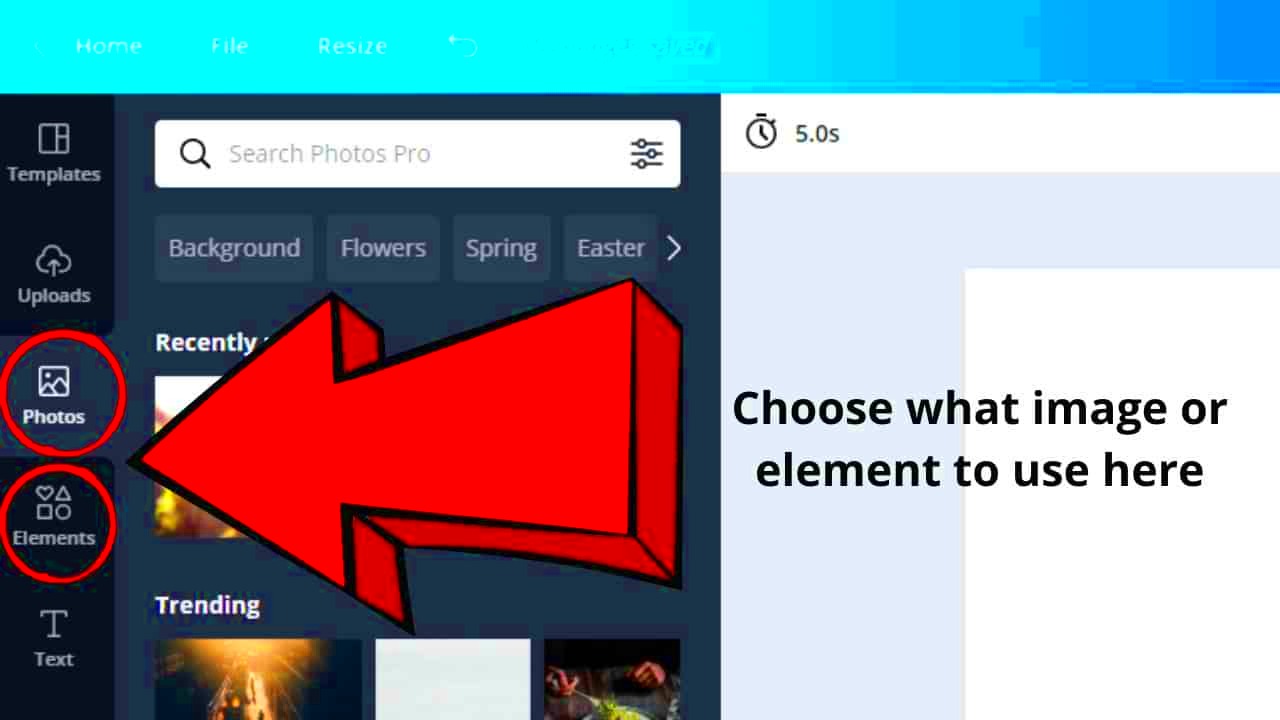
- Select Your Base Image: Begin by choosing the main image that will serve as the background.
- Add Additional Images: Upload or select images you want to layer on top of the base image.
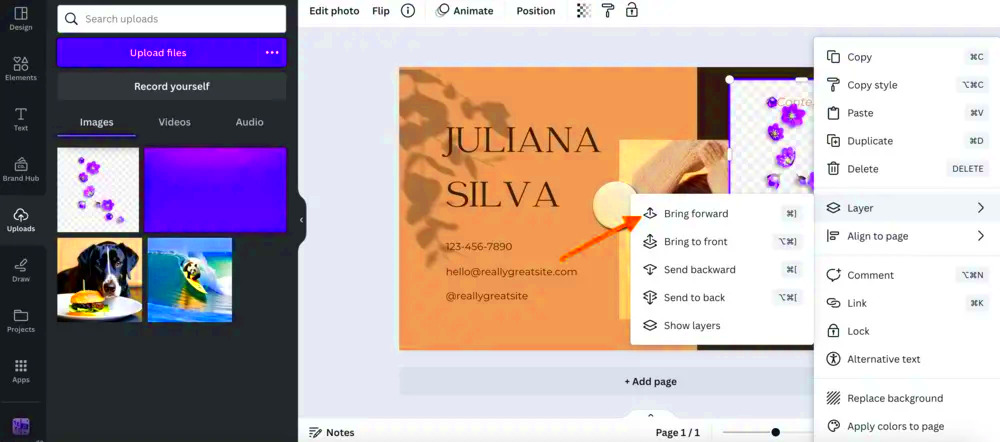
- Arrange Layers: Click on an image and use the “Position” tool to move it forward or backward in the layer stack.
- Adjust Transparency: To create a more blended look, consider adjusting the transparency of the top layers.
- Experiment with Effects: Canva offers various effects like shadows and outlines that can enhance the layered images.
Whenever I follow these steps, I experience a rush of inspiration. It’s similar to trying out a dish for the first time. The anticipation of blending different elements and discovering the results keeps me returning to it. Canva adds an element of fun to this creative process making it easy for anyone to join in regardless of their expertise.
Also Read This: Effortless Methods to Move Videos from Dailymotion to YouTube
Tips for Effective Image Layering
Mastering the art of blending visuals can take a design from decent to exceptional. Throughout my journey I’ve picked up some tricks that have had an impact on my work. The essence lies in viewing layering as not merely piling up pictures but also weaving a story. Check out these actionable suggestions to enhance your design skills:
- Start with a Strong Base: Choose a solid background that complements your main subject. It should enhance, not overpower.
- Use Contrast: Ensure there’s a good contrast between the layers. Light elements on a dark background (and vice versa) will help your design pop.
- Be Mindful of Space: Just like a crowded street can be overwhelming, too many elements can confuse the viewer. Leave some breathing space in your design.
- Play with Transparency: Adjusting the transparency can create beautiful effects, making layers appear softer and more integrated.
- Use Text Wisely: If you add text, make sure it’s legible. Sometimes, layering images can obscure important messages.
These suggestions have assisted me in creating designs that connect with audiences. For example at my cousins wedding I blended pictures of the couple with a delicate floral backdrop and added transparency to achieve a whimsical look. The praise I received was incredibly gratifying!
Also Read This: How to Speed Up Video Uploads on YouTube
Common Mistakes to Avoid When Layering Images
Although adding layers to your designs can elevate them, it's important to be mindful of potential pitfalls. Drawing from my own journey, here are a few missteps to be cautious about.
- Ignoring Hierarchy: Not establishing a clear order can confuse viewers. Decide what should be in the foreground and what should fade into the background.
- Overcrowding: Too many layers can lead to visual chaos. Remember, less is often more. Choose only the elements that serve your purpose.
- Neglecting Alignment: Misaligned layers can make your design look unprofessional. Take a moment to ensure everything is properly aligned.
- Using Distracting Colors: Bright colors might clash rather than harmonize. Stick to a color palette that brings your images together.
Looking back on my initial try at layering I recall how I overwhelmed my creation with a bunch of pictures. The outcome? A jumbled up mess that nobody could really enjoy. That experience taught me valuable lessons in honing my design abilities.
Also Read This: Can I Use iStock Photos for Free and Understand Licensing
Enhancing Your Designs with Layers
Once you understand the principles of layering the potential is limitless. Employing layers in a way can infuse your creations with vibrancy and convey your message more powerfully. Here are some ways to elevate your designs.
- Storytelling through Layers: Use layers to narrate a story. For instance, in a travel blog, you can layer images of landscapes with overlaying quotes about the journey.
- Creating Mood: The right layers can set the mood. A warm filter over a beach scene can evoke a sense of relaxation, while bold graphics can convey excitement.
- Using Textures: Layering textured images can add depth. For instance, a rustic wooden background can enhance a vintage-themed design.
While working on a project for my friends new business I tried out layering techniques to design an eye catching promotional flyer. By blending different textures, colors and fonts I was able to craft a design that beautifully reflected the essence of the brands identity. It was fulfilling to witness how the art of layering can elevate a concept into something visually stunning!
Also Read This: How to Use Adobe Stock Templates in Premiere Pro for Creative Video Projects
FAQs about Canva Layering Images
When it comes to layering images in Canva, beginners often have a lot of questions. Based on my experience here are some of the commonly asked ones.
-
What is the best way to layer images in Canva?
The best way is to start with a strong background image, then add layers one at a time. Experiment with the positioning and transparency until you achieve a look that feels right. Remember, it’s about balance!
-
Can I use multiple layers of the same image?
Absolutely! Using the same image in different layers can create interesting effects, especially when combined with varying transparency levels or filters.
-
How can I remove a layer in Canva?
To remove a layer, simply click on the image you want to delete and hit the delete button. Alternatively, you can right-click and choose the option to delete.
-
Is there a limit to how many layers I can use?
While there isn’t a strict limit, keep in mind that too many layers can slow down your design process and might lead to a cluttered appearance. Strive for clarity over complexity!
-
Can I layer text and images?
Yes, layering text over images can create powerful visual statements. Just ensure that the text remains legible and doesn't blend too much with the background.
These frequently asked questions address a few of the issues I’ve encountered during my time with Canva and I trust they will assist in clarifying your experience when it comes to layering images.
Conclusion on Canva Layering Images
To sum up getting the hang of layering images in Canva can really take your design projects to the level infusing depth and significance into your visuals. With some practice and imagination you can turn everyday designs into stunning pieces of art that leave an impact on your audience. Embrace the idea of layering try out new things and allow your creativity to run wild!