Canva has emerged as a favorite tool for numerous individuals particularly among those who enjoy crafting eye catching visuals without having to possess advanced graphic design expertise. I recall my initial experience with Canva where I was initially daunted by its wide range of features but soon discovered just how intuitive it is to use. The platform provides an assortment of templates, fonts and images suitable for a variety of projects ranging from social media content to business presentations.
Canva offers a feature that lets you easily move elements around on your canvas. This makes it simple to arrange things just the way you want. Moreover its collaboration tools enable seamless teamwork with friends or coworkers on your design. You can share your project with others and receive their feedback instantly which is incredibly valuable for collaborative efforts.
Some notable features of Canva include:
- Templates: Thousands of pre-designed templates to kickstart your project.
- Stock Images: Access to a library filled with high-quality images.
- Text Tools: An array of fonts and text effects to enhance your designs.
- Animations: Simple ways to add animations for a more engaging experience.
How to Add an Image to Your Canvas in Canva
Incorporating an image into your Canva canvas is a breeze! When I discovered the process I felt like a creative sorcerer. Here’s a straightforward guide on how to seamlessly include images in your work.
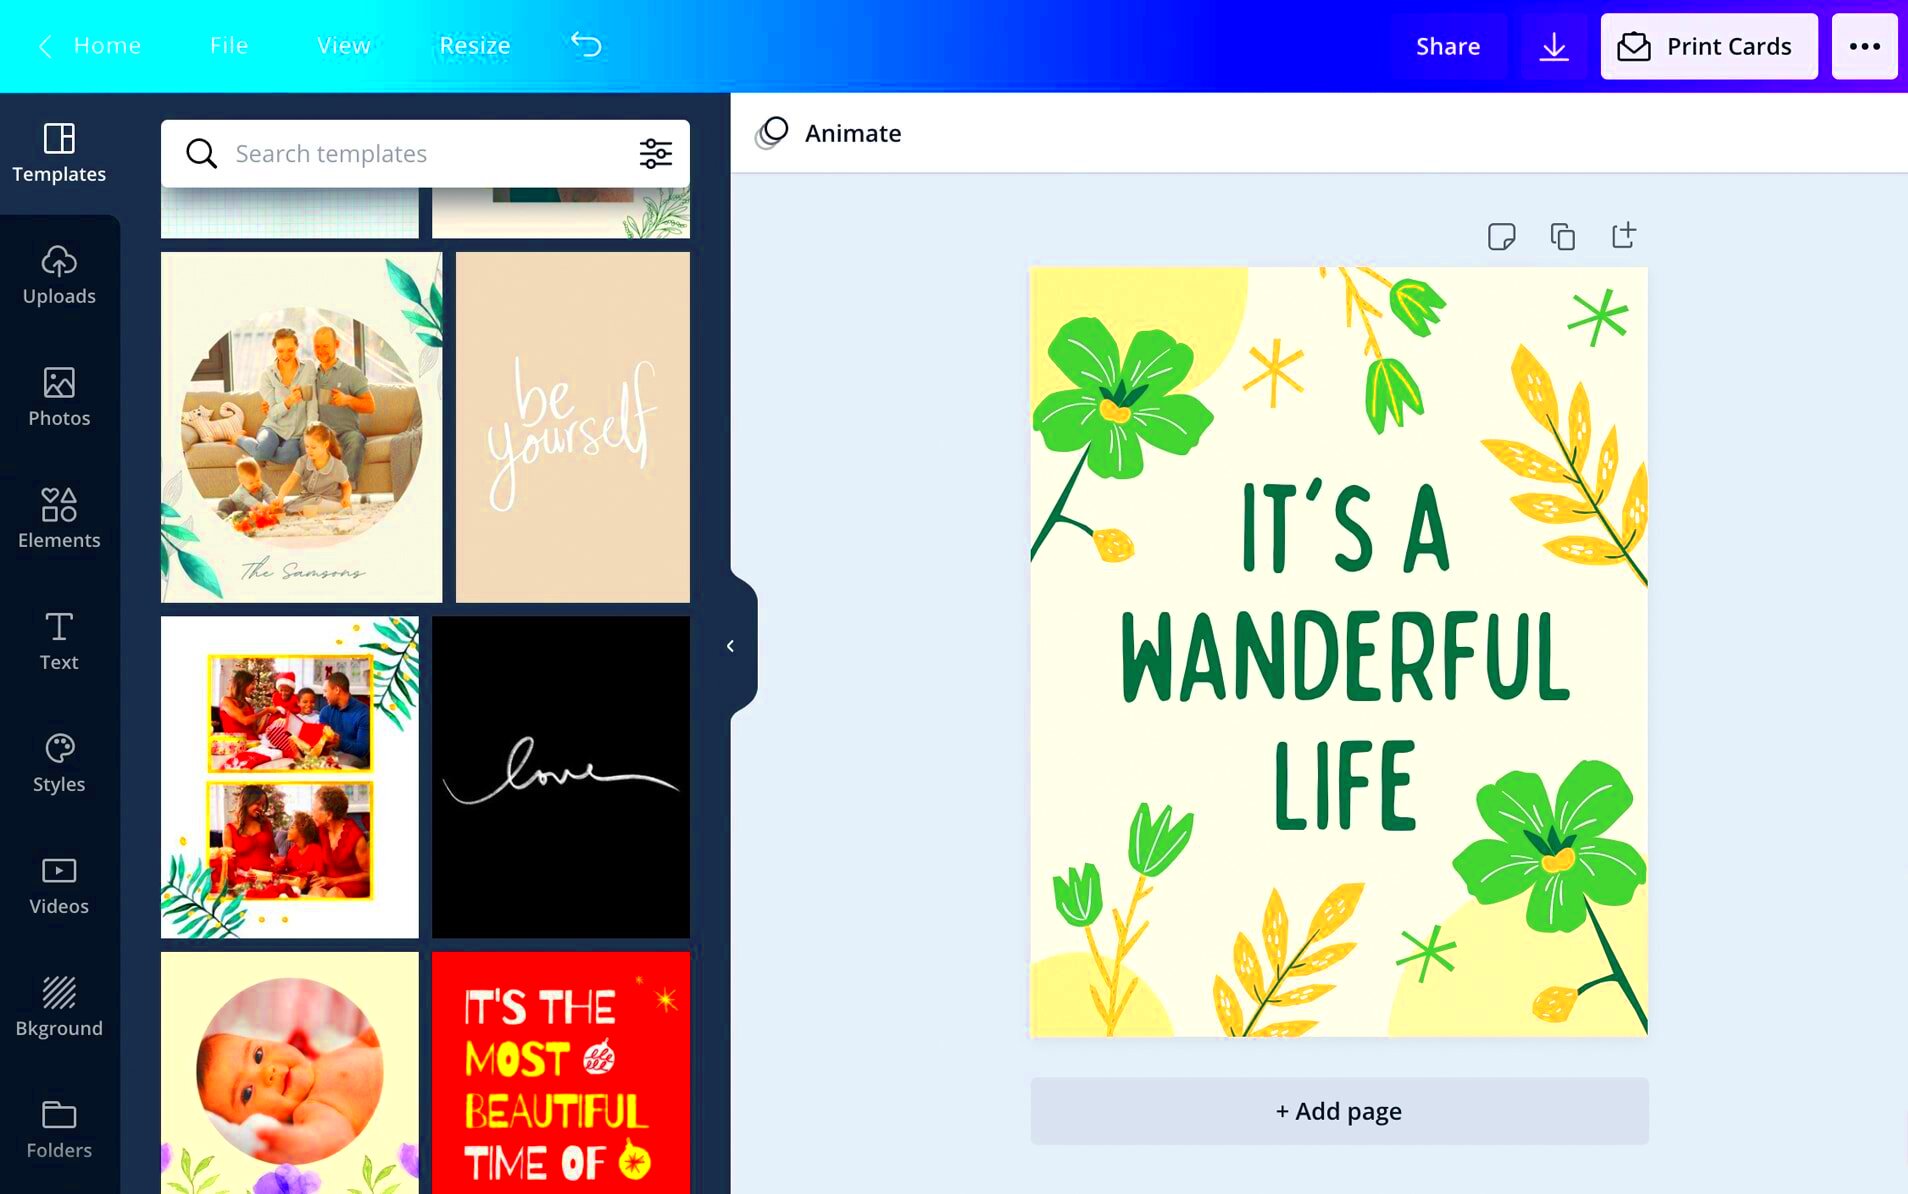
- Select a Template: Start by choosing a template that suits your needs.
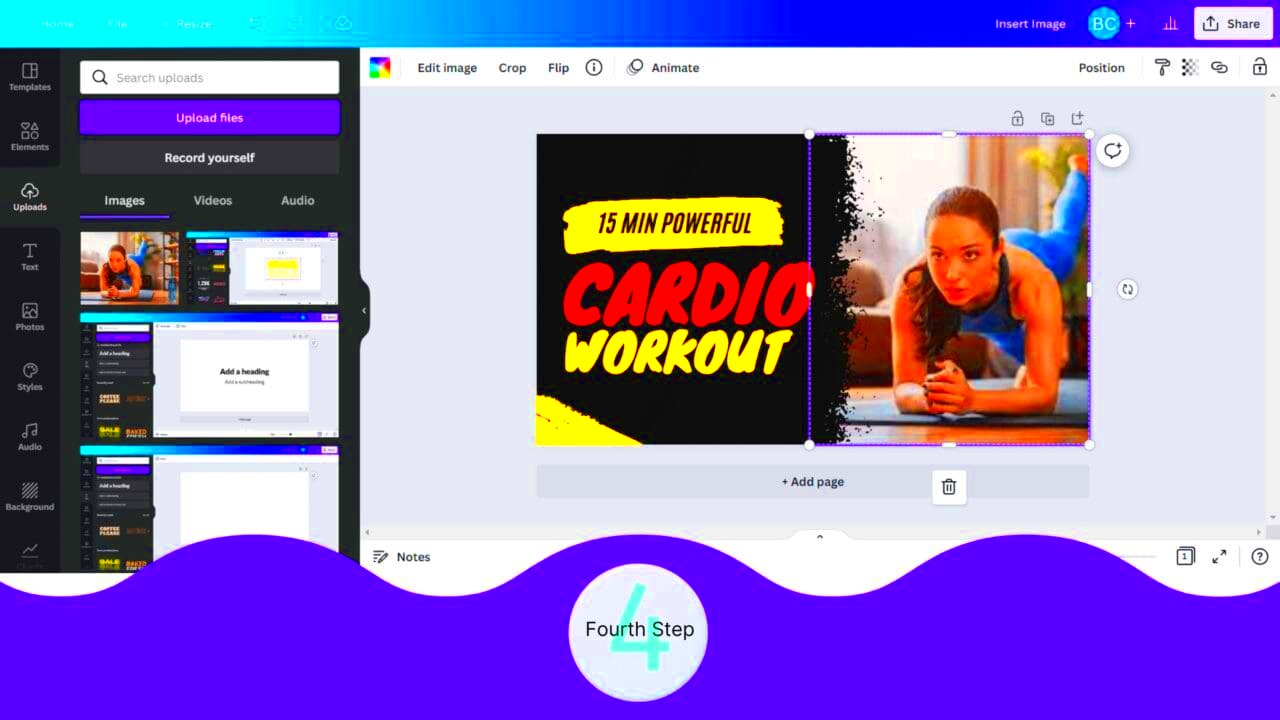
- Click on “Uploads”: On the left sidebar, you’ll see the “Uploads” tab. Click on it.
- Upload Your Image: Click on the “Upload an image” button and choose the image file from your computer.
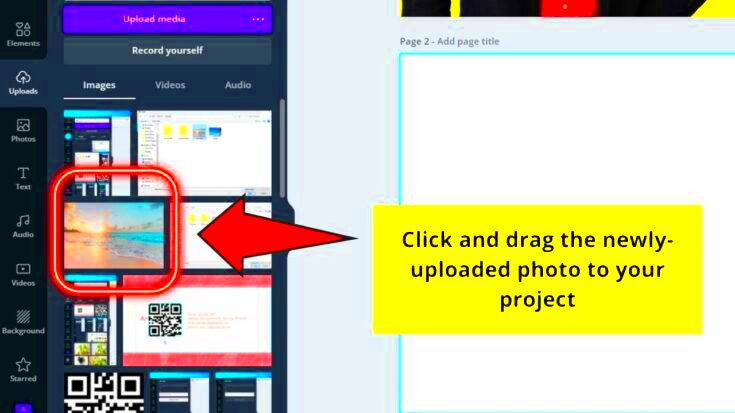
- Drag and Drop: Once uploaded, simply drag your image onto the canvas. You can resize and position it as you wish.
And there you have it! Youve seamlessly incorporated an image into your design. Its as simple as that. Keep in mind that playing around with various positions and dimensions can greatly elevate your end result.
Also Read This: What Is the Cost of a Shutterstock Subscription and How It Benefits You
Using the Canva Image Downloader
The Canva Image Downloader is a tool that tends to be overlooked by users. When I came across it for the time I felt as if I had found a hidden gem of opportunities. This functionality lets you effortlessly download your creations making it convenient for sharing or printing purposes.
Using the image downloader is easy just follow these steps
- Finalize Your Design: Ensure that your design is exactly how you want it.
- Click on “Download”: At the top right corner of the screen, you’ll find the “Download” button.
- Select Format: Choose the file format you prefer, such as PNG or JPG.
- Click Download: After selecting the format, click the “Download” button again. Your design will be saved to your device.
This tool goes beyond simply downloading images; it gives you the option to select the quality of your picture. This can be really important based on whether you intend to print it or share it online. If you plan to use the images for printing I highly suggest downloading them in quality. It's those nuances that truly matter!
Also Read This: Understanding YouTube Video Playback and Its Features
Exploring Image Editing Options in Canva
One of the things I really love about Canva is its powerful image editing features. When I began using this platform I was blown away by the extent to which I could personalize an image with just a few clicks. Its not merely about inserting pictures; its about turning them into something distinctive that aligns with your creative vision.
Canva provides a range of editing features that can greatly improve your pictures. Here are a few of the notable choices.
- Filters: You can apply different filters to give your images a specific mood or vibe. I often use the “Retro” filter to add a nostalgic touch to my photos.
- Adjustments: The “Adjust” tool allows you to tweak brightness, contrast, saturation, and more. I remember adjusting the saturation of a sunset photo, and it felt like I was painting the sky!
- Crop and Resize: You can easily crop out unnecessary parts of an image or resize it to fit your canvas perfectly.
- Text Overlay: Adding text on top of images can make them pop. Just ensure the font contrasts well with the background.
While trying out these features you'll find that striking a balance is crucial. Overdoing effects can make a picture appear messy but the right tweaks can enhance your design wonderfully. I constantly remind myself that simplicity is often better in the realm of editing.
Also Read This: Explore the Lyrics of What the Hell by Avril Lavigne and Sing Along
Tips for Choosing the Right Images
Selecting images is crucial for your design and I've learned this lesson through my own experiences. When I started using Canva I used to choose images purely based on how they looked. However I soon came to understand that a good image should convey a narrative or stir up feelings. Here are some suggestions to assist you in making the selection.
- Relevance: Ensure the image aligns with the message you want to convey. For instance, if you’re creating a travel blog post, a stunning landscape or local culture photo would be fitting.
- Quality: Always opt for high-resolution images. I remember using a pixelated image once, and it made my entire design look unprofessional.
- Color Scheme: Choose images that complement your color palette. I like to create a mood board first to see how everything ties together.
- Emotion: Select images that evoke feelings relevant to your content. A smiling person can add warmth and positivity to your design.
In the end, be patient when picking out pictures. It’s similar to choosing the spices for a meal; the right ones can enhance the whole experience. Feel free to try things out until you discover the ideal combination!
Also Read This: Removing Subscribers from Your YouTube Channel
Common Issues When Adding Images to Canva
Like with any tool you might run into some challenges when it comes to adding images to Canva. When I started using this platform I had my fair share of frustrating moments but those experiences taught me valuable lessons. Here are some problems that often arise and tips on how to overcome them.
- File Format Problems: Sometimes, you might try to upload an image only to find it’s in the wrong format. Canva accepts JPG, PNG, and SVG files. I recommend converting any problematic images using online converters.
- Slow Uploads: If you have a slow internet connection, images may take longer to upload. I’ve found that resizing large images before uploading can help speed things up.
- Image Overlapping: When you add multiple images, they can overlap in ways you didn’t intend. Use the “Position” tool to align them correctly. I often create a layer order to keep everything organized.
- Resolution Issues: Low-resolution images can appear blurry on the canvas. Always check the resolution before uploading, especially if you plan to print your designs.
Dont forget that obstacles are a natural part of the process. Whenever you face a problem view it as a chance to enhance your abilities. As you continue to put in effort youll find it easier and more self assured to overcome these challenges!
Also Read This: Creating Flying Paper Lanterns for Dailymotion
Frequently Asked Questions
While exploring Canva I came across several questions that frequently arise among first time users. By sharing the responses to these common queries I aim to enhance your journey and make it more enjoyable. Below are some questions regarding the usage of Canva.
- Can I use Canva for free?
Yes, Canva offers a free version with plenty of features. While the premium version provides additional resources and capabilities, many users find the free plan sufficient for their needs. - Are the images in Canva royalty-free?
Most images in Canva are either free or available for a small fee. It’s essential to check the license for each image you use to avoid any copyright issues. - Can I collaborate with others in Canva?
Absolutely! Canva allows you to invite others to edit your designs in real time. I often work on projects with friends, and it’s exciting to see our ideas come together live. - How do I access my designs later?
All your designs are automatically saved in your Canva account. Just log in, and you’ll find everything under the “Your Projects” section. - Can I download my designs in different formats?
Yes! Canva allows you to download your designs in various formats, including PNG, JPG, and PDF, depending on your project’s needs.
Newcomers often have these questions and tackling them can really boost your confidence when it comes to design projects. Keep in mind that you’re not on this journey; many users have similar concerns and exploring these topics together can be a rewarding experience.
Conclusion and Final Thoughts
To sum up Canva is a tool that enables anyone to craft beautiful visuals, no matter their design background. By delving into its functionalities learning to incorporate and modify images and selecting visuals you can take your projects up a notch. Don't let obstacles hold you back; every mistake presents a chance, to improve. Embrace the journey and allow your imagination to radiate!