When I began my journey with Canva I was initially taken aback by the sheer number of choices available. However one of the first lessons I picked up was the importance of image sizes. To put it simply image dimensions refer to an images width and height usually measured in pixels. If youve ever attempted to use an image that was too small for your purpose you probably felt the annoyance of pixelation. This experience taught me that grasping image sizes is essential for anyone looking to craft visually appealing designs. Whether youre creating a poster, a social media update or a presentation getting the right dimensions can truly make a difference.
Importance of Correct Image Dimensions
Selecting the image size is not just a matter; it plays a crucial role in delivering your message effectively. Picture sharing a pixelated photo on social media or even worse having an image that gets awkwardly cropped. Here are some reasons why getting the image dimensions right is important;
- Visual Appeal: Images that fit perfectly look professional and grab attention.
- Better Engagement: Posts with high-quality images often receive more likes and shares.
- Platform Requirements: Each platform has its own preferred dimensions, so adhering to these ensures your images display correctly.
In my view grasping these subtleties can set apart an average design from an exceptional one. Its not solely about aesthetics; it also involves establishing a connection with your audience, on a level.
Also Read This: How to Add Interests on LinkedIn to Showcase Your Passions
How to Change Image Dimensions in Canva
What I really appreciate about Canva is how easy it is to use. Resizing images is a breeze. Let me walk you through the steps.
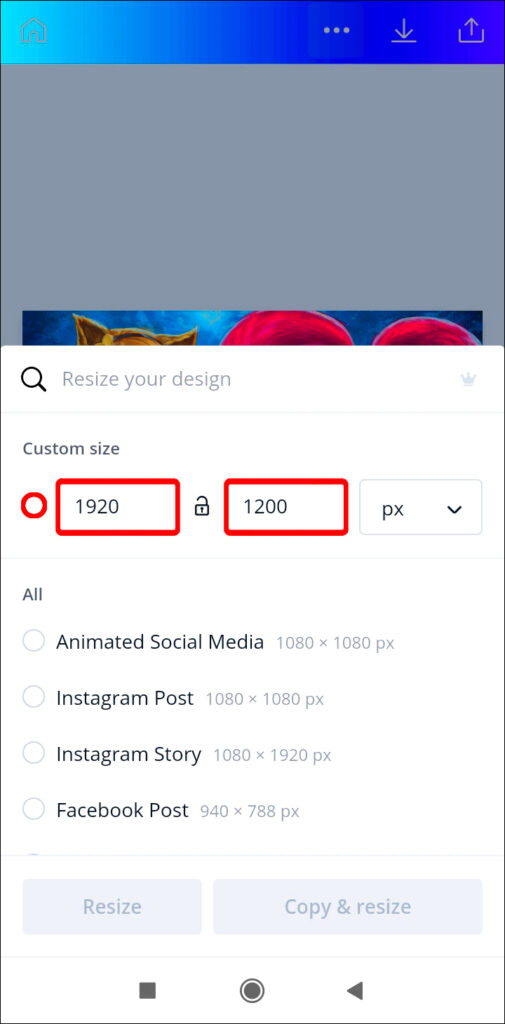
- Open Your Design: Start by selecting the design you want to modify.
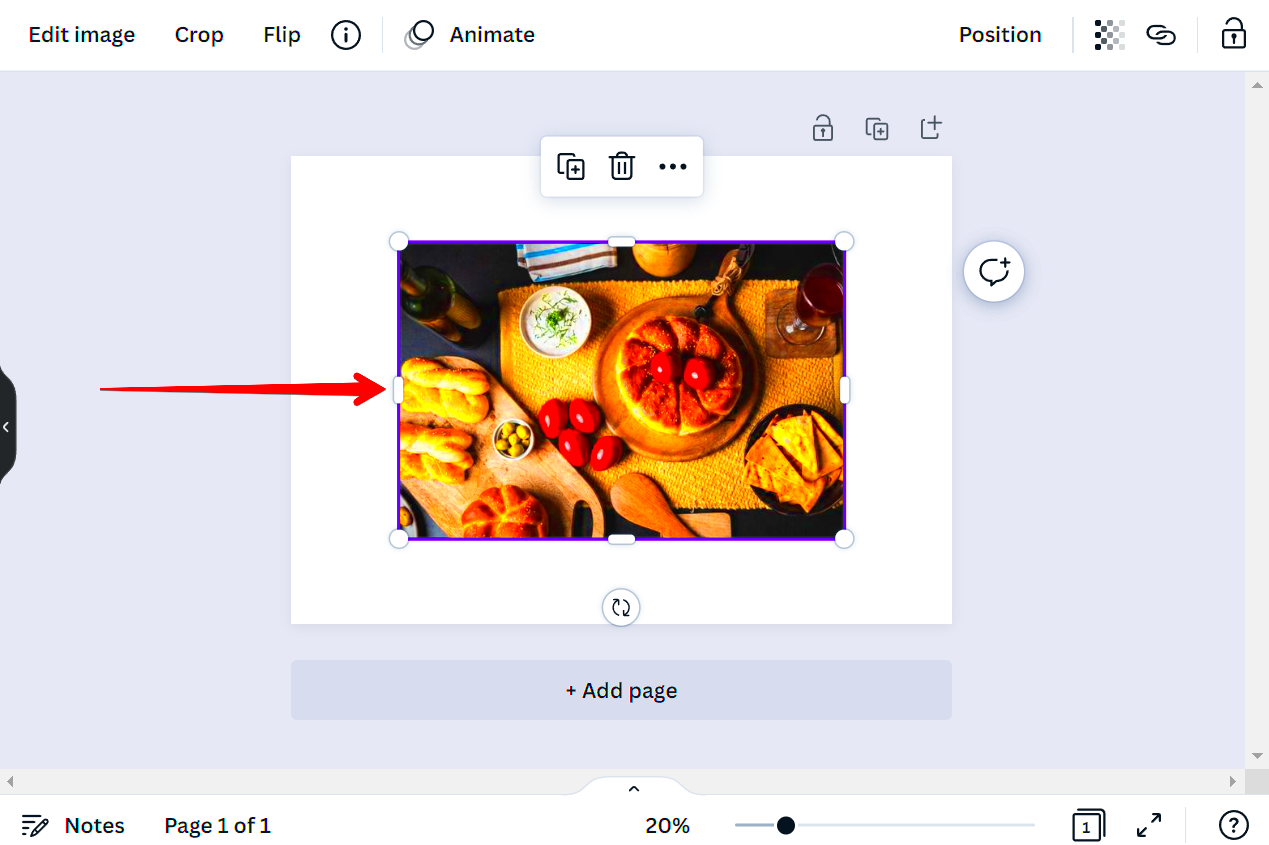
- Click on the Image: Select the image whose dimensions you want to change.
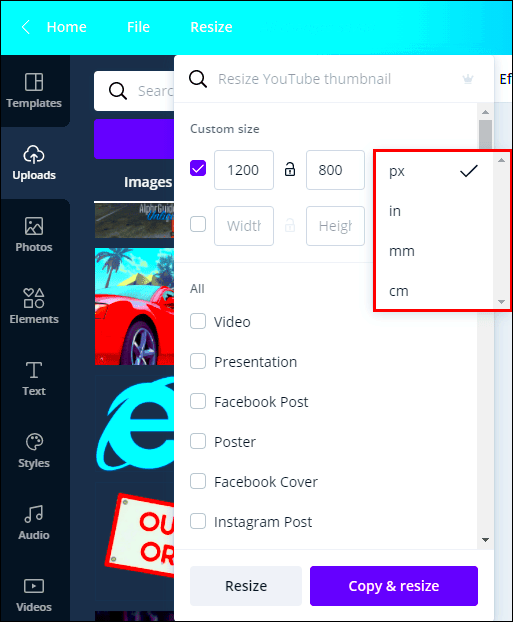
- Resize Options: In the toolbar, you will find the option to input specific dimensions. You can either type in the desired width and height or drag the corners of the image to resize.
- Maintain Aspect Ratio: Make sure to keep the aspect ratio locked if you want to avoid distorting the image.
After working on a few projects resizing images became something I did automatically. Don’t forget that with practice you’ll get better! The more you play around with resizing the more at ease you’ll feel. You’ll soon realize that adjusting dimensions is not a matter; it’s a chance to add a touch to your designs.
Also Read This: Canva Background Image Change
Common Image Dimensions for Social Media
When I started exploring social media marketing I quickly discovered that different platforms have varying image size requirements. Using the dimensions can significantly impact the reception of your posts. I still recall the instance when I shared an image on Instagram that was too small and ended up looking pixelated. That experience really emphasized for me the significance of getting the dimensions right!
Check out this useful chart for the sizes of images used on different social media platforms.
| Platform | Post Type | Recommended Size (Pixels) |
|---|---|---|
| Shared Image | 1200 x 630 | |
| Square Post | 1080 x 1080 | |
| In-Stream Photo | 1200 x 675 | |
| Shared Image | 1200 x 627 |
These measurements are essential as they ensure your visuals look sharp and polished enhancing engagement. I’ve noticed that sticking to these standards not only improves the appearance of my posts but also increases their likes and shares. It’s really about leaving a mark!
Also Read This: Accessing and Using YouTube on Various Devices
Choosing the Right Dimensions for Your Project
When it comes to picking the sizes for your project it goes beyond just sticking to some rules. Its about grasping the narrative you wish to convey. Each project has its own needs and I’ve come to realize that the dimensions can impact the way a message is communicated. I recall working on a flyer for an event and noticing that the dimensions I initially selected made the text appear crowded. I had to begin again but it turned out to be a lesson!
Here are a few suggestions to help you select the appropriate size.
- Know Your Platform: Different platforms cater to different audiences. Make sure to tailor your dimensions accordingly.
- Consider the Content: If your project has a lot of text, opt for dimensions that allow for comfortable spacing.
- Stay Consistent: If you’re creating a series of images, maintain a consistent style and size to strengthen your brand identity.
Whenever I set the size for a project, I make it a point to remember that its a chance to enrich the story. Putting thought into the dimensions can really impact how your audience views your creation.
Also Read This: How to Check Your YouTube Music Recap for the Year
Tips for Maintaining Image Quality When Changing Dimensions
One of the hurdles I encountered in the beginning was preserving the quality of images during resizing. It can be disheartening to put effort into a design only to discover that the resized version appears blurry or distorted. I remember an occasion when I adjusted a graphic for a presentation and it turned out looking less than polished. That experience emphasized for me the significance of resizing methods.
Here are a few suggestions to assist you in preserving the quality of your images.
- Use High-Resolution Images: Start with the highest quality images available. The more pixels, the better the final result will be.
- Avoid Stretching: When resizing, make sure to adjust the dimensions proportionately to avoid distortion.
- Check File Formats: Use formats like PNG or TIFF for images with text or sharp edges, and JPEG for photographs.
- Preview Before Finalizing: Always preview your images in the intended context before finalizing to ensure quality.
Based on what I’ve seen these habits can spare you a lot of emotional pain down the road. Now when I resize an image I do so with a sense of assurance, knowing that I’m putting these valuable insights into practice. The quality matters and it shows the dedication you invest, in your craft!
Also Read This: Can I use iStock photos on my website? Navigating the usage rights for web content.
FAQs About Canva Image Dimensions
While exploring Canva I came across a lot of inquiries regarding image sizes that seemed to be on people minds as well. Its reassuring to realize that we share similar challenges, dont you think? Here are some common questions Ive encountered along with the lessons Ive learned through my journey.
1. What are the standard dimensions for a Facebook cover photo?
The recommended dimensions for a Facebook cover photo are 820 x 312 pixels. It’s essential to keep key elements within the central area, as the sides may get cropped on mobile devices.
2. Can I use the same dimensions for different platforms?
While you can use the same dimensions, it’s not advisable. Each platform has its preferences, and sticking to those will ensure your images look their best. I learned this the hard way when a beautifully designed image looked awkward on Twitter!
3. How can I check the dimensions of an image in Canva?
In Canva, simply click on the image, and you’ll see the dimensions displayed in the toolbar at the top. It’s a straightforward way to ensure you’re on track.
4. What if my image gets cropped when uploaded?
This can be frustrating! To avoid this, always preview your images before finalizing. It helps to have a design that allows for a bit of margin around the edges.
5. Is there a way to resize multiple images at once?
Yes! Canva allows you to select multiple images and resize them simultaneously. This feature has saved me so much time, especially during bulk uploads for events.
Conclusion on Canva Image Dimensions
Grasping and using the image sizes in Canva can greatly influence how well your designs turn out. Whether it’s for social media or promotional content investing time in understanding dimensions helps your visuals communicate your message effectively. Keep in mind that it’s not solely about the measurements; it’s also about resonating with your audience through eye catching visuals. As you play around with sizes you’ll become more self assured in your design abilities, which will enrich your creative journey.