Have you ever glanced at a design and sensed that it lacked something? I recall the challenge I faced while arranging the words on my initial poster for a community event. That’s when I discovered Canva’s text filling function. It felt like a moment of inspiration! Incorporating images into text not only enhances its richness but also infuses a unique flair into your creations. This approach enables you to turn regular text into an engaging visual journey making it more eye catching and memorable.
Why Use Image Filling in Canva Text?
Incorporating image text can enhance your design in ways you may not anticipate. Here are some reasons to think about using this approach:
- Visual Appeal: Using images in text makes your designs visually striking and engaging.
- Branding Opportunities: Incorporate brand colors and images that resonate with your identity.
- Creative Expression: It allows for endless creativity—experiment with different images to reflect your message.
- Attention-Grabbing: Image-filled text captures viewers' eyes faster than plain text.
When I created the invitations for my friends wedding I incorporated floral designs that matched the theme of the event. The feedback I received was incredible! Everyone adored the appearance of the invites and it really captured the essence of the occasion perfectly.
Also Read This: Mastering Video Editing on Storyblocks for Enhanced Outcomes
Step-by-Step Guide to Fill Text with an Image
Starting with image filling in Canva is easy. Heres a simple step by step guide.
- Open Canva: Log into your Canva account or create one if you haven’t already.
- Create a New Design: Choose the type of design you want to create, like a poster or social media post.
- Add Text: Use the text tool to insert the text you want to fill with an image.
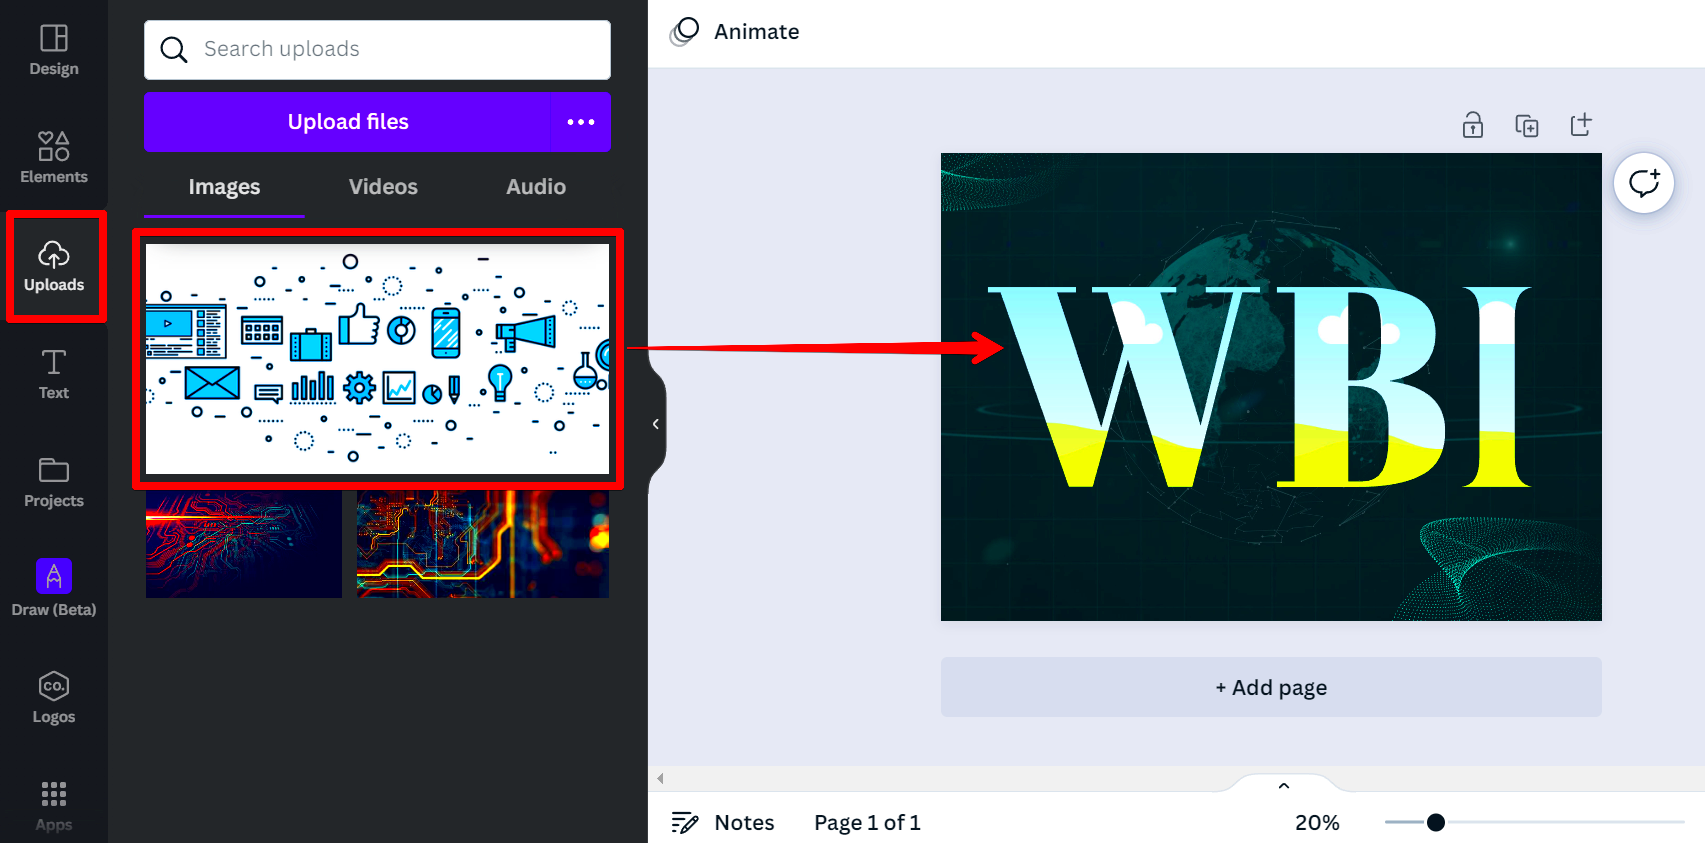
- Choose Your Image: Select an image from Canva’s library or upload your own.
- Fill Text with Image: Click on the text, then go to the "Effects" menu and select "Fill." Choose your image from the options.
- Adjust the Image: Resize and reposition the image to fit your text perfectly.
- Final Touches: Add backgrounds or other elements to enhance your design further.
By following these steps you can craft visuals that effectively communicate your message. Keep in mind that the secret lies in enjoying the process and being open to experimentation. The more you explore the different features the more distinctive your creations will turn out to be!
Also Read This: Understanding the Number of Wrestlers in the Royal Rumble
Tips for Choosing the Right Images
Selecting images to complement your text can greatly impact your design workflow. Initially when I began using Canva I tended to choose pictures solely for their visual appeal. However I quickly discovered that the narrative behind an image is equally important. The right picture has the power to stir emotions and establish a connection with your audience, on a profound level. Here are a few suggestions to assist you in finding the images.
- Relevance: Ensure the image aligns with your message. For instance, if you’re designing a travel brochure, images of landscapes or landmarks work best.
- Quality Matters: Use high-resolution images. Blurry images can diminish the overall look of your design and reflect poorly on your brand.
- Color Harmony: Choose images that complement your color scheme. If your design has a vibrant palette, don’t opt for dull images.
- Emotionally Engaging: Select images that evoke feelings. A picture of laughter can create a sense of joy, making your text more impactful.
- Consistency: Maintain a consistent style throughout your design. This might mean using images with similar tones or textures.
Keep in mind that the picture you select can either reinforce your message or confuse it. When I adorned my message with visuals of my hometown for a community gathering it not only brought a touch but also struck a chord with everyone present. Your selections should capture the spirit of your overall concept.
Also Read This: Resolving Issues with Reaching Fortiguard Downloader Servers
Enhancing Your Design with Image-Filled Text
After adding images to your text it’s crucial to understand how to take that design up a notch. While text with images can be eye catching there are several techniques to make it even more striking. Through experience I’ve discovered that subtle adjustments can have a significant impact. Here are some tips to enhance your designs:
- Add Backgrounds: A subtle background can help your image-filled text stand out. Consider using gradients or soft textures that don’t overpower the text.
- Play with Contrast: Ensure that there’s enough contrast between your text and background. If your text is dark, a lighter background will make it more readable, and vice versa.
- Experiment with Fonts: The right font can elevate your design. Choose a font style that complements the images and overall theme of your design.
- Incorporate Shapes: Adding shapes can frame your text, guiding the viewer’s eyes to it. Use circles or rectangles behind your text for emphasis.
- Use Shadows and Effects: Adding a shadow effect can give your text depth, making it more dynamic and visually appealing.
While working on a project for my friends café I incorporated coffee beans into the text and chose warm colors for the background. This design beautifully captured the cafes ambiance and attracted customers with ease.
Also Read This: How to Cancel Your Shutterstock Plan and Manage Your Subscription
Common Mistakes to Avoid When Using Image Filling
Although blending visuals with text can be an exhilarating artistic journey it’s important to be cautious as errors can diminish the impact of your design. I discovered this through my early experiments. Here’s a summary of missteps to watch out for and tips on steering clear of them.
- Overloading on Effects: It’s tempting to go wild with effects, but less is often more. Overdone effects can make your design look cluttered and unprofessional.
- Ignoring Readability: If your text is hard to read due to the image or background, it defeats the purpose. Always prioritize clarity.
- Inconsistent Themes: Using images that clash in style can confuse viewers. Stick to a cohesive theme that reflects your message.
- Neglecting Image Licensing: Always ensure that the images you use are licensed properly. Using copyrighted images can lead to legal issues down the line.
- Forgetting about Mobile View: With many people viewing designs on mobile devices, ensure your text and images look great on smaller screens too.
When I created a poster for a festival I adorned the text with hues and intricate designs. Although it appeared vibrant many found it challenging to decipher the event information. This experience taught me the importance of striking a balance between artistic expression and practicality.
Also Read This: How to Extract Transcripts and Scripts from YouTube Videos
Examples of Creative Uses for Image-Filled Text
In the realm of design text enriched with images can be a potent element infusing depth and involvement into the message. I still recall the moment I encountered an ad employing this approach – it was promoting a travel agency showcasing stunning views within the text. That experience motivated me to explore this concept in my own creations. Here are ways you can incorporate image filled text into your work:
- Event Promotions: Use images related to the event within the text. For example, if you’re promoting a music festival, fill the text with vibrant images of past performances or bands.
- Quotes and Sayings: Enhance inspirational quotes with images that represent the message. A quote about adventure can be filled with images of mountains or roads, making it more impactful.
- Social Media Posts: Grab attention on platforms like Instagram or Facebook with text filled with colorful patterns or textures. It can make your posts stand out in crowded feeds.
- Brand Storytelling: Use images that reflect your brand’s journey or values. A coffee shop could fill text with images of coffee beans, capturing the essence of their offerings.
- Infographics: Incorporate image-filled text into infographics to make data visually appealing. A health-related infographic could use images of fruits or vegetables to fill the relevant text sections.
While creating a poster for a charity event I incorporated pictures of smiling faces from past gatherings into the text. The happiness exuding from these images conveyed a message and inspired increased participation from the community.
Also Read This: Improve YouTube Shorts Quality for Enhanced Viewing and Engagement
Frequently Asked Questions about Canva Text Filling
Using Canva's text filling feature is a lot of fun but it can also raise some questions, for newcomers. I frequently assist my friends in overcoming their design hurdles. Here are a few common queries that I've come across.
- Can I use any image for text filling? Yes, as long as the image is high quality and fits the theme of your design. Just ensure you have the rights to use it!
- How do I maintain readability? Choose images that are not too busy or colorful. Opt for images with space where the text can stand out clearly.
- Can I fill text with multiple images? While Canva doesn’t support multiple images in one text field directly, you can overlay text on different images using layers creatively.
- What types of text work best with images? Bold, large text generally works better because it provides more area for the image to shine through and maintains visibility.
- Is this feature available in the free version of Canva? Yes, the text fill feature is accessible in both free and paid versions, making it easy for anyone to experiment.
Whenever I face a challenge in design I like to remind myself of the support and resources at my disposal. Connecting with other designers or exploring Canva's tutorials often brings valuable perspectives to the table.
Wrapping Up Your Design Journey
As we wrap up our journey through the world of text with images in Canva, it’s important to take a moment to reflect on our insights. Design goes beyond visuals; it encompasses weaving narratives and fostering connections. Every creation serves as a chance to convey feelings, communicate ideas and establish a connection with viewers. I recall feeling anxious when crafting my initial design but as I tackled more projects I became increasingly self assured and creative.
As you set out on your design adventure keep these final suggestions in mind
- Keep Experimenting: Don’t hesitate to try new things. Some of the best designs come from spontaneous creativity.
- Learn from Feedback: Share your work with friends or fellow creators. Constructive criticism can help you grow.
- Stay Inspired: Follow designers or join online communities to stay motivated and inspired by others' creativity.
- Practice Makes Perfect: The more you design, the more your style will evolve. Embrace each step of the journey.
Ultimately, it's all about savoring the journey and letting your imagination soar. So don't hesitate to infuse your writing with visuals that resonate with you and allow your creations to narrate your one of a kind tale!