When I entered the world of Behance I didn’t fully grasp the impact of a thoughtfully written project description. It wasn’t until I got input from other creatives that I understood the significance of this aspect of my project. Your project description goes beyond being a couple of lines; it’s an opportunity to engage with your audience and convey the narrative behind your creation. An engaging description has the power to enchant your audience and leave a lasting impression of your work.
Think about it a captivating project can grab attention, but if you don't provide an interesting description people might overlook the true essence of your creation. A thoughtfully crafted description adds depth, shares insights into your artistic journey and highlights your enthusiasm. It welcomes your audience into your universe enabling them to recognize the time and consideration poured into your work.
Here are some reasons why its important to have a project description.
- Contextualizes Your Work: It helps viewers understand your intentions and the inspiration behind your project.
- Enhances Engagement: An engaging description can spark conversations and feedback.
- Improves Searchability: Keywords in your description can make it easier for others to find your work.
- Showcases Your Personality: Your writing style reflects who you are as a creative.
Steps to Access Your Behance Project
Finding your way to your Behance project is pretty easy but I do recall feeling a bit confused during my initial visit to the site. With a plethora of choices available it’s not uncommon to feel a bit overwhelmed. So here’s a straightforward guide to assist you in navigating through it.
- Log In to Your Behance Account: Start by logging into your Behance account. If you don’t have one yet, it’s quick and easy to create!
- Go to Your Profile: Once you’re logged in, click on your profile icon at the top right corner of the page.
- Select Your Projects: In your profile, you’ll see a tab labeled “Projects.” Click on it to view all your uploaded works.
- Choose the Project You Want to Edit: Scroll through your projects and select the one you wish to edit.
While these steps might appear straightforward they can help you avoid unnecessary hassle. Take some time to get to know the layout. Once you’re in you’ll discover a range of tools available to enhance your project description!
Also Read This: Fortiguard Downloader’s Firewall Protection Features
Editing the Project Description on Behance
Revising your project description on Behance is akin to perfecting a work of art; it calls for careful consideration and meticulous detail. When I chose to refresh my own project I did so with intention. Heres a guide on how to enhance your description effectively.
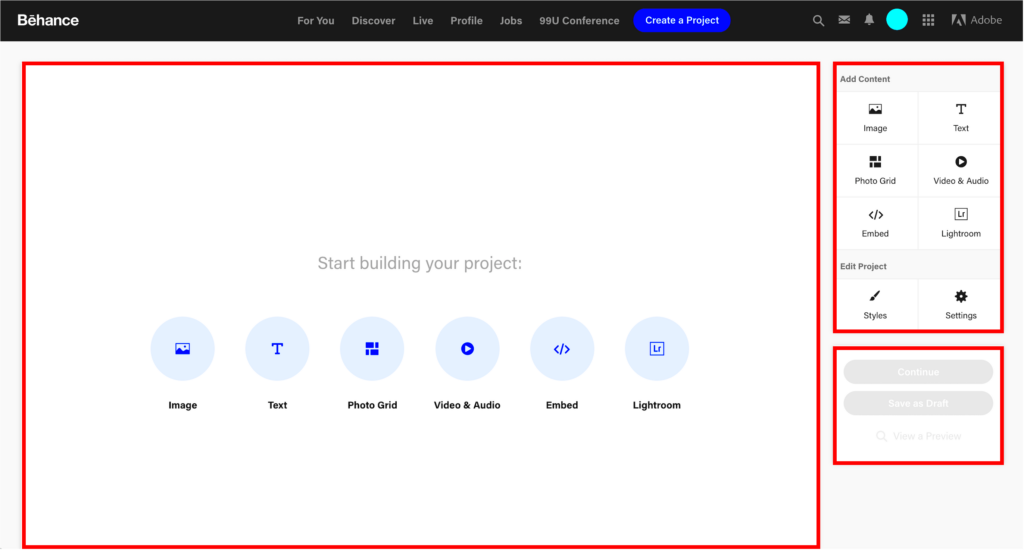
- Click on the Edit Button: After selecting your project, look for the “Edit” button. This will take you to the editing interface.
- Navigate to the Description Section: Scroll down to find the project description area. Here, you’ll be able to make changes.
- Update Your Content: Write or modify your description. Don’t hesitate to share personal anecdotes or insights that can give depth to your project.
- Format Your Text: Use bullet points, bold text, or even tables to make your description more readable and engaging.
- Preview Your Changes: Before publishing, take a moment to preview your changes. This step allows you to see how it will look to viewers.
- Save Your Edits: Once you’re satisfied, hit the “Save” button to update your project description.
Editing allows me to look back on my creative path and discover fresh perspectives on how to express my ideas. Its important to let your project description grow alongside your work, reflecting the essence of your artistic evolution.
Also Read This: How to Add Friends in My Hero Ultra Rumble
Best Practices for Writing Engaging Descriptions
Creating a project description is a blend of creativity and strategy. I recall the moment I penned my project description on Behance. It was a mix of excitement and anxiety as if I were sharing a piece of my soul with others. Through the years I’ve discovered some tips that can elevate your writing from ordinary to enthralling.
First and foremost getting your point across is crucial. Consider the core message you wish to communicate. Here are a few strategies that have proven to be effective for me.
- Be Authentic: Share your personal journey related to the project. What inspired you? What challenges did you face? This connection creates a bond with your audience.
- Use Clear and Concise Language: Avoid jargon that might alienate readers. Simple, clear language can make your work more accessible.
- Highlight Key Features: Use bullet points to outline significant aspects of your project. It allows readers to quickly grasp the essentials.
- Incorporate Storytelling: People love stories. Frame your description as a narrative; share what motivated you and what you learned along the way.
- Include Call-to-Actions: Encourage engagement. Ask readers for their thoughts or invite them to explore your other projects.
A captivating description goes beyond simply conveying what you do. It’s about welcoming others into your imaginative realm and igniting their curiosity. So make sure to infuse your unique character into your writing!
Also Read This: Setting Up FortiGate Fortiguard Downloader Proxy
Using Visuals to Enhance Your Project Description
As an artist, I believe that pictures convey a message more effectively than mere text. Although a carefully crafted description is important, visuals have the ability to take your project to new heights. When I refreshed my Behance portfolio, I was struck by the impact that visuals can have in enhancing my written content.
Here are a few effective methods to incorporate visuals into your project description.
- Choose Relevant Images: Use images that resonate with the theme of your project. They should enhance the viewer's understanding rather than distract from it.
- Create Infographics: If your project involves data or statistics, consider using infographics. They present information in an engaging and digestible format.
- Include Process Shots: Show the evolution of your work. Process images not only provide insight into your methods but also help viewers appreciate the effort behind the final product.
- Use Videos: A short video explaining your project can add a dynamic element. It allows viewers to see your passion and enthusiasm firsthand.
- Consider Layout and Design: Pay attention to how visuals are arranged. A well-structured layout can make your project more appealing and easier to navigate.
By carefully adding images to your project description you can enhance the experience for your audience making it more engaging. Keep in mind that it’s not solely about presenting your work; it’s about weaving a narrative that strikes a chord with people.
Also Read This: Trending in Pixels: Exploring Adobe Stock’s Most Popular Images
Common Mistakes to Avoid When Editing
Revising your project description can be a challenge, especially when you've invested so much emotion into it. I've had my share of blunders along the way and every single one has taught me a lesson. To assist you in steering clear of traps here are some missteps that I've come to recognize and avoid.
- Neglecting Proofreading: Typos and grammatical errors can undermine your credibility. Always take a moment to proofread your description or ask a friend to review it.
- Being Overly Vague: Avoid using general statements that don’t provide real insight. Specificity gives your audience a clearer understanding of your work.
- Ignoring Structure: A wall of text can be overwhelming. Break your description into manageable sections with headers or bullet points.
- Failing to Update: As your skills evolve, so should your project descriptions. Don’t hesitate to revisit and revise older projects to reflect your current style and expertise.
- Overcomplicating Language: While it's tempting to use fancy words, simplicity often works best. Your goal is to connect, not to confuse.
By being aware of these mistakes you can make sure that your project description connects with your audience and effectively communicates your creative vision. Editing involves more than fixing mistakes; it’s about polishing your message and making it stand out.
Also Read This: Behance name origin explanation
Tips for Optimizing for Searchability
In the era, it takes more than just crafting visually appealing projects to stand out. I realized this lesson through my own experience when I saw that my designs weren't receiving the exposure I had anticipated on Behance. While it was somewhat discouraging it motivated me to explore the realm of search engine optimization (SEO). Enhancing your project for discoverability can greatly impact its reach, allowing your work to connect with a wider audience.
Here are some actionable suggestions that have proven effective in boosting the visibility of my project.
- Use Relevant Keywords: Identify keywords that resonate with your project. Incorporate them naturally in your title, description, and tags. Tools like Google Keyword Planner can guide you in finding the right words.
- Create Compelling Titles: Your title is the first thing potential viewers will see. Make it intriguing yet informative, ensuring it reflects the essence of your project.
- Tag Wisely: Behance allows you to add tags. Use them wisely! Choose tags that accurately represent your work and are likely to be searched by your target audience.
- Update Regularly: Fresh content often ranks better in search results. Don’t hesitate to update your project description or visuals occasionally to keep things current.
- Engage with the Community: Interacting with fellow creatives can also enhance your visibility. Leave thoughtful comments on others’ projects and join discussions.
Enhancing search visibility goes beyond mere algorithms; it involves linking your creations with individuals who will truly value them. By putting in some work you can make your endeavors stand out even more in the sea of artistic expression!
Also Read This: how to download shutterstock images without watermark
Frequently Asked Questions
As I explored the realm of Behance I frequently caught myself contemplating the same queries that newcomers often have. It’s completely natural to feel somewhat disoriented, especially when you’re aiming to establish your presence in an artistic community. To help alleviate some of that hesitation lets tackle a few commonly posed questions.
- How long should my project description be? Aim for clarity and conciseness. Typically, a few paragraphs should suffice. Make sure it provides enough detail without overwhelming the reader.
- Can I change my project description after publishing? Absolutely! You can edit your description anytime. It’s a good idea to revisit your work regularly and make updates as needed.
- What if I struggle with writing? Don’t stress! Writing is a skill that improves with practice. Consider sharing your thoughts with a friend or using voice-to-text apps to get started.
- Are visuals really that important? Yes, visuals play a critical role in capturing attention. They complement your description and help convey your story more effectively.
- How do I know if my project is search-optimized? Regularly check your project’s analytics on Behance to see how viewers find your work. Adjust your keywords and tags based on this data.
These inquiries merely scratch the surface yet tackling them can provide clarity on your journey within the Behance community. Keep in mind that each artists voyage is distinct and it's absolutely normal to seek support as you navigate through it.
Wrapping Up Your Editing Journey
As I take a moment to think about my editing experiences I am filled with gratitude. Editing goes beyond being a mere job; it’s an adventure that gives us the opportunity to convey our ideas with greater clarity and impact. I still vividly recall the moment I clicked “publish” after dedicating hours to perfecting my project description. The feeling of achievement was truly remarkable as I realized I had invested my utmost effort into it.
As you put the finishing touches on your editing process it can feel like a mix of closing one chapter and opening another. Here are a few reflections to keep in mind as you wrap up your work.
- Take a Step Back: After editing, take a break before revisiting your project. This distance helps you view it with fresh eyes.
- Seek Feedback: Don’t hesitate to share your work with trusted friends or fellow creatives for feedback. Their perspectives can offer valuable insights.
- Celebrate Your Efforts: Regardless of the outcome, acknowledge the time and energy you invested in your project. Every step contributes to your growth.
- Stay Open to Change: Your creative journey is ongoing. Be open to revisiting and evolving your project as your skills and insights develop.
Dont forget that each project you finish brings you closer to growing as an artist. Embrace the process, acknowledge how far youve come and continue to push the limits of your imagination. Enjoy the editing process!