Designing handmade cards is a delightful way to express creativity and heartfelt sentiments. Whether it’s for a birthday, anniversary, or just to say “thank you,” crafting personalized cards makes your message even more special. In this guide, we’ll walk you through the steps of creating beautiful cards from scratch, ensuring you have a fun and fulfilling experience along the way!
Materials Needed for Handmade Cards

Before diving into the card-making process, it’s essential to gather all the necessary materials. Having the right tools at your fingertips will make your crafting easier and more enjoyable. Here’s a handy list of materials you’ll need:
- Cardstock: This is your base. Choose from various colors and textures to set the mood for your card.
- Envelopes: Make sure you have matching envelopes for your cards. They come in different sizes and colors.
- Scissors: A good pair of scissors is crucial for cutting cardstock and any decorative elements.
- Glue or Double-Sided Tape: Adhesives help hold your design together. Double-sided tape provides a clean look.
- Markers/Pens: Use fine-tip markers or pens for writing messages and adding details.
- Decorative Elements: Think stickers, washi tape, ribbons, and stamps to enhance your card's design.
- Paper Trimmer: This is useful for achieving straight edges and precise cuts.
- Ruler & Pencil: A ruler helps measure and align your design elements, while a pencil allows for easy sketching before committing.
With these materials in hand, you’ll be ready to unleash your creativity and start designing your handmade cards!
Also Read This: Optimal Timing for Updating Your LinkedIn Profile After a Job Change
Choosing a Design Theme
When it comes to designing handmade cards, the first step is picking a design theme. This sets the tone for your entire card and reflects the occasion or message you want to convey. Here are some popular themes to consider:
- Floral: Perfect for birthdays, anniversaries, or just to say "I care!" You can use bright colors for a cheerful vibe or muted tones for a more sophisticated look.
- Minimalist: Less is more! A clean layout with ample white space can make a statement. Choose a single focal point, like a graphic or a quote.
- Rustic: Think wood textures, burlap, and lace. This theme works wonderfully for weddings or fall celebrations.
- Whimsical: Playful colors and fun illustrations can bring your card to life. Ideal for children’s parties or light-hearted events.
- Seasonal: Tailor your design to capture the essence of the season—warm colors for autumn, pastels for spring, or icy blues for winter.
As you choose a theme, think about the recipient's personality. A card for a friend may be colorful and quirky, while one for a parent might lean towards elegance. Don't hesitate to mix and match themes—creativity knows no bounds!
Also Read This: Discovering TV Shows Available for Streaming on Dailymotion
Creating the Card Base
Once you've settled on a design theme, it's time to create your card base. A solid foundation is essential for a beautiful card. Here's how to do it step-by-step:
- Gather Your Materials: You'll need cardstock (choose a color that complements your theme), scissors, a ruler, and a bone folder (for crisp folds).
- Choose Your Size: Standard card sizes include 4.25 x 5.5 inches (A2) or 5 x 7 inches. Decide on the size that best suits your design.
- Cut the Card: Measure and cut your cardstock according to the size you selected. Precision is key here!
- Fold the Card: Use the bone folder to create a sharp fold. A clean crease gives your card a professional look.
- Decorate the Inside (Optional): You can add a contrasting color or patterned paper to the inside for a surprise element.
And there you have it! Your card base is ready to be transformed with your chosen design theme. Remember, the card base is just the beginning—let your creativity shine as you add layers and embellishments!
Also Read This: How to Favorite an Image in ShootProof
5. Adding Decorative Elements
When it comes to designing handmade cards, decorative elements can truly elevate your creation. Think of these embellishments as the icing on the cake, making your card not just beautiful but also unique. Here are some popular decorative elements to consider:
- Stickers and Die-Cuts: These are quick and easy ways to add flair. Choose stickers that match your theme, whether it's floral for a birthday or hearts for an anniversary.
- Ribbons and Twine: Adding a ribbon or some twine can bring texture and depth. You can tie it around the card or create bows for a charming effect.
- Brads and Gems: For a bit of sparkle, consider using brads or gems. These little details catch the light and can draw attention to specific parts of your design.
- Embossing: This technique adds a three-dimensional element to your cards. Use an embossing folder or heat embossing powder to create raised designs that pop.
- Stamps and Inks: Stamping is a great way to add intricate designs. Use different ink colors to create a layered look or a gradient effect.
Remember to balance these elements; too many can overwhelm your design. Aim for harmony and ensure that each piece complements the overall look of your card!
Also Read This: Web and Video Filtering Services Provided by Fortiguard Downloader
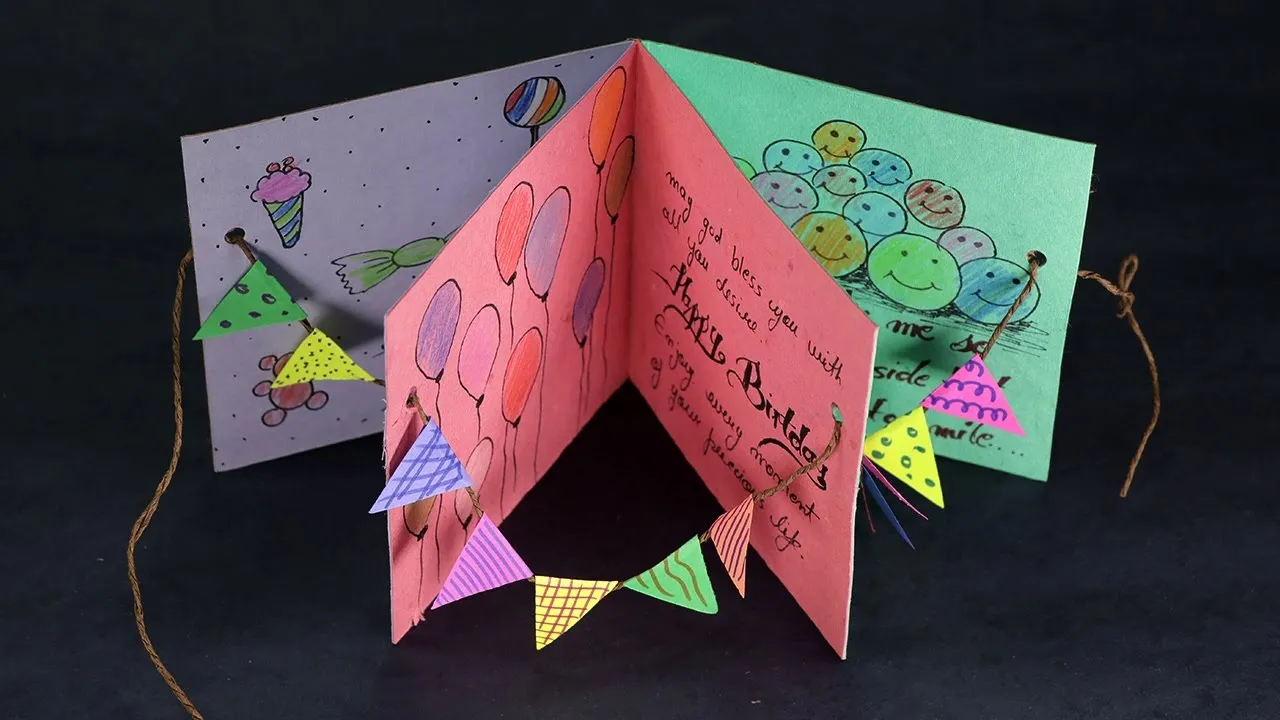
6. Incorporating Personal Touches
Making your cards truly special often comes down to adding personal touches. These elements reflect your unique style and the recipient's preferences. Here are some thoughtful ways to personalize your handmade cards:
- Handwritten Messages: Skip the printer! A handwritten note adds warmth and sincerity. Write a heartfelt message that connects with the recipient.
- Photos: Including a photo can make the card more memorable. Whether it’s a cherished memory or a recent snapshot, it adds a layer of intimacy.
- Custom Artwork: If you’re artistically inclined, consider adding your own drawings or doodles. This shows effort and creativity that store-bought cards simply can’t match.
- Favorite Colors: Use the recipient’s favorite colors in your design. This small detail shows thoughtfulness and care.
- Meaningful Quotes: Include a quote or saying that resonates with the occasion or your relationship. It can be a famous quote or something personal between you two.
Incorporating these personal touches will not only enhance the aesthetic of your card but also strengthen the emotional connection between you and the recipient. After all, it’s these unique elements that make your card a treasured keepsake!
Also Read This: Dribbble Uncovered: Beyond the Buzz, Finding Design Treasures
7. Finalizing Your Handmade Card
After pouring your creativity into designing your handmade card, it’s time for the exciting part—finalizing it! This step involves making sure everything is just right before you present your masterpiece.
First, take a moment to assess your card. Here are some aspects to consider:
- Color Balance: Do the colors complement each other? Adjust any elements that seem off.
- Text Clarity: Is your message clear and legible? Check for typos or unclear fonts.
- Adhesives: Ensure all elements are securely attached. Use double-sided tape or liquid glue for a neat finish.
- Embellishments: Are any additional decorations needed? Consider adding sequins, glitter, or stickers for that extra flair.
Next, let’s talk about the finishing touches. Here’s a quick checklist:
| Task | Status |
|---|---|
| Trim edges neatly | ✅ |
| Sign the card | ✅ |
| Include a personal note | ✅ |
Once these tasks are complete, take a step back and admire your work! Your card is now ready to spread joy and love.
Also Read This: Combined Plan Options for Videoblocks Audioblocks and Storyblocks Users
8. Sharing Your Creations on Dailymotion
Now that you’ve finalized your handmade card, why not share your creative process with the world? Dailymotion is a fantastic platform to showcase your artistry and connect with like-minded crafters!
To get started, create a short video capturing your card-making journey. Here’s how:
- Record Your Process: Use your smartphone or camera to film each step, from selecting materials to the final touches.
- Edit Your Video: Use simple editing software to trim clips, add background music, and include text overlays for clarity.
- Create a Compelling Title: Choose an engaging title like “Handmade Card Magic!” to attract viewers.
- Upload to Dailymotion: Sign in to your account and follow the upload instructions. Don’t forget to add tags related to crafting!
Once your video is live, share it on social media to increase visibility. Engage with viewers by responding to comments and encouraging them to share their own creations. Who knows, you might inspire someone else to dive into the world of handmade card making!
Step-by-Step Guide to Designing Handmade Cards
Creating handmade cards is a fulfilling and creative process that allows you to express your thoughts and feelings in a personal way. Whether for birthdays, holidays, or just a thoughtful note, handmade cards carry a special touch. Here’s a step-by-step guide to help you design your own unique cards.
Materials You Will Need
- Cardstock paper
- Scissors
- Glue or double-sided tape
- Markers or colored pencils
- Stamps and ink pads
- Embellishments (e.g., ribbons, stickers)
- Ruler and pencil
Step-by-Step Instructions
- Choose Your Card Size: Decide on the size of your card. Common sizes are 5x7 inches or 4.25x5.5 inches.
- Fold the Cardstock: Cut the cardstock to your desired size and fold it in half carefully.
- Design the Front: Sketch out your ideas on the front of the card. You can use markers, stamps, or collage techniques.
- Add Personal Touches: Use embellishments like ribbons or stickers to enhance your design.
- Write Your Message: Inside the card, write a heartfelt message. Use a nice pen to make it look neat.
- Final Touches: Review your card for any last adjustments or additions.
Tips for Success
| Tip | Description |
|---|---|
| Practice Makes Perfect | Try different designs before settling on a final one. |
| Be Creative | Don't hesitate to experiment with colors and materials. |
| Keep It Simple | Sometimes less is more; a clean design can be very effective. |
In conclusion, designing handmade cards can be an enjoyable and rewarding experience. By following these steps and utilizing your creativity, you can create beautiful cards that will surely delight your recipients.