Tissue flowers are a delightful and creative way to brighten up any space or occasion. Whether you're decorating for a party, creating a stunning centerpiece, or just looking for a fun craft project, these flowers can add a pop of color and a touch of whimsy. The best part? They’re incredibly easy to make and can be customized to match your theme or decor. With just a few simple materials, you can transform ordinary tissue paper into beautiful blooms that are sure to impress. Let’s dive into the world of tissue flowers and explore how to create them step by step!
Materials Needed for Tissue Flowers
Creating stunning tissue flowers requires just a handful of materials, most of which you probably already have at home. Here’s a list to get you started:
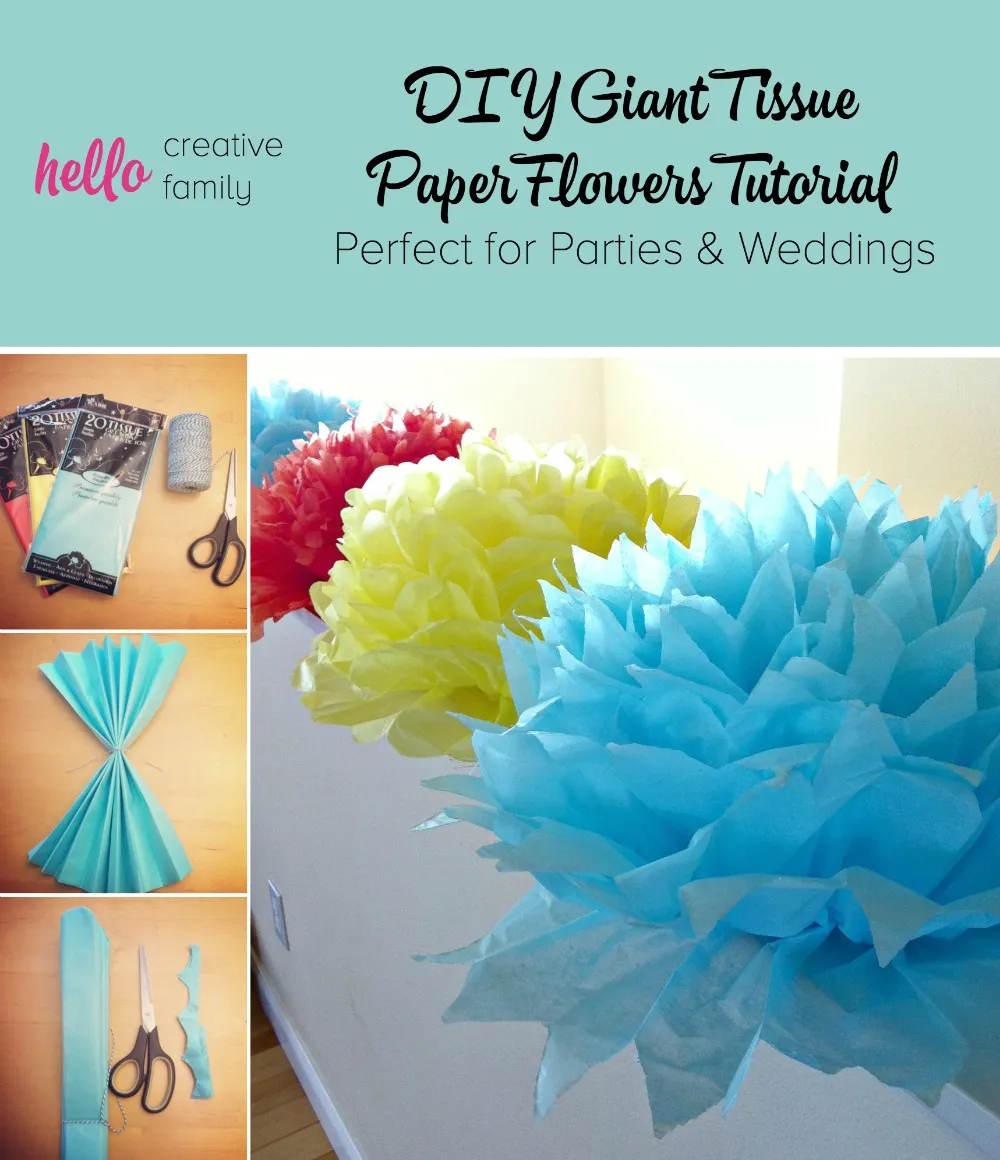
- Tissue Paper: Choose vibrant colors or patterns to make your flowers really stand out. Typically, you’ll want 8 to 10 sheets of tissue paper per flower.
- Scissors: A good pair of scissors is essential for cutting the tissue paper into the desired shapes.
- Floral Wire: This will be used to secure the flowers together and act as the stem. You can also use pipe cleaners as an alternative.
- Floral Tape: This is perfect for wrapping around the floral wire to give it a more professional look.
- Glue (optional): If you want to add embellishments or secure layers more firmly, a glue stick or craft glue can be handy.
- Embellishments (optional): Consider adding beads, glitter, or other decorative items to personalize your flowers.
With these materials on hand, you’re ready to start crafting your beautiful tissue flowers. Don't worry if you're not an experienced crafter; the process is straightforward and incredibly rewarding!
Also Read This: How to Block YouTube Ads on Your iPad Effectively
Choosing the Right Tissue Paper
When it comes to creating stunning tissue flowers, your choice of tissue paper plays a significant role in the final outcome. Not all tissue paper is created equal, and there are a few factors to consider before making your selection.
- Color Variety: Look for tissue paper that comes in a variety of colors. This allows you to mix and match to create beautiful, eye-catching flowers. Brands like American Greetings and Darice offer a wide palette.
- Weight: The weight of the tissue paper can affect how your flowers hold their shape. Medium-weight tissue paper is often ideal as it provides a balance between flexibility and sturdiness.
- Texture: Some tissue papers have a more delicate, crinkled texture, while others are smooth. Experiment with different textures to find what looks best for your project. Crinkled tissue can give your flowers a more natural look.
- Size: Tissue paper typically comes in various sizes. For larger flowers, consider using sheets that are at least 20” x 30”. Smaller sheets can work for delicate, smaller blooms.
In summary, the right tissue paper can elevate your floral creations from simple to spectacular. Don’t hesitate to explore different colors and textures to find what fits your style best!
Also Read This: Understanding Changes in YouTube Video Font Size and How to Fix Display Issues
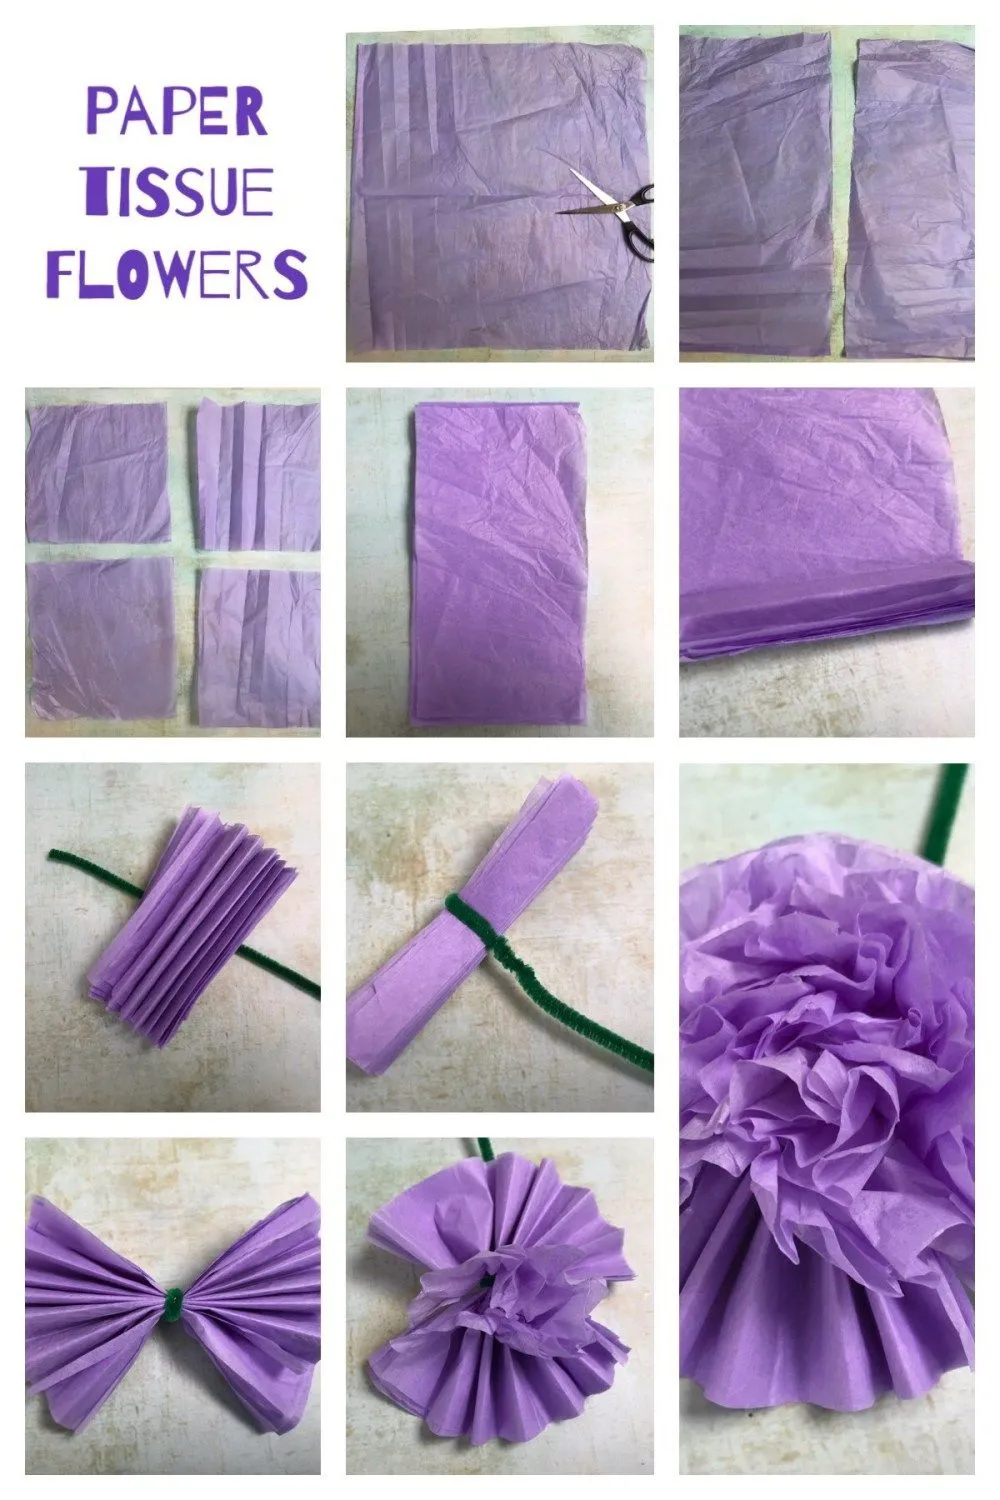
Basic Techniques for Folding and Cutting
Mastering the basic techniques for folding and cutting tissue paper is crucial in crafting beautiful flowers. Let’s break this down into simple steps that anyone can follow!
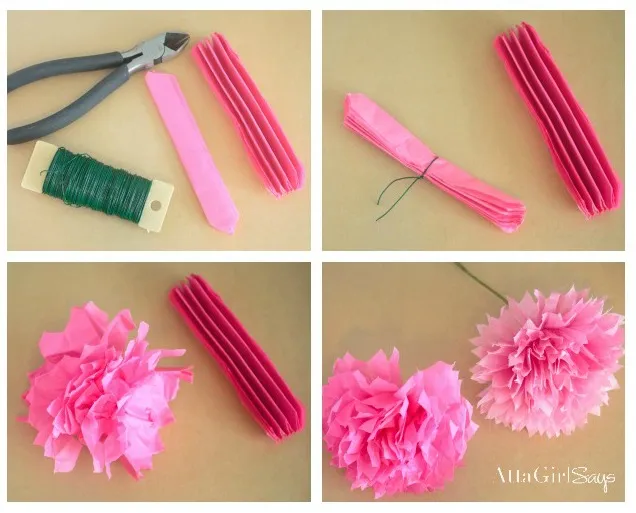
- Folding: Start by stacking several sheets of tissue paper (around 5 to 10 sheets) on top of each other. Make sure they’re aligned nicely. Next, fold the stack accordion-style, making each fold about 1-2 inches wide. This creates the petals of your flower.
- Securing the Base: Once you have your folded stack, use a piece of floral wire or a pipe cleaner to secure the center tightly. This will be the base that holds your flower together.
- Cutting Petals: Now for the fun part! Use scissors to round off the ends of your folded stack, creating a petal shape. You can also cut into the edges for a more intricate petal design.
- Fluffing: Gently pull apart each layer of tissue paper, starting from the top. This is where your flower begins to take shape! Be gentle so you don’t tear the paper.
With these basic folding and cutting techniques, you’re well on your way to creating beautiful tissue flowers that will impress anyone!
Also Read This: The Benefits of Using Stock Footage in Your Video Production
5. Step-by-Step Instructions for Making Tissue Flowers
Creating beautiful tissue flowers is a delightful and straightforward process! Follow these steps to craft your stunning blooms:
- Gather Your Materials: You'll need:
- Colorful tissue paper (at least 6 sheets)
- Scissors
- Floral wire or pipe cleaners
- Floral tape (optional)
- A ruler and pencil
Also Read This: How to Cite an iStock Image in APA Format
6. Tips for Adding Personal Touches
Personalizing your tissue flowers can make them even more special! Here are some creative ideas:
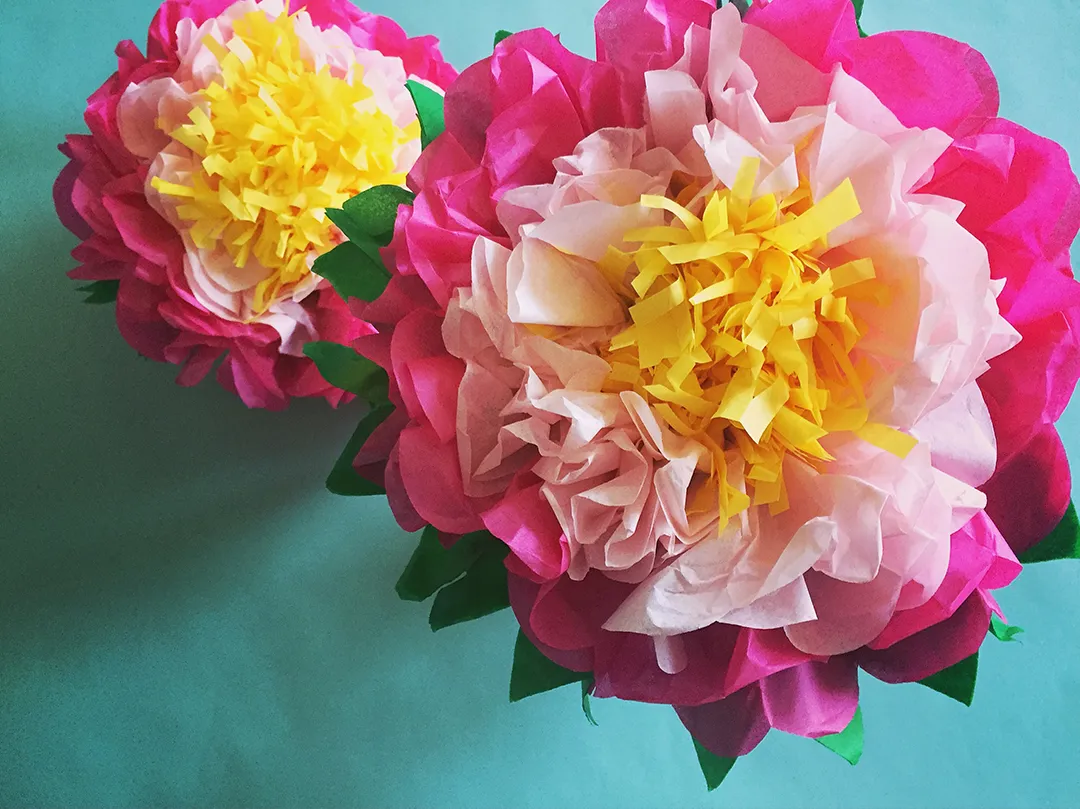
- Mix and Match Colors: Use different colored tissue paper to create multi-colored flowers. For instance, a vibrant yellow flower with a lavender center can make a stunning statement!
- Add Scent: Spritz your flowers with a few drops of essential oil or fragrance before displaying them for a lovely scent that enhances the experience.
- Use Different Shapes: Experiment with different petal shapes and sizes. For example, try making large blooms with rounded petals for a peony look, or sharp, jagged petals for a dahlia.
- Incorporate Leaves: Use green tissue paper to create leaves. Cut out leaf shapes and attach them to the stem with floral tape, giving your flowers a more natural look.
- Create Bouquets: Combine multiple flowers in a bouquet. You can even add ribbons or decorative pins for an added flair!
With these tips, your tissue flowers will not only be beautiful but also uniquely yours!
Also Read This: A Music Lover’s Guide to Discovering New Tracks on OK.ru
7. Creative Ideas for Displaying Tissue Flowers
If you've poured your heart into creating beautiful tissue flowers, it's time to showcase them in a way that truly shines! Here are some creative ideas for displaying your stunning floral creations:
- Wall Art: Create a stunning wall display by arranging tissue flowers in a shadow box or directly on a canvas. Mix and match colors and sizes for a vibrant effect.
- Table Centerpieces: Use a vase filled with your tissue flowers as a centerpiece for dining tables or coffee tables. Pair them with candles for a cozy vibe.
- Gift Wrapping: Attach a small tissue flower to the top of gift packages. It adds a personal touch and makes the gift feel extra special.
- Wreaths: Create a beautiful wreath for your front door or as a wall hanging. Use a wire frame and glue or tie your tissue flowers to it for a delightful burst of color.
- Hair Accessories: Transform smaller tissue flowers into hair clips or headbands. They add a whimsical touch to any outfit!
- Party Decorations: Use tissue flowers to decorate for parties or events. Hang them from the ceiling, attach them to balloons, or use them as garlands.
- Photo Backdrops: Create a stunning backdrop for photoshoots by arranging tissue flowers on a large board or wall. It’s perfect for weddings, birthdays, or any celebration!
Remember, the key is to let your creativity flow. Mix colors, experiment with shapes, and have fun finding the perfect display that reflects your style!
8. Conclusion and Final Thoughts
Creating tissue flowers is not just a craft; it’s an art form that allows you to express your creativity and bring a touch of beauty into your world. From choosing the right colors to crafting unique designs, each step is filled with possibilities. You’ve learned how to make these lovely blooms, and now it’s all about enjoying the process.
Don’t forget, displaying your tissue flowers creatively can enhance any space and bring joy to others. Whether you opt for a simple vase or an elaborate wreath, each arrangement tells a story. Here are a few final thoughts to consider:
- Experiment: Don’t be afraid to try new techniques or combinations of colors. The more you explore, the more unique your creations will be.
- Share Your Work: Consider sharing your tissue flower creations on social media or with friends. You never know who might be inspired by your art!
- Keep Practicing: Like any craft, the more you practice, the better you’ll get. Each flower you make adds to your experience and skill.
So, grab your tissue paper, let your imagination run wild, and start creating those beautiful flowers today! Happy crafting!