Welcome to our fun and creative journey into the world of paper crafting! Today, we're going to learn how to make a stunning paper diamond. This simple yet elegant craft is perfect for all ages and can be used for various purposes, such as decorations, gifts, or even party favors. So, grab your materials, and let's get started on this sparkling project that is sure to add a touch of brilliance to your day!
Materials Needed
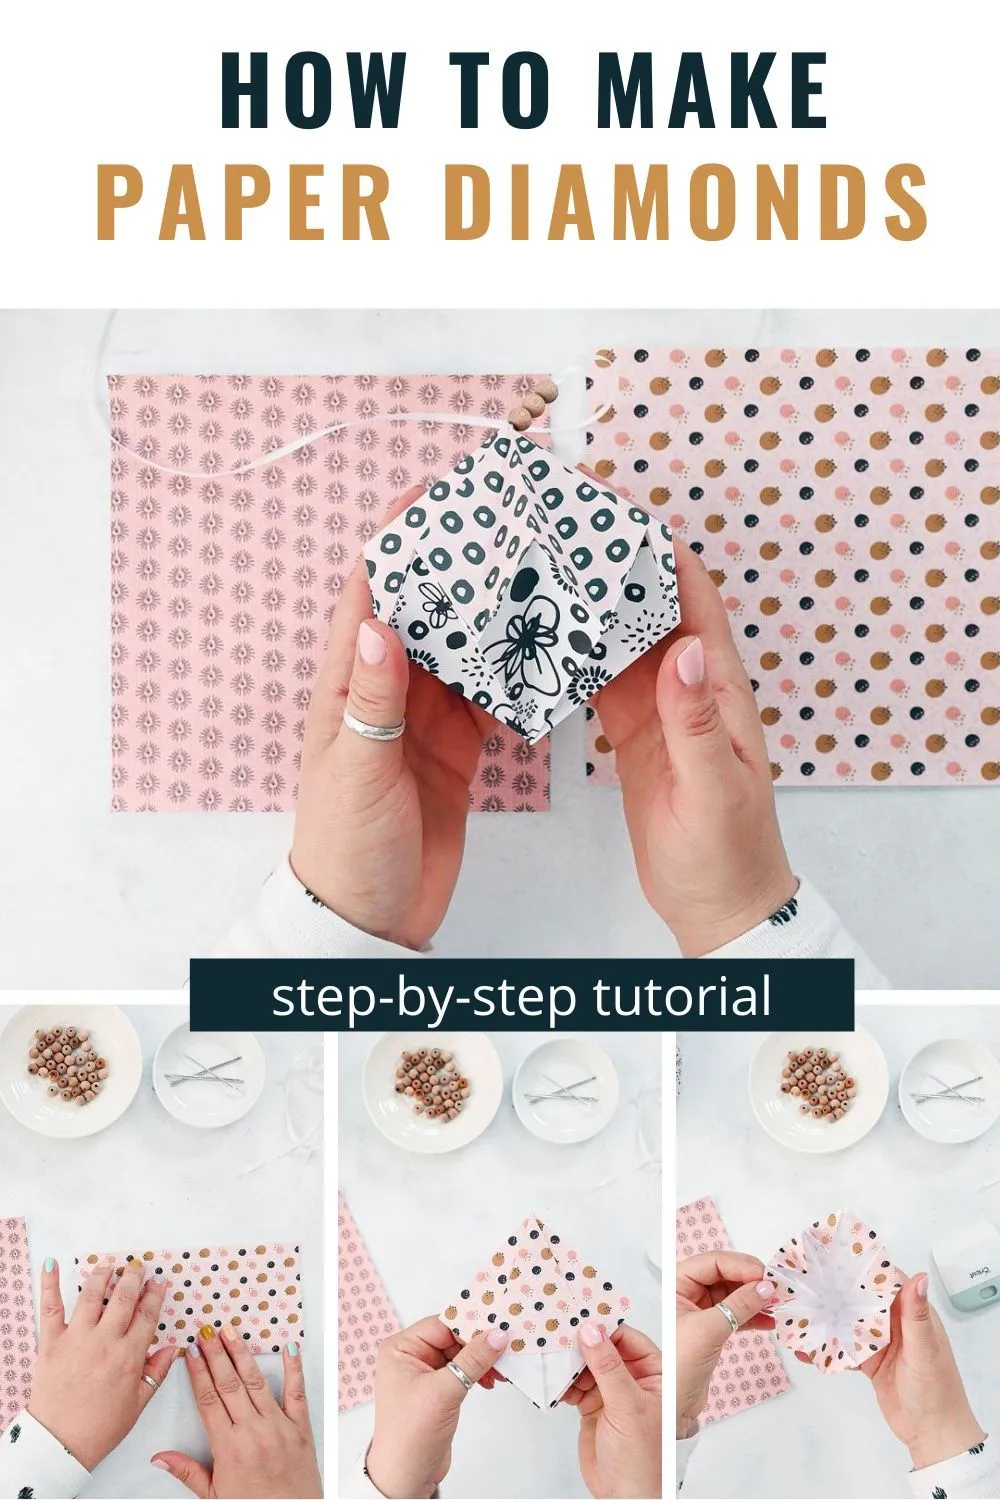
Before we dive into the crafting process, let's gather everything you’ll need. Having your materials ready will make the experience smoother and more enjoyable. Here’s a handy list to help you out:
- Colored Paper: Choose any color you like! You can use origami paper, scrapbook paper, or even plain printer paper. For a more authentic diamond look, consider using metallic or glitter paper.
- Scissors: A good pair of scissors is essential for cutting your paper accurately.
- Ruler: This will help you measure and create precise folds and cuts.
- Pencil: Use a pencil for marking measurements on your paper before cutting.
- Glue or Tape: You'll need this to hold your diamond pieces together. Glue dots or double-sided tape work wonders!
- Bone Folder (optional): This handy tool helps create crisp folds but isn’t necessary if you don’t have one.
- Decorative Elements (optional): If you want to jazz up your diamond, consider adding glitter, stickers, or ribbons.
Now that we've got our materials lined up, we're ready to start crafting! Gather everything in a comfortable workspace, and let’s unleash our creativity.
Also Read This: Effective Methods for Saving Images from ShootProof
Step-by-Step Instructions
Creating a paper diamond can be a fun and rewarding craft project! With just a few materials and some simple steps, you can make your very own shimmering paper diamond. Let’s dive right into it!
What You'll Need:
- Colored paper (preferably in shades of blue, pink, or any color you like)
- Scissors
- Glue or tape
- Pencil
- Ruler
- Craft knife (optional, for more intricate cuts)
Instructions:
- Cut Out the Template: First, use the ruler and pencil to draw a diamond shape on your colored paper. The dimensions can vary, but a good size to start with is about 6 inches tall and 4 inches wide. Cut out the diamond shape carefully.
- Create the Facets: Next, you’ll want to create the facets of your diamond. Draw smaller diamond shapes inside the larger one, mimicking the look of a real diamond's facets. You might want to draw 4 or 5 smaller diamonds.
- Cut the Facets: Using your scissors (or craft knife for precision), cut out the smaller diamond shapes. This will give your diamond that classic faceted look.
- Fold the Edges: Now, gently fold the edges of the facets upwards to create a 3D effect. Make sure to be gentle so you don’t tear the paper.
- Assemble the Diamond: Finally, use glue or tape to secure the edges of the facets to keep them in place. Adjust the shape until you’re happy with how it looks.
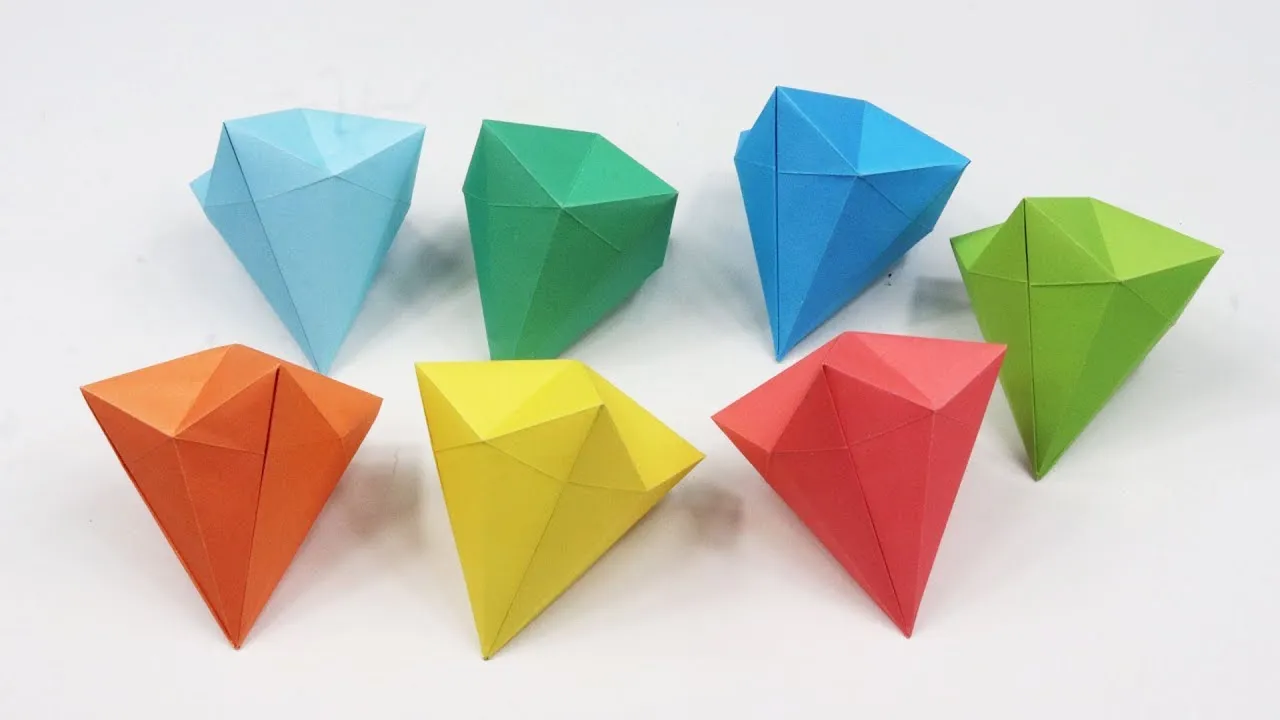
And voila! You have your very own paper diamond. Feel free to make several in different colors to create a sparkling collection!
Also Read This: A Rumbling Sound Was Heard in the Distance
Tips for Success
Crafting is always more enjoyable when you have a few handy tips up your sleeve! Here are some tried-and-true suggestions to help you create the perfect paper diamond:
- Choose the Right Paper: Opt for a heavier paper or cardstock for better structure and durability. Lighter paper might not hold its shape as well.
- Use a Template: If you’re not comfortable drawing freehand, look for printable diamond templates online. This can save you time and ensure your shapes are symmetrical.
- Be Precise with Cuts: Take your time when cutting. A sharp pair of scissors or a craft knife will give you cleaner edges, which is crucial for a polished look.
- Experiment with Colors: Don’t hesitate to mix and match colors or use patterned paper for a unique look. A multi-colored diamond can be just as stunning!
- Practice Folding: If you’re new to folding paper crafts, practice on scrap paper first. This will help you get the hang of it before you work on your final piece.
- Use a Bone Folder: For crisp folds, consider using a bone folder. This tool can help you create sharp edges and give your diamond a professional finish.
By keeping these tips in mind, you’ll be well on your way to crafting beautiful paper diamonds that impress everyone! Happy crafting!
Also Read This: Behance picture download tutorial
Creative Variations
When it comes to crafting paper diamonds, the possibilities are nearly endless! Once you've mastered the basic technique, why not experiment with a few creative variations? Here are some fun ideas to inspire you:
- Colorful Patterns: Instead of plain paper, try using patterned scrapbook paper or wrapping paper. Floral designs, polka dots, or even stripes can add an eye-catching twist to your diamonds.
- Size Matters: Play around with different sizes. Create mini diamonds for a charming garland, or go big and make a statement piece for a party backdrop!
- Glitter and Glam: Add some sparkle! A sprinkle of glitter or metallic paper can turn a simple diamond into a dazzling decoration, perfect for festive occasions.
- Layering: Create a multi-dimensional look by layering smaller diamonds to form a larger one. This adds depth and visual interest to your craft.
- Personal Touch: Customize your diamonds with personal messages or drawings. Use markers, stamps, or stickers to add a unique flair that reflects your personality.
Feel free to mix and match these ideas, or even come up with your own variations. The beauty of crafting lies in the freedom to express your creativity!
Conclusion
Creating paper diamonds is not only a fun and engaging craft, but it also opens the door to endless creative possibilities. Whether you're making them for decorations, gifts, or just as a relaxing pastime, these little gems can add a touch of whimsy to any space. By experimenting with colors, sizes, and embellishments, you can tailor each diamond to suit your style and needs.
Remember, the most important part of crafting is to enjoy the process. So gather your materials, unleash your creativity, and don't be afraid to try new things! We hope this simple craft tutorial has inspired you to create your very own paper diamonds and explore all the creative variations that come with it. Happy crafting!